 "promoted by the color red" (whenindoubtflatout)
12/14/2019 at 18:00 • Filed to: volvo, 240, turbo, turbobrick, turbobricks, k-jet, wagon, swedish, sweden
 2
2
 9
9|
"promoted by the color red" (whenindoubtflatout)
12/14/2019 at 18:00 • Filed to: volvo, 240, turbo, turbobrick, turbobricks, k-jet, wagon, swedish, sweden | 2
| 9 |
Like many old European cars, my Volvo has a leak. Or two. Or three, depending on the position of the moon and level of fluids in any tank of your choice. Those who read the preceding 11.5 chapters will know that I plugged the fuel leak but I could never quite fix that oil leak no doubt caused by me loosening that drain bolt during the initial oil change.
In the months since the last update (five!) months ago, it has moved approximately 500 feet so my friend could store some stuff in my shed, gushing oil like a wounded rig or a race car that’s missed a shift. One of the local shops, since shuttered, refused to smog it because it “leaked too much”, so I decided the best course of action was to order a large box of things from FCP Euro, shipped via stagecoach from New Jersey.
With the fuel system issues addressed around Chapter 8, I began tracking down the source of the oil leaks beneath the engine.
I narrowed the source to the following places:
Cam seals - rear-side addressed in chapter 10
Valve cover gasket - see above
Rear Main Seal - this requires dropping the gearbox
turbo drain pipe gasket - on turbo cars only and a fairly simple fix
Oil feed
Drain bolt
Having addressed the rear cam seal and valve cover gasket in Chapter 11 and a strong case of denial convincing me it wasn’t the rear main seal, I went ahead and narrowed it down to #4-5 with #6 to be addressed down the line. At its first oil change I might have loosened the oil feed, but since it was right next to the turbo drain, I figured it was easier to tackle all three jobs at once.
!!! UNKNOWN CONTENT TYPE !!!
After patching the Miata after a slight accident involving gravel roads, I gathered everything to work on the Volvo during the July 4th weekend and drove it up onto the best $30 ramps from Harbor Freight.
Then SoCal was hit with not one, but two earthquakes centered near my city. My house was fairly scrambled, but no injuries to the people or property inside. Another week passed before I inspected the Harbor Freight ramps for any cracks. No damage! The car didn’t even wiggle.
Time to get back to work! Well, sort of. This being a turbo car, that meant taking out a lot of oddly-sized bolts too big (or too small) for whatever I had in my kit, so that took more trips to Home Depot and more individual wrenches to add to my tool kit.
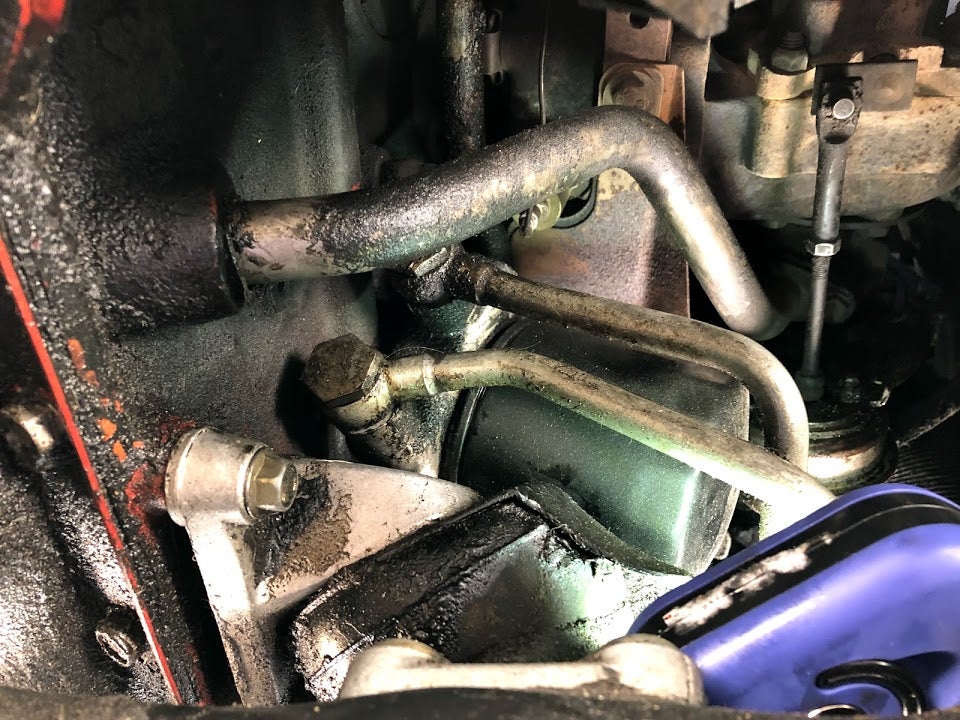
Step 1: I tightened up the oil feed banjo bolts as I should have after the first oil change. I would have bet money that monkeying around on these trying to get around the hot feed lines to the filter was the source of the leak.
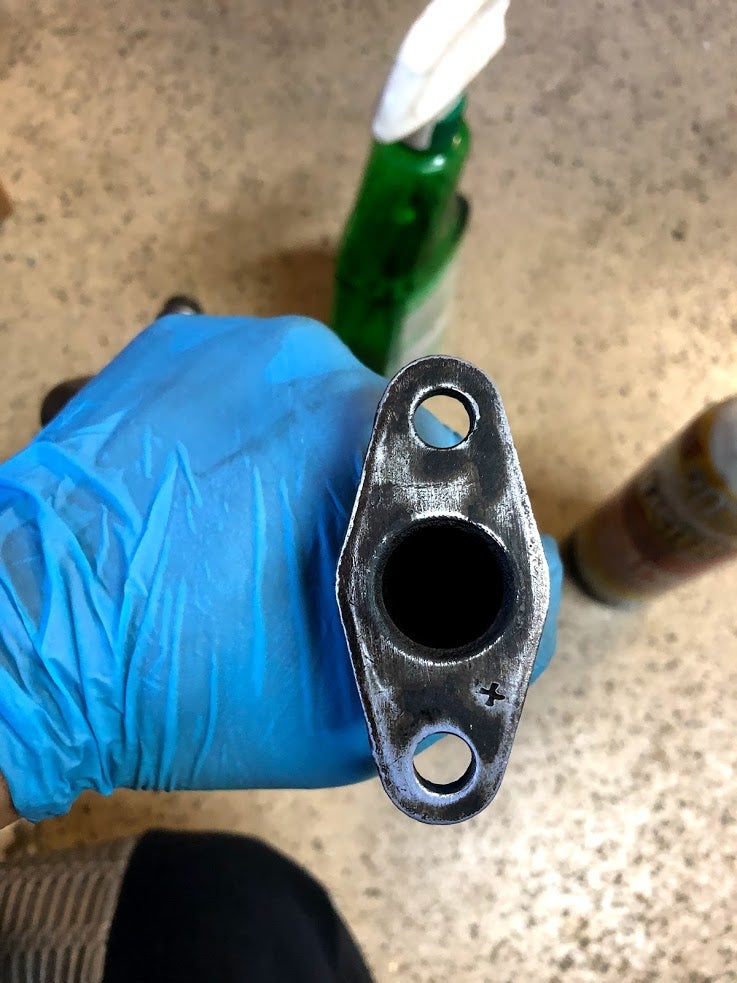
Step 2: Replacing the drain gaskets. There are two gaskets - one at the end that mates to the turbo and one O-ring mating that slips neatly into the badly stained block. The iPd video (on a FWD car) made it look easy, so I set to work.
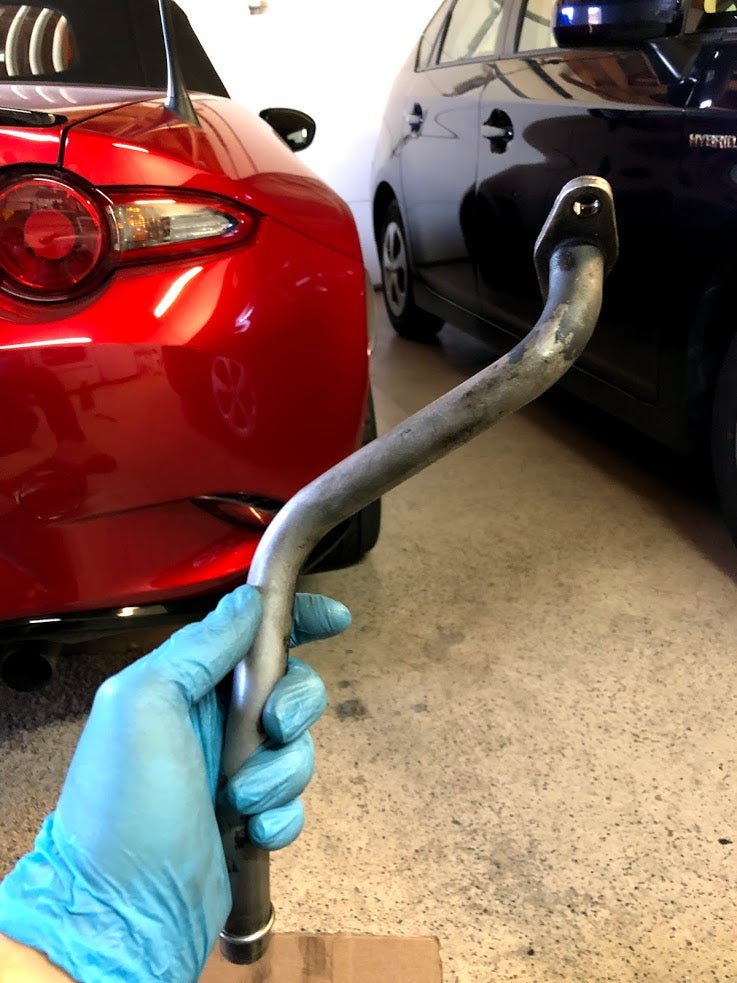
Great! The drain pipe bolts came undone with several extensions, a flex head head ratchet, and I think another flex socket had to come into a play. Imagine a Rube Goldberg machine held up only by my barely gloved hands. But wait! What of that arm in top right box?
Well, God finally had enough of my bullshit engineering in the so-called “real world” and forced me to face the consequences of someone else’s engineering. You see, I had to pry off the circlip, undo the wastegate itself, slip it out of its mounting, remove the actuator arm, and then and only then could I take the cursed drain pipe out. They could have designed it to not be like this, but they didn’t. There was probably a sale at IKEA or Ingmar Bergman’s new film came out or something else that day.

Not one to be defeated, I gave everything a quick pass with some sandpaper to get out all that nasty grit, followed by a blast of compressed air to reduce the amount of crap going into the oil.
Step 3: Putting it back together. What the video doesn’t show is that the process of putting it back. No, it doesn’t go straight in. Rather, you place the palm of your hand and push the gasket (that you’ve lubricated with some white lithium grease because you’re a good little mechanic!) into the block side. Then you rotate it about 90 degrees towards the turbo side where you can then put the lubricated turbo-side gasket on and tighten each side back up. Hope you remembered to replace the missing washers! Expect a few tries since this is a job best suited for someone with three arms.
No, I don’t have a photo. My third arm was busy fitting everything back on.
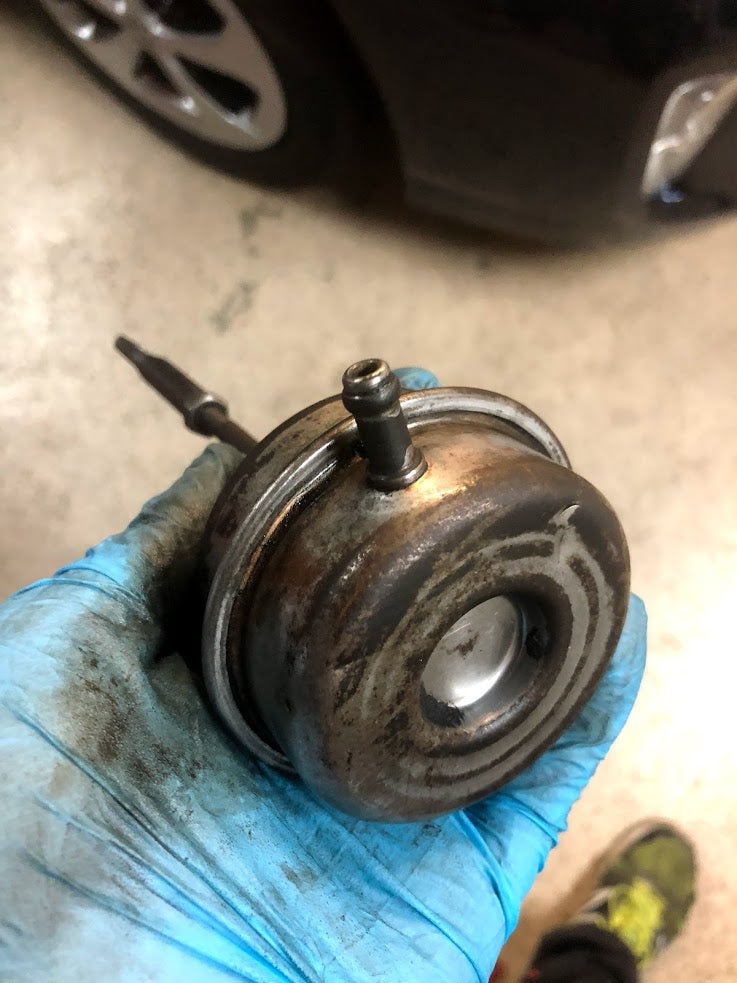
Of course, this being a Volvo, this meant something else had to break. In this case it was the wastegate actuator hose, a tiny little piece of hose that decide it had enough and slipped right off its spring-clamped perch and into my hands..
Step 4: Replacing the wastegate. $1.78 in hose later, I was ready to get to work. Of course, being the genius that I am, I figured it was easier to just put the section of hose to the turbocharger fitting and then slip it onto the wastegate side. This proved to be a bad idea as servicing a turbo while it’s still in the car is like trying to stuff a turkey after placing it in the oven. Even if it’s cold, you’ll still wish for the additional elbow room.
No pictures. It’s hard to take pictures when you’re stringing together four-letter words.
The lock nuts threads looked a little worn, so I replaced them with Metric 7.0 nuts & lock washer while I was there. One of the Volvo guys I turned to suggested smearing some RTV in the gap between the gasket and the drain pipe, so a bit of that went in there.
On 28 September, several months after getting started on a “15 minute job” the Volvo fired to life on its first turn, after I gave it a bit of throttle on cold starts. It ran, sounding every bit like the asthmatic tractor that is the famous Volvo redblock and it wasn’t gushing oil like the Exxon Valdez!
And of course, it promptly failed smog for running too damn rich: high HC and CO means no California sticker. And then the water pump started leaking. Oh, then it severed the other end of the n
egative battery cable because of course it would. And then a Volvo tuner offered to buy the car off me when I’ve had enough bored.
Stay tuned.
 AestheticsInMotion
> promoted by the color red
AestheticsInMotion
> promoted by the color red
12/14/2019 at 19:00 |
|
Okay but h ow many times have you gone out, sat in the seats, and realized it was all worthwhile?
|
promoted by the color red
> AestheticsInMotion
12/14/2019 at 19:05 |
|
All the damn time! There’s a certain sense of satisfaction you get when you drive a car you repaired with your own two hands. :)
I’m sure it’s better once I finally buy those Evo 8 Recaros...
 cmill189 - sans Volvo
> AestheticsInMotion
cmill189 - sans Volvo
> AestheticsInMotion
12/14/2019 at 19:59 |
|
While 240 seats are pretty good they’re no where near the comfort level of newer Volvo’s.
|
AestheticsInMotion
> cmill189 - sans Volvo
12/14/2019 at 20:23 |
|
Ohhhhh for some reason I was thinking he had an 850.
I’m getting the oppo- Volvo- owner’s- with- major- mechanical-issues mixed up lol
|
cmill189 - sans Volvo
> AestheticsInMotion
12/14/2019 at 20:56 |
|
Never forget I have the two worst offenders according to the internet and they’re both great.
 MKULTRA1982(ConCrustyBrick)
> promoted by the color red
MKULTRA1982(ConCrustyBrick)
> promoted by the color red
12/14/2019 at 22:37 |
|
Because the seats are surely trashed?
|
MKULTRA1982(ConCrustyBrick)
> promoted by the color red
12/14/2019 at 22:48 |
|
I’m not sure about the turbo redblocks but from my understanding if you want redblocks to not leak you have to service the PCV system. You probably already know but the crankcase pressure will just keep forcing oil out the seals until it is unclogged. I just got the oil separator box and the o-ring from the dealership for like 50$ CAD.
Hopefully the water pump is just the little o-ring on top (that’s why mine is leaking and has that little pool of green on top of the water pump)
|
promoted by the color red
> MKULTRA1982(ConCrustyBrick)
12/14/2019 at 23:32 |
|
Good point, I think the PCV is probably due soon. Noticed a bit of oil weep in the airbox when I swapped the filter last weekend.
Right now I’m going fairly deep into getting everything I need for the water pump replacement. Figured I might as well take care of the thermostat and other hoses & overflow tank while I
’m down there.
|
promoted by the color red
> MKULTRA1982(ConCrustyBrick)
12/15/2019 at 05:28 |
|
It looks like it. Both are worn to their foam backing and the passenger-side looks like it’ll need a new grid too. Doing a full rebuild with new foam & covers will set me back about what it would cost to buy Recaros anyway, but I won’t stop looking for a full blue cloth set.