 "RallyDarkstrike - Fan of 2-cyl FIATs, Eastern Bloc & Kei cars" (rallydarkstrike)
07/31/2018 at 12:22 • Filed to: Fog Lights
 2
2
 6
6|
"RallyDarkstrike - Fan of 2-cyl FIATs, Eastern Bloc & Kei cars" (rallydarkstrike)
07/31/2018 at 12:22 • Filed to: Fog Lights | 2
| 6 |
Awhile back, !!!error: Indecipherable SUB-paragraph formatting!!! for my Accent as I miss having them in poor weather. That kit arrived last week and on the 27th, !!!error: Indecipherable SUB-paragraph formatting!!! .
The problem was, my wiring didn’t work and I couldn’t get the switch to light up....argh. This morning I had some free time again, so I took everything apart for a second time and checked on the lame I-probably-shouldn’t-use-it-but-don’t-have-any-plugs-near-my-car-to-solder-it clip-on style wire tap I was using to steal a power signal for the relay from my leftmost 12v socket inside the car (Accents have 2 12v sockets!).
When I popped it open, it was clear that the tap hadn’t actually TAPPED through the insulation on the wires...bummer. It would take a million extension cords to get my soldering iron to the car to actually strip it and solder everything up, so I decided I would cheat a bit and use some wire strippers to open the insulation on the wires JUST (i.e. a millimeter or two...) enough to try putting the connector on them and squeezing it on hard with a pair of pliers to properly clamp down on and pinch the wires.
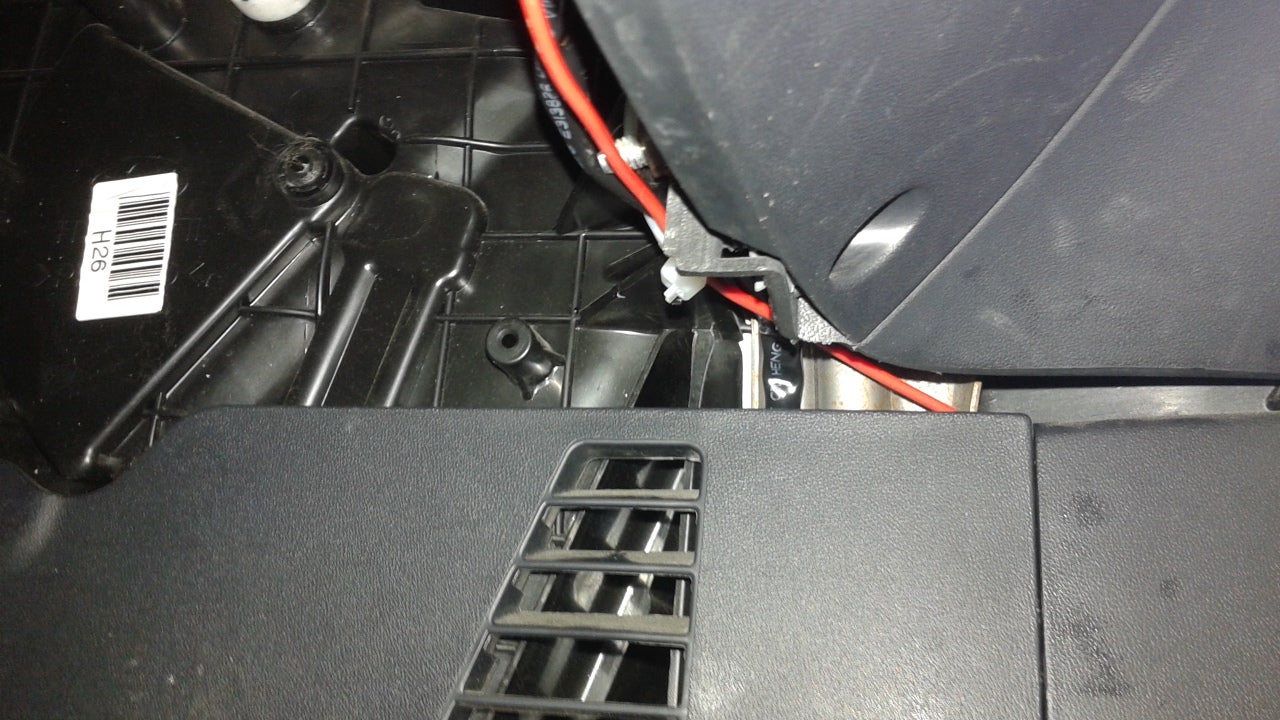
While I was at it, I also decided to get around to running the ‘extension’ cable through the firewall - the ‘extension cable’ being the power from the switch that would run through to trigger the relay in the engine compartment and connect the interior harness with the engine bay harness. I used a bent clothes-hanger and copious amounts of scotch tape to try and VERY carefully push the ‘extension cable’ (the single red one in the pic) through the existing main grommet in the firewall and then bolt it back on - luckily the cover in the driver’s footwell is very easy to remove and replace, just two 10mm bolts!:
The wire runs from the interior harness cover up and to the left around near the fuse box and through 2 zipties along the bottom of the dash trim over to the 12v socket location:
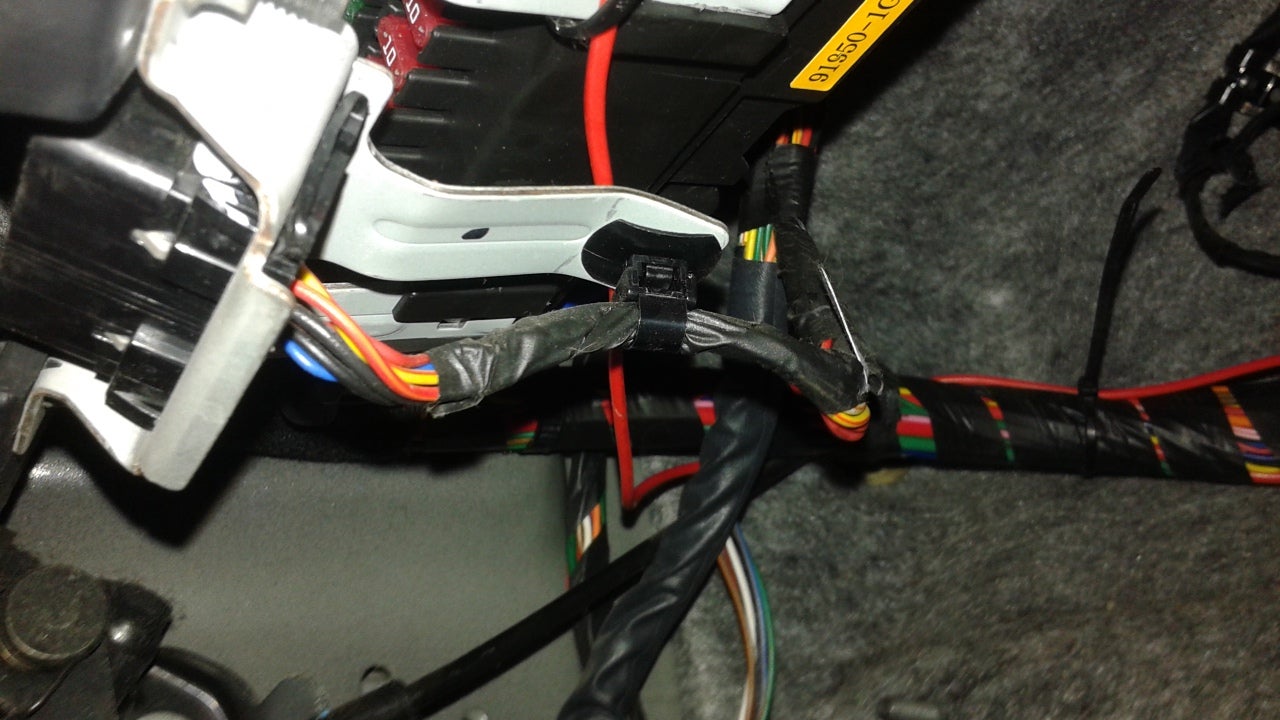
I checked my wiring - the ground wire was fine where I had mounted it to a bolt for the driver’s side kick panel and I uncovered the plastic I had on the lead for the ‘extension cable’ and plugged that in:
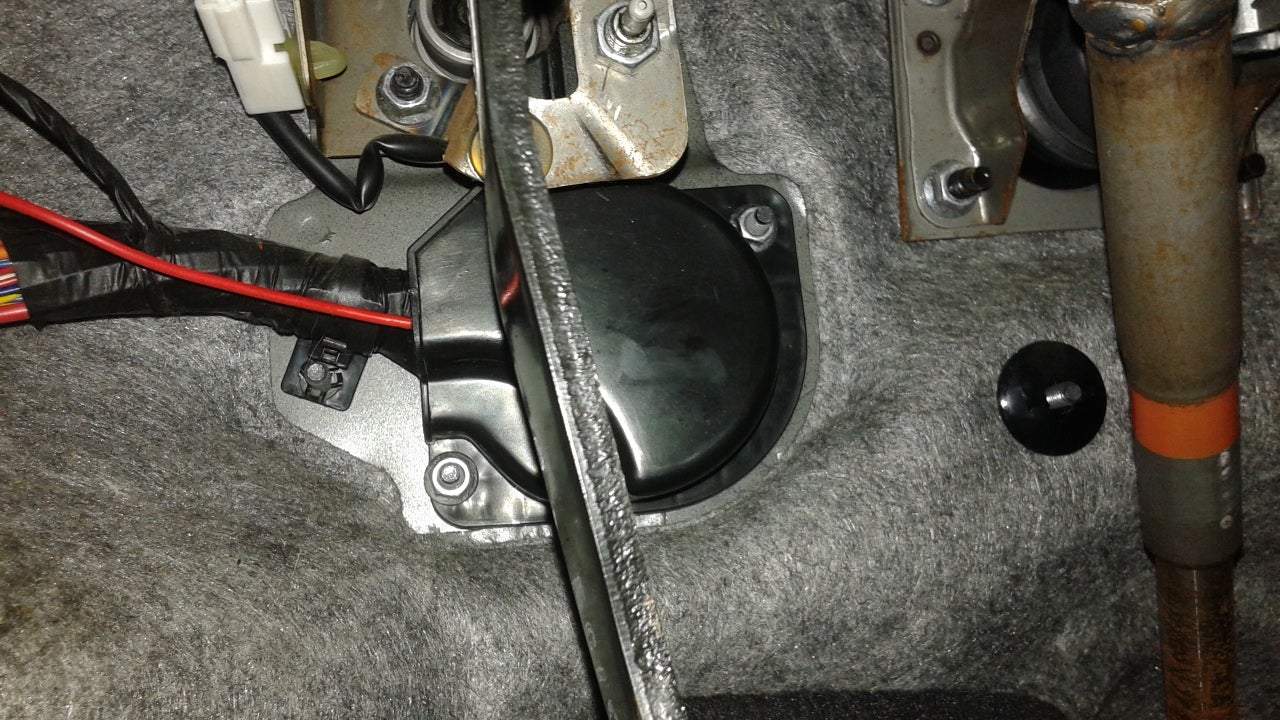
On the engine bay side, I ran into three issues....one larger than the others. The smaller issue was that my hanger/tape/wire method to get the ‘extension cable’ through the wiring harness grommet had worked.....but rather than coming out the end, it had poked a
hole in the grommet, itself and come out through that...you can see it barely missed coming out the booted end of the grommet where it was supposed to and came out that little hole instead. I actually left it like that as the wire is pretty light and there isn’t much tension on it, so I don’t think the boot on the grommet will rip through over time or anything, but I could be wrong (hopefully not!). I pulled the wire through from the interior into the engine bay rather than the other way around as there is almost no space to work on the engine bay side.
Do you guys think this will be OK?

The second small issue is that there is no easy place to run the ‘extension cable’ on the engine bay side that doesn’t pass nearby things....where the wire comes out is very close to my brake system so the wire may rub on it a bit. Nothing sharp there, so it SHOULD be ok, but closer than I’d like.
For now, because I didn’t get the actual lights or engine bay harness installed, I ziptied the wire to an existing part of the harness to bring it up and over the driver’s side strut tower and carefully covered the end of the ‘extension cable’ with a baggie and a twist tie to protect it from shorts and slid it down into the fender where it wouldn’t touch anything hot:
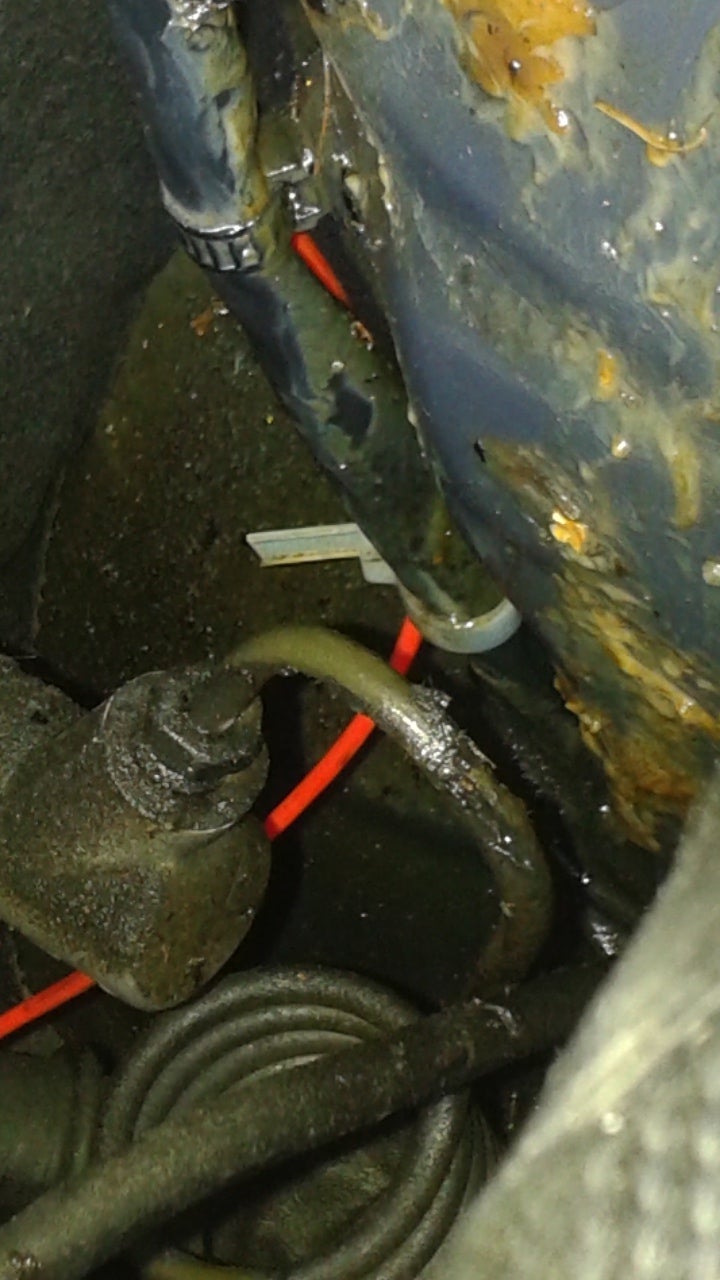

ignore all the pine needles and waxy undercoating sealant on my strut towers....the shop I use GOES TO TOWN with the stuff in the engine bay...really annoying when you’re working in there, especially on hot days like today because it gets very greasy and....gooey...and sticks to everything, like your hands. I twist tied the baggie-ended ‘extension cable’ to one of the fender mount points so it wouldn’t slip so far in somewhere where I couldn’t easily get it back out next time.
The final BIG issue is that one of the front two bolts I have to remove to get the bumper off and install the lights is....stripped. The driver’s side bolt comes out for fun, but the passenger bolt just spins in place despite me using the ‘gently rock it back and forth’ trick to try and get it unstuck....it seems like it stripped itself anyway.
The Accent is in the shop tomorrow morning to get some light surface rust underneath touched up before it grows into something worse, so seeing as I don’t have any power cutting tools at all, I’ll see if they can get the bolt off and out for me and re-tap the hole so I can finally get the bumper off and get the damn lights mounted!
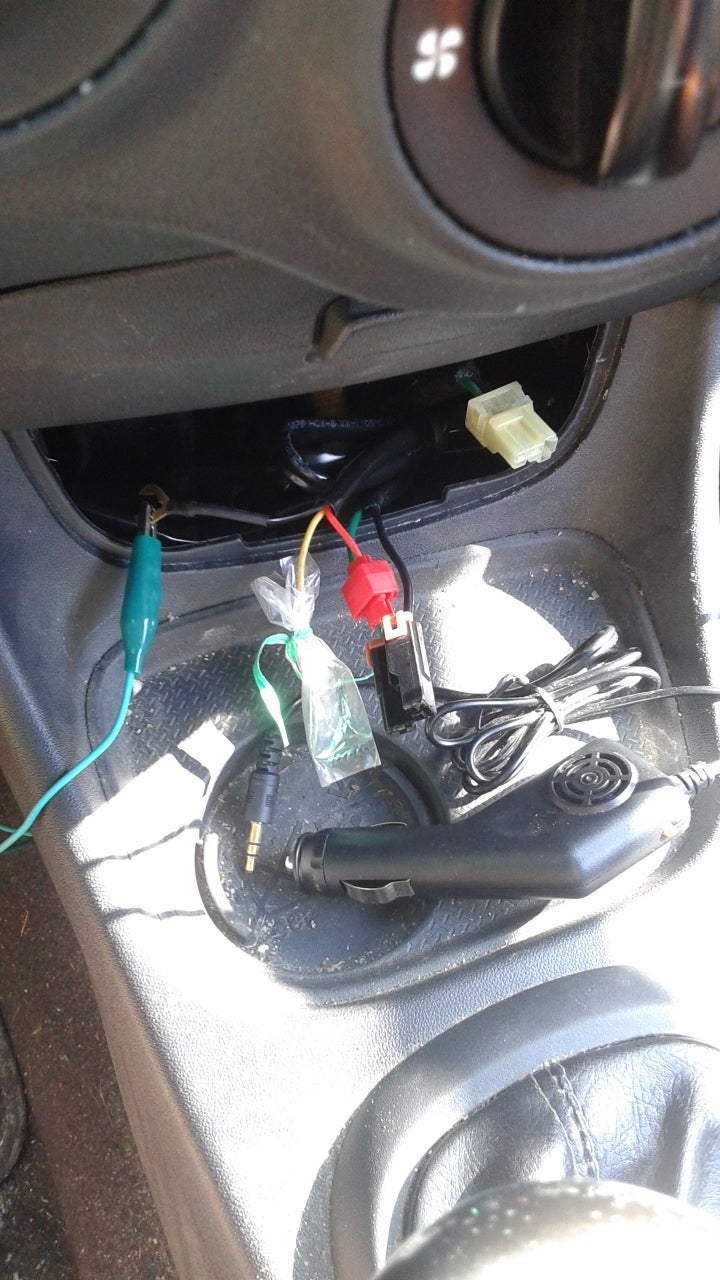
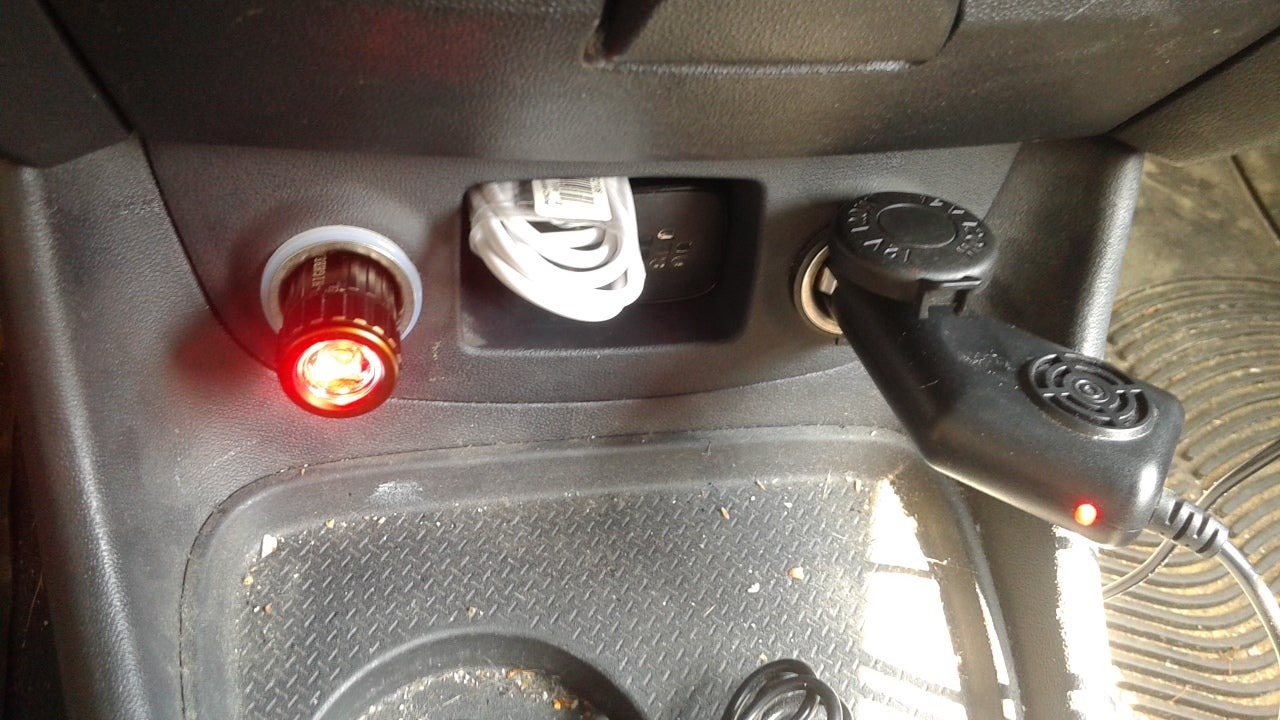
Despite that HIGHLY ANNOYING occurrence with the bolt, there was some light at the end of the tunnel. I put everything back together in the interior and reconnected and put back my 12v sockets to make sure they still worked as they should:
All was well there, so it was time for the moment of truth to see if I had the interior wiring fixed and working this time...I pressed the new fog light switch to see if it would now get power and...
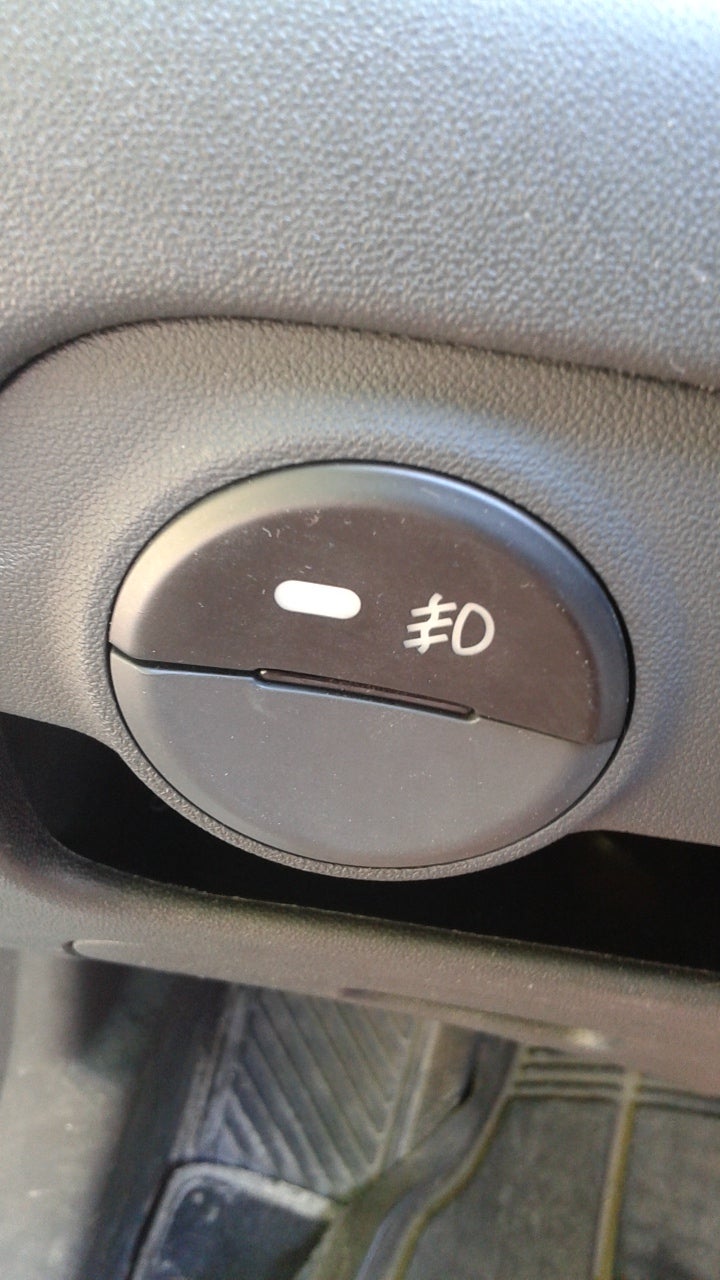
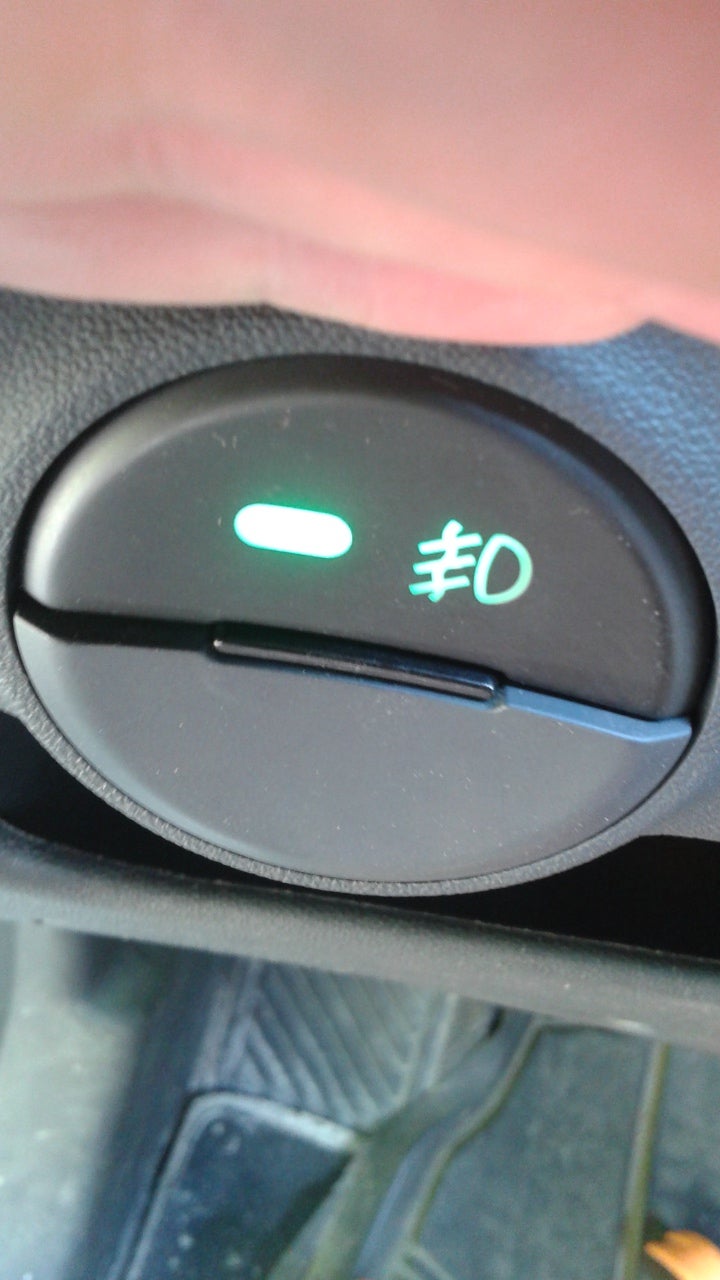
HOLY CHEESEBALLS...it works! Because it’s wired to accessory power, the switch’s fog light symbol lights up ALL the time regardless of if the lights are on or not. Not a big deal at all, but pressing the button lit up the little green indicator light as needed! At least the wiring on the INSIDE of the car is done now! Now if only I can get that bumper sorted to replace the grill insert...
 vicali
> RallyDarkstrike - Fan of 2-cyl FIATs, Eastern Bloc & Kei cars
vicali
> RallyDarkstrike - Fan of 2-cyl FIATs, Eastern Bloc & Kei cars
07/31/2018 at 12:56 |
|
Sweet, you are so close.
V
a
m
p
i
r
e
c
l
i
p
s
a
r
e
a
l
w
a
y
s
s
k
e
t
c
h
y
,
I
w
o
u
l
d
i
n
v
e
s
t
i
n
a
w
i
r
e
l
e
s
s
s
o
l
d
e
r
i
n
g
i
r
o
n
i
f
y
o
u
r
g
o
i
n
g
t
o
b
e
d
o
i
n
g
t
h
e
s
e
p
r
o
j
e
c
t
s
a
w
a
y
f
r
o
m
s
h
o
r
e
p
o
w
e
r
.
Don’t worry about the grommet, it’s better to put it through it’s own hole like you did anyways. Run it along any other wire harnesses or brake lines (whatever) that go where you are going. Once you are at the relay you can cable tie it up.
I
n
s
t
e
a
d
o
f
e
l
a
s
t
i
c
s
a
n
d
b
a
g
g
i
e
s
j
u
s
t
e
l
e
c
t
r
i
c
a
l
t
a
p
o
t
h
e
e
n
d
s
s
o
t
h
e
y
d
o
n
’
t
m
a
k
e
c
o
n
t
a
c
t
.
As far as the stripped screw is it possible that the clip on the back of it is spinning too? body panel fasteners work in mysterious ways - and are often plastic and cheap.
A
l
s
o - that shop need to knock it off with the underhood sp
r
a
y
.
.
A
c
l
e
a
n
e
n
g
i
n
e
b
a
y
i
s
w
a
y
b
e
t
t
e
r
t
h
a
n
t
h
a
t
.
|
RallyDarkstrike - Fan of 2-cyl FIATs, Eastern Bloc & Kei cars
> vicali
07/31/2018 at 21:59 |
|
Clean engine bays are nice, but if the sealant on the strut towers keeps them from rusting, I can’t complain too much. The clip the screw bolts into is incredibly hard to see from any angle unless the bumper is removed, so no idea if it’s spinning or not...
The wires in the engine bay for the lights will probably run along the driver’s side fender and then down to where the lights mount in the bumper. I don’t know yet where I will get a ground for the lights....if the engine bay harness will reach, probably the battery for ground and power. Not sure where I will mount the relay and fuse though!
I would rather not use the vampire clip, but I am nowhere near ‘shore power’ without a million extension cords. I’ll prob get a wireless soldering iron someday down the road, but I had budgeted $100 for this mod for my car to splurge a little....the rest of my money g
oes straight to more important things, so the iron will have to wait! :)
Thanks for the positive comment! I have Selective Yellow bulbs for the lights, so it should look pretty nice at night (not that I will be one of those “drive around with your fogs on all the time” people). Hoping they will work as well as the fogs did in my old car to help me see better in snow/rain and fog (we get a lot of fog here, being on the coast in Nova Scotia).
Cheers!
 pip bip - choose Corrour
> RallyDarkstrike - Fan of 2-cyl FIATs, Eastern Bloc & Kei cars
pip bip - choose Corrour
> RallyDarkstrike - Fan of 2-cyl FIATs, Eastern Bloc & Kei cars
08/01/2018 at 05:37 |
|
well done
|
RallyDarkstrike - Fan of 2-cyl FIATs, Eastern Bloc & Kei cars
> pip bip - choose Corrour
08/01/2018 at 07:59 |
|
Thanks! Car is in the shop as I write this from my phone at MacDonald's getting a little surface rust repaired. They're going to get the bolt out for me, so hopefully I can get everything installed later this week! :)
|
vicali
> RallyDarkstrike - Fan of 2-cyl FIATs, Eastern Bloc & Kei cars
08/01/2018 at 11:25 |
|
I like grounding the main light circuit back to the neg on the batt. It eliminates the chance of weird grounding issues later on.
Fuse should be an inline type and can just hang or be cable-tied with other wires.
Relays usually have a bolt hole to hang it from, hopefully you can find a threaded hole somewhere on the inside of the engine bay that will work, worst case cable tie it down to another wiring harness.
Yellow fogs are awesome, mine are driving lights because we get less fog but lost of dust/snow..
|
RallyDarkstrike - Fan of 2-cyl FIATs, Eastern Bloc & Kei cars
> vicali
08/05/2018 at 08:09 |
|
Re: grounding back to the battery - that’s what I’ll prob do as well as the harness that came with the kit is already designed for that.
There is already a fuse in-line (normal automotive fuse) in a pop-top fuse holder with small windows on the side to look in and see if it is blown or not.
Relays
usually have a bolt hole to hang it from, hopefully you can find a
threaded hole somewhere on the inside of the engine bay that will work,
worst case cable tie it down to another wiring harness. I don’t see any obvious way to mount the fuse holder though, annoy
ingly. As for the relay, yes, there is a hole at the top - hopefully I can find an unimportant and easily accessible bolt.
I’m hoping the factory mounts work as a mix between fog / driving lights as we get a lot of both. The lens aren’t yellow for me, unlike yours (or are yours covered with vinyl?), but I bought yellow Sylvan
ia
bulbs for them....still have to find a day to finish up the engine bay side of things and get the fog brackets mounted!