 "Akio Ohtori - RIP Oppo" (akioohtori)
07/15/2018 at 18:10 Ģ Filed to: tooty scooty, Bad Ideas
 16
16
 7
7|
"Akio Ohtori - RIP Oppo" (akioohtori)
07/15/2018 at 18:10 Ģ Filed to: tooty scooty, Bad Ideas | 16
| 7 |
Well as quickly as it came on, it was over. Within 15 days I became aware of motorized bicycles, bought all the required parts, and built one. It has been both amazingly frustrating and fun. Here is it went.
Disclaimers: This build is for entertainment and learning purposes only. I do not expect to get any practical use out of the end product. I understand this is the worst choice of 2-wheel motorized transport.
Bike
The bike itself arrived in a single large box from Walmart. A Walmart outside of town had one in stock, but IÆm a lazy bastard, so I opted for their free 2-day shipping.
The bike itself was fairly well packed and mostly assembled when it arrived. The front tire, front fender, handlebars, seat, and pedals were all that needed to be installed.
Despite the simplicity, I still managed to put the fender on backwards the first time, so hooray for that.
Still, we got it assembled and took it out into the back yard for a spin. There, we discovered three things:
None of us had muscle memory for coaster brakes
Having a single gear kinda sucks
This fucker is heavy . Fourty-four pounds, to be exact.
Still, no one crashed and the bike mostly worked aside from some fender rubbing. Tomorrow, it was to become something... different.
The Kit
Arrived in classicly bad Amazon packaging. The kit was tightly encapsulated 25 lbs box that was then placed in a larger box with a single piece of packing paper. You know... for safety. Hilarious.
Luckily the kit itself was well packaged and nothing was damaged. A common pain point for these kits is the gas getting damaged in shipping. Mine had a small dent, about the size of the end of a pencil, but all in all not enough to worry about.
Surprisingly, the kit came with printed instructions. Though hilariously bad, they were handy to have as a quick reference.
Rear Sprocket
The first part of the install on these is also, allegedly, the most difficult. The rear wheel needs to be removed and the rear sprocket installed. (Sidenote: I had an overwhelming urge to watch the !!!error: Indecipherable SUB-paragraph formatting!!! while doing this.) As you would expect, this involves removing the rear wheel. The instructions I was using were very clear that you should take special care not to accidentally disassemble the rear hub when removing the wheel. They also offered no indication on how one would avoid doing that, and so I managed to not remove the hub so much as bugger up the brakes bad enough that I had to then remove the hub.
Joy.
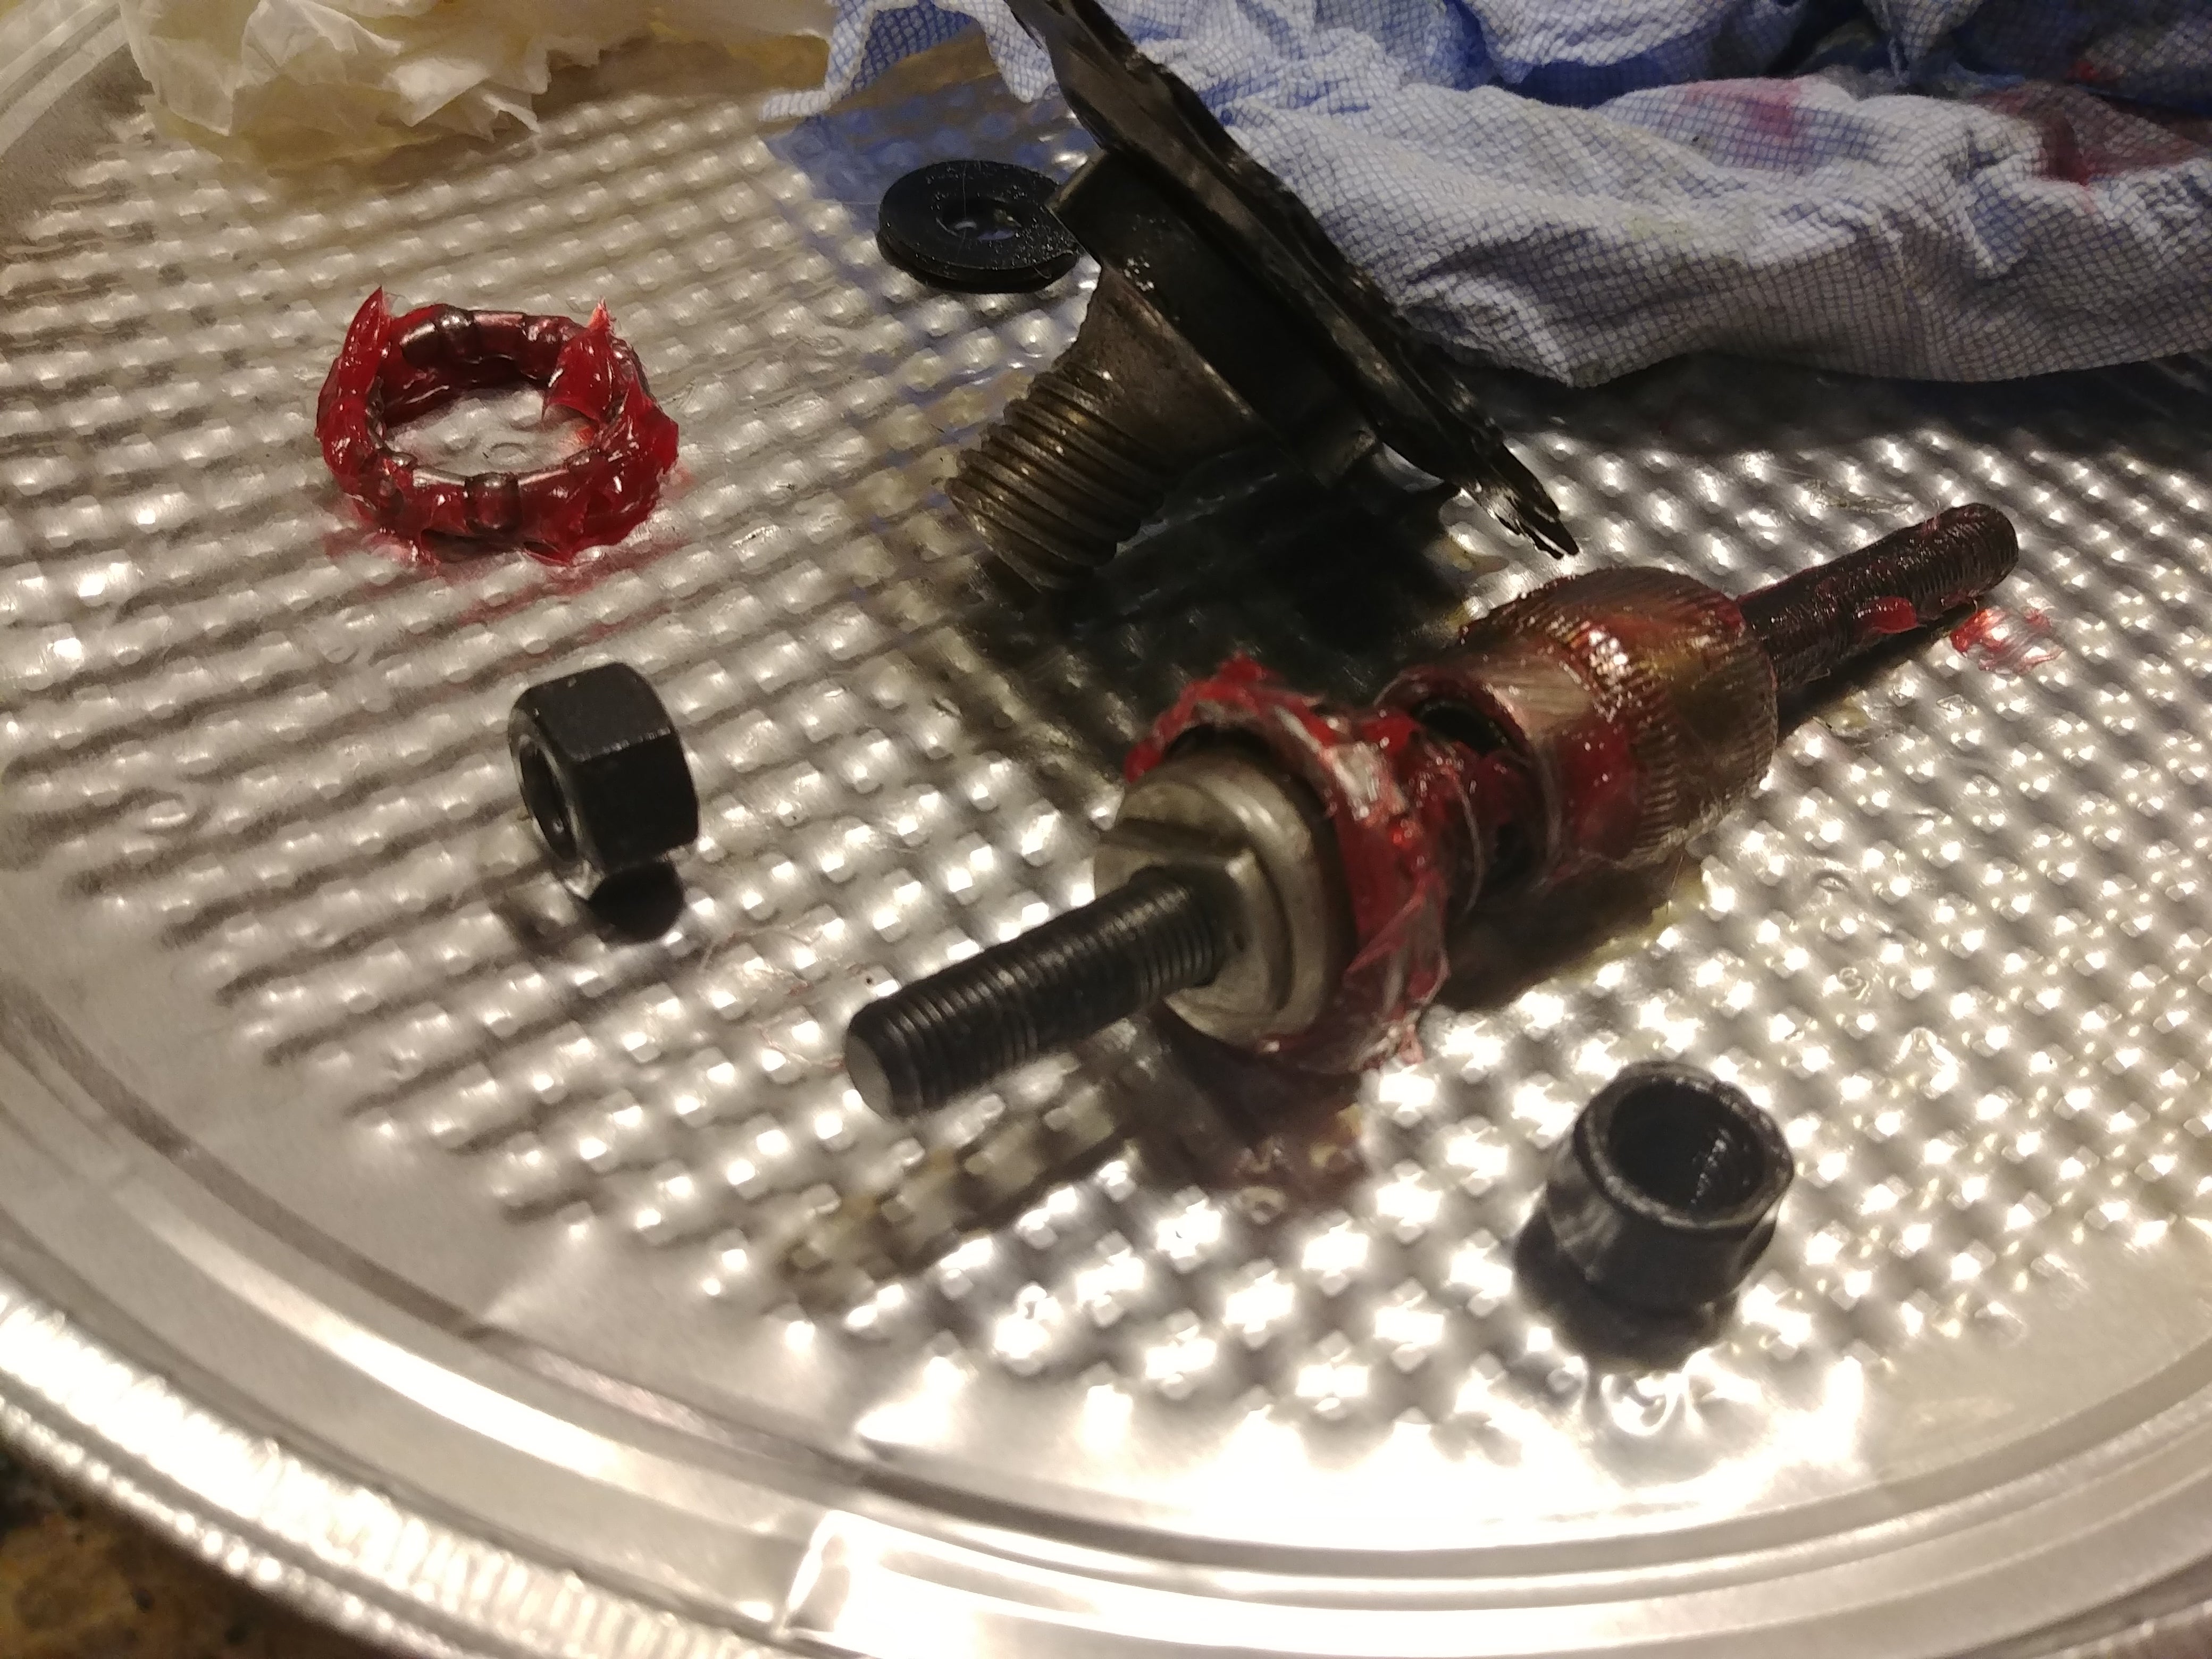
On the bright side, this gave me a chance to repack the bearing with automotive grease and remove the coaster brake shoes.
After installing the rear sprocket three times, I finally got it on. After a little adjustment to tame some of the rotational wobble, I finally had a slightly less functional bike with a saw blade attached to one side!
Time for bed.

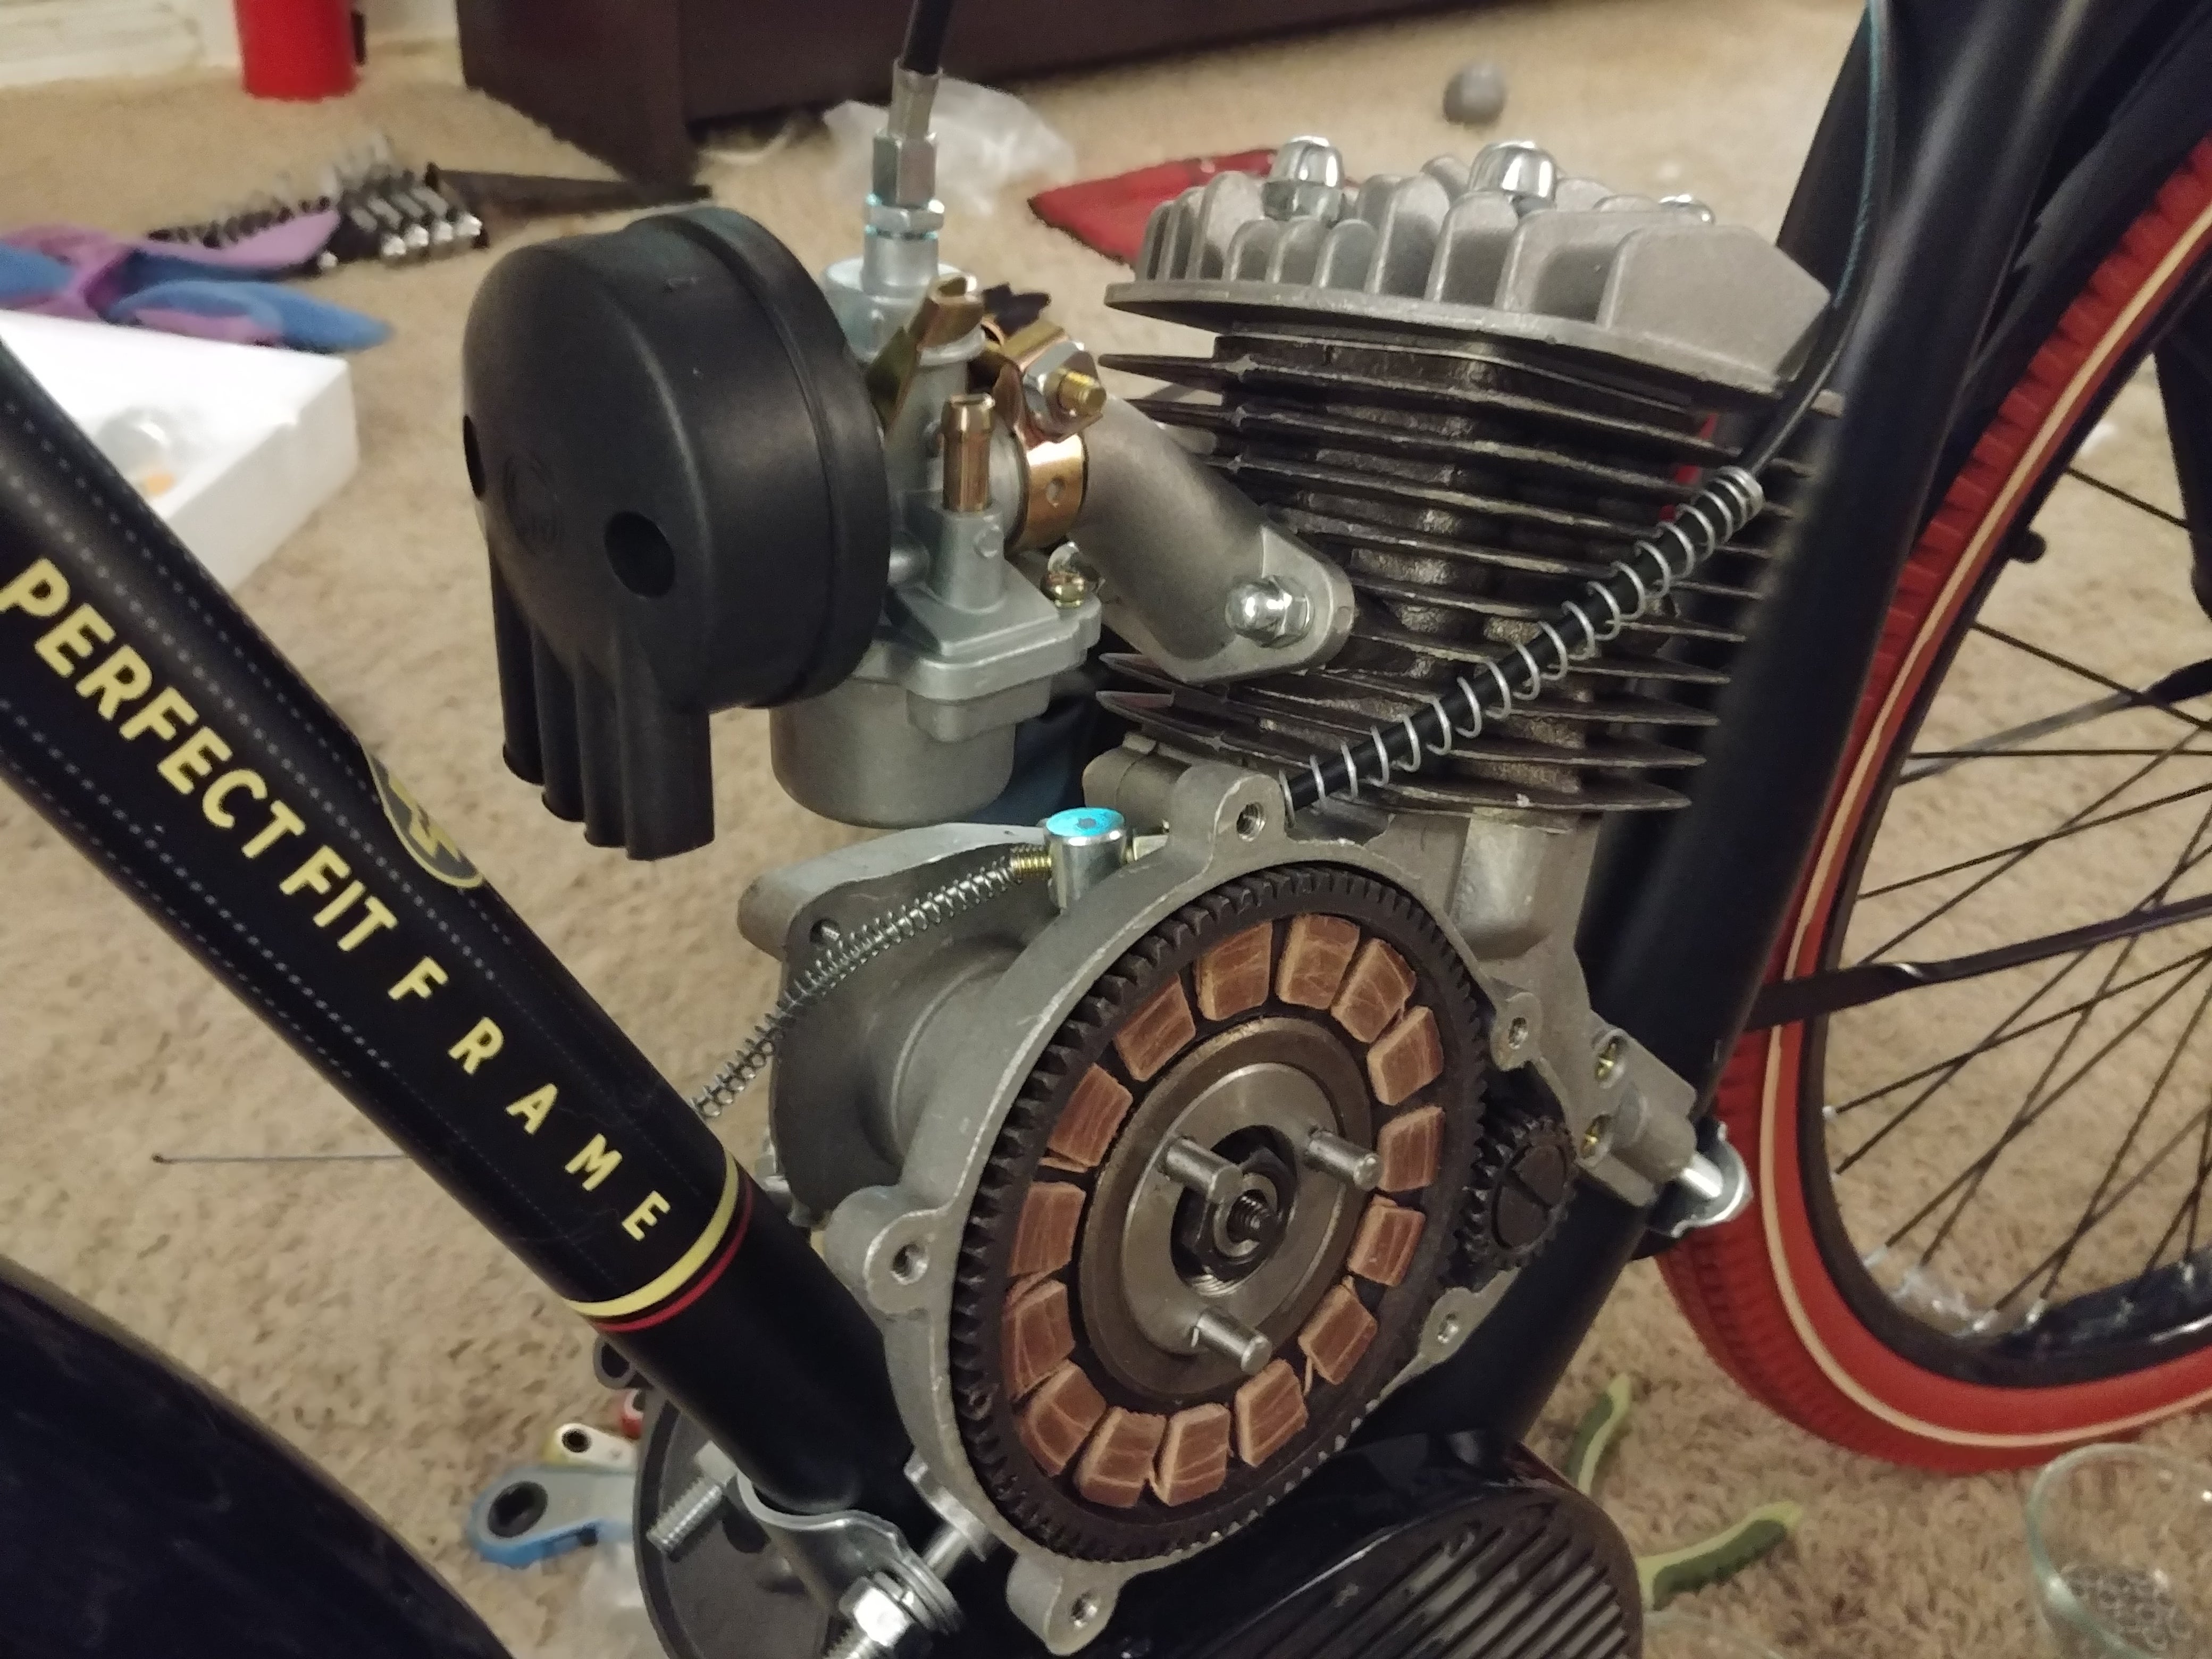
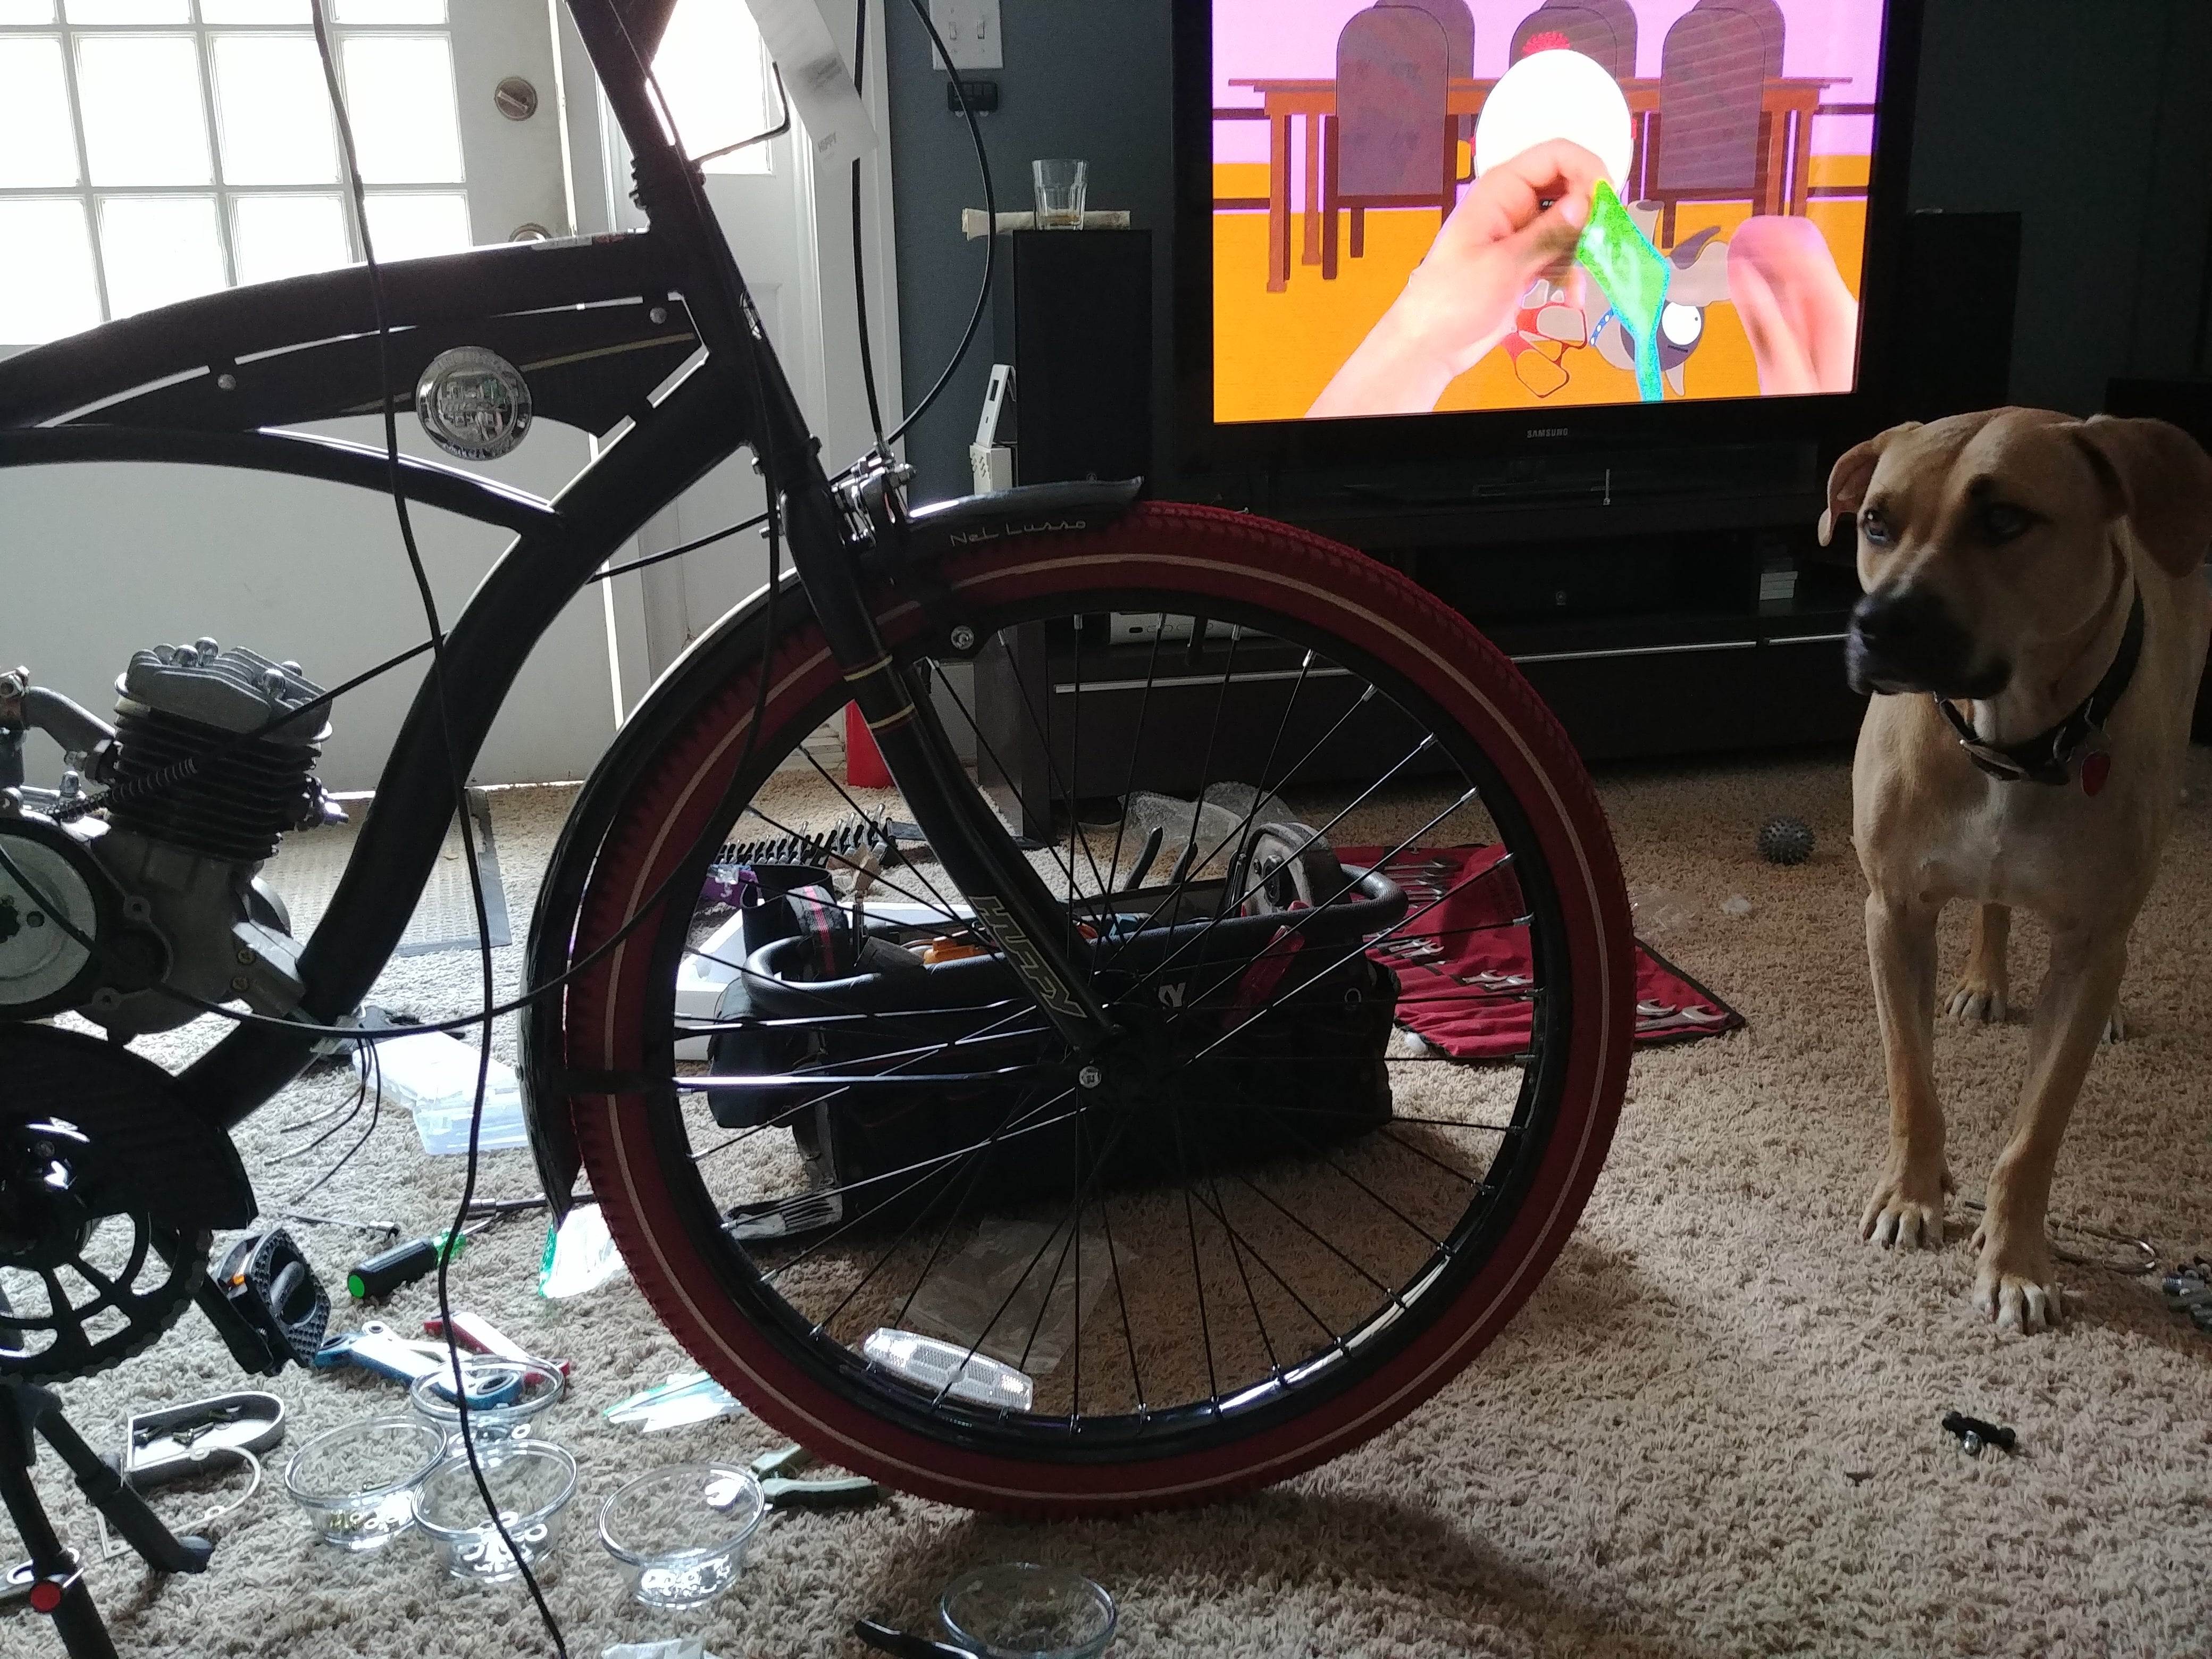
Motor
The bike I chose, a 26" Huffy Nel Lusso, is pretty much exactly the type of bike these kits are designed for, both in size and geometry.
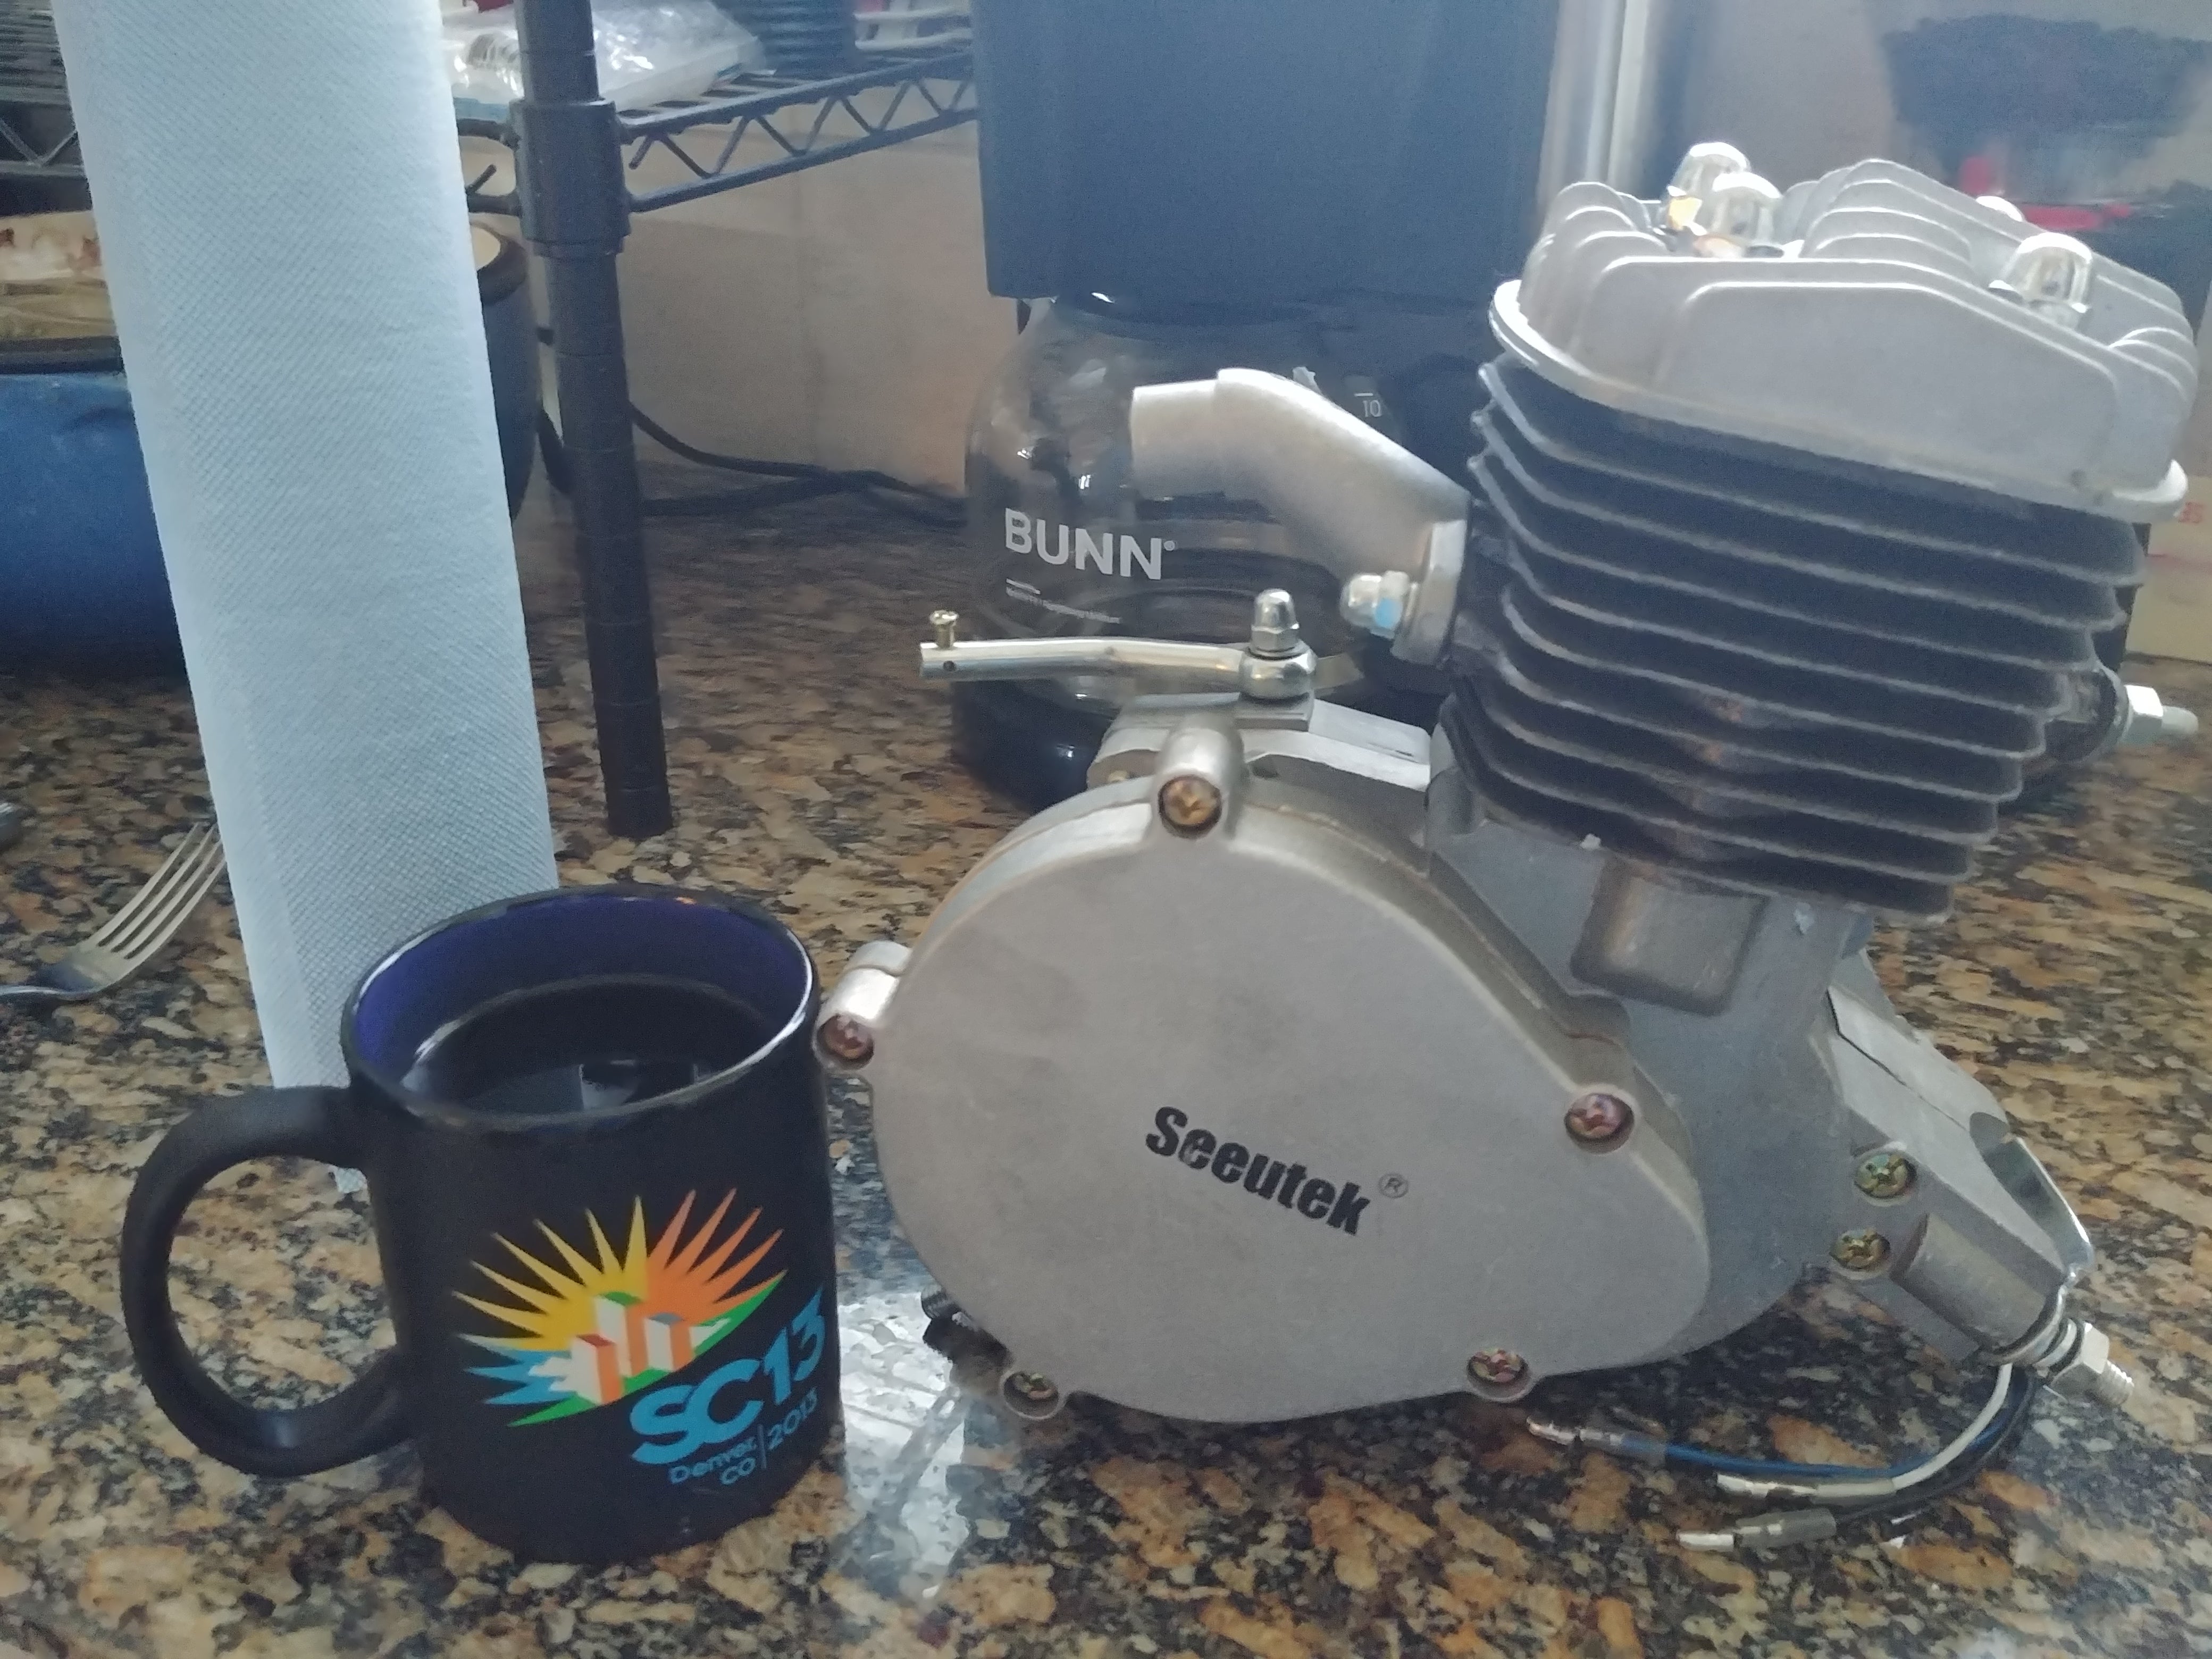
Despite this, the front mounting bracket was slightly too short to mount to the frame. To combat this, the kit comes with an alternate mounting plate, but since the fit was already so close and the contours were so good, I oped to replace the front mounting studs with bolts and use the stock mounting bracket.
This worked well, and I think makes for a cleaner install.
And really that was it. 2 bolts and 2 nuts and the motor was on the bike!
I also went ahead and re-torqued the head bolts to 14 ft/lbs , as apparently theyÆre known for being loose initially.
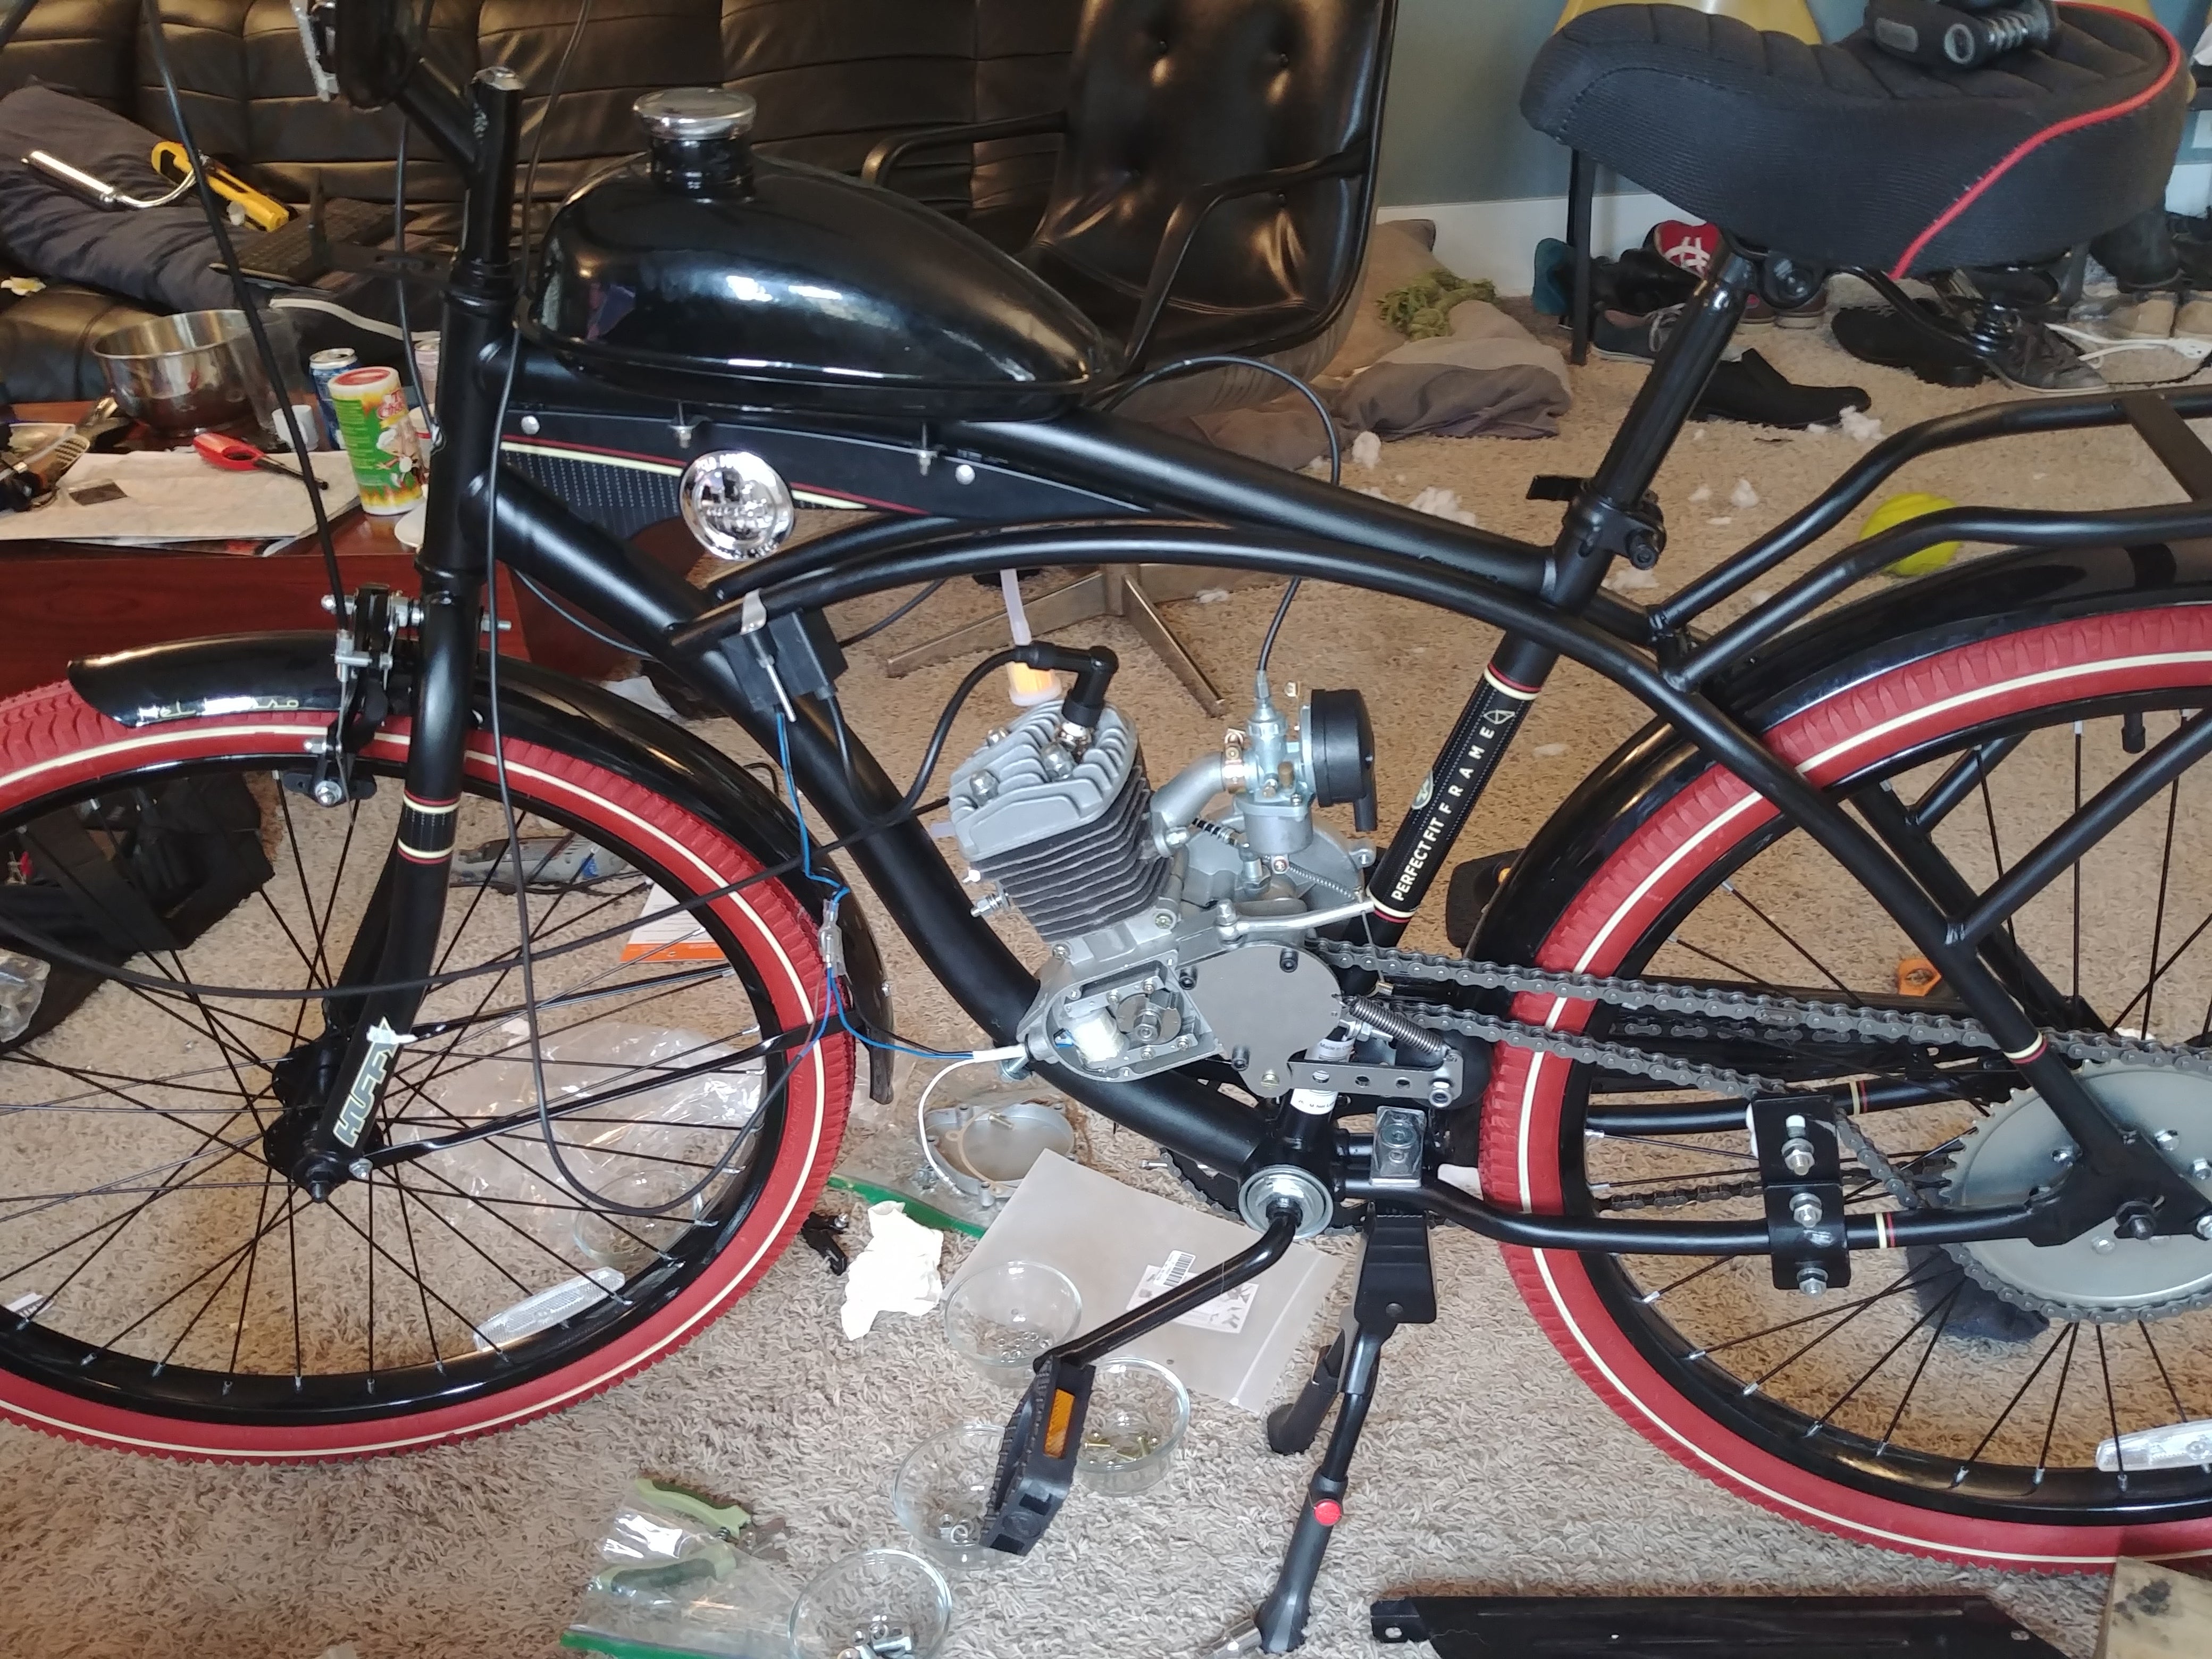
Clutch
Next up was supposed to be the chain install, but in the interim my bike had already developed a fault. The clutch wouldnÆt disengage.
Knowing nothing about these, I wasnÆt quite sure what to do. Luckily my old pal whiskey figured now was the correct time to completely disassemble the clutch, and so I did.
The mechanism is actually delightfully simple. The clutch lever pushes in a pin and in turn pushes out the clutch plate (flywheel?), causing it to disengage from the friction material of the clutch. Interestingly the clutch turns with the engine and the clutch plate is coupled to the wheels.
It is delightfully simple.
Anyway, after taking off the flower nut, which is also how the clutch is adjusted, everything freed up and the clutch started working again. A few quick adjustments and we were back in business.
I still donÆt know what caused it to seize like that, but I am sure I will find out at the least opportune moment, later.
Chain
After removing the master link, fitting the chain was pretty easy. Unfortunately I originally cut it one link too short and had to reinstall that link and break the chain again. IÆm sure that wonÆt come back to haunt me later.
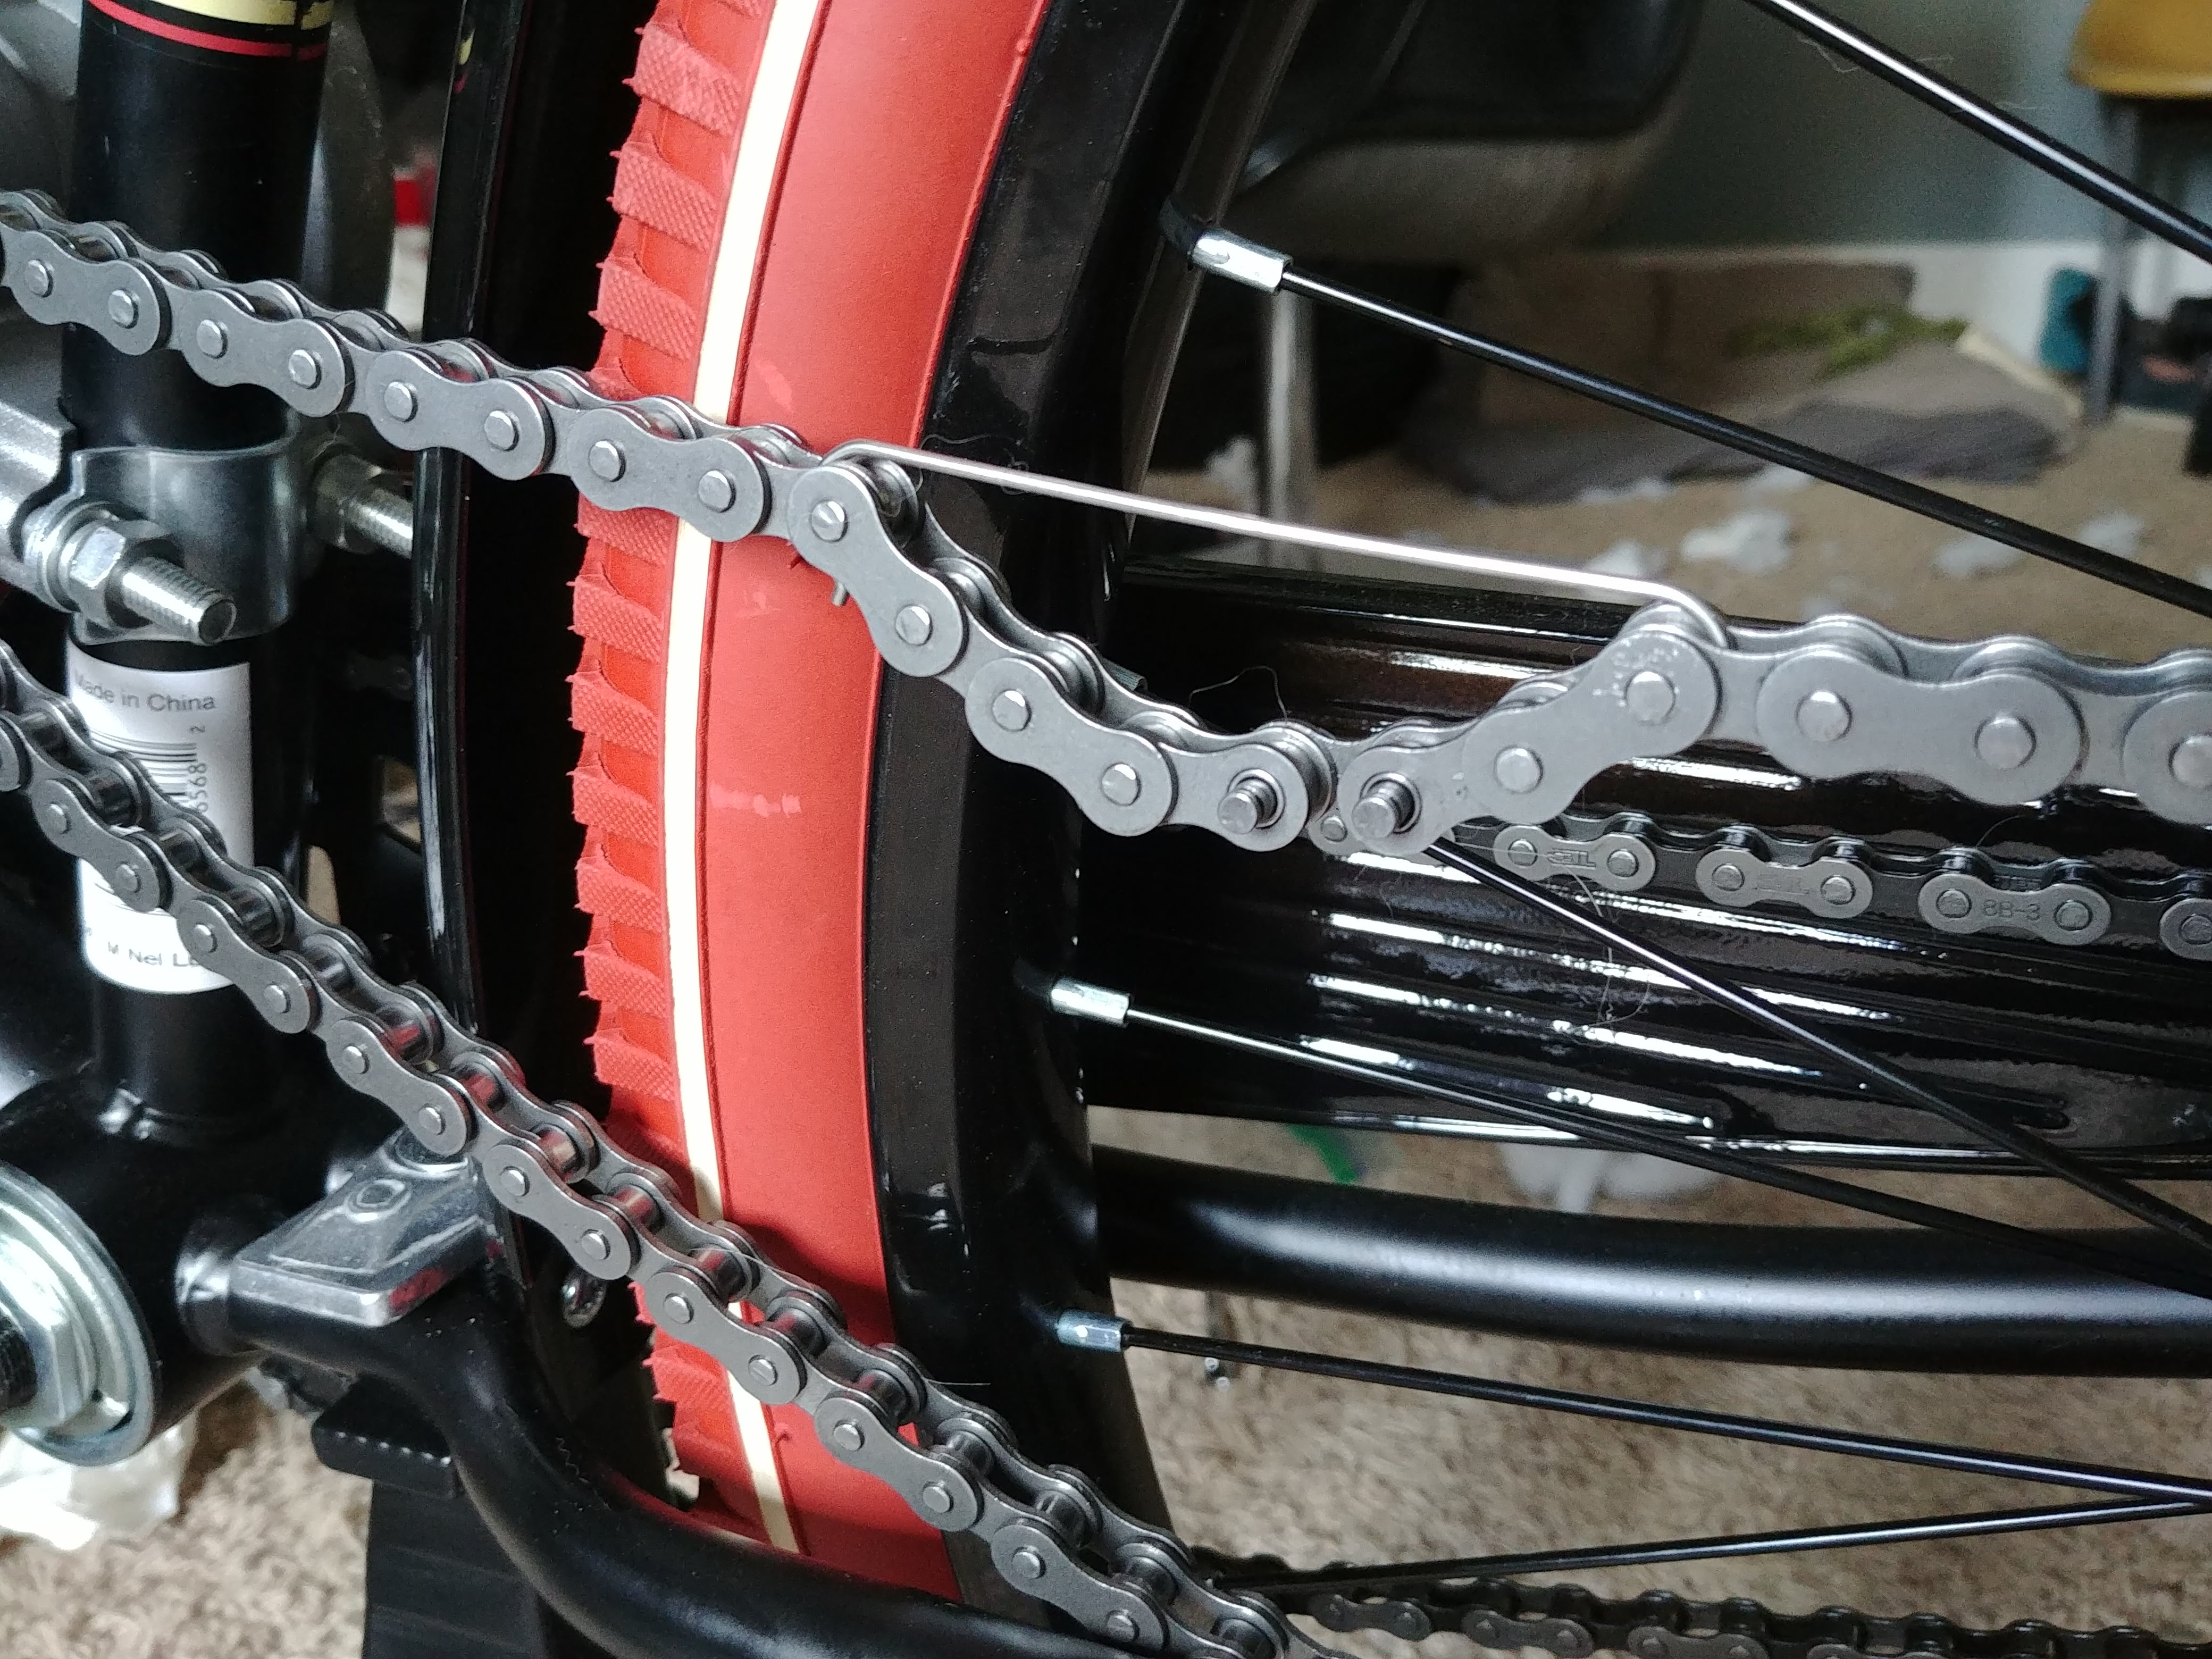
Despite being as short as possible, the chain had a annoying amount of slop in it. Luckily the chain guide that came with the kit (and I painted black) took out most of it, and the eBay tensioner (which I would not recommend) took the rest.
The tensioner was a little annoying as it came with no instructions or any indication of how to use it. Also the pieces were not finished after the were machined, leaving a lot of rough edges.. The seller was pretty defensive when I pointed that out, but at least he didnÆt think the world was going to end on October 4th. (That is a crazy story for another time.)
Fuel Tank and Lines
The fuel tank was next and seems like it should be straightforward.
It was not.
Huffy decided that we would like the the little decor panel thing SO MUCH that they attached it with rivets. Unfortunately, they didnÆt car enough to make sure the fit and spacing was even, so even the thin gas tank mounting brackets wouldnÆt fit in some places.
I waffled on if I should cut out the decor panel, drill out the rivets, or just force the whole thing into submission.
Ultimately, I opted for the 3rd option, hand tightening the brackets where they would fit and then forcing the tank into the position I wanted.
It works, but the handle bars do hit the tank sometimes, which I am sure will never become annoying or cause a problem.
Also the tank has to be slightly off-kilter because the cut-off valve interferes with the frame.
The fuel line and filter went in without a problem, though we did discover after filling up that the filter that came with the kit leaks terribly, so new filters are en route via Amazon.
Wiring
The wiring on this thing is also fairly straightforward. There are three electrical components: The coil, the dynamo, and the kill switch. The coil and the dynamo just wire together, black to black and red to red. The kill switch is slightly more complicated as its wires were black and red. Luckily I had instructions, which insisted the wires were some other colors.
Hooray!
That said, I was pretty sure all the kill switch does is short out the dynamo so the coil stops producing spark and kills the engine. Operating on that assumption, I wired it in randomly and moved on.
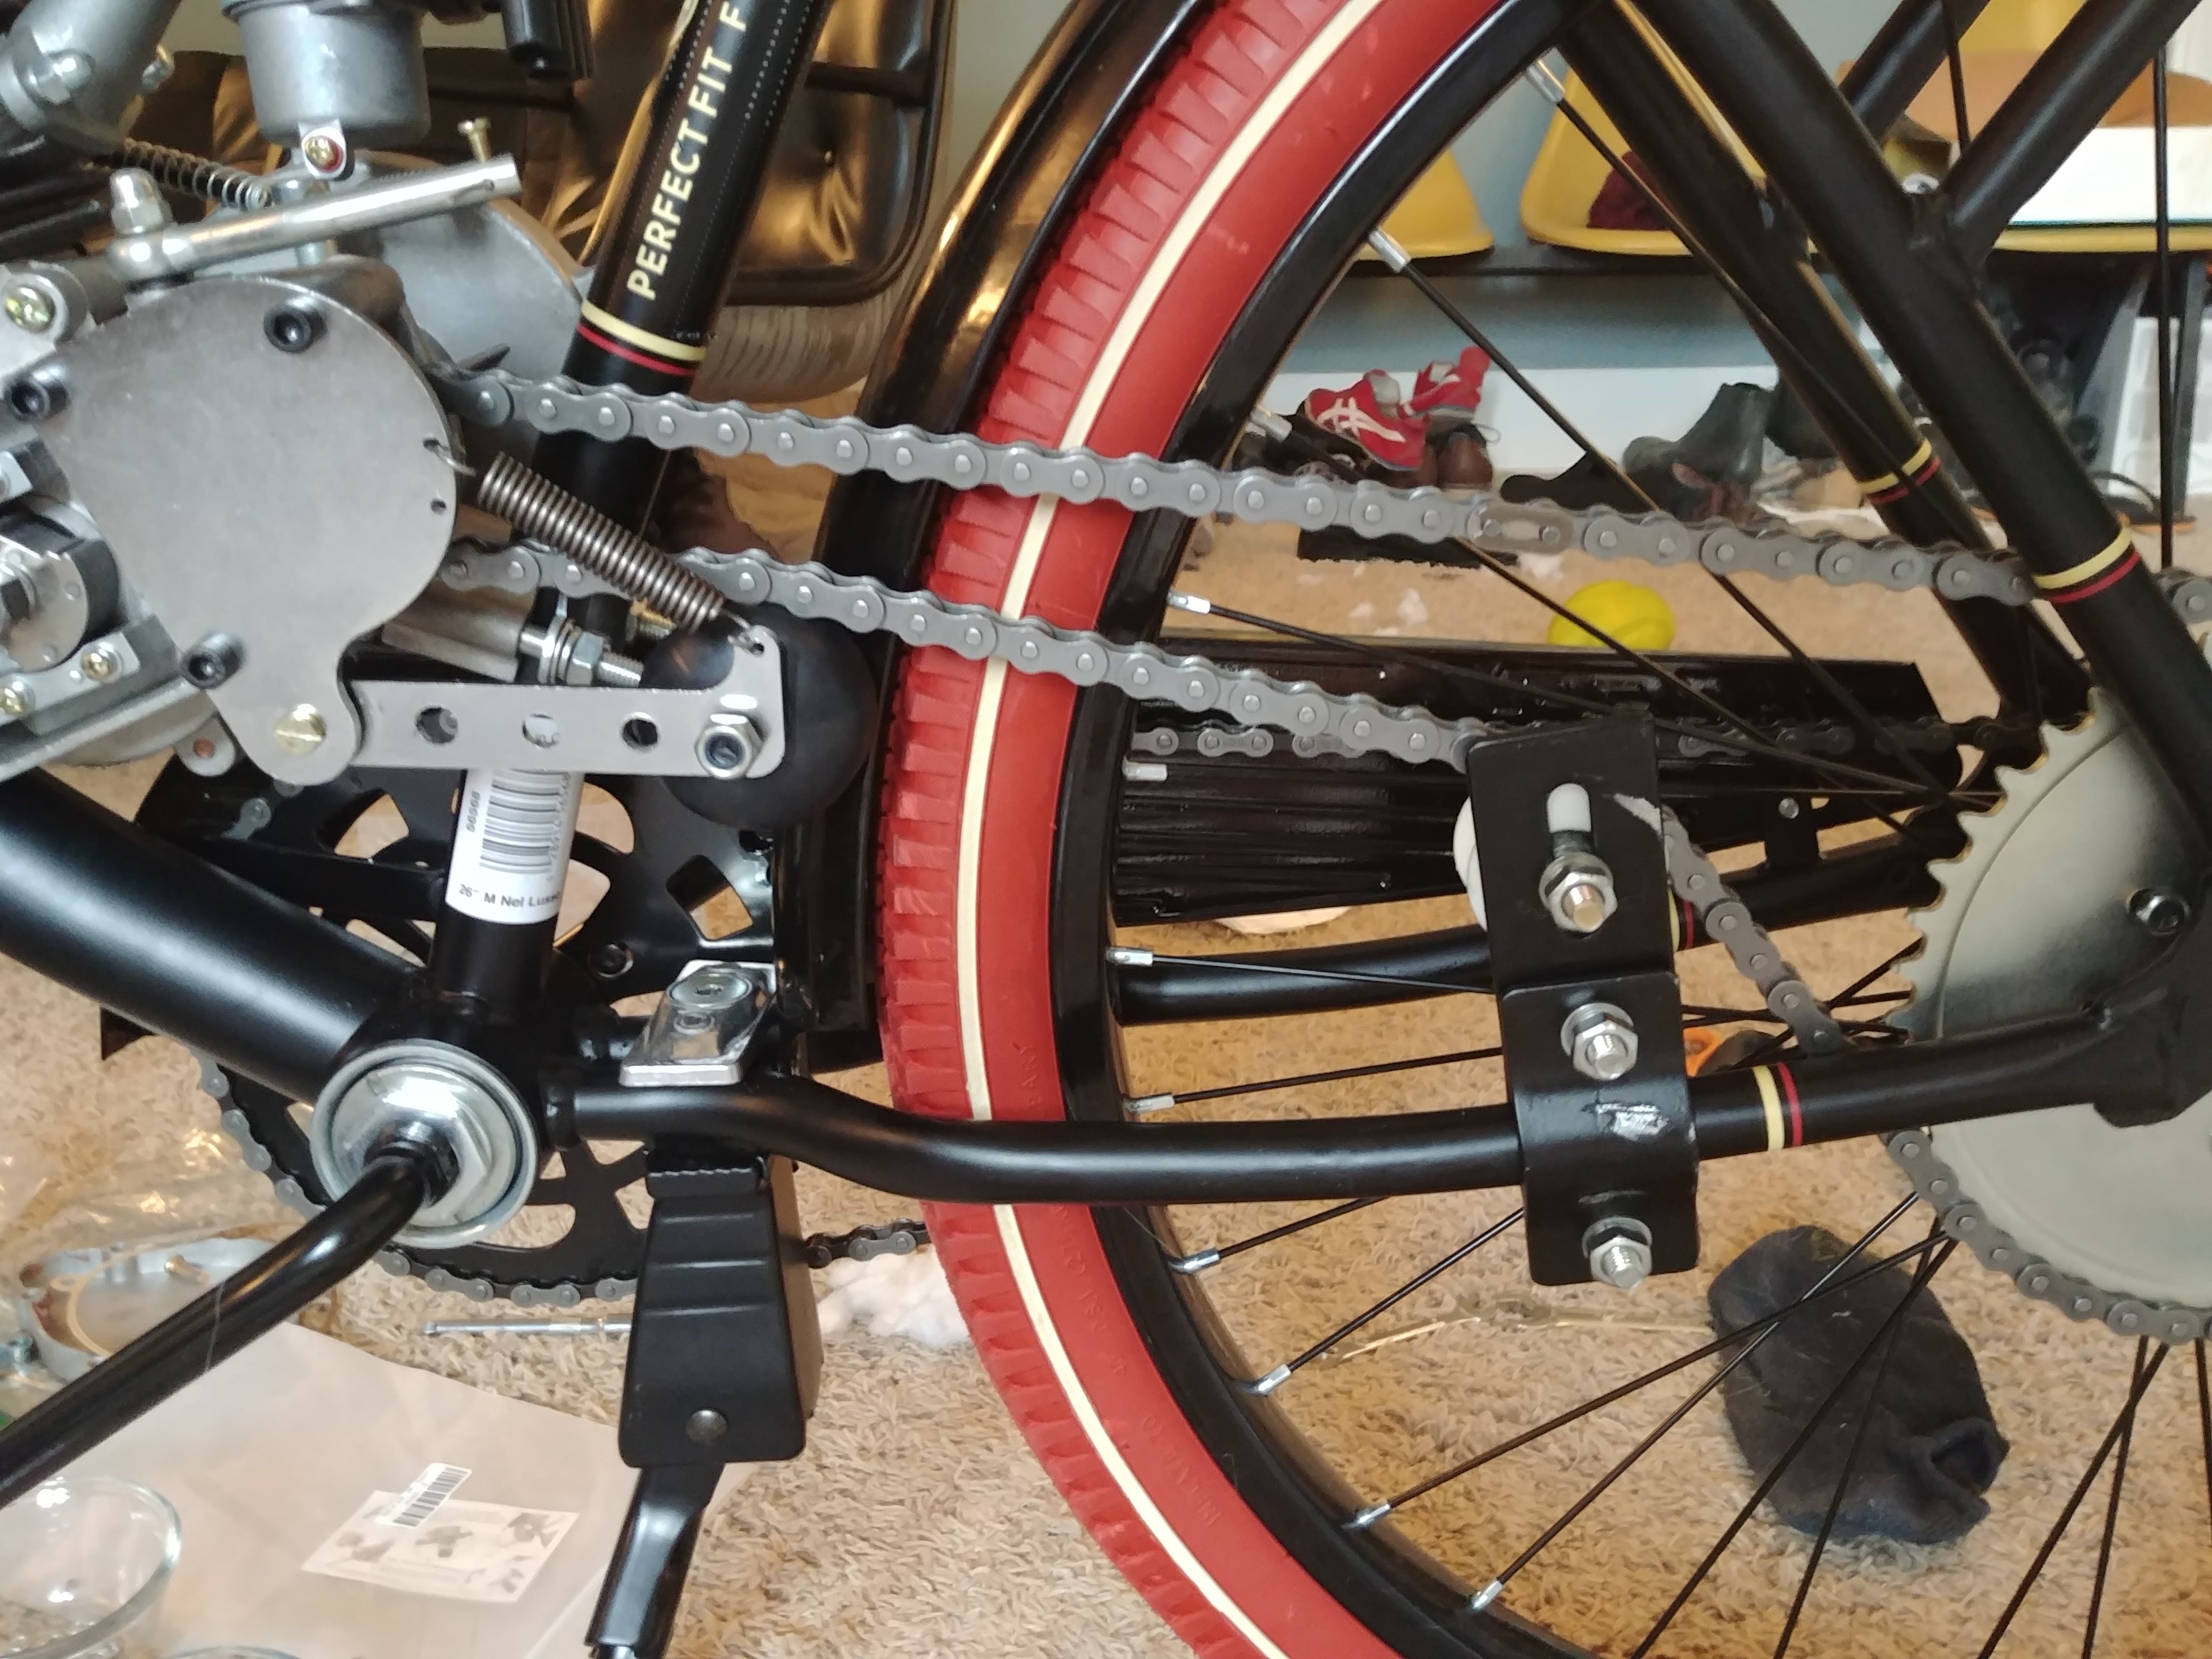
Brakes
Hey those are probably important! I went with caliper brakes which bolt on to the same location the fenders do. Install was fairly straightforward except if I mounted the rear fender and the brakes at the same time to the same mounting point, the fender wouldnÆt allow the brakes to clamp.
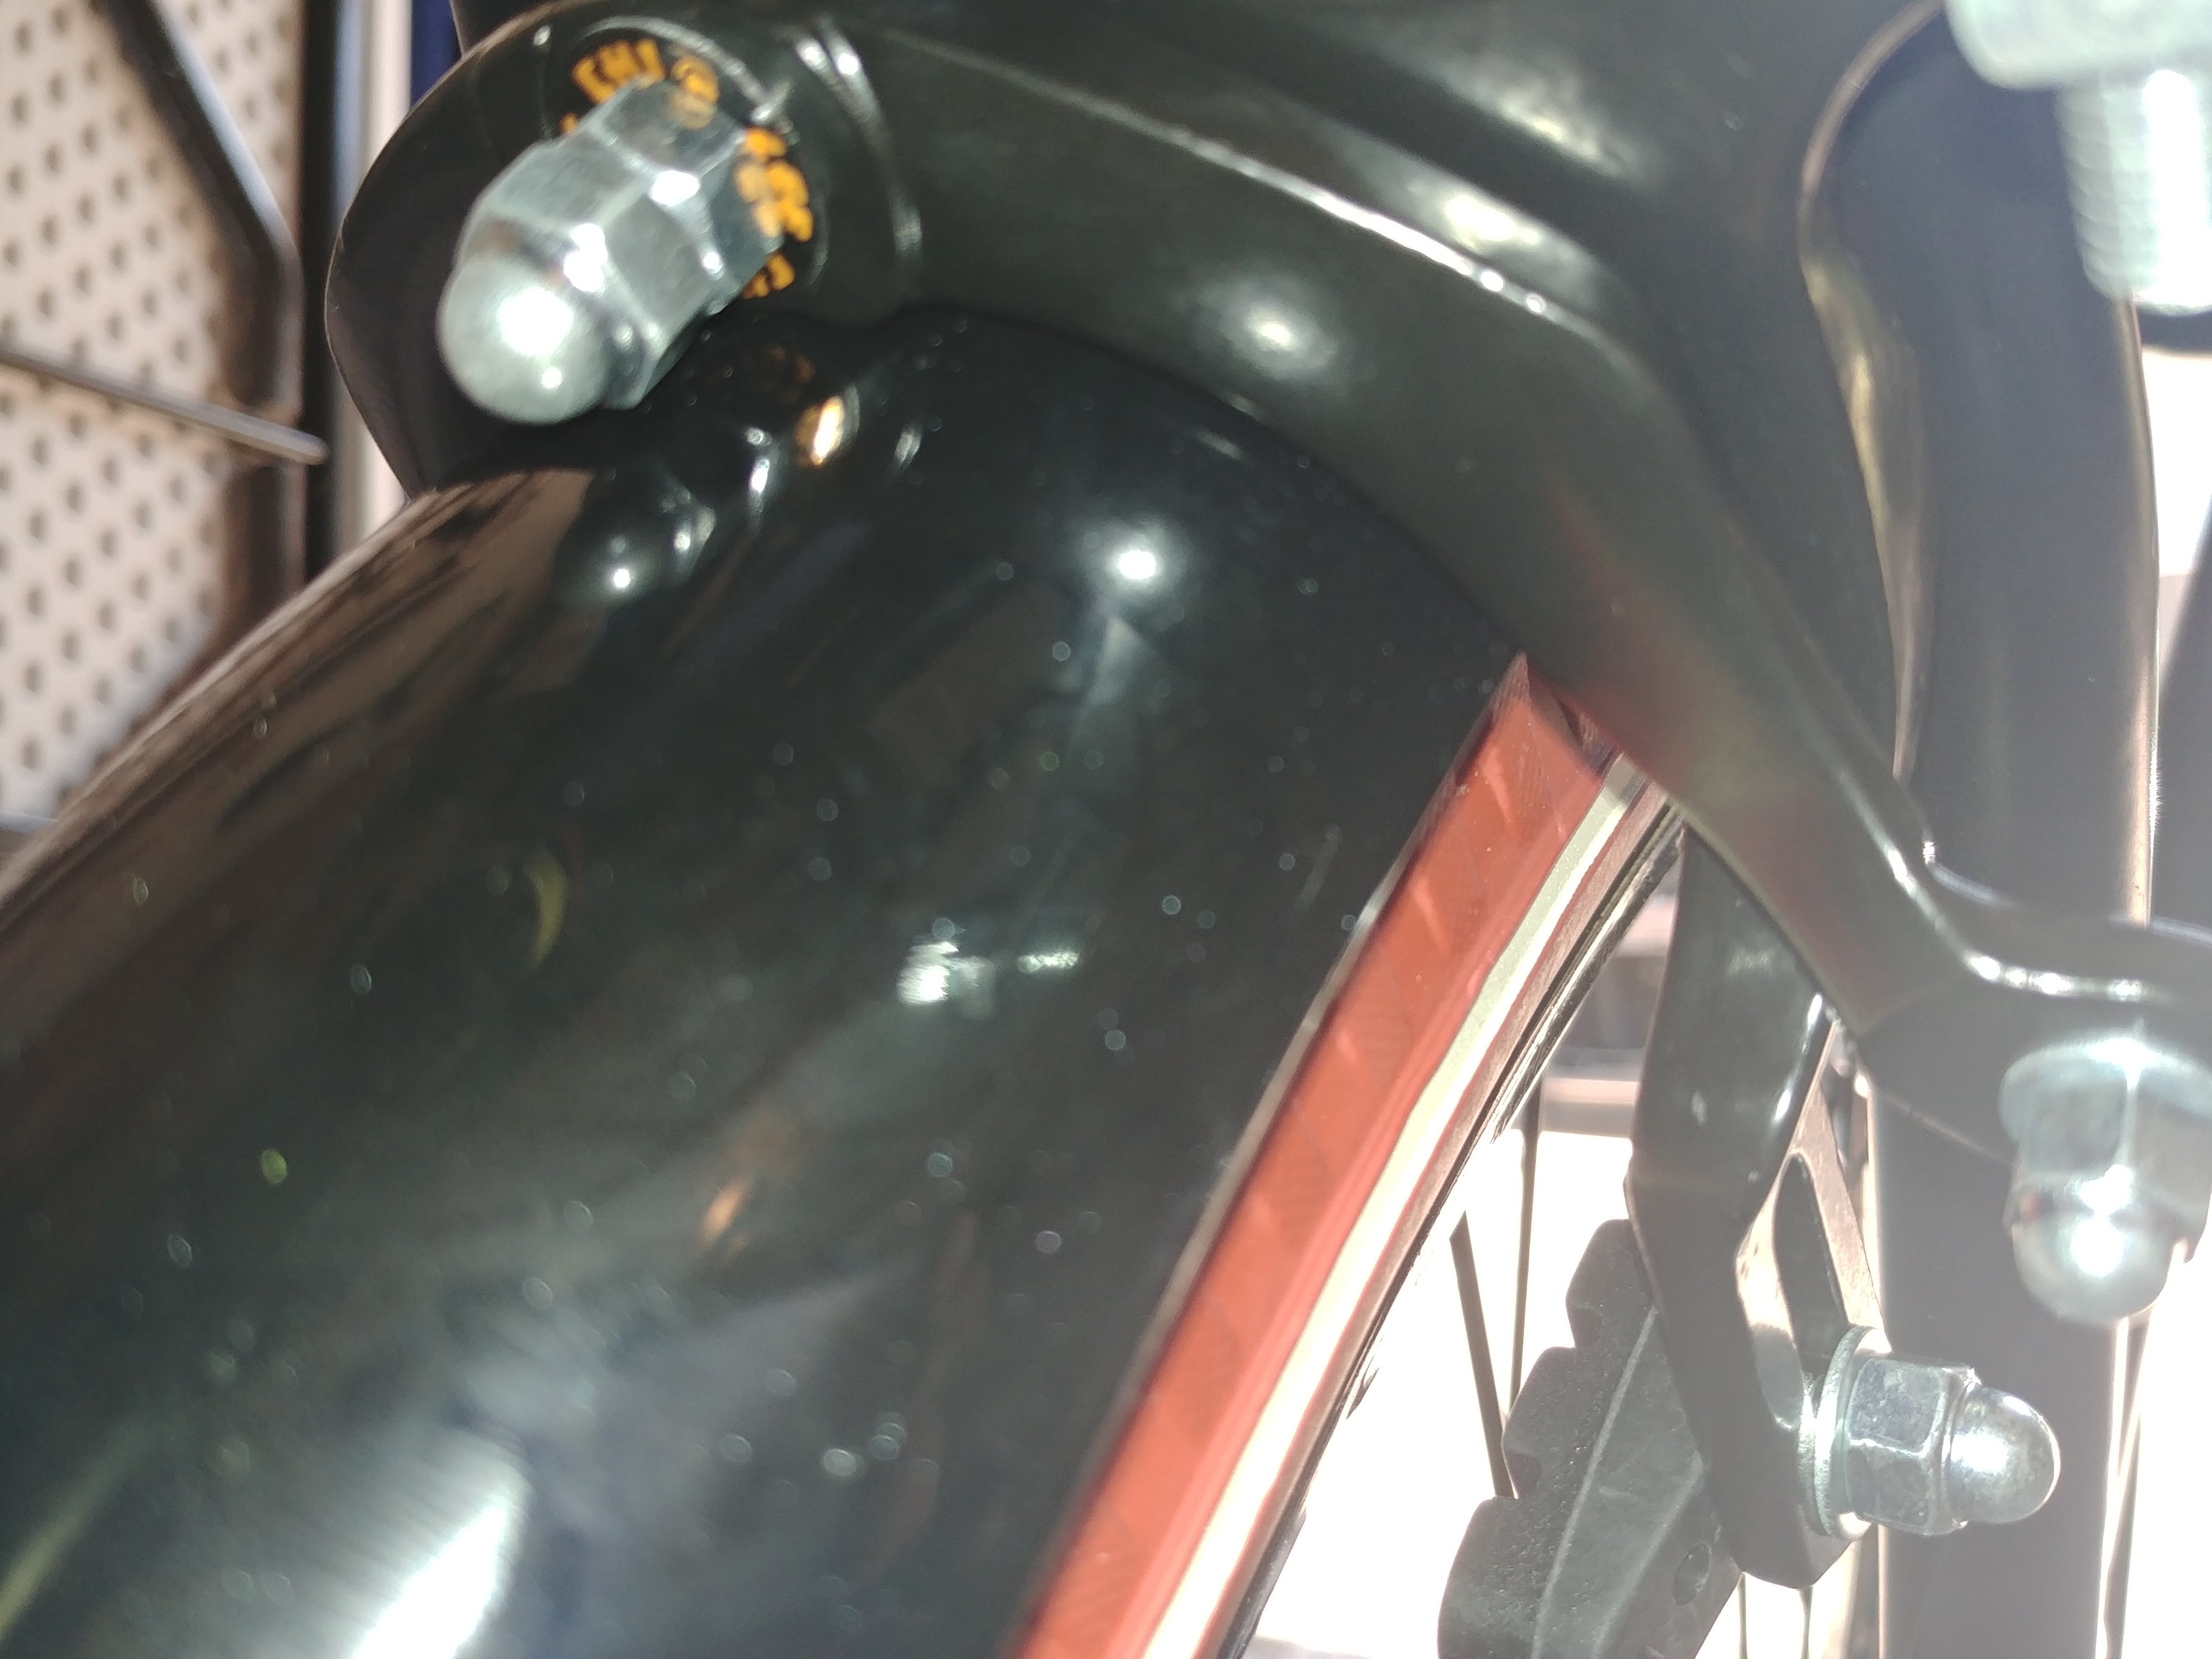
This was easily solved by slotting that mounting point and then centering it using zip ties instead.
I also opted for a dual brake lever to keep things simple.
The brakes work extremely poorly due to the wheels not being designed for them, and will certainly need to be one of the first upgrades.
Cable routing
This was surprisingly difficult. The brakes, throttle, clutch, and wiring all needed to be routed in a way that would make them free to operate and out of the way, but also aesthetically pleasing. IÆm not 100% happy with how I ended up doing it, but overall I think it looks OK and works just fine. The additional resistance added to the clutch and throttle give them a quality feel, even if it really is just cable resistance.
Other Stuff
The stock kickstand was hilariously bad, so I oped for a moped style dual leg stand. I also did another thing that I canÆt remember, but I am sure it will come to me eventually.
Summary
Overall the kit was both easy and difficult. I ended up using pretty much every tool in my tool box to get it on there, as many of the fittings are in tight or awkward places.
The build took about 10-12 hours over the course of three days. Some of the extra time was due to problems with the bike, builder, and whiskey, but overall I think that amount of time is a reasonable estimate.
Getting it started for the first time was a chore, but a chore worthy of its own article, so expect that in the next couple of days.
Helping Doggo for your time.
 Berang
> Akio Ohtori - RIP Oppo
Berang
> Akio Ohtori - RIP Oppo
07/15/2018 at 19:45 |
|
I th ink the brake needs the shoes to keep the brake clut ch Ā from unscrewing all the way and coming loose in the h ub.
|
Akio Ohtori - RIP Oppo
> Berang
07/15/2018 at 19:51 |
|
I choose to believe you are incorrect.Ā I look forward to the ensuing crash.
 razorbeamteam
> Akio Ohtori - RIP Oppo
razorbeamteam
> Akio Ohtori - RIP Oppo
07/15/2018 at 20:28 |
|
Looks awesome! I bet that thing will be a blast to rideĀ
 Manwich - now Keto-Friendly
> Akio Ohtori - RIP Oppo
Manwich - now Keto-Friendly
> Akio Ohtori - RIP Oppo
07/15/2018 at 21:03 |
|
What I want to know is... when are you installing the Bunn coffee maker on the bike?
|
Akio Ohtori - RIP Oppo
> Manwich - now Keto-Friendly
07/15/2018 at 21:19 |
|
Phase 2
|
Manwich - now Keto-Friendly
> Akio Ohtori - RIP Oppo
07/17/2018 at 17:15 |
|
And then phase 3... espresso capability!!!
|
Akio Ohtori - RIP Oppo
> Berang
09/07/2018 at 22:06 |
|
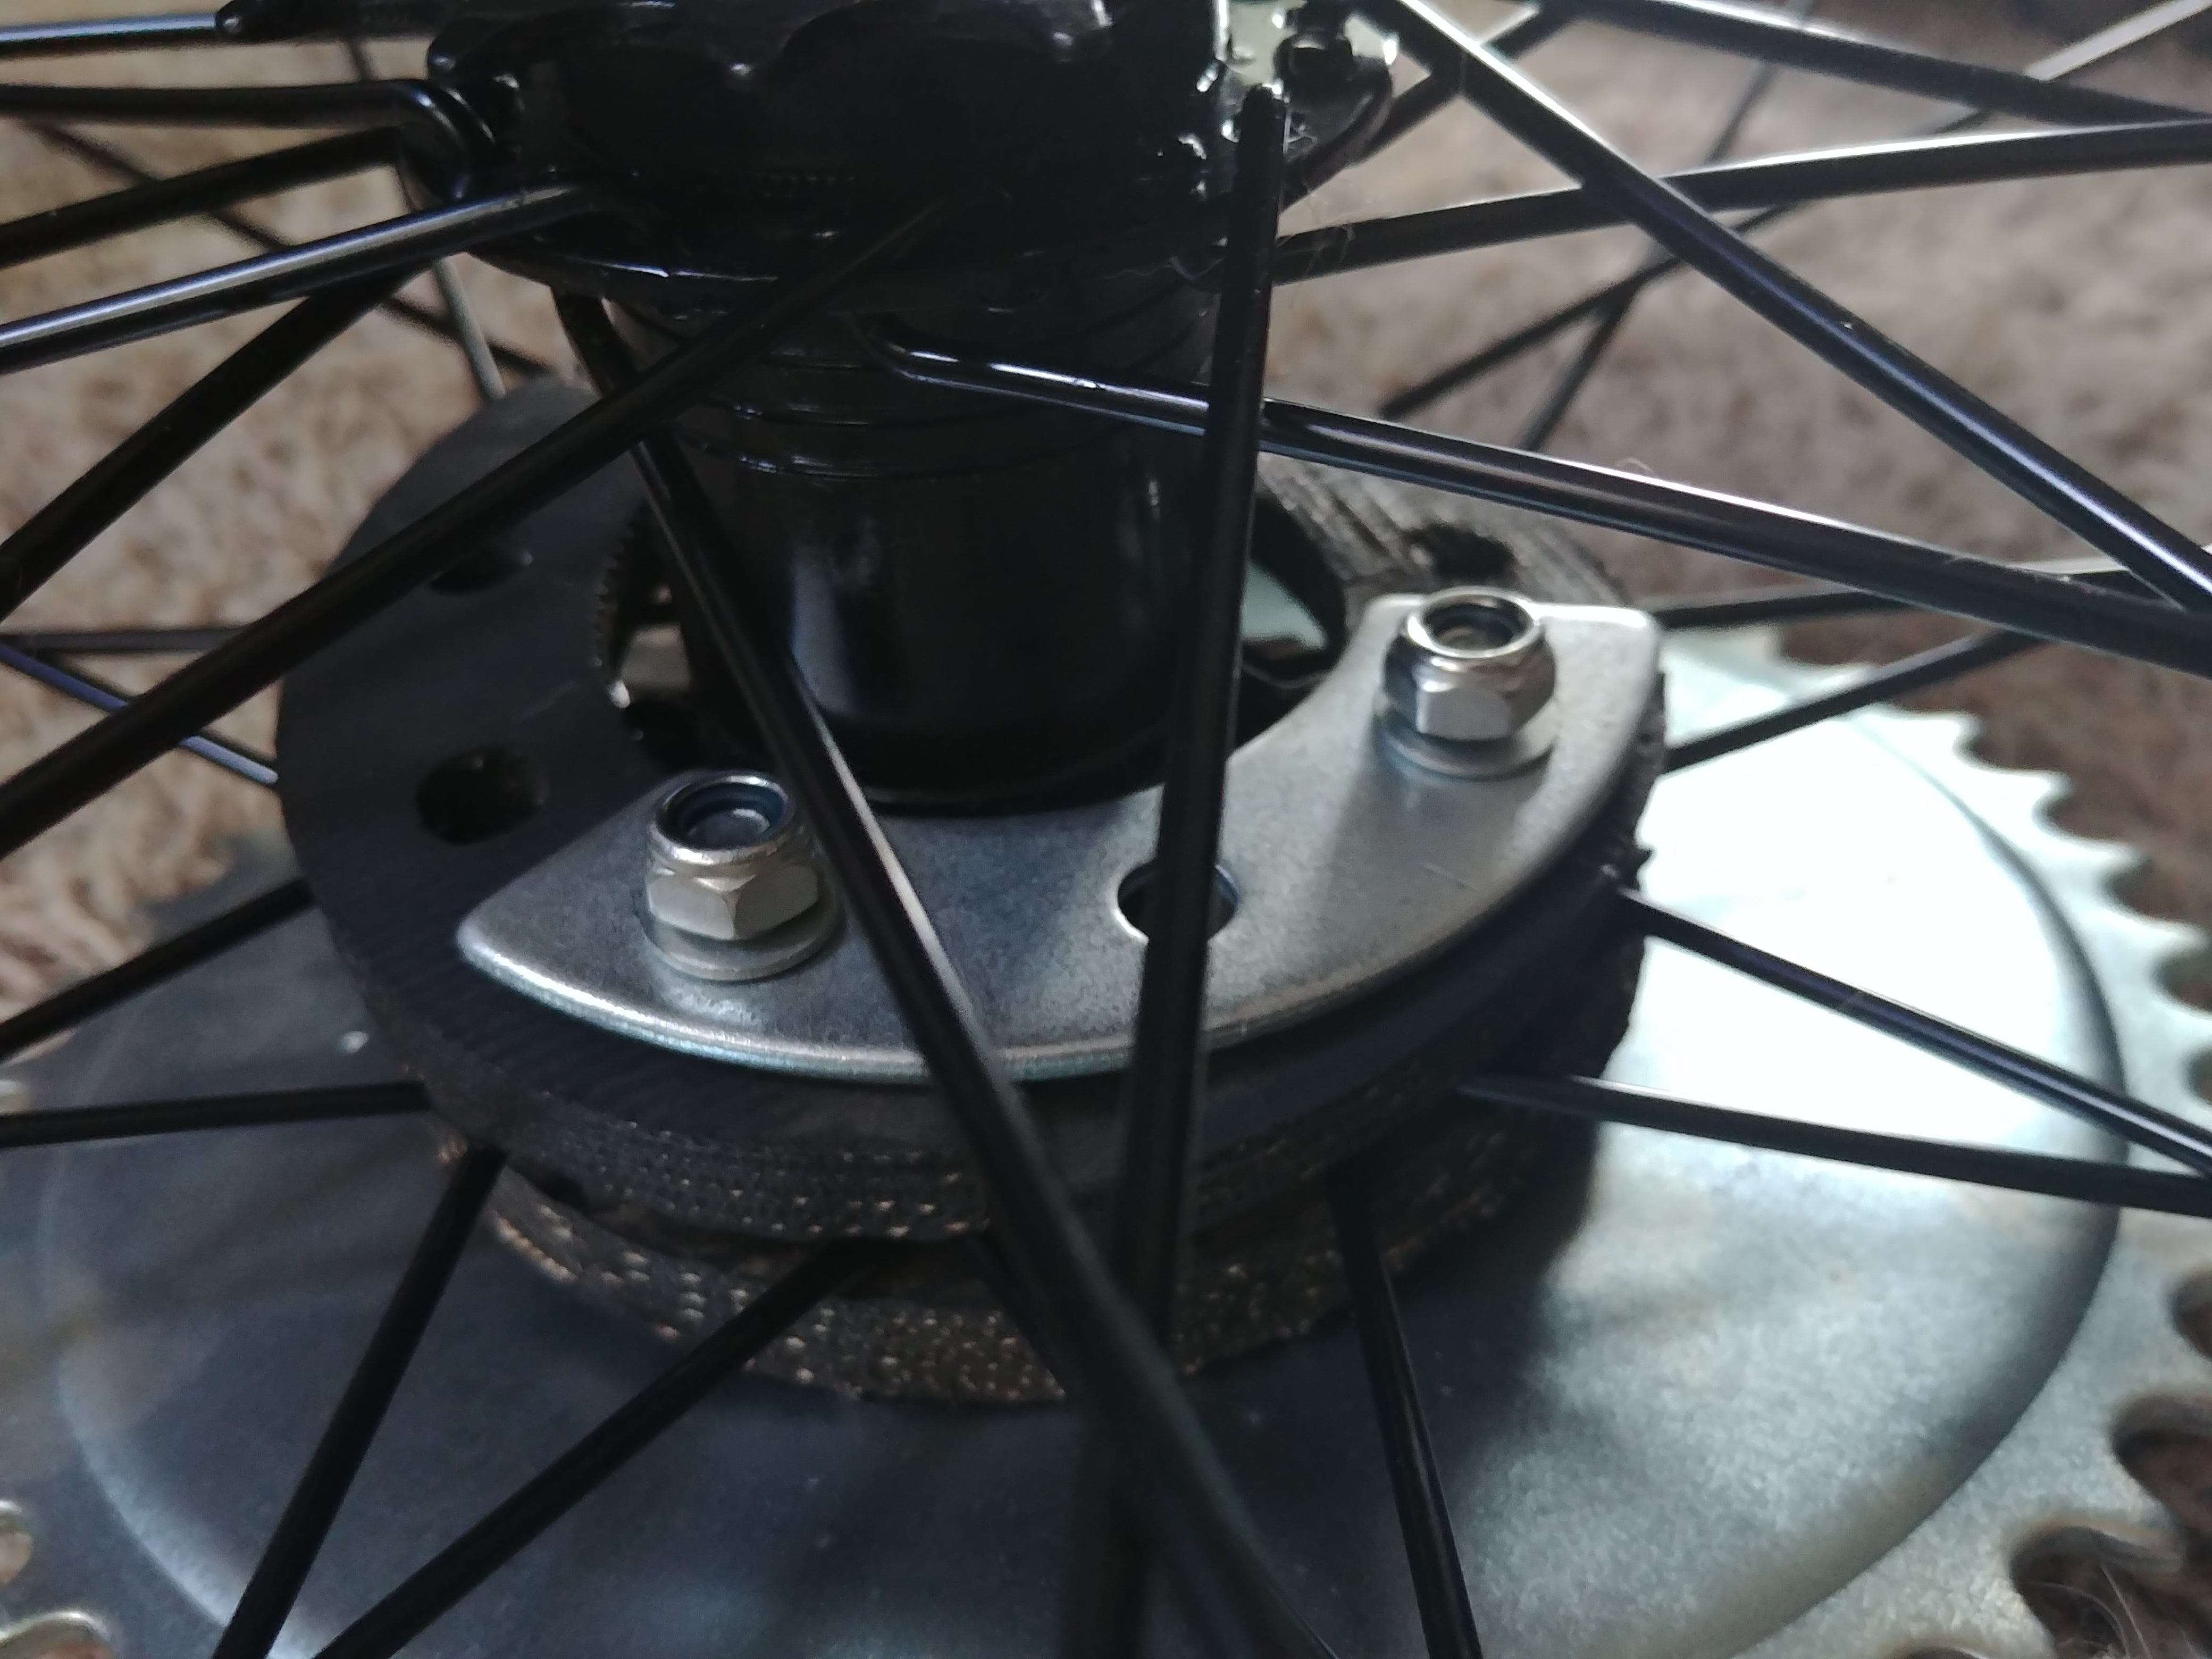
Hey fun fact! I just rebuilt the rear hub and went ahead and included the brake pads/ shoes this time . This was a mistake. Turns out if you donÆt have a coaster brake arm (mine wonÆt fit with the rear sprocket in place) having the pads in and then using the coaster brake causes the rear hub to disassemble while in motion.
Now we know that.
Did a little digging and yeah you can just remove the pads. Some people add some washers to take up some of the slack that gets introduced when you do this, but meh.