 "Pearson Hurst" (phurst)
05/24/2015 at 18:06 • Filed to: None
 3
3
 8
8|
"Pearson Hurst" (phurst)
05/24/2015 at 18:06 • Filed to: None | 3
| 8 |
Sorry for the re-post, but I wanted the weekend peeps to get a chance to see it.
I’ve done a thing. It’s utterly pointless on so many levels, but I had a great time along the way, so I guess that’s what really counts, right?
Last fall, I ended up scoring a free 1982 Trac moped on Craigslist. It was old and rusty and missing parts, but it was free, and I had never really messed with anything 2 stroke outside of the occasional piece of lawn equipment. After I got it, I tinkered with it enough to get the engine running, and then put it away for the winter. When I got it, this is what it looked like.
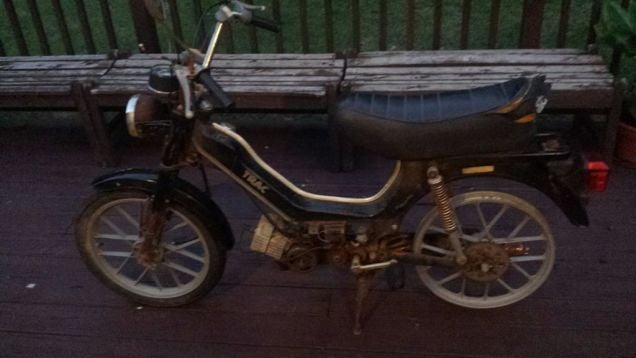
Rusty, dirty and missing vital parts, but something about it was fairly appealing to me. Here is where I explain why doing anything with this moped besides scrapping it is why this project got the title it has. A moped is in no way a practical thing for me to have. This one tops out at about 30, and I can’t even leave my neighborhood without needing to go at least 45. It’s an off-brand, 32 year old South Korean moped without much availability for parts. It’s not one of the “cool” vintage models that are so popular these days, so resale value is minimal. Naturally, with all of that in the front of my mind, I decided fuck it, I’m going to fix it up.
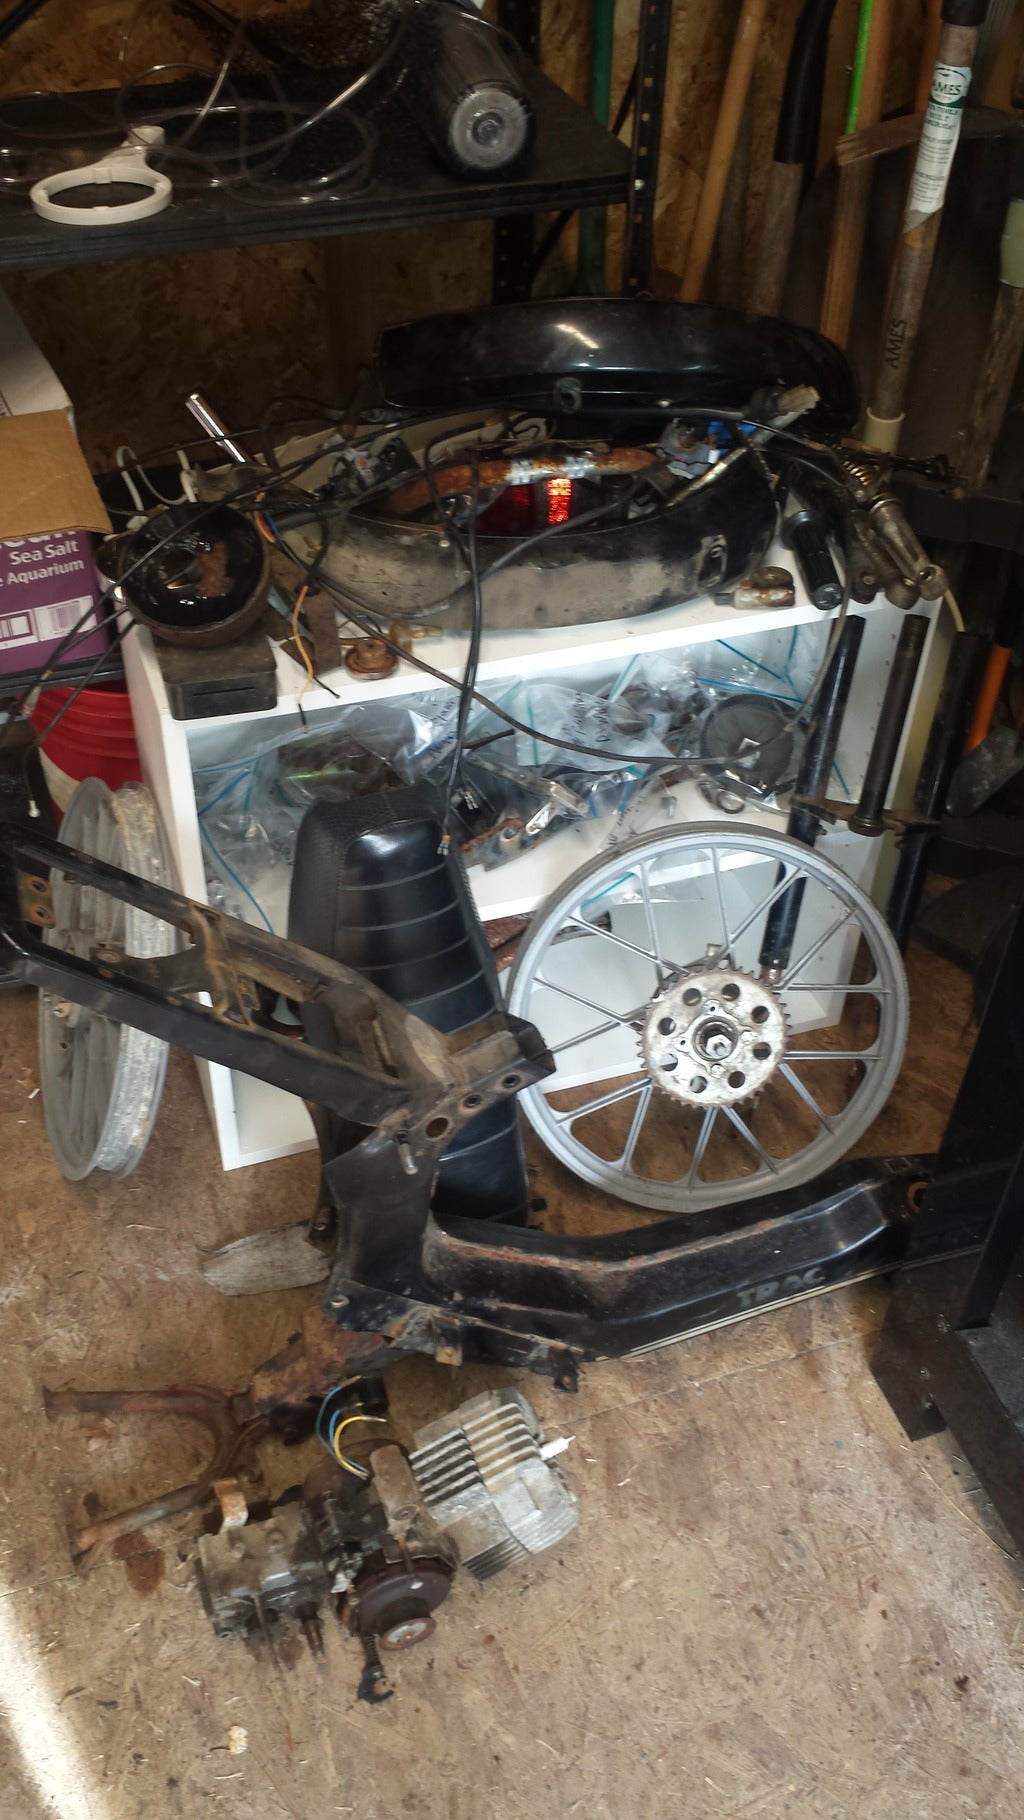
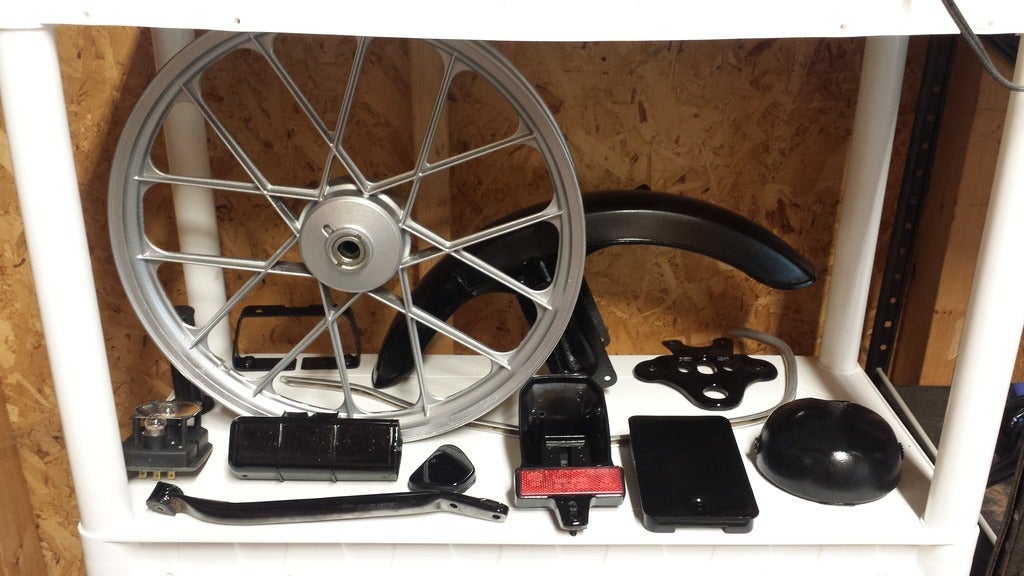
I considered just finding enough parts to get it running, hit it with a rattle can and call it good, but ultimately I decided if I was going to do it, I might as well do it right. That way I could be sure all the rust was addressed, and I could make sure everything was in good usable shape so there would be no surprises further down the road. This meant complete dis-assembly, cleaning, stripping, re-cleaning and painting of every individual part, and cleaning and/or replacement of all of the hardware. I also had to track down all of the missing/broken parts, including such major components as the drive chain, tubes, tires, a rear brake cable, choke lever, brake light switches, crank arm cotters, pedals, and a fuel line. Thankfully, tracking down the parts was not too big a deal. Once all the parts arrived, it was time to get started.
It became immediately obvious just how much neglect this poor moped had been subjected to.
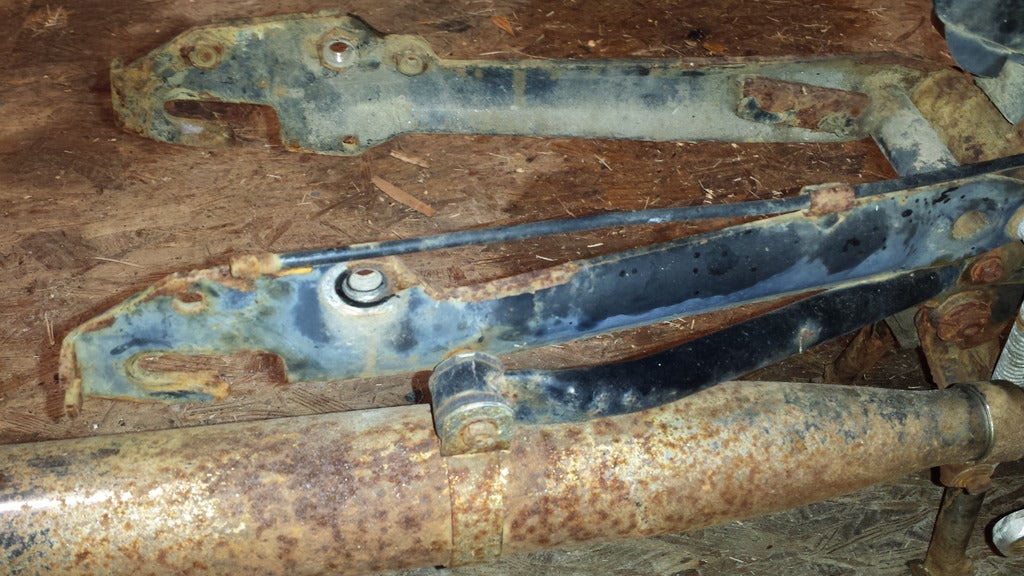

Time for this project was mostly relegated to the time between dinner and bed time. Couple that to the fact that I took lots and lots of reference pictures, and individually labeled and bagged all the hardware for each part. After a couple of evenings, I was left with a big pile of rusty parts.
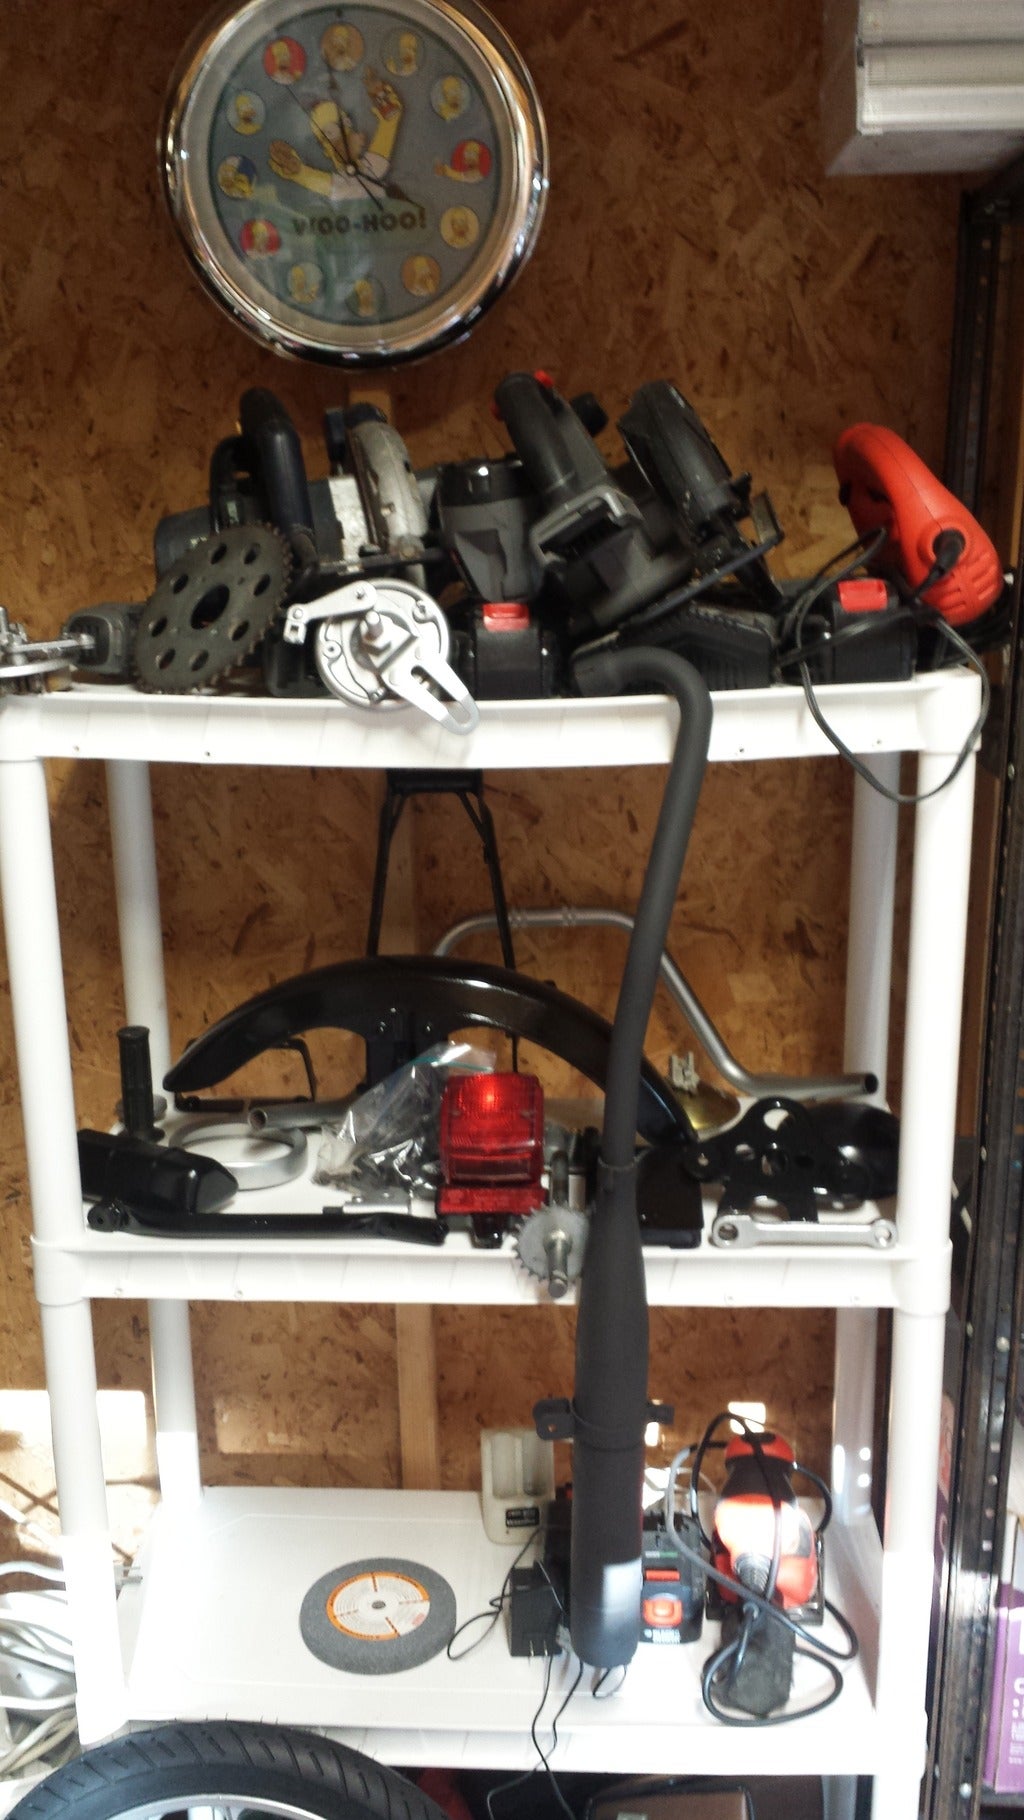
Because I’m working in a detached shed with no climate control in the humid south, it was necessary to paint parts the same evening they were stripped, or run the risk of flash rust showing up. Over the next few weeks, I got intimately familiar with the wire wheel, on both my bench grinder and drill, hand held brushes, electric sander, foam sanding blocks, and a number of other implements of destruction. The typical process involved picking a part, wiping it down to remove dirt, mud wasp nests and what have you, wire wheeling/sanding, wiping down with degreaser and laying down one or more coats of Rust-Oleum. Yes, I went cheap and easy. I opted to bypass priming, even though it might help adhesion, and I could have used a hi-build primer and put in a little additional work to address some of the pitting, but I’m not doing a concourse level restoration, and I’ve had pretty good luck with straight Rust-Oleum on bare metal in the past, so cheap and easy it was.
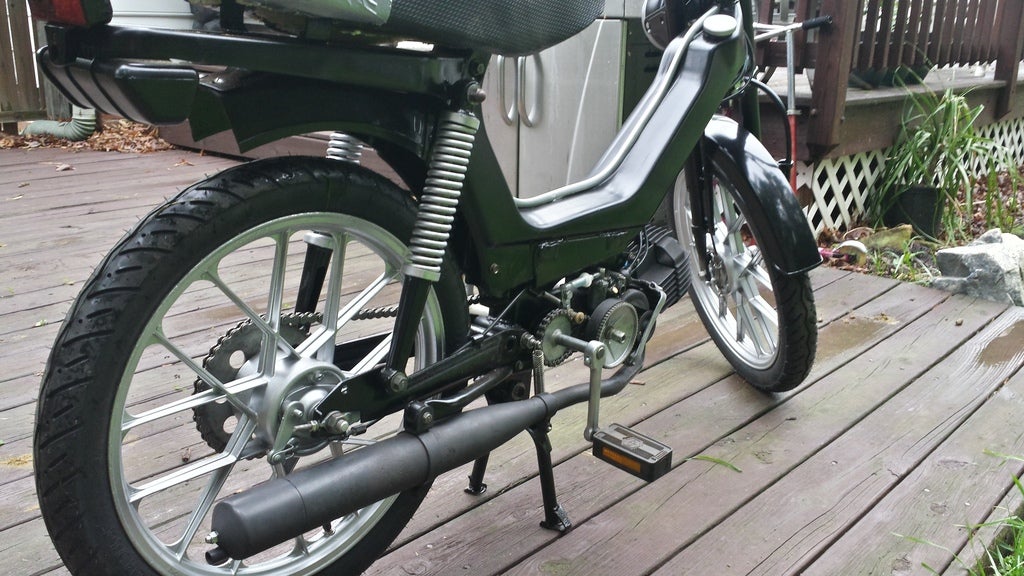
I decided to stick with black as the primary color. The chrome parts were a different story. Paying to have anything rechromed would be a ludicrous expense for this project, so those parts were cleaned and sanded and sprayed with an understated gunmetal paint, along with a few accent pieces and the alloy wheels. After a few weeks, I was starting to accumulate a fair number of clean and painted parts.
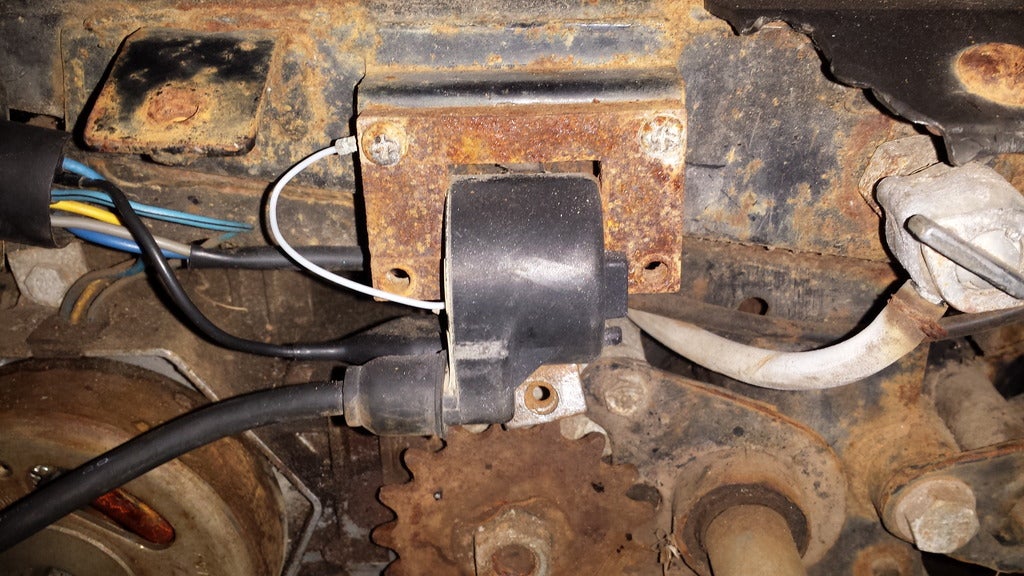
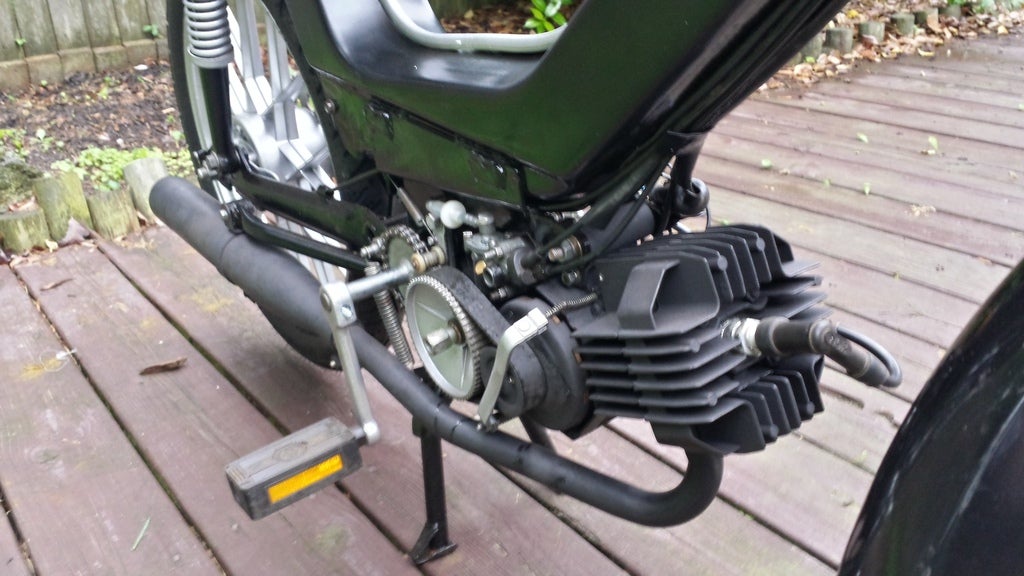
It wasn’t all cleaning and painting either. I had to clean out the gas tank, rebuild the carb, clean and re-pack all the bearings, free up the drum brakes, clean the inside of the brake drums, change the oil in the transmission, degrease the clutch and friction surfaces, de-carbon the exhaust, clean and degrease the engine, and a variety of other repair/maintenance tasks. Finally, I had everything ready to go back together, and I figured in a few evenings, I’d be done. How wrong I was. Besides the act of physically putting everything back together, I still had to clean every single screw, bolt, nut, washer, clip and other piece of hardware. That’s a very time consuming process. I also had to try to remember how everything went together. I took lots and lots of reference pictures, but somehow, every time I got stuck or confused, there was no picture that showed me exactly what I needed to see. Such is life I suppose. I’ll have to try harder next time.
Once things were coming back together, I found I didn’t particularly care for the way the engine looked attached to the nice repainted frame. The head on this moped is aluminum, and despite being cleaned up fairly well, it still looked dingy. After consulting with a number of people, I decided it would be ok to paint the engine case and head with the same hi-temp paint I had used on the exhaust.

Much better.
As assembly progressed, I needed to decided about how to address the two parts I hadn’t been able to find replacements for, the rear fender and the seat. The seat frame had mostly disintegrated to do prolonged exposure to the weather. Water would seep into the seat foam and rust away the metal shell of the seat. I haven’t been able to find a replacement, so I needed to figure out what to do. The torn upholstery could just be taped up, but to shore up the actual structure of the seat to hold my fat ass, I decided to just fill it all in with expanding foam.
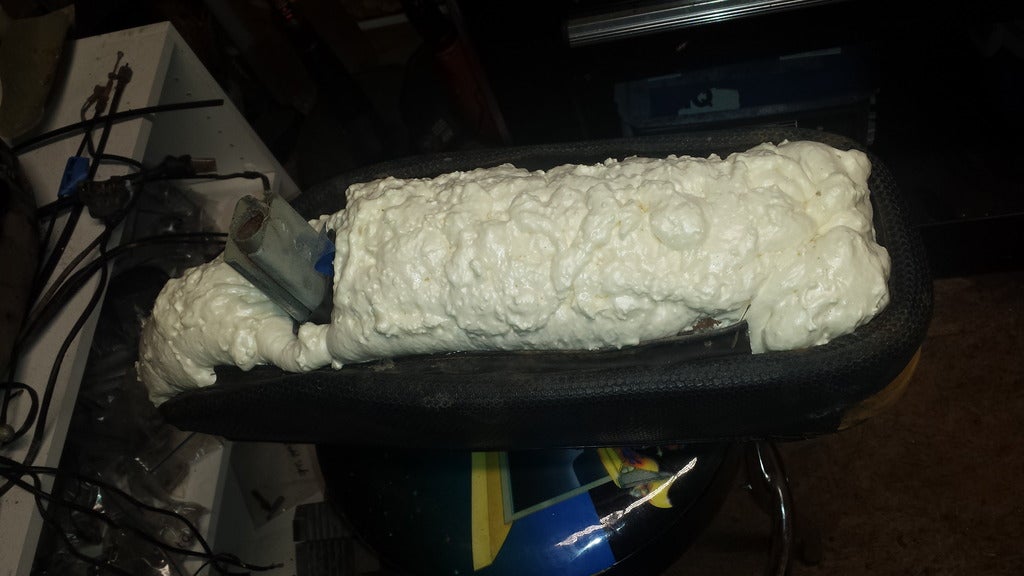
While this definitely added rigidity, it also added a bunch of extra work. The seat flips up to allow access to a storage compartment, so I needed to carve out the hinge, seat latch release, and bumpers. It wasn’t hard, just time consuming.
The last 1/3 of the rear fender was all smashed up. There was no fixing it, and I couldn’t find a decent replacement, so I had to work with what I had. I decided to simply cut off the rear part of the fender after it attaches to the top of the frame. Visually, it’s ok, and since most of the fender is still there, it still provides protection. The real problem was the part I cut off was the part where the brake light lives. After entertaining a variety of absurd and convoluted options, I decided to simply drill and tap a hole in the rear of the frame and just screw the damn thing in. Looks fine, works fine. Problem solved.
The only other problem was, the moped hadn’t come with either engine cover or chain guards. They’re basically unobtanium, so I elected to just cut off all the studs and mounting points. It looks a lot cleaner and clears a number of potential things to snag on. I guess there is the increased potential for getting a pant leg or shoe lace to get hung on a sprocket or something, but I suppose it is what it is.
Wednesday night, I finally finished reassembly. I put gas/oil mix in the tank, kicked it over and it started right up. It was after midnight, so a test drive was out of the question.
Overall, I’m quite happy with how it came out. It’s certainly not professional quality, but it’s something I wouldn’t be ashamed to be seen riding.
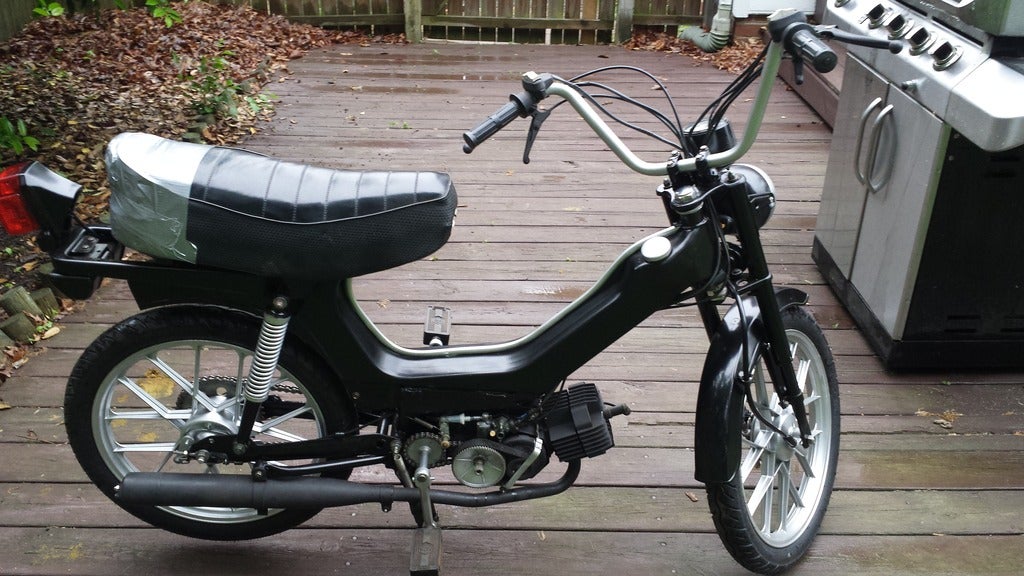

So, where do we go from here? I started this project with the thought that I would sell it when I was done. My wife sees people asking for $600-$800+ for mopeds from Puch, Tomos and Honda. I keep trying to explain to her that those are the Fords, Chevys and, well, Hondas of the moped world, and I have the equivalent of a Daewoo. As I mentioned, It’s kind of an off-brand, and not particularly desirable or valuable, but I could probably cover my expenses without too much trouble, and of course I really have no good reason to own a moped that I can’t use to go anywhere. Thursday night, after I got home from work, I finally got a chance to take it out for a test drive. Yeah, I’ll be keeping it. It’s just so entertaining to ride! I’ve NEVER had so much fun going 30 MPH. It just put a huge grin on my face. What I had intended to be a trip around the block turned into a 30 minute meander through my neighborhood, smiling the whole time. I got a few nods and waves from folks too, which was cool. I wouldn’t say I’ve been converted to the two wheel lifestyle, but I know I want to keep this little gem and keep flying around the neighborhood in it all summer long.
 jkm7680
> Pearson Hurst
jkm7680
> Pearson Hurst
05/24/2015 at 18:20 |
|
Really nice work!
 thebigbossyboss
> Pearson Hurst
thebigbossyboss
> Pearson Hurst
05/24/2015 at 18:29 |
|
When I visited Burkina Faso I rode around on mopeds. It was a lot of fun. Glad to see you “BRAAAAAAAPING” your way around the neighbourhood. Your wife should be happy....as far as a hobby car goes that’s a pretty damn cheap one.
Congratulations on all your success that is awesome.
 speedygopher
> Pearson Hurst
speedygopher
> Pearson Hurst
05/24/2015 at 18:49 |
|
That is sweet. Need to find some old No Fear stickers to add 5-10 mph to the top end.
|
Pearson Hurst
> thebigbossyboss
05/24/2015 at 19:05 |
|
Wow, Burkina Faso? I bet that was a hell of an adventure!
|
thebigbossyboss
> Pearson Hurst
05/24/2015 at 21:15 |
|
Sure was friend.
http://oppositelock.kinja.com/that-time-i-to…
|
Pearson Hurst
> thebigbossyboss
05/24/2015 at 22:02 |
|
Great read. Thanks for the link.
 pip bip - choose Corrour
> Pearson Hurst
pip bip - choose Corrour
> Pearson Hurst
05/25/2015 at 05:29 |
|
well done!
just need the decals now.
|
thebigbossyboss
> Pearson Hurst
05/25/2015 at 12:52 |
|
Glad you enjoyed.