 "StudyStudyStudy" (jesterjin)
04/29/2015 at 14:30 • Filed to: 240z, project car
 5
5
 3
3|
"StudyStudyStudy" (jesterjin)
04/29/2015 at 14:30 • Filed to: 240z, project car | 5
| 3 |
Then came some of the fun stuff. Reassembly.
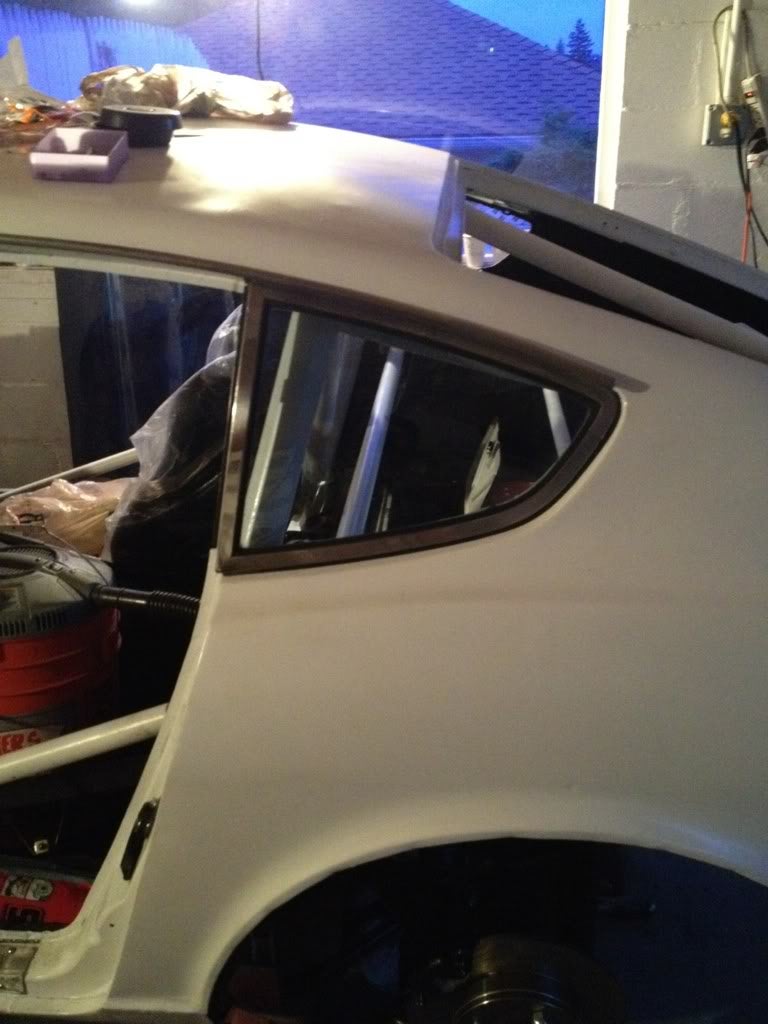
Quarter windows were inserted with the primer from the PO rubbed off and the stainless rebrushed.

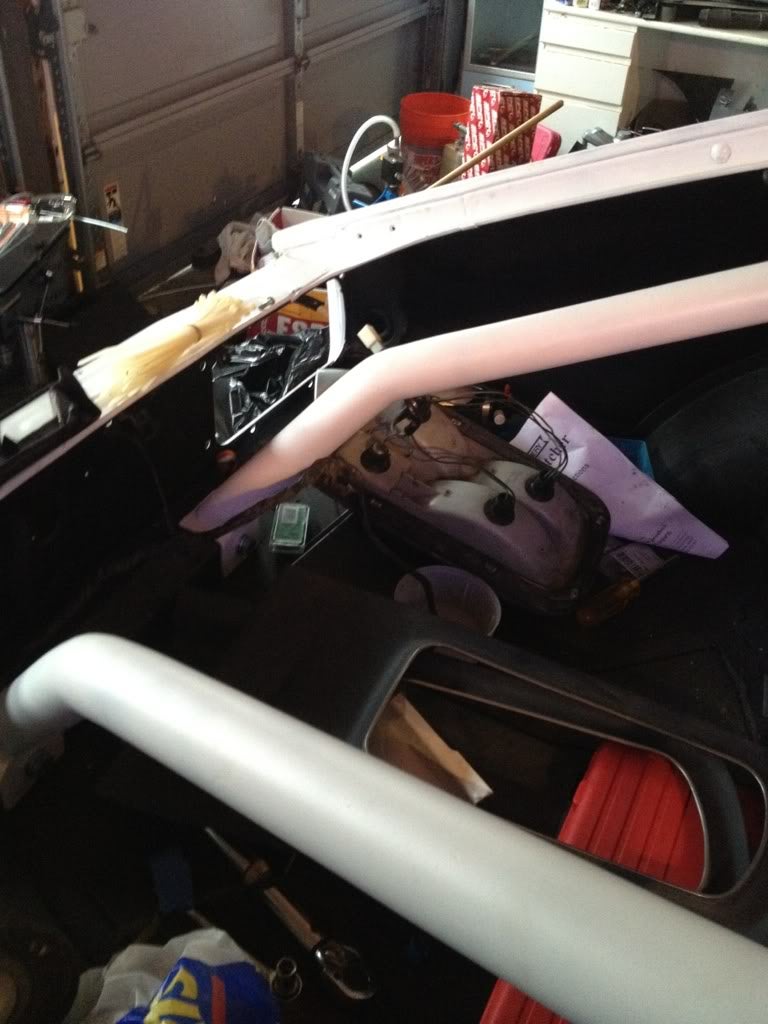
The cheapo seats and the second hand crow harness was installed for test fitting.
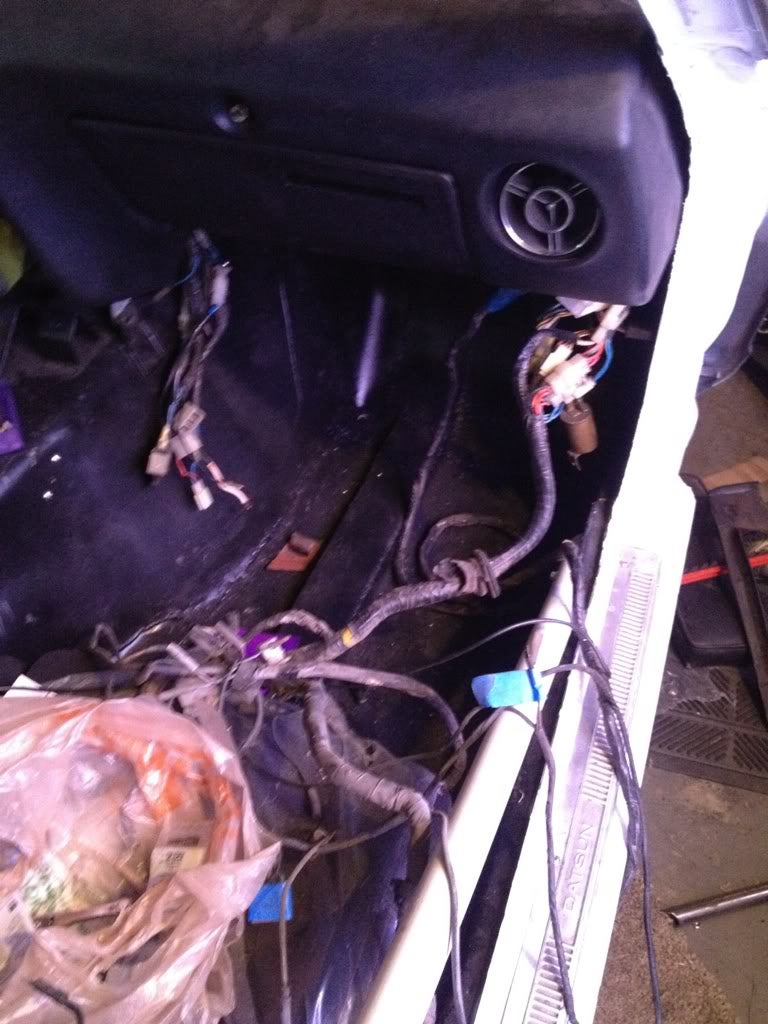
Then the dash went in along with the spaghetti of wiring along with it.
The rear tail lights were connected along with their bulbs
Then the taillights went in with the finisher panel.
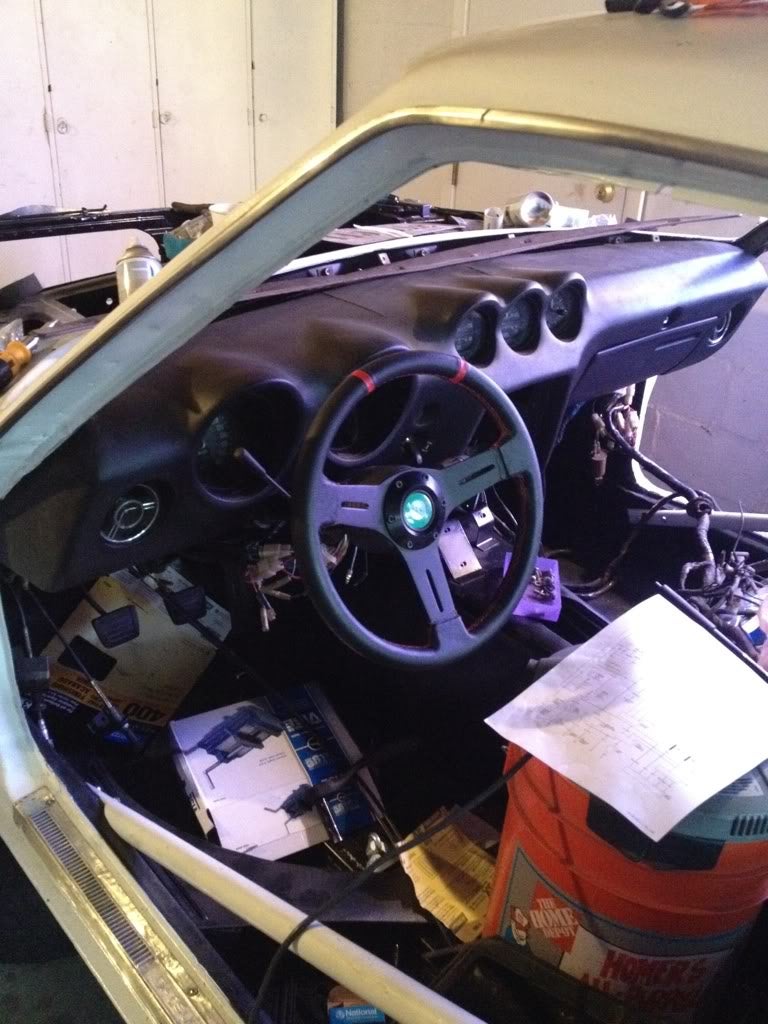
The steering wheel went on so I could make driving noises.
A little reading showed the common failure of the little cover that protects the electronics on the wiper motor. A user had found that a honda wiper motor from a later 90’s civic/accord would fit with minor modifications.

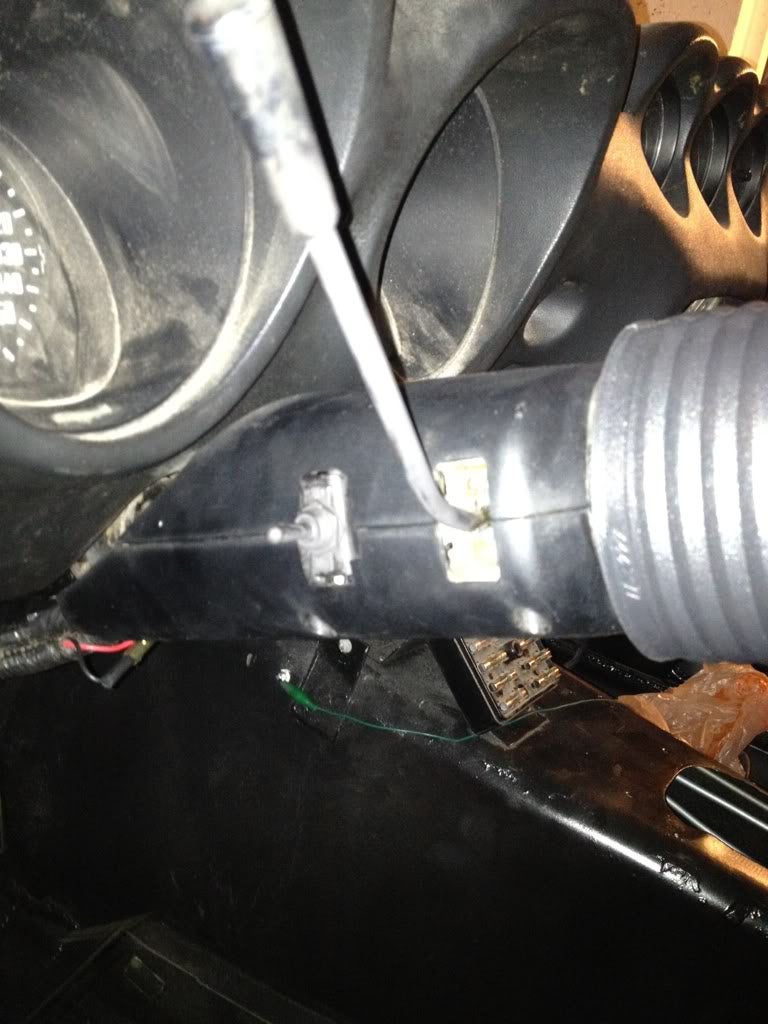
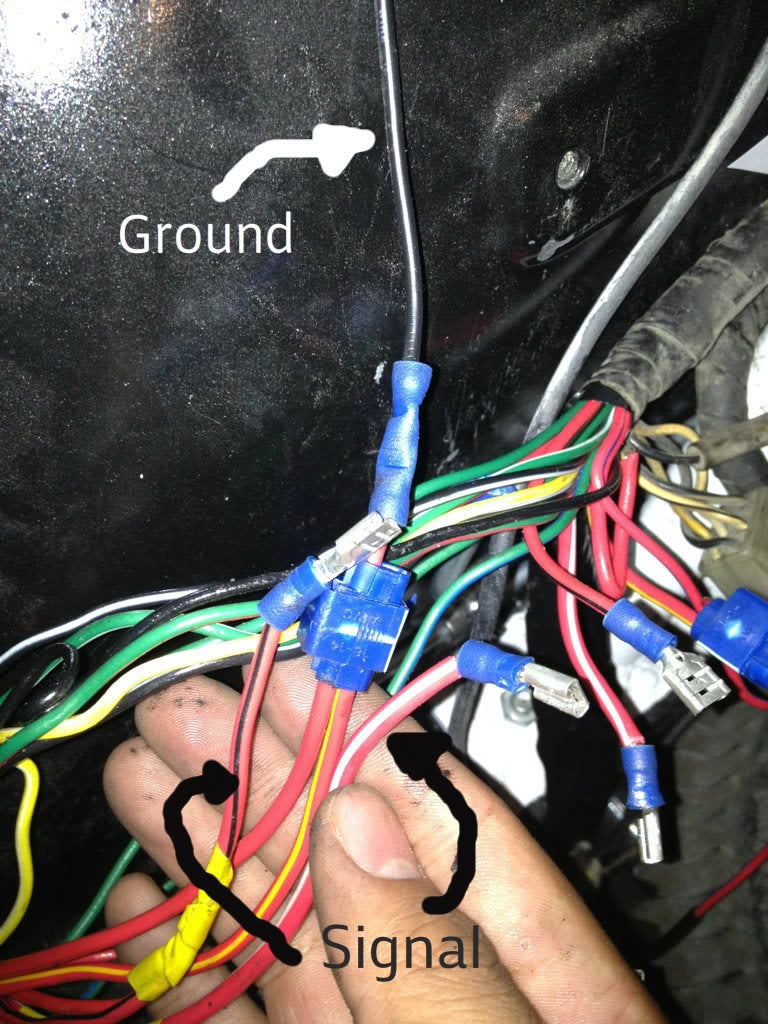
Then it came to the wiring. Having been so long and having removed so many of the accessories, my wiring was quite a problem. The rear was easy enough, other then some connectors that were not used for the deleted antenna, rear side marker, everything went together easily. The problem all started with this guy.
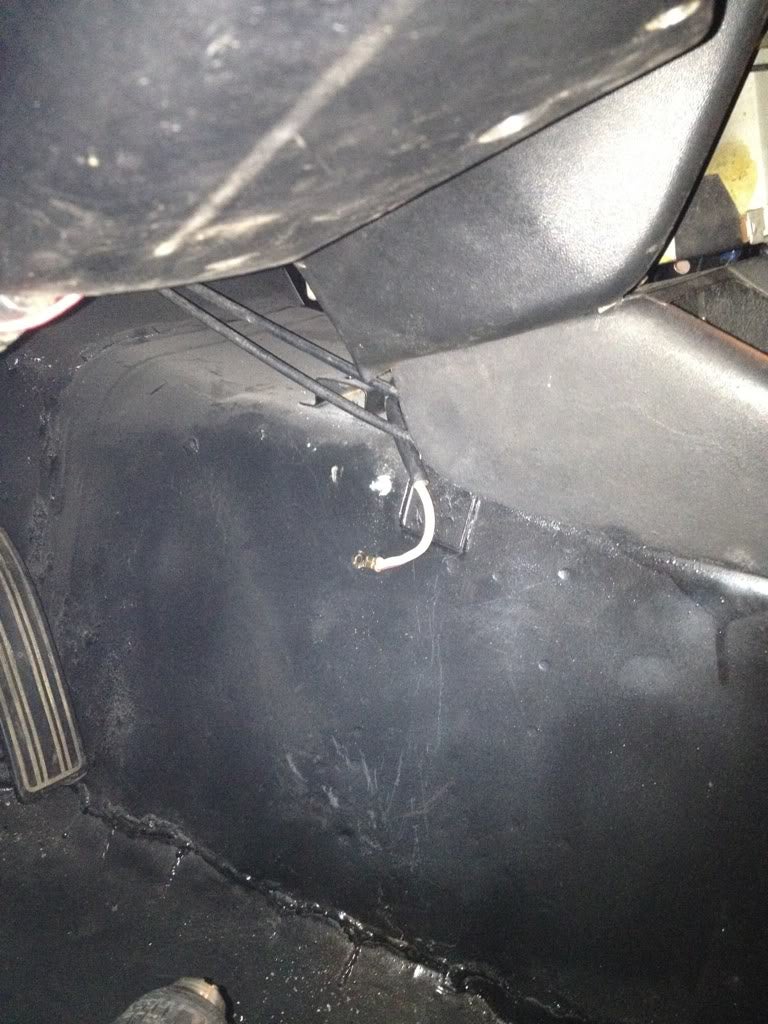
I really couldn’t figure out where it went. It was a ring terminal so it had to bolt in somewhere, but where? I asked around, and someone off the bat said that it looked to be a main power wire that fed the fuse box. I looked at my fuse box and didn’t see an empty spot.
Being daft, I disregarded the advice and I thought maybe it is a ground (little did I know the white with red wire was the main power wire for the car throughout the car) and I bolted it into a nearby hole. I hooked up the battery and the fusible links burned up in a puff of smoke. Now most people would call it quits, but I decided to replace the fusible links with a thicker wire and attached the battery again. After these wires burned out it clicked that I was being stupid and needed to think of what I was doing.
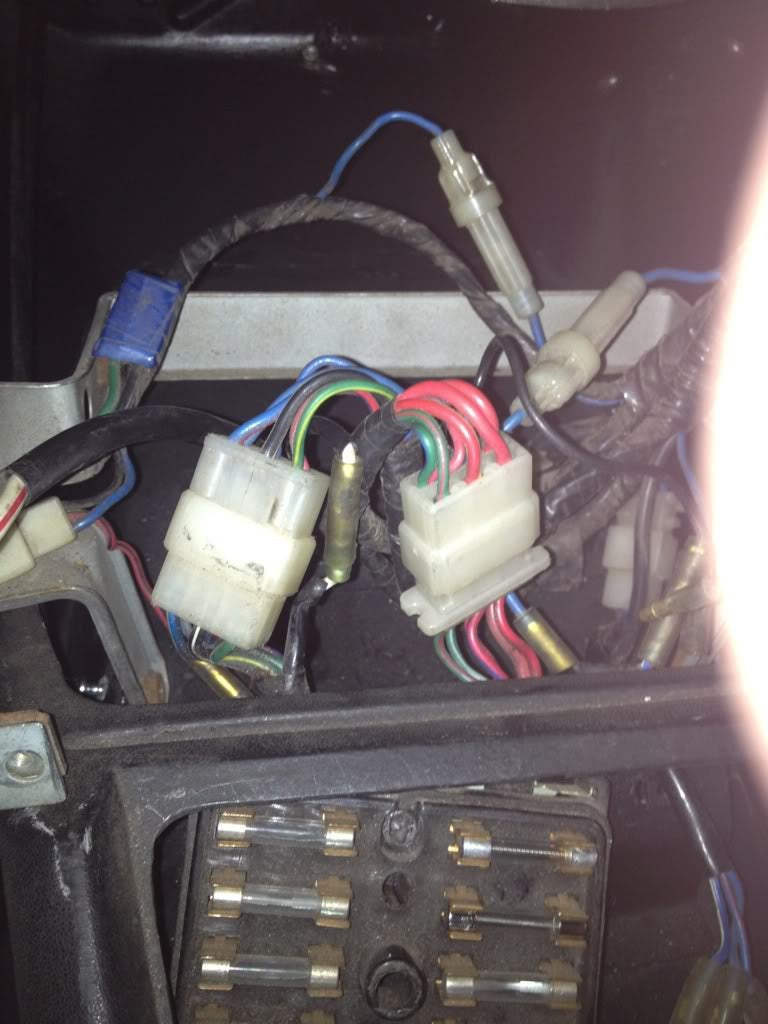
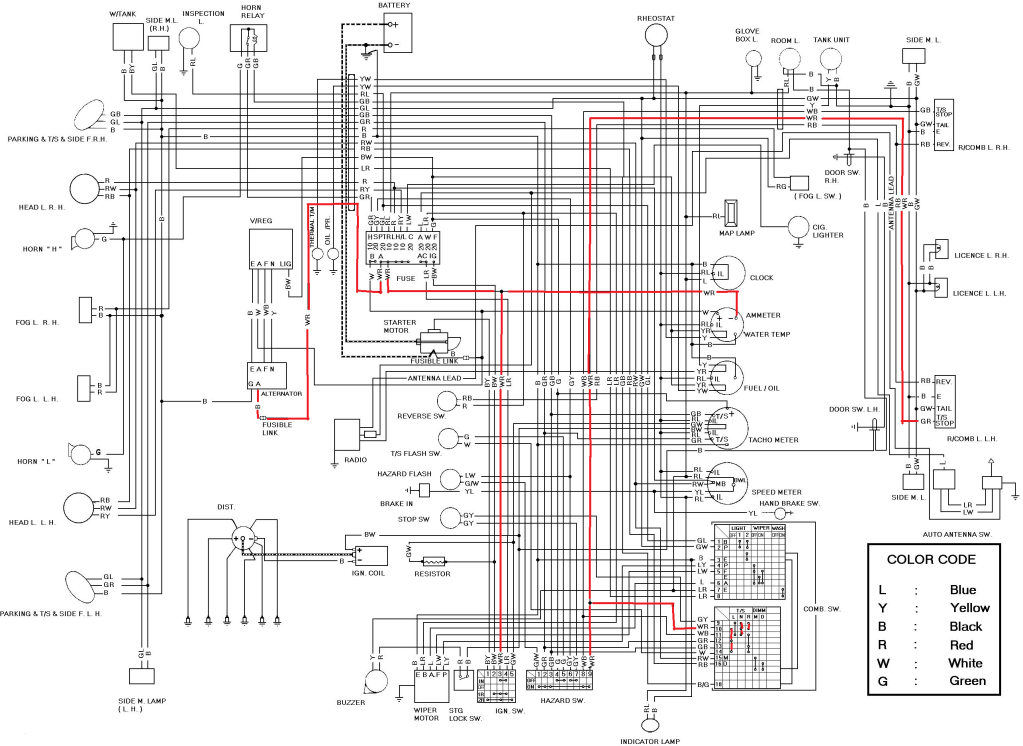
I spent the time to trace all the white with red wire on the wiring diagram
And still couldn’t find my problem. Then as I was cleaning up, I found my old fuse box and noticed...a screw for a ring terminal on the back! As indicated, two wires enter the fuse box, the first one was connected on the top and the second underneath. I replaced the fusible links with a large amperage fuse and hesitantly reconnected the battery and voila let there be light and starter motor stuff.
I gleefully went through the steering column controls and to my dismay, only the right blinker seemed to flash. No left turn, no horn. So time to take apart the steering column controls.
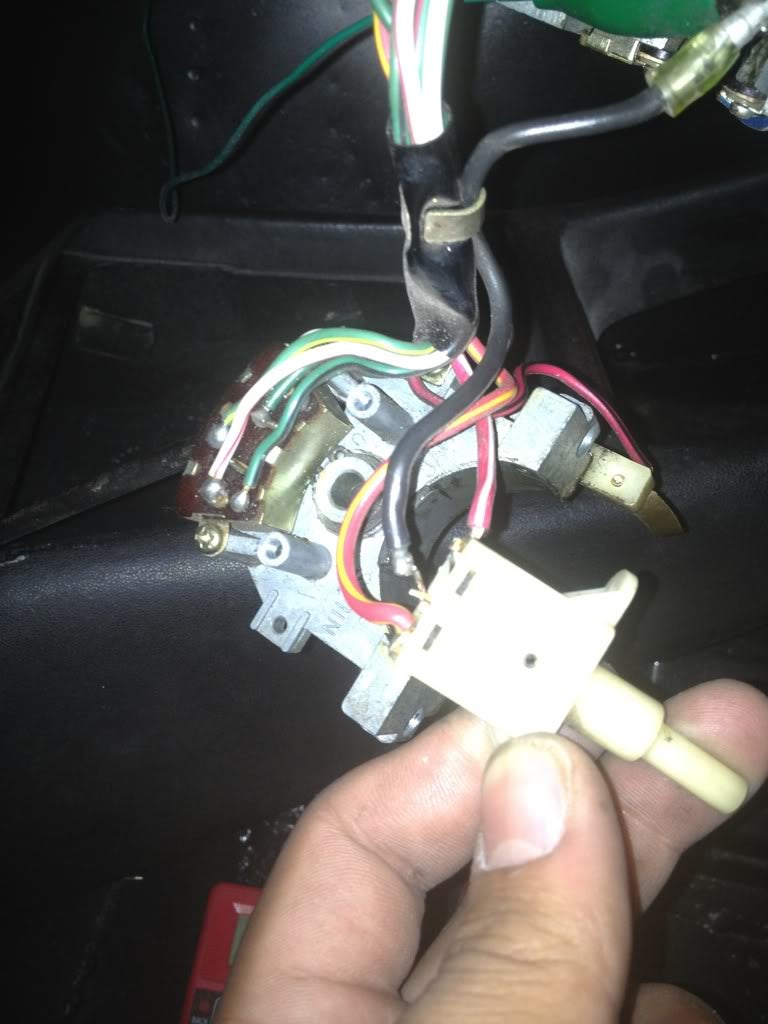
The high beam selector switch was not doing to well either being awfully sloppy and with a broken contact.
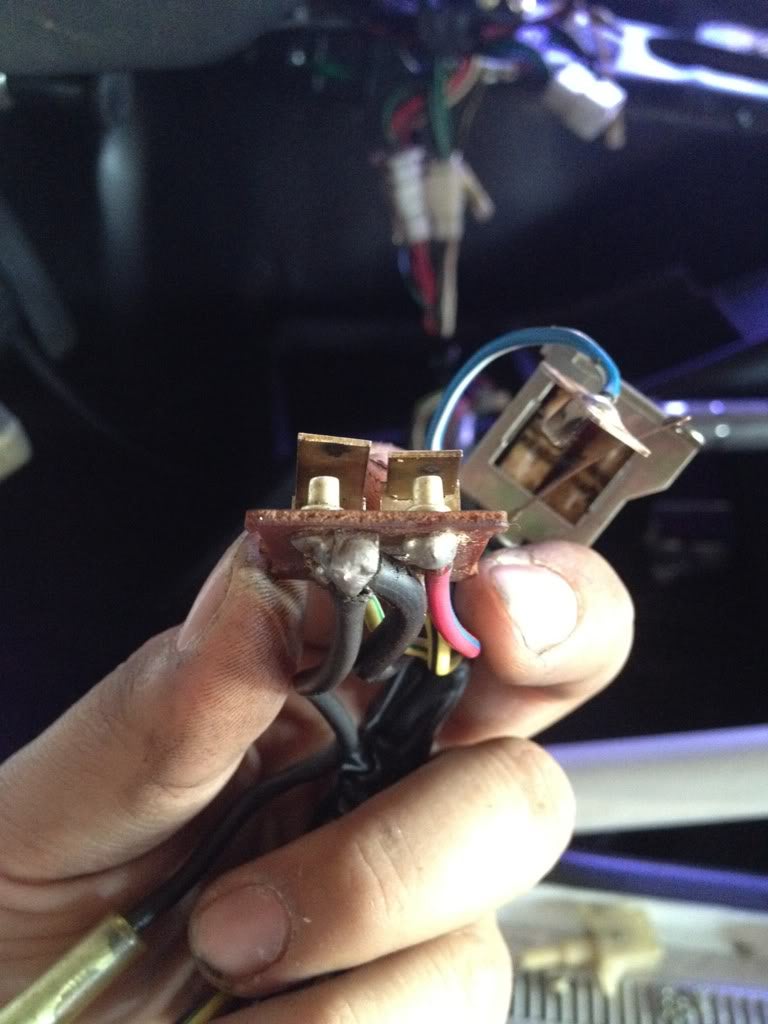
The bottom of the contact for the turn signal showed the problem the intermittent contact was causing sparks and burn marks which prohibited conductivity. I cleaned that off, polished it up with some emory cloth and re shaped the retaining tabs so the rocker would rock more smoothly and we were in business.
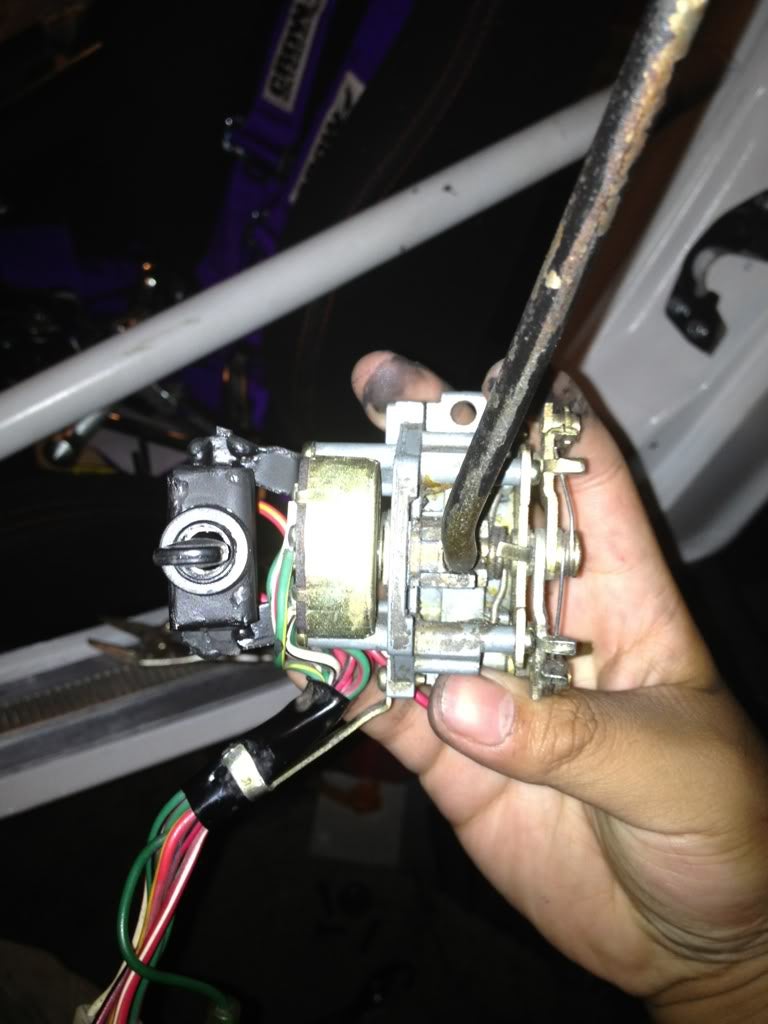
I replaced the broken high beam selector switch with a simple dual position switch and built a fairly shoddy bracket to mount it.
Then I clearance the steering column so I could access it.
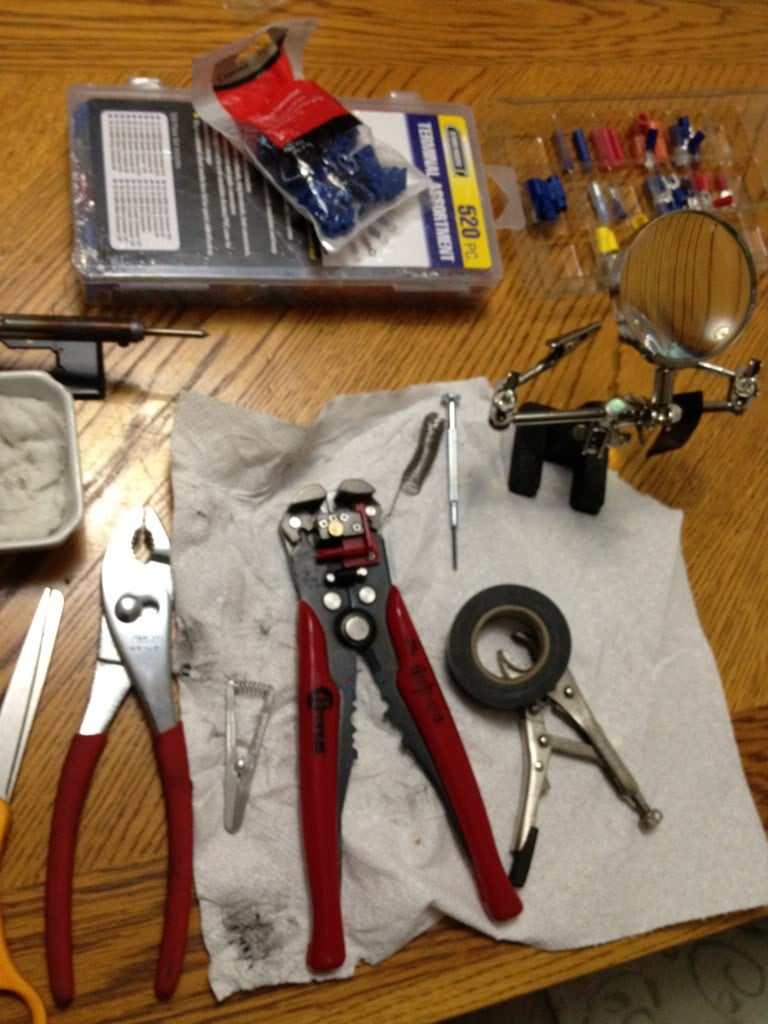
Another problem with these cars is that the full voltage for the headlights run through the headlight switch then all the way to the front. This causes a fair load on the wires and a significant voltage drop. There is an excellent swap kit that is plug and play, but being cheap I decided I could make my own easily enough. So I gathered my wiring tools
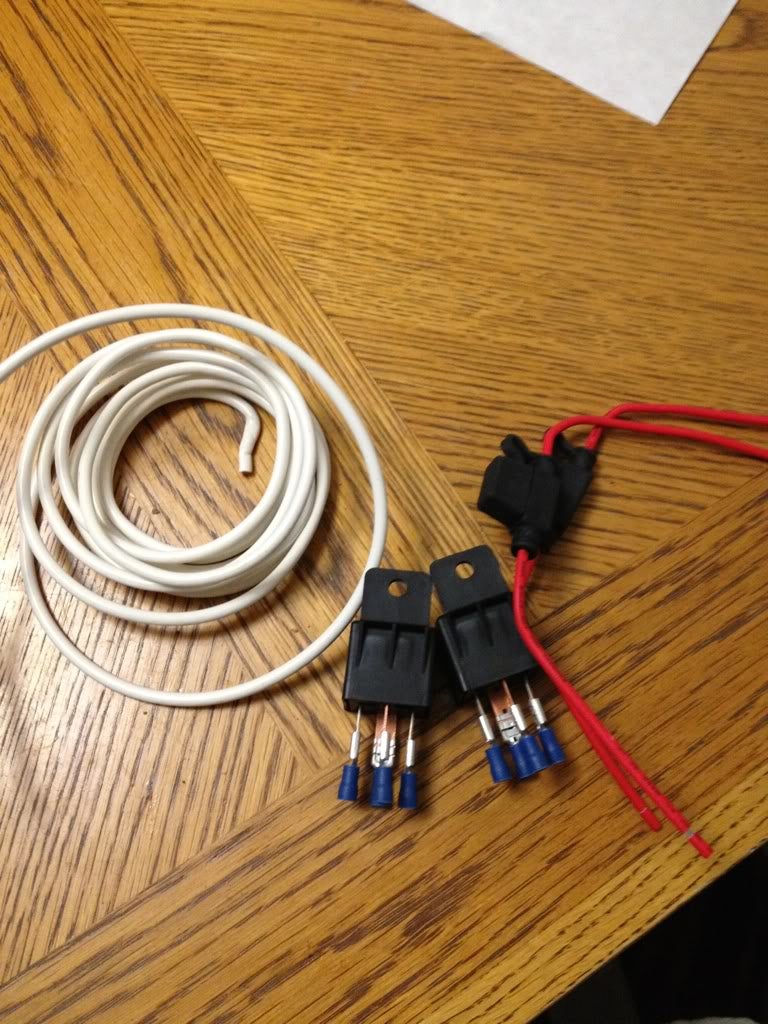
And the parts needed
With a helpful diagram,
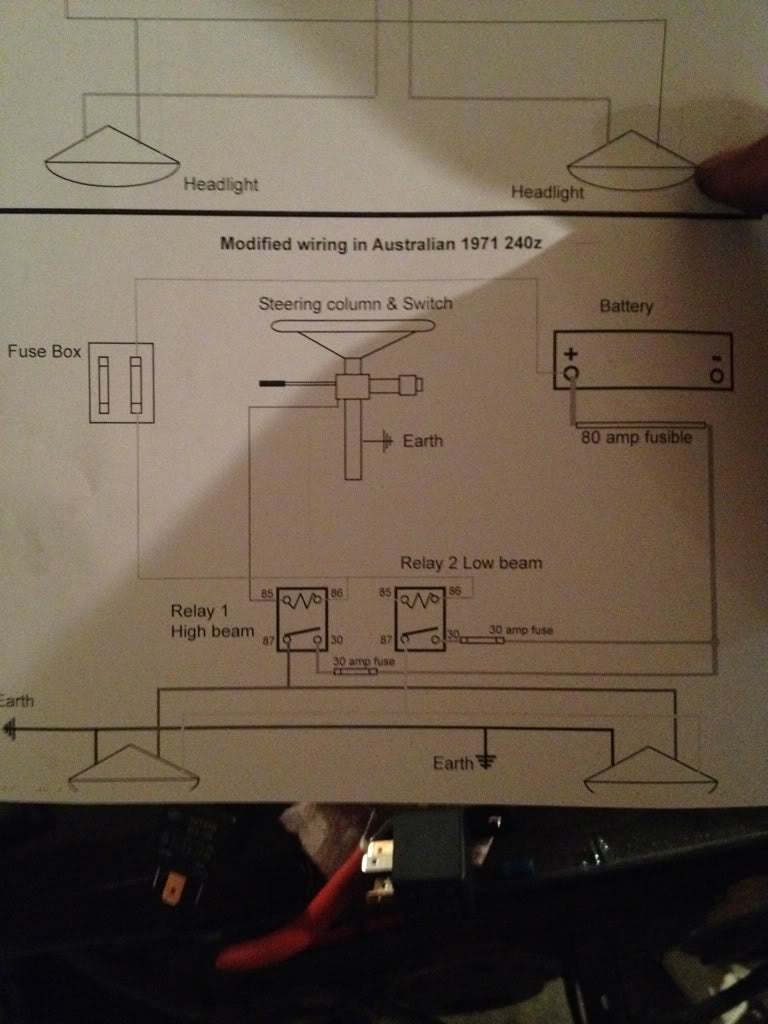
Wired it up (please excuse the poor crimps and such, I was a wiring novice still at this point, I get much better I promise).
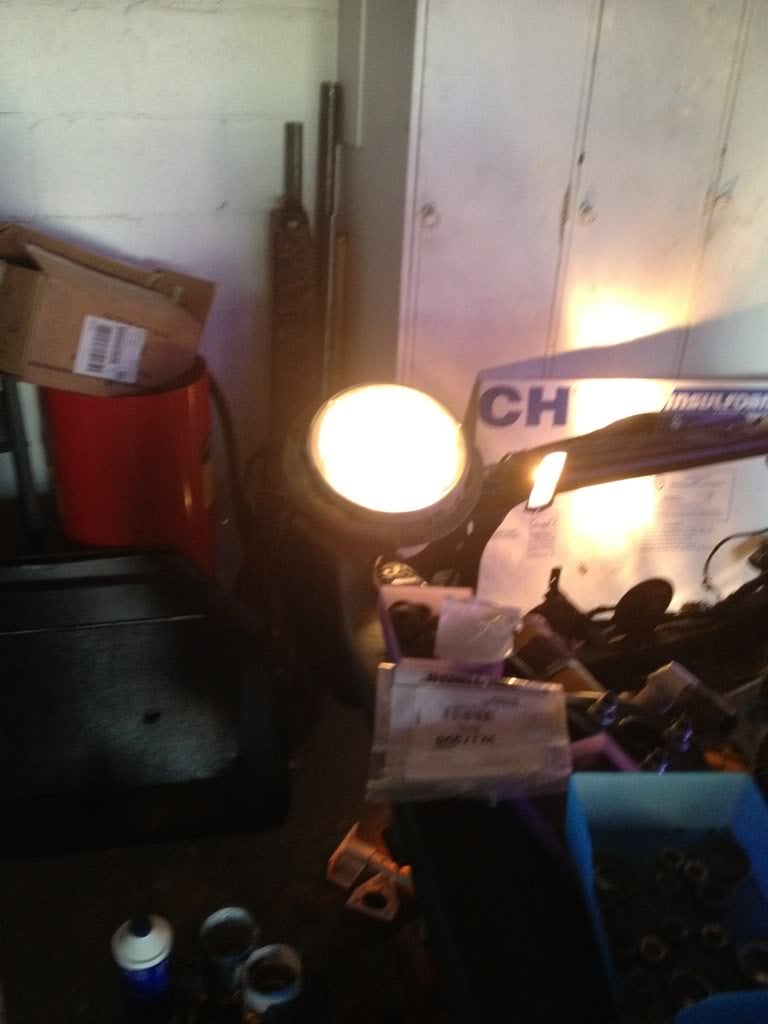
Finished up some more wiring and then back to the fun sport of reassembly.
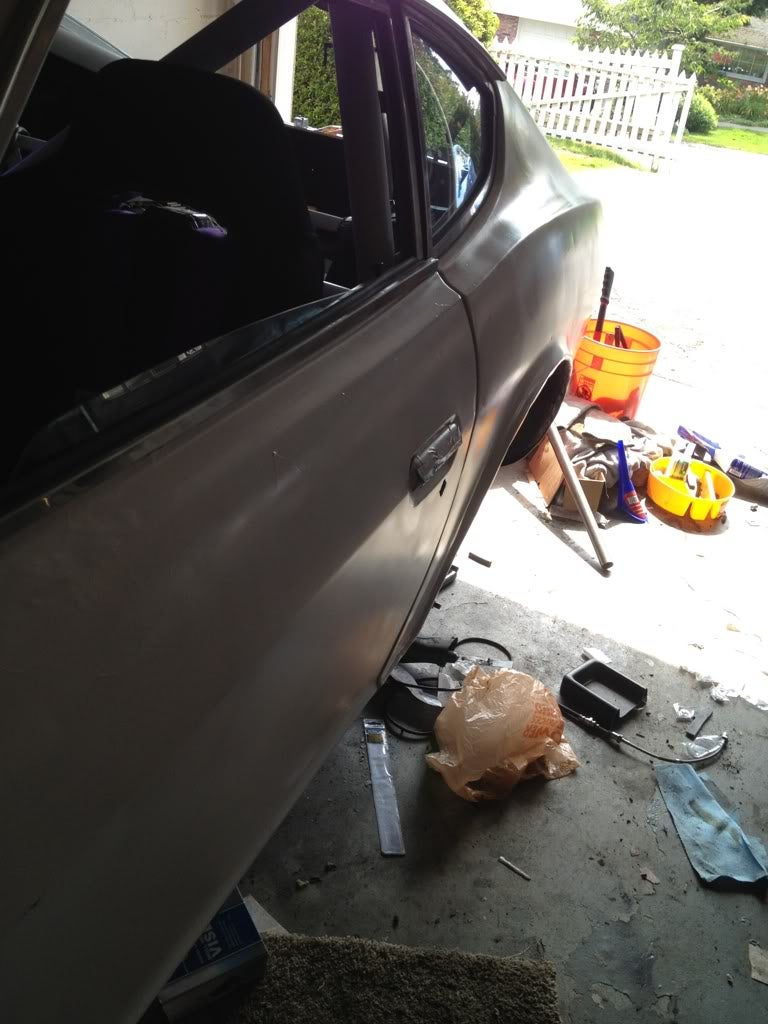
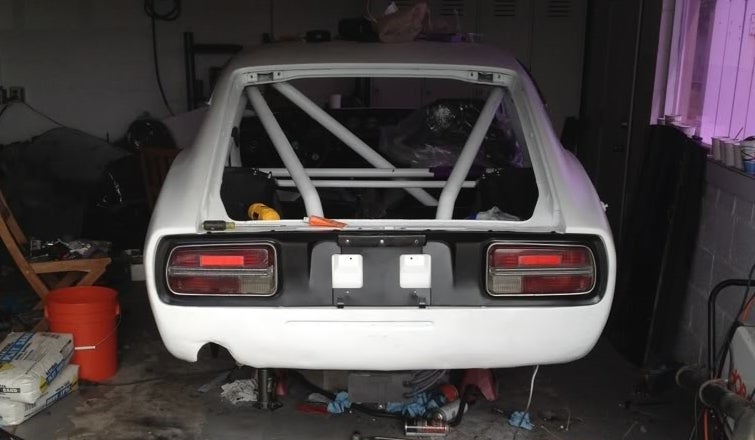
Doors went back on.
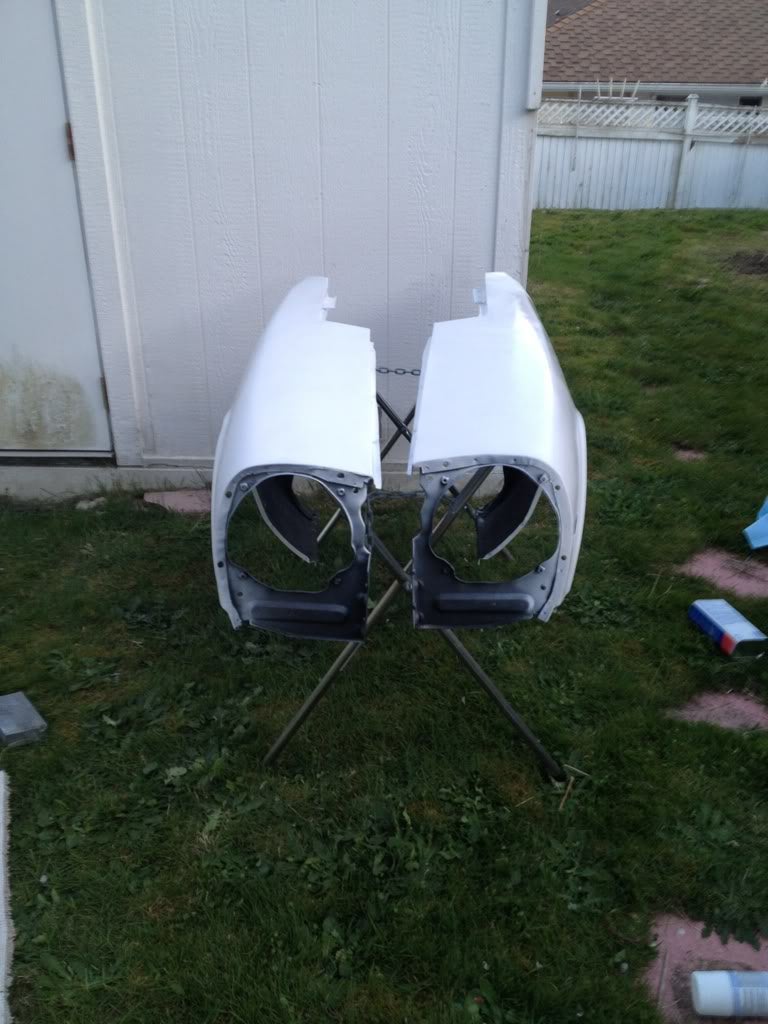
And fenders and the hatch were painted waiting their turn.
With the wiring reinstalled, it was time to work on the heart of the car and get into all the shenanigans that engine buildings brings with it.
Things I learned:
Take your time, rushing can and will lead to mistakes.
Remember your electrical theory.
Don’t guess, a digital multimeter is 5$ at harbor freight or free with a purchase with the coupon. Learning how to use it is easy and can help diagnose or identify faults and problems. There is no reason you shouldn’t have one (I keep a half dozen or so of the harbor freight ones, a couple spares and a couple scattered throughout the car, tool box, house, etc. I even give them away to the people who ask for help and don’t have one).
Bolting things on is soooooooooo much easier then metal work or wiring.
All those labels you made on the wiring harness that you thought would be stupid because they were obvious? Super helpful when you are putting things back together severeal months or years later. Label EVERYTHING.
Costs:
50 - wiring connectors, switches, and relay
20 - wires
50 - paint
Subtotal: 120
Total spent: 7745
!!! UNKNOWN CONTENT TYPE !!!
!!! UNKNOWN CONTENT TYPE !!!
 MonkeePuzzle
> StudyStudyStudy
MonkeePuzzle
> StudyStudyStudy
04/29/2015 at 14:42 |
|
“label everything”
so wise. I did this but then realised half way through reassembly that everything could only reach one place and everything had a unique plug so I COULDN’T connect it wrong
WRONG!!! the pre fuel and post fuel air measuring devices on my car had THE SAME PLUG (because they were the same design of sensor) and were within a few inches of each other so the wiring reached! a hell of a problem as the ECU though there was not enough fuel (because it was reading before fuel mix) and would FREAK OUT!
a simple fix that should not have been an issue... BECAUSE THEY WE F-ING LABELED CORRECTLY BUT PLUGGED IN WRONG BY THE SAME MORON WHO DID THE LABELING!!!
anyhoo, keep up the posts, a great read each time.
 RustedSprinter
> StudyStudyStudy
RustedSprinter
> StudyStudyStudy
04/29/2015 at 14:43 |
|
Its starting to look like a 240Z! Keep it up!
|
StudyStudyStudy
> MonkeePuzzle
04/29/2015 at 15:44 |
|
So true.
“Oh this harness is super simple, the plugs end up exactly where it needs to go”
2 years later....
“Which side went to the front again?...”
I literally had a friend tell me to stop labeling, it would be really obvious. Glad I ignored him for the most part.