 "LimitedTimeOnly @ opposite-lock.com" (limitedtimeonly)
02/16/2018 at 08:45 • Filed to: Sway bars, GTI, VW Golf GTI, Autocross
 5
5
 9
9|
"LimitedTimeOnly @ opposite-lock.com" (limitedtimeonly)
02/16/2018 at 08:45 • Filed to: Sway bars, GTI, VW Golf GTI, Autocross | 5
| 9 |
I may not have spent much time wrenching on cars in my life, but I am changing that. This is the story of how, on a Friday in January of this year, I took advantage of the brief bit of warm weather and replaced my stock rear sway bar and endlinks with stiffer and stronger parts. It did not go too smoothly.
As mentioned in previous posts, I wanted to upgrade the car handling for autocross competition, where at limit the car understeers. Wisdom of the internet suggested not only replacing the rear sway bar but also the endlinks.
!!! UNKNOWN CONTENT TYPE !!!
So, having borrowed a set of ramps in order to do the work with the suspension under compression (supposedly easier, and it seemed necessary to me) I swept the leaves and dirt out of the garage, and set up.

LED shoplight under the car, FTW. Canine supervision, also FTW.
The job is generally considered a 1 to 2 hour job. I budgeted 4 hours, which was good . . . it took me 3 and a half hours.
To start with, I removed the bolts holding the endlinks to the control arm.
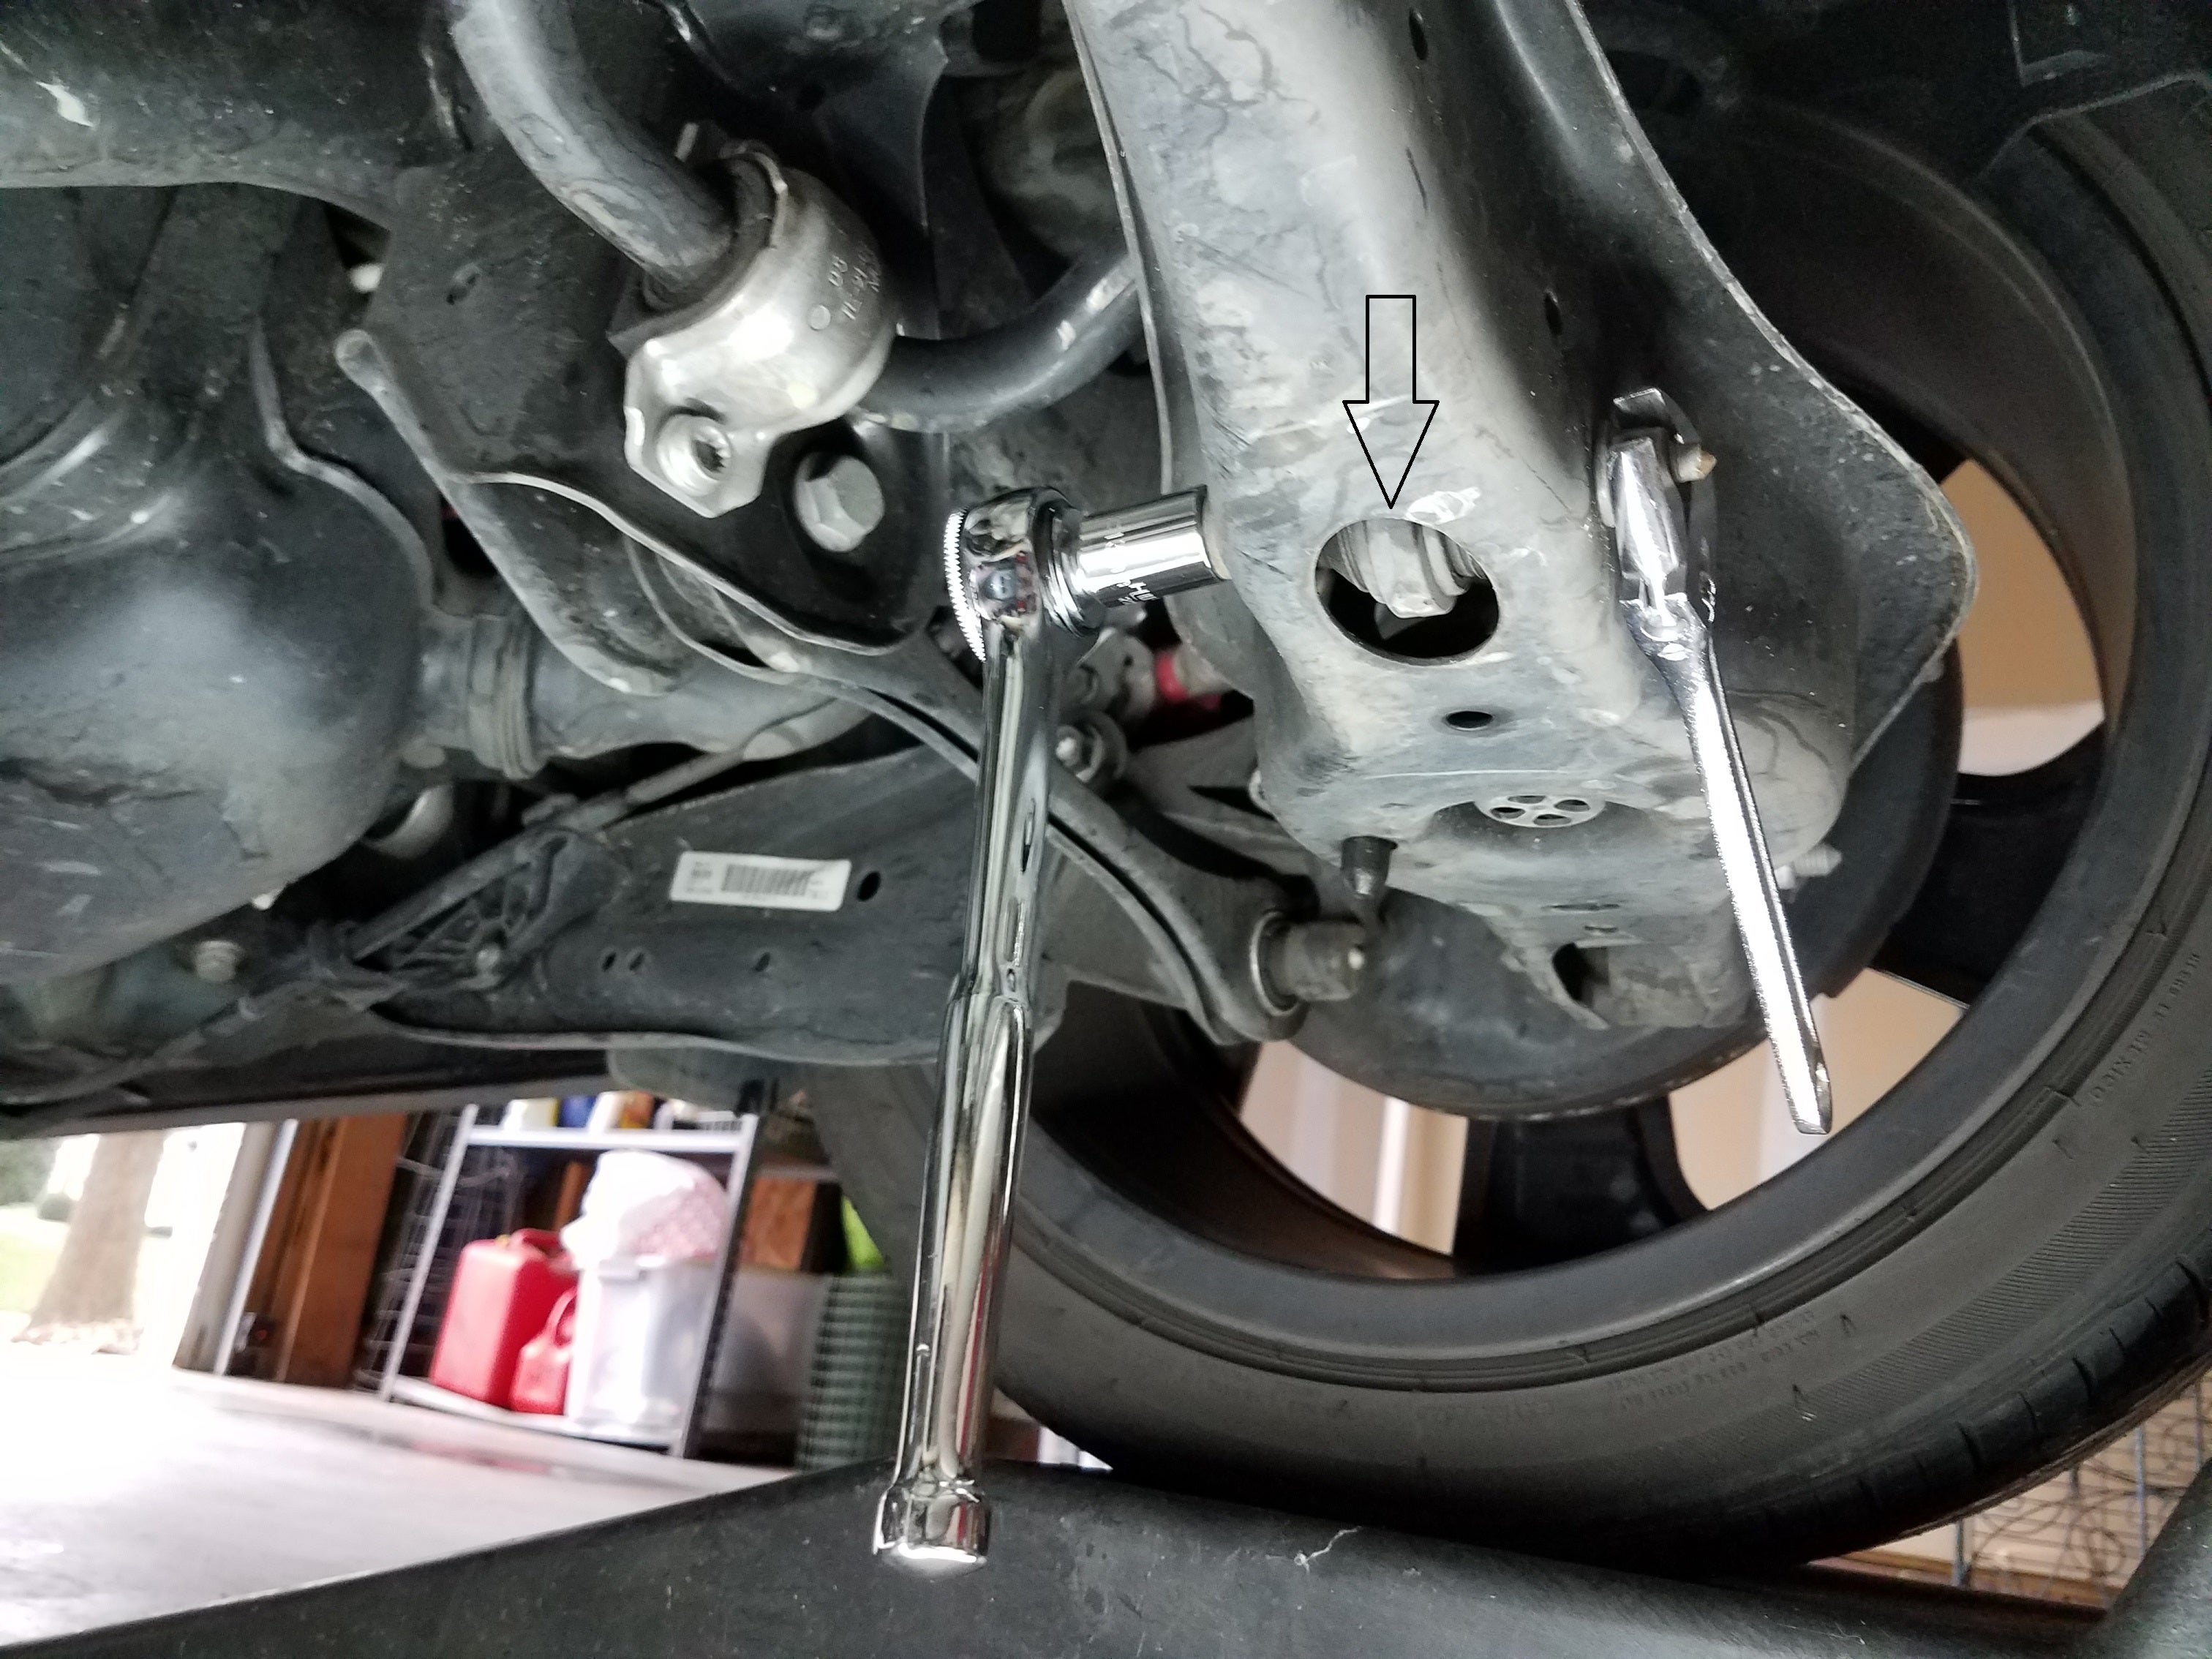
Arrow points to endlink bottom peeking through the control arm.
Then, I removed the bolts holding the brackets over the sway bar bushings. This required a 10mm triple square (A.K.A. 12 point) spline, so I had purchased a set in advance to be sure that I wouldn’t strip the bolt.

This photo came in handy later when I was reminding myself the correct orientation of the sway bar.
Then I unbolted one side of the muffler to allow more room, and I was finally able to pull out the sway bar with the endlinks attached.

Muffler hanger bolt
This took about 40 minutes, probably about as fast as I could have gone. Plus, it was an enjoyable 40 minutes because my helper dog laid down against me while I was stretched out under the car.
“What are you doing, stop moving around and let’s nap!”
I then needed to remove the brackets from the OEM sway bar bushings so that I could re-use them. I spent about 5 minutes figuring out that I was not going to get the brackets off by prying them off with a screwdriver, as one video instructed. Hammer applied, and off they came.
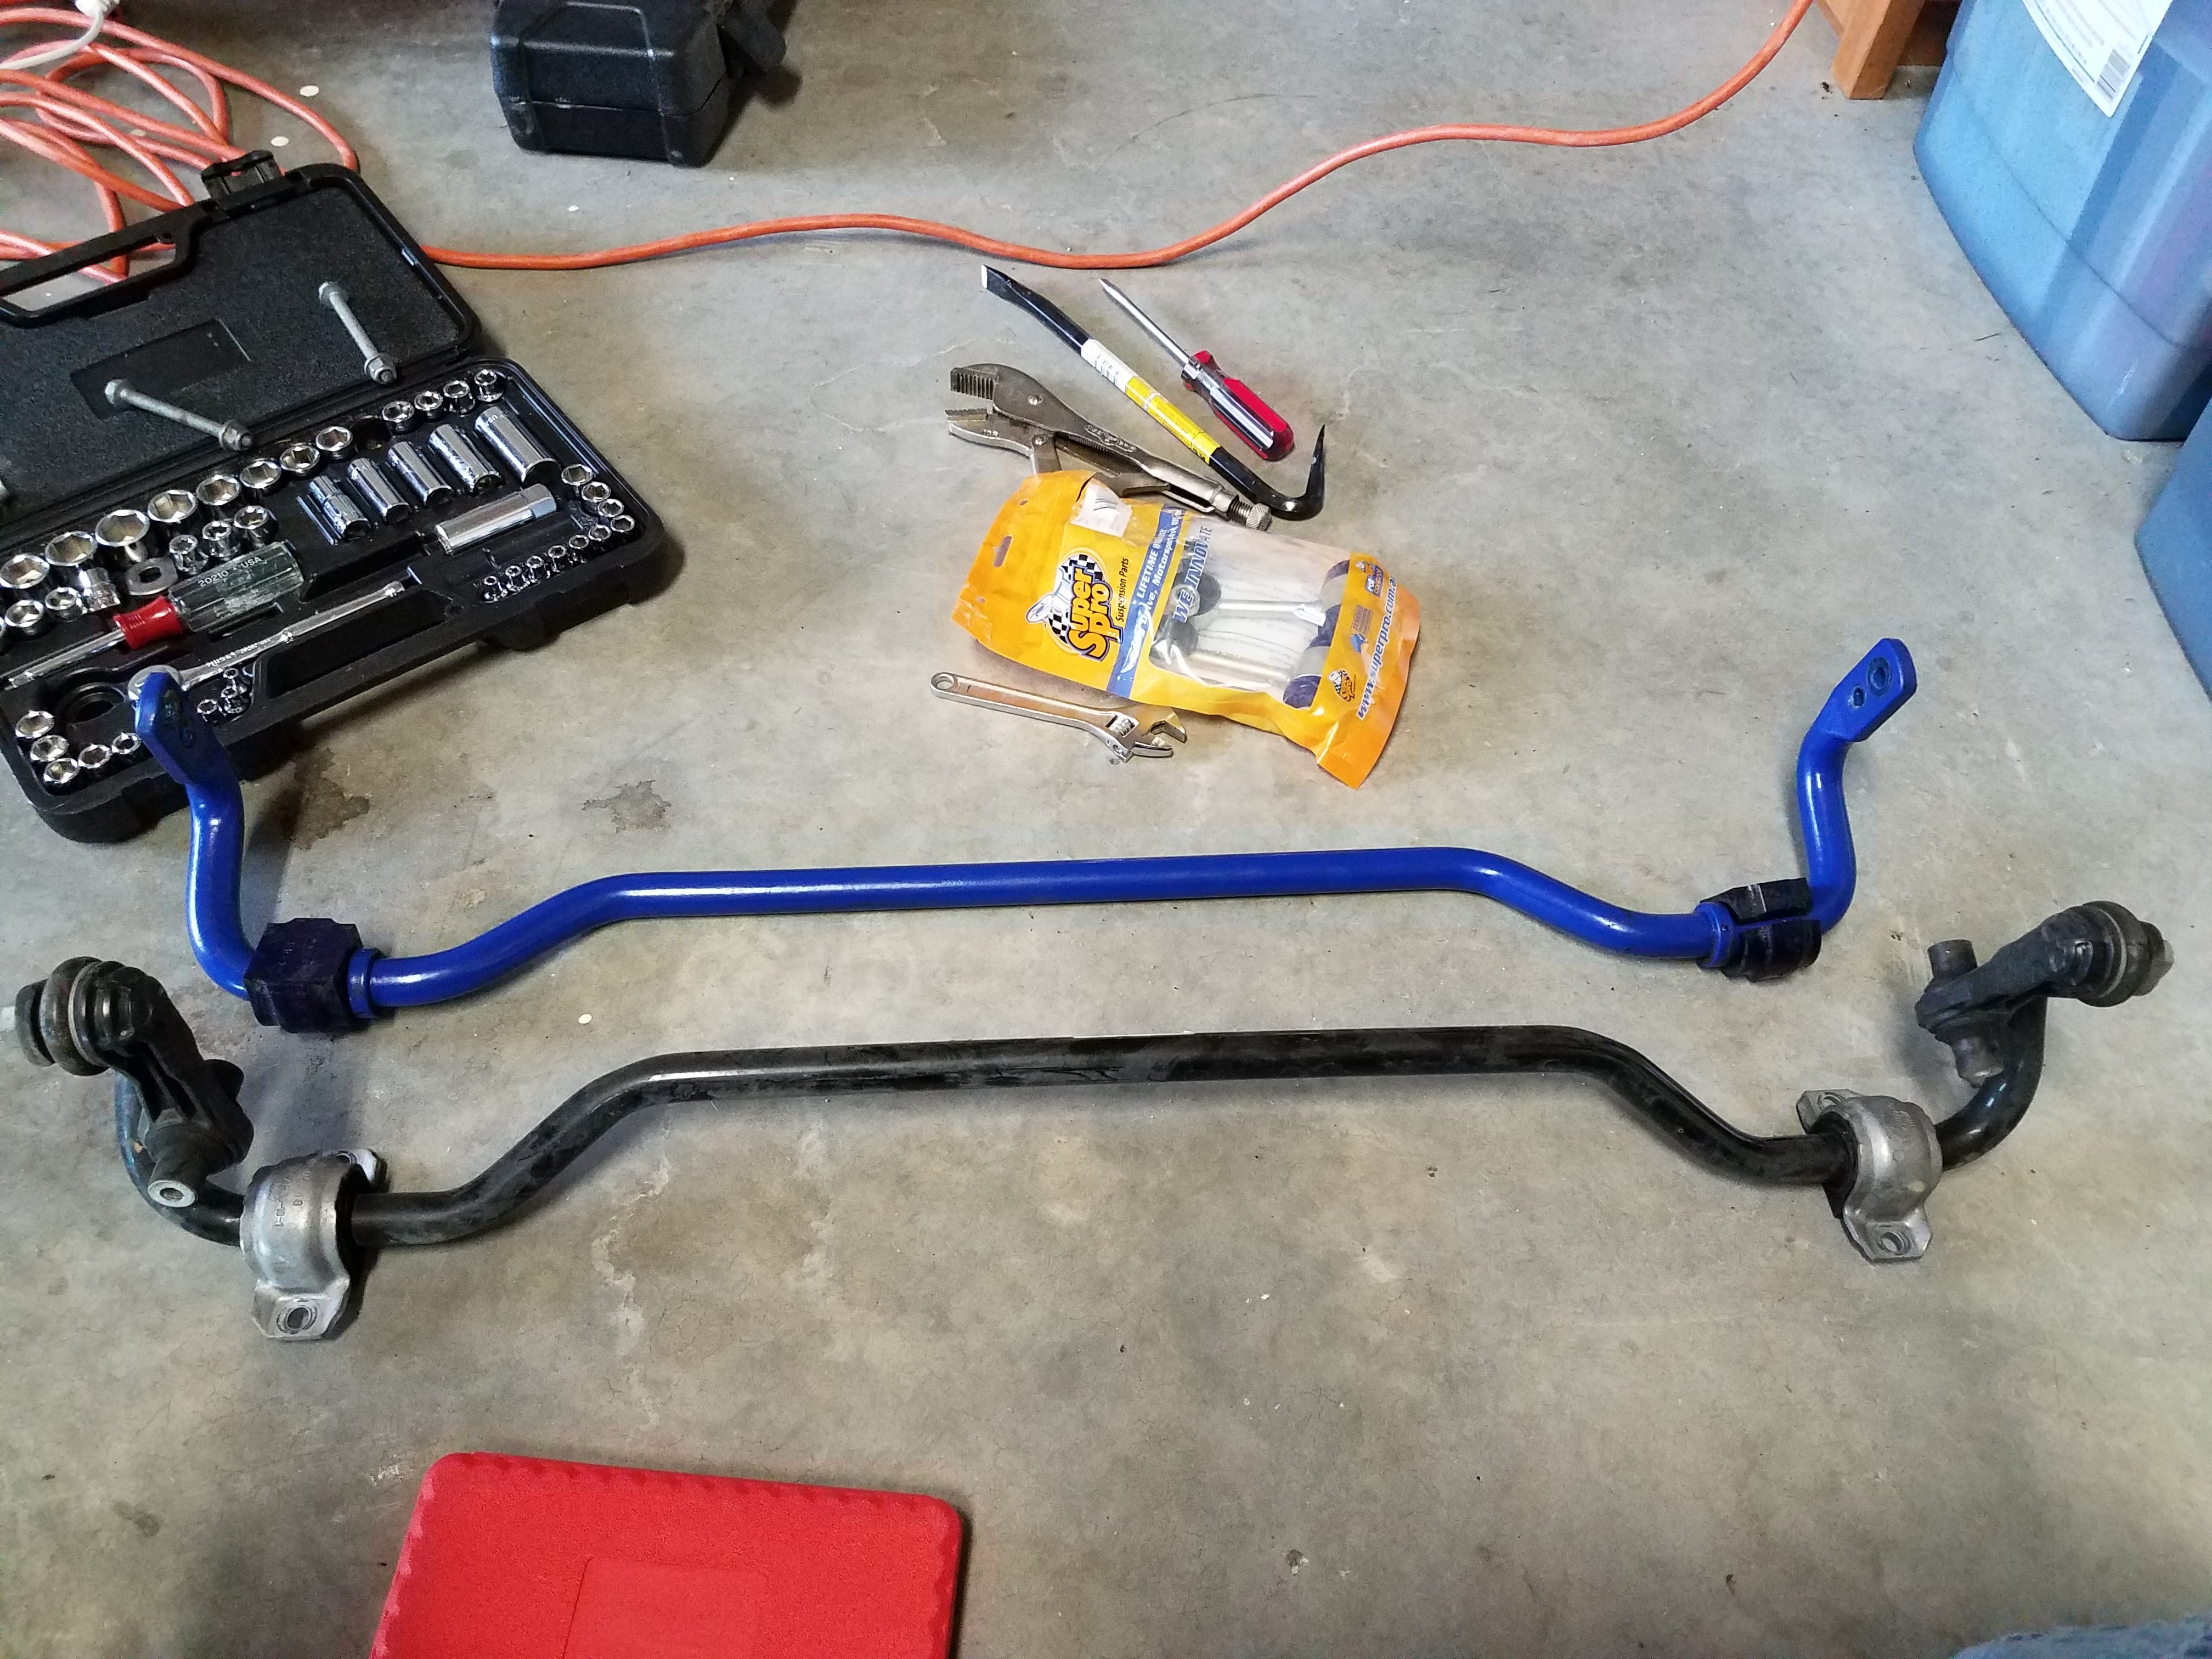
Here you see the OEM sway bar below the SuperPro sway bar, with the SuperPro endlinks in the yellow bag above. Crow bar was not needed for the brackets (seen here still on the OEM bar bushings).
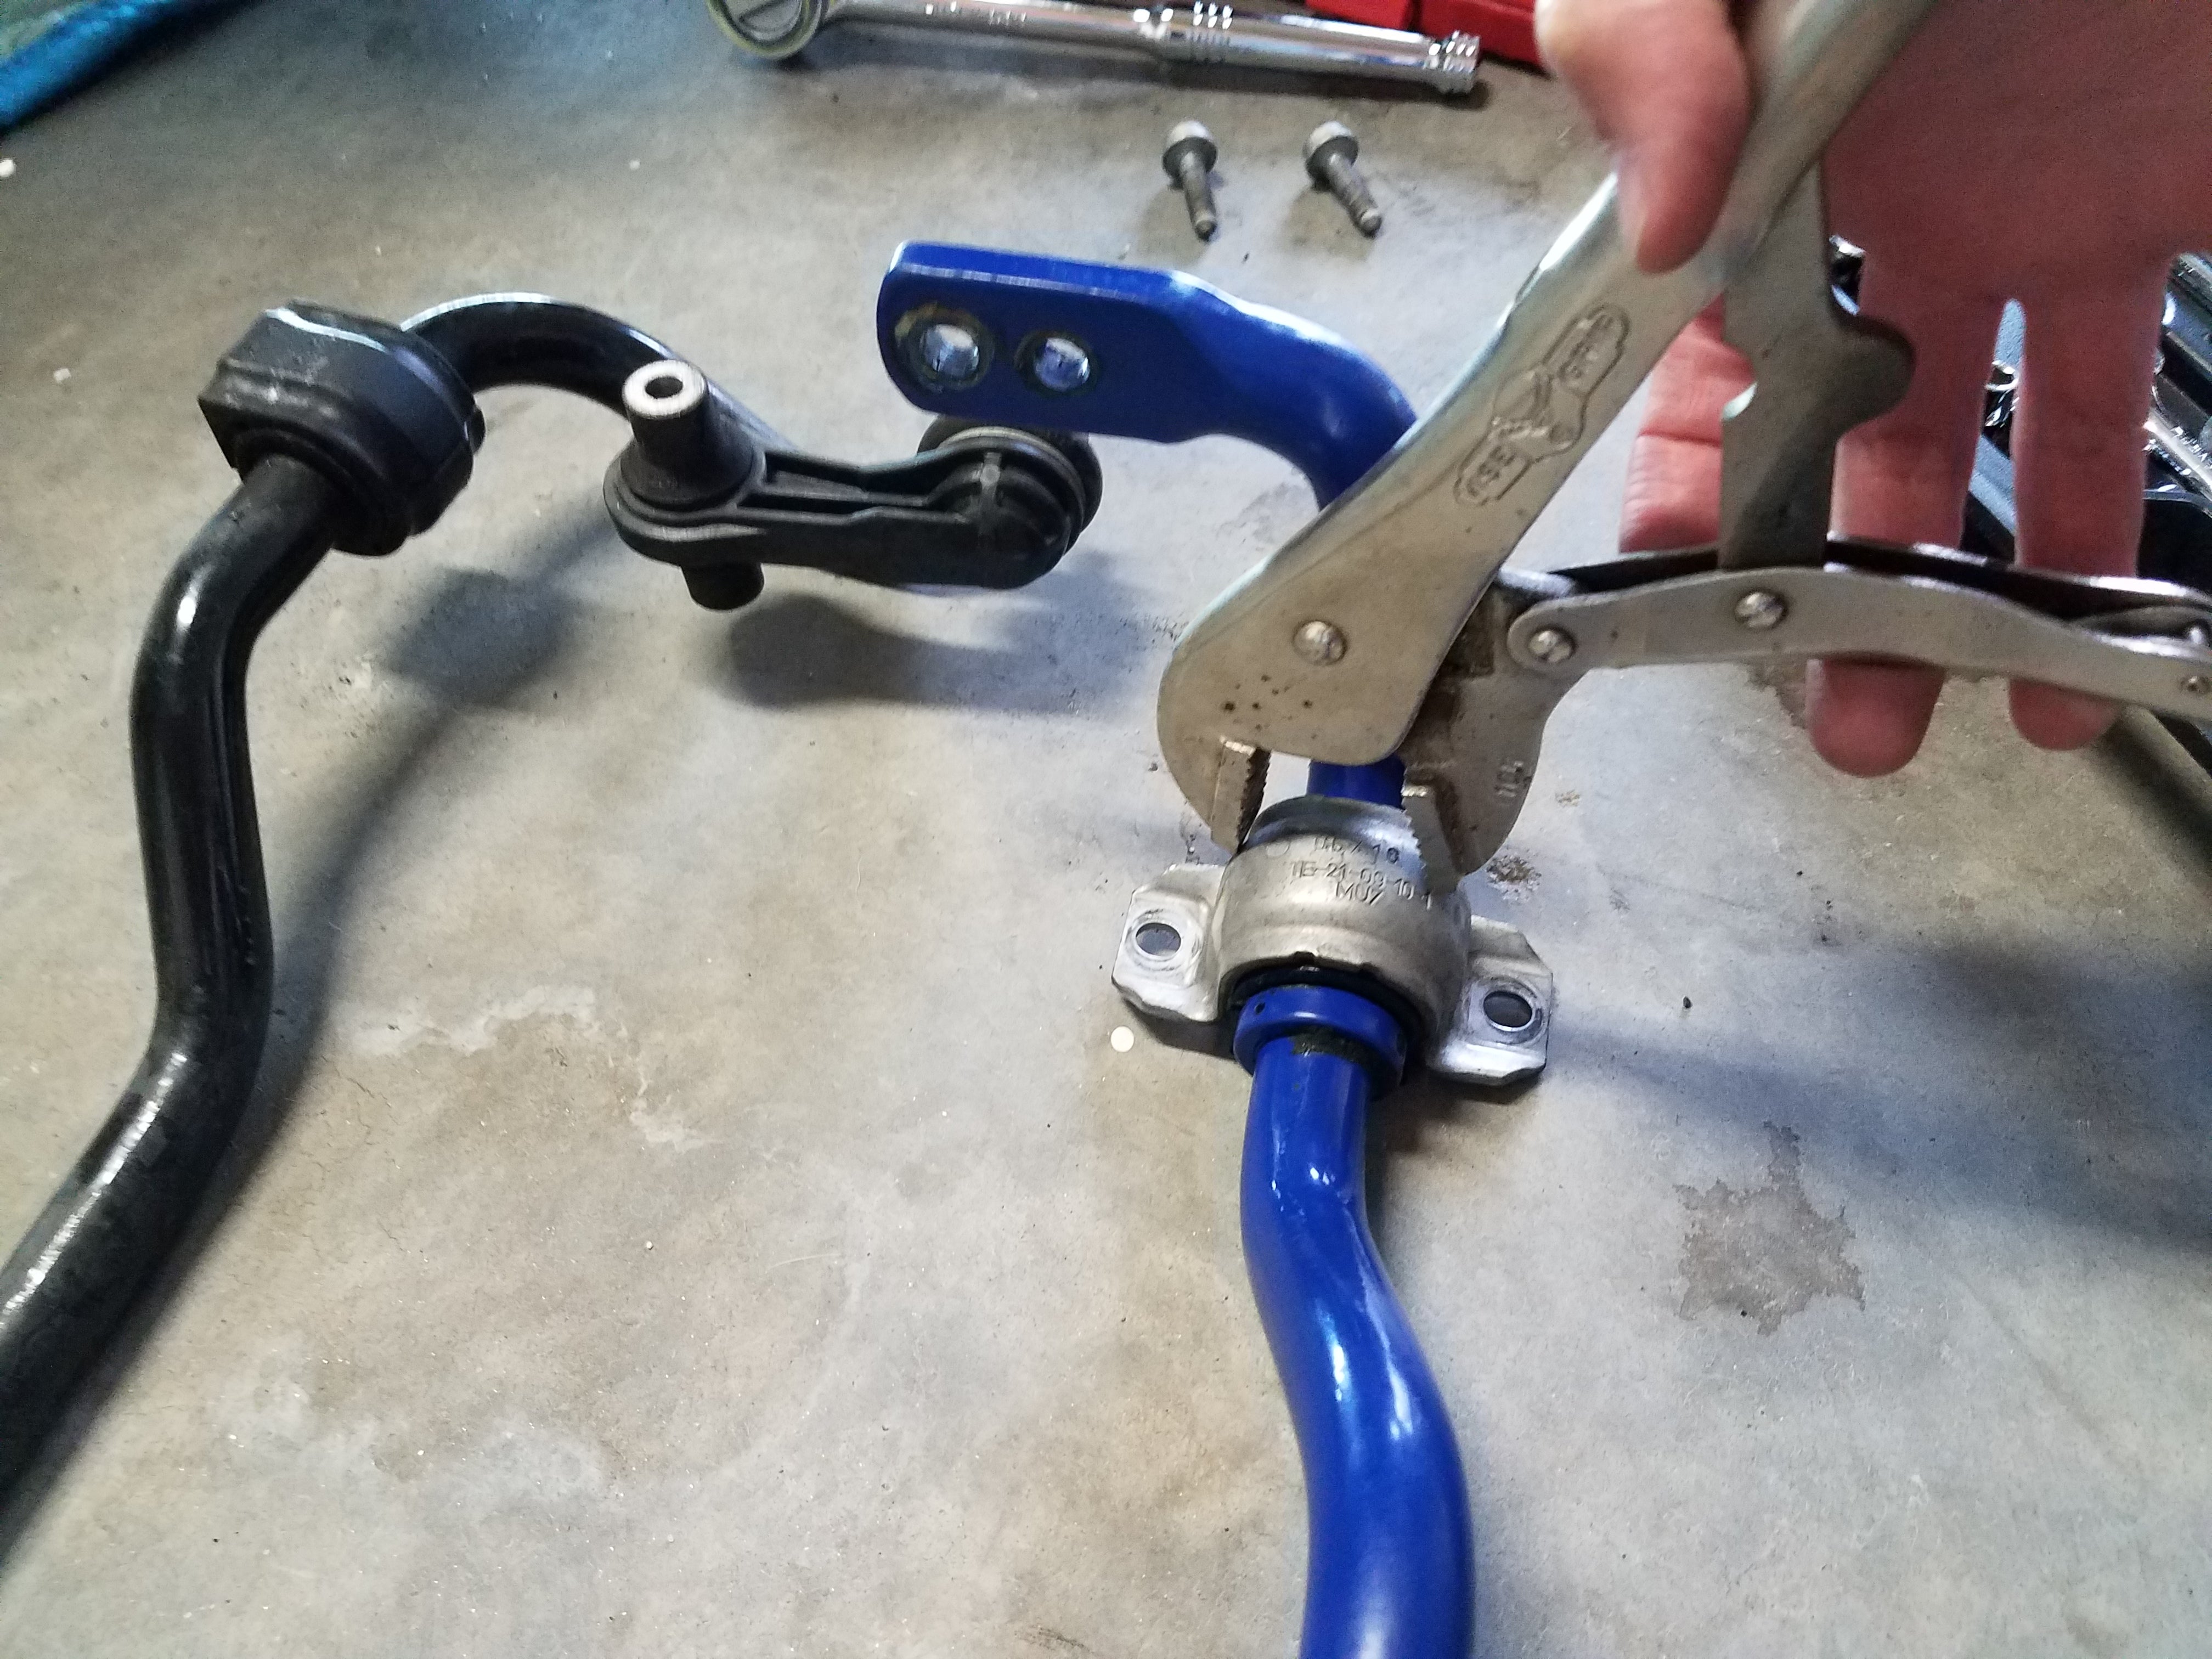
I then tried to clamp the brackets down onto the new bar’s bushings, but my visegrips were too small for the job. Much later, I remembered a vise clamp in a corner of the garage, but it seemed unnecessary at that point, because the hammer method seemed to not affect the shape of the brackets and they seemed to fit fine.
I then tried attaching one of the new endlinks to the swaybar. It seemed like there was a lot of room, so I looked at the OEM endlinks and thought that maybe I needed to take a portion of those off to re-use.
Ha. No.
I wasted a half hour failing to correctly remove the endlinks because I didn’t pay attention to the fact that I needed to hold the center with a triple-square bit, and turn the outside with the wrench to loosen things. After trying to force it and breaking one of my 5mm triple squares (yes, relatively cheap material, I’m not super strong), I got an endlink off and determined that it did not come apart any further, and I was really supposed to use the SuperPro endlinks as provided.
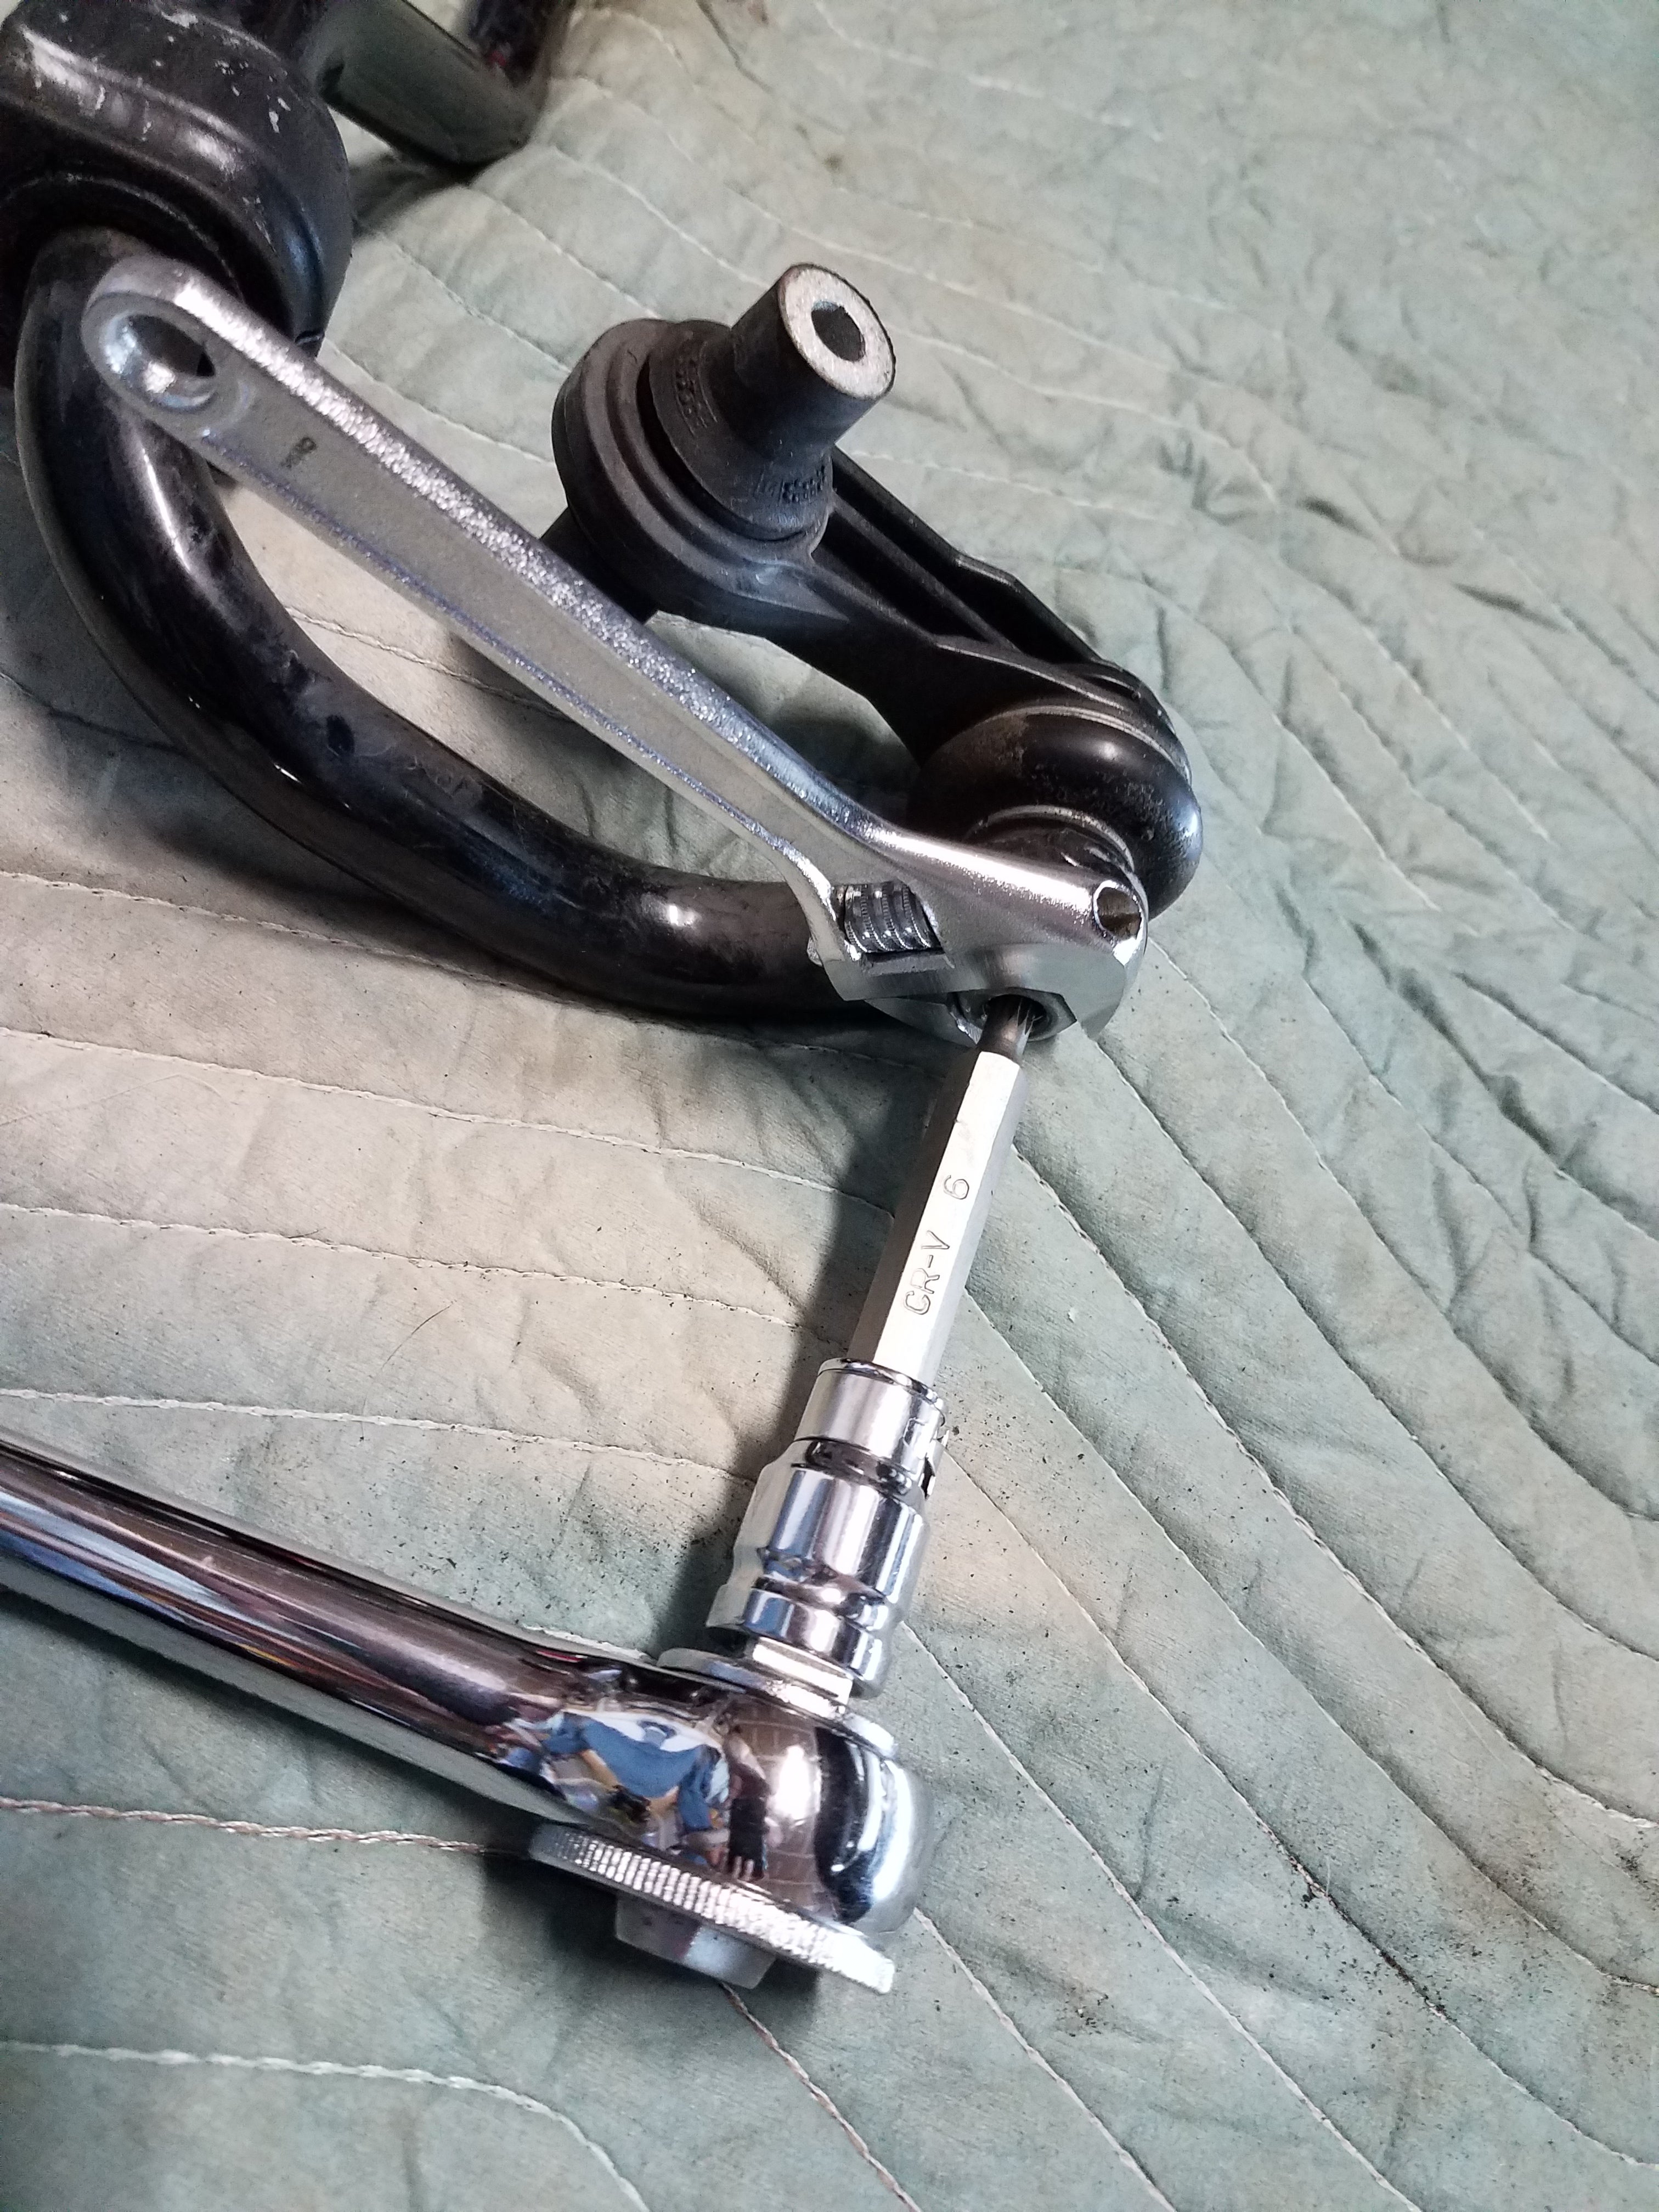
I thought I was going to remove the pillowy part of the OEM endlink, but it doesn’t separate.
At this point a friend showed up to help. I put the both endlinks on the new sway bar, and maneuvered it all under the car and got the bar into place, and bolted the muffler back on. However, the endlinks would not go into the control arm.
After much experimentation, I made the call to reverse course, unbolted the muffler again, unbolted the sway bar, pulled it all out and took the endlinks off.
We then put the endlinks in place in the control arm.
That sentence is easy to write, but these SuperPro endlinks have much more contact area with the control arm than the OEM ones, and it was very difficult for us to put them into place. It required a lot of leverage with screwdrivers, but they got there. This step was what took the biggest portion of time.
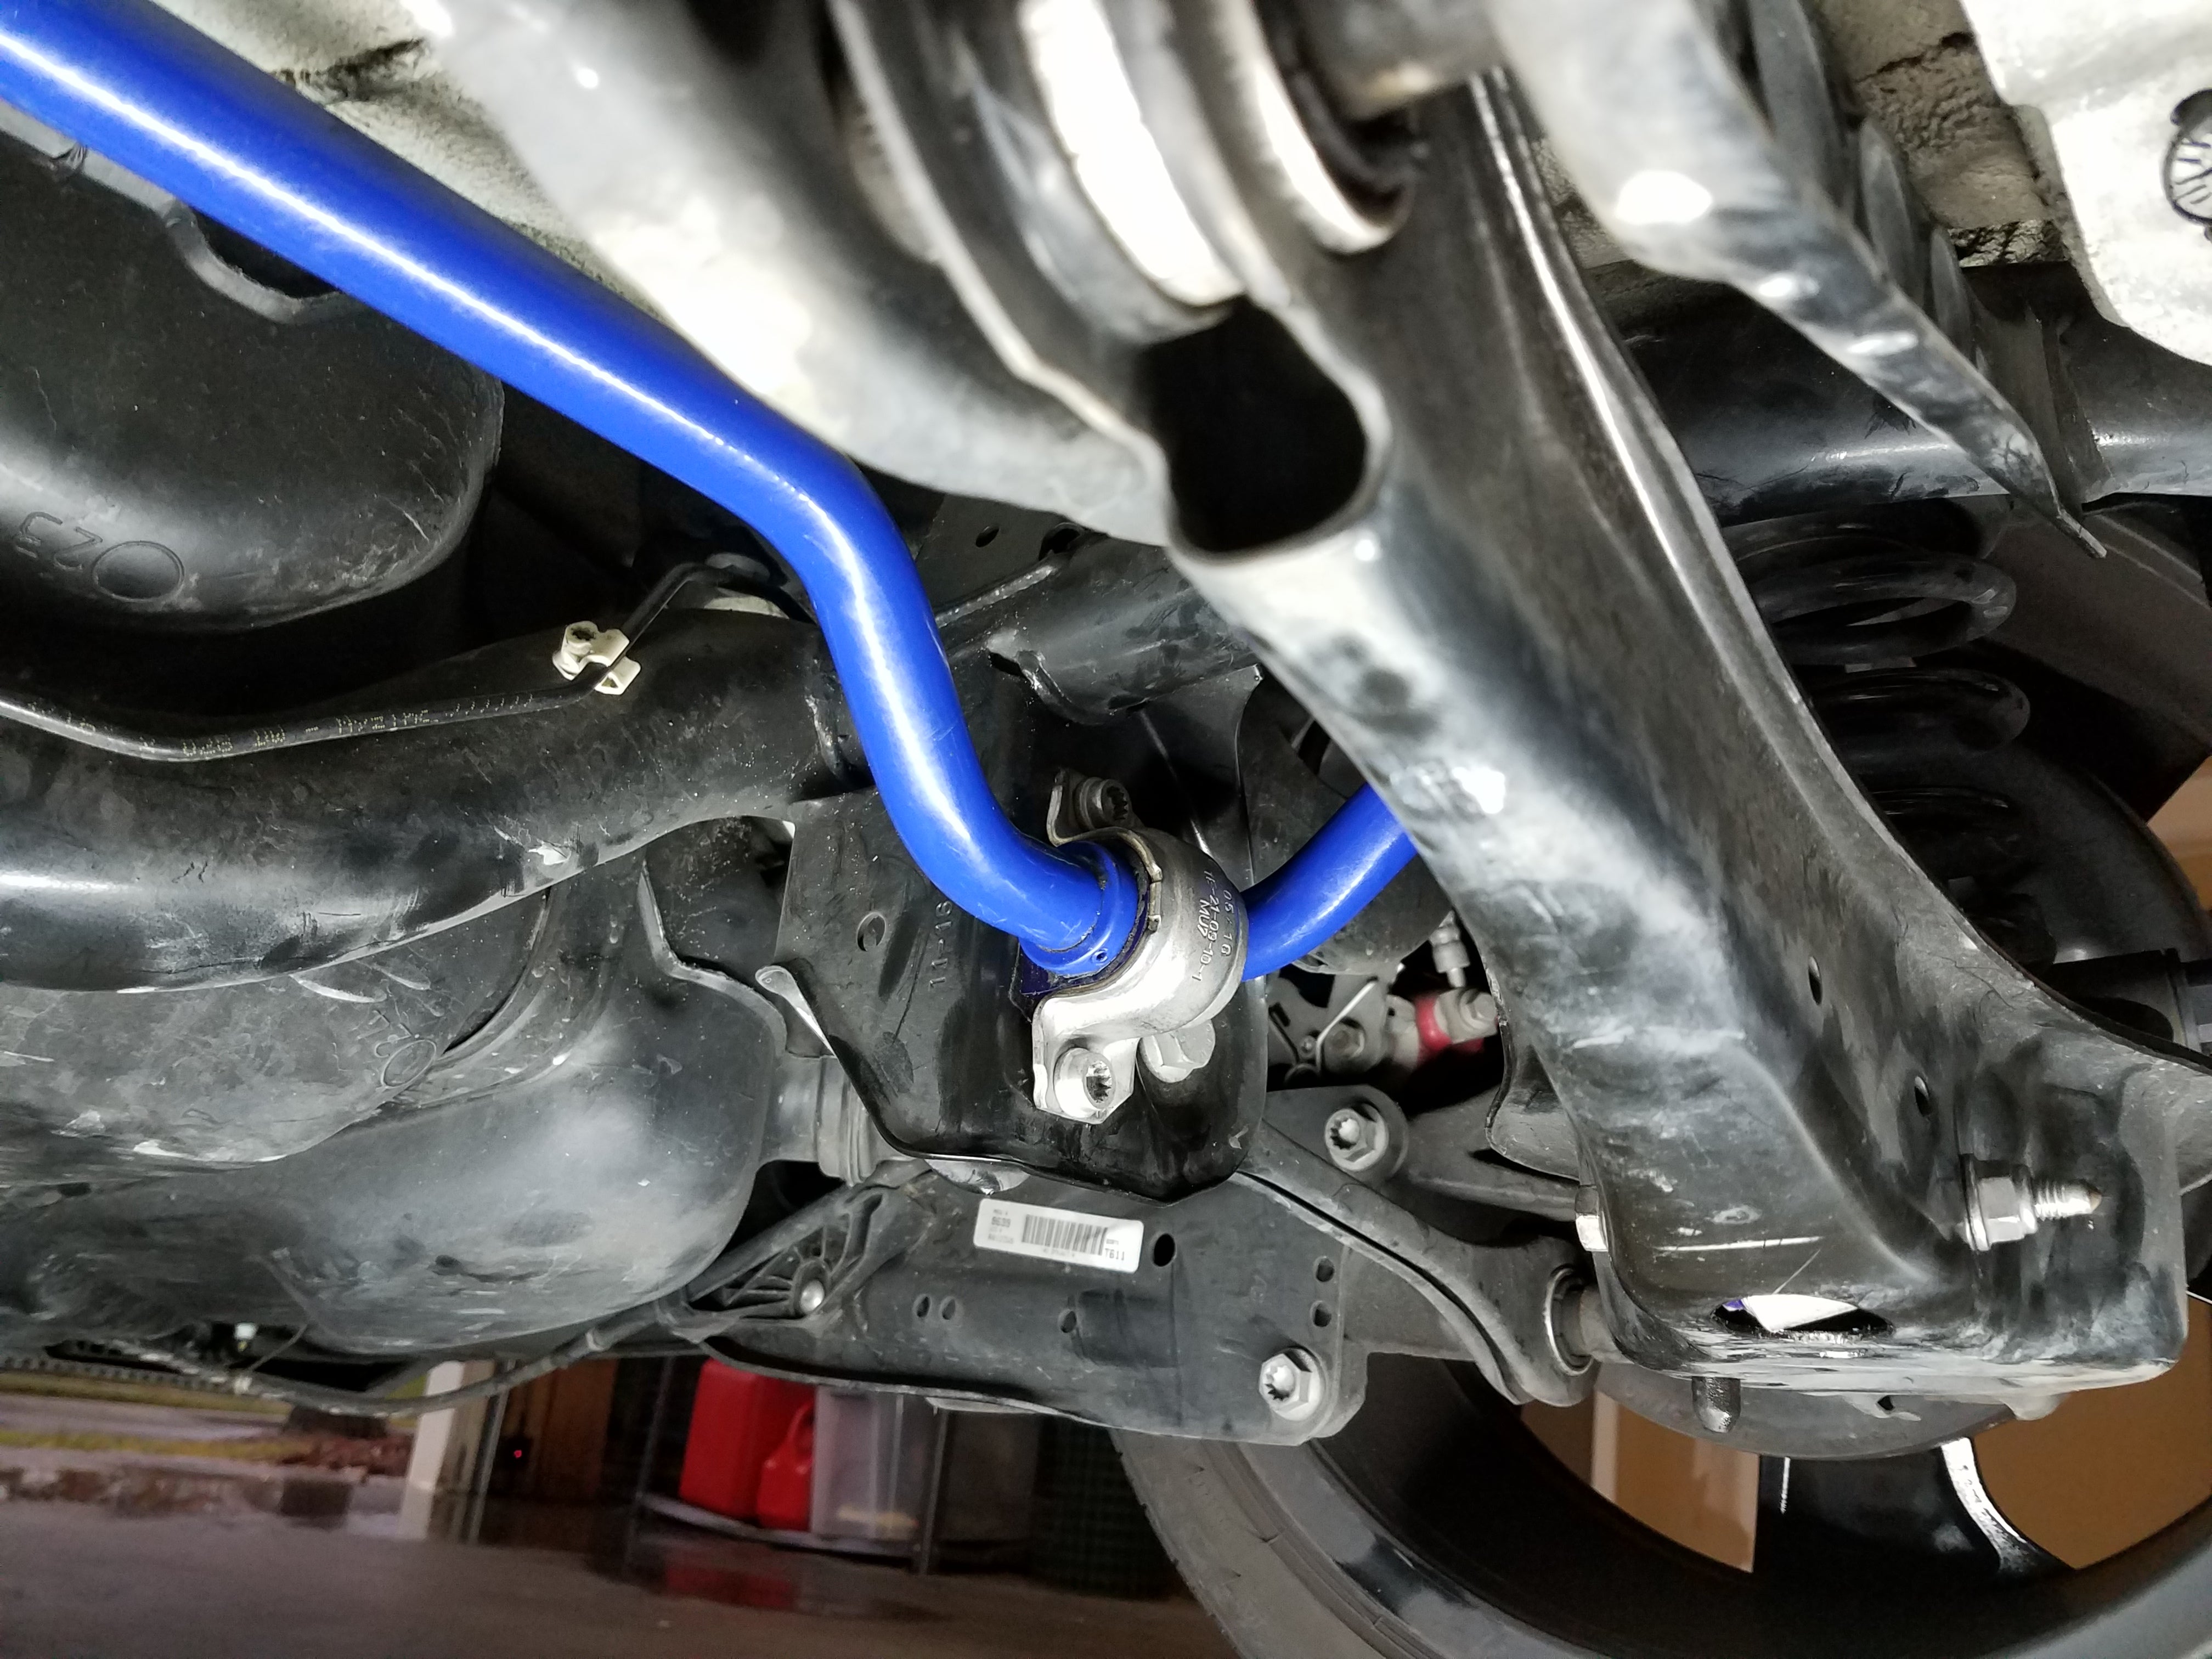
We then put the sway bar back in, loosely bolted it and maneuvered the endlinks to attach at the stiff connection point inboard on the sway bar arm. We then each tightened different things down.
Another lesson learned: If working with someone else, be clear about who is making sure that everything is tightened properly.
After the install, I couldn’t remember who tightened the bolts holding the sway bar, and the next morning tried tightening them with a torque wrench. Perhaps because it was a low setting, I think the wrench just didn’t click, and I broke one of the bolts. As it turns out, these are supposed to be single use bolts anyway, so I ordered a set.
Later, after driving for a few days with everything where it was supposed to be, I kept hearing clunking, and eventually figured out that the bolts holding the endlinks to the control arm were too loose. I’m pretty sure that I was supposed to finish tightening these.
One disturbing thing after all of that is that with the endlinks attached to the stiffer bolt location on the sway bar, the bottoms of the endlinks are at quite an angle, which I worry may shorten their lives. Time will tell.

The results?
I have figured out that braking late into a corner will allow me to induce oversteer with this setup, and I’m looking forward to revising my driving style when the autocross season finally starts. It’s been worth it, with almost no difference in daily ride comfort.
And afterwards I bought some additional wrenches and other tools that will make such an operation go more smoothly in the future, including adjustments. I even got a set of the ramps for super cheap off of FB marketplace. Who knows what mismanaged repair or modification may be next for me . . .
 CalzoneGolem
> LimitedTimeOnly @ opposite-lock.com
CalzoneGolem
> LimitedTimeOnly @ opposite-lock.com
02/16/2018 at 08:53 |
|
Your time wrenching on cars does not define you as a Jalop.
 pip bip - choose Corrour
> LimitedTimeOnly @ opposite-lock.com
pip bip - choose Corrour
> LimitedTimeOnly @ opposite-lock.com
02/16/2018 at 08:55 |
|
VW and there belief in using bolts only once is ridiculous, that’s why i will never own a VW group vehicle.
warranty repairs are a nightmare when doing an engine rebuild.
 TorqueToYield
> LimitedTimeOnly @ opposite-lock.com
TorqueToYield
> LimitedTimeOnly @ opposite-lock.com
02/16/2018 at 08:59 |
|
I would still use jack stands with ramps - and chock the wheels not on the ramp.
 jebidia24
> LimitedTimeOnly @ opposite-lock.com
jebidia24
> LimitedTimeOnly @ opposite-lock.com
02/16/2018 at 09:02 |
|
This is how it all starts. First you just want some mild upgrades for autocross and before you know it you’re stripping a car down to the bare chassis and building a full fledged race car from scratch. Don’t worry about how much time something takes. It’s most important that it is done correctly, so take your time. Also, everyone (even the most seasoned mechanics) get frustrated working on a car at one point or another (some everytime). Triple square bolts suck, I have broken or stripped many. I usually replace them when I can.
 vondon302
> LimitedTimeOnly @ opposite-lock.com
vondon302
> LimitedTimeOnly @ opposite-lock.com
02/16/2018 at 09:13 |
|
My wrenching projects hardly ever go as planned especially when “upgrading” to after market parts.
 Wrong Wheel Drive (41%)
> LimitedTimeOnly @ opposite-lock.com
Wrong Wheel Drive (41%)
> LimitedTimeOnly @ opposite-lock.com
02/16/2018 at 09:29 |
|
Sway bars are by far the best upgrade to any car. It also took me much much longer than expected to get my sway bars right. The end links were definitely the worst part since mine were completely rusted together. I needed air tools to get both sets apart and off of the car. Never even attempted to detach the front ones from the bar since that whole pile just got thrown right out. It was crazy though how it had absolutely zero downsides and made such a large improvement to turn in, I no longer oversteered with massive steering input. With my front sway bar at the tightest setting and a proper alignment, my Miata will switch between slight understeer and oversteer depending on throttle/brake input. Stock it just oversteered like mad anytime you looked at it funny. I do find it interesting though that your stock and upgrade bars are of similar size. I imagine the new one is MUCH stiffer but mine was also like double the diameter.
|
LimitedTimeOnly @ opposite-lock.com
> Wrong Wheel Drive (41%)
02/16/2018 at 09:42 |
|
My stock bar was 22mm hollow, and the SuperPro is 22mm solid, so it is much stiffer, especially when attached at the inboard connection to the endlinks. As per my other post, almost triple the stiffness. By comparison, the non-PP bar is 20mm solid, same performance.
I was annoyed to realize that I just had the car aligned before I did this, and really ought to get it aligned again now that I messed around with the rear suspension.
|
Wrong Wheel Drive (41%)
> LimitedTimeOnly @ opposite-lock.com
02/16/2018 at 09:54 |
|
Yeah its worth the cost of another alignment. Sure is cheaper than another set of four tires. Ask me how I know lol.
 razorbeamteam
> LimitedTimeOnly @ opposite-lock.com
razorbeamteam
> LimitedTimeOnly @ opposite-lock.com
02/16/2018 at 11:43 |
|
Congrats on this undertaking. I put a new sway bar on my A4 and can confirm its a pain in the butt but (lol) totally worth it. Going from memory here, I went from 18mm to 25mm, and the difference was dramatic. The drivetrain of all quattro cars is such that the engine hangs over the front and causes it to push in every turn. Now, the car is balanced and even. Going hard into a turn and you feel the force in your hips and everything stays in control.