 "InfinityAero" (infinityaero)
03/31/2016 at 15:55 • Filed to: None
 3
3
 9
9
 "InfinityAero" (infinityaero)
03/31/2016 at 15:55 • Filed to: None |  3 3
|  9 9 |
Not everyone has a project car. I’m enjoying my first right now— well, unless you count “daily driver that always breaks down” as a “project car”. To those uninitiated, and I know I’m preaching to the choir here, why in the hell would anyone want to rebuild or modify a vehicle? I would argue there are three basic reasons:
1) Because I have to! (restorations, component replacement, maintenance, structural reinforcement)
2) Because I want to! (more power, better handling, lighter, more visually appealing
3) Because I can!
I’m coming at you directly from Camp 3 with this post. Currently, I’m in the process of restoring an old classic, which of course requires all three. I’ll be replacing suspension components, respraying it, and doing all the maintenance it’s missed out on for the last 20 years (category 1). I’ll be removing smog equipment, upgrading the carb/exhaust, and maybe even throwing in a hot cam or two or some high compression pistons (category 2).
The respray in particular acts as a bit of a PNR (Point of No Return) on the project. Especially since I went the cheap/easy/convenient route with repairing the rust on the doors, which will surely rear its ugly head at some point down the line. As I started prepping for paint, I quickly realized a couple things:
1) Man, it’d really be easy to pull off the doors, trunk, and hood and make molds from them
2) Ermmm... I’m really not going to want to use those components to make molds *after* I painted them.
Thought I’d chronicle the process for making my first mold.
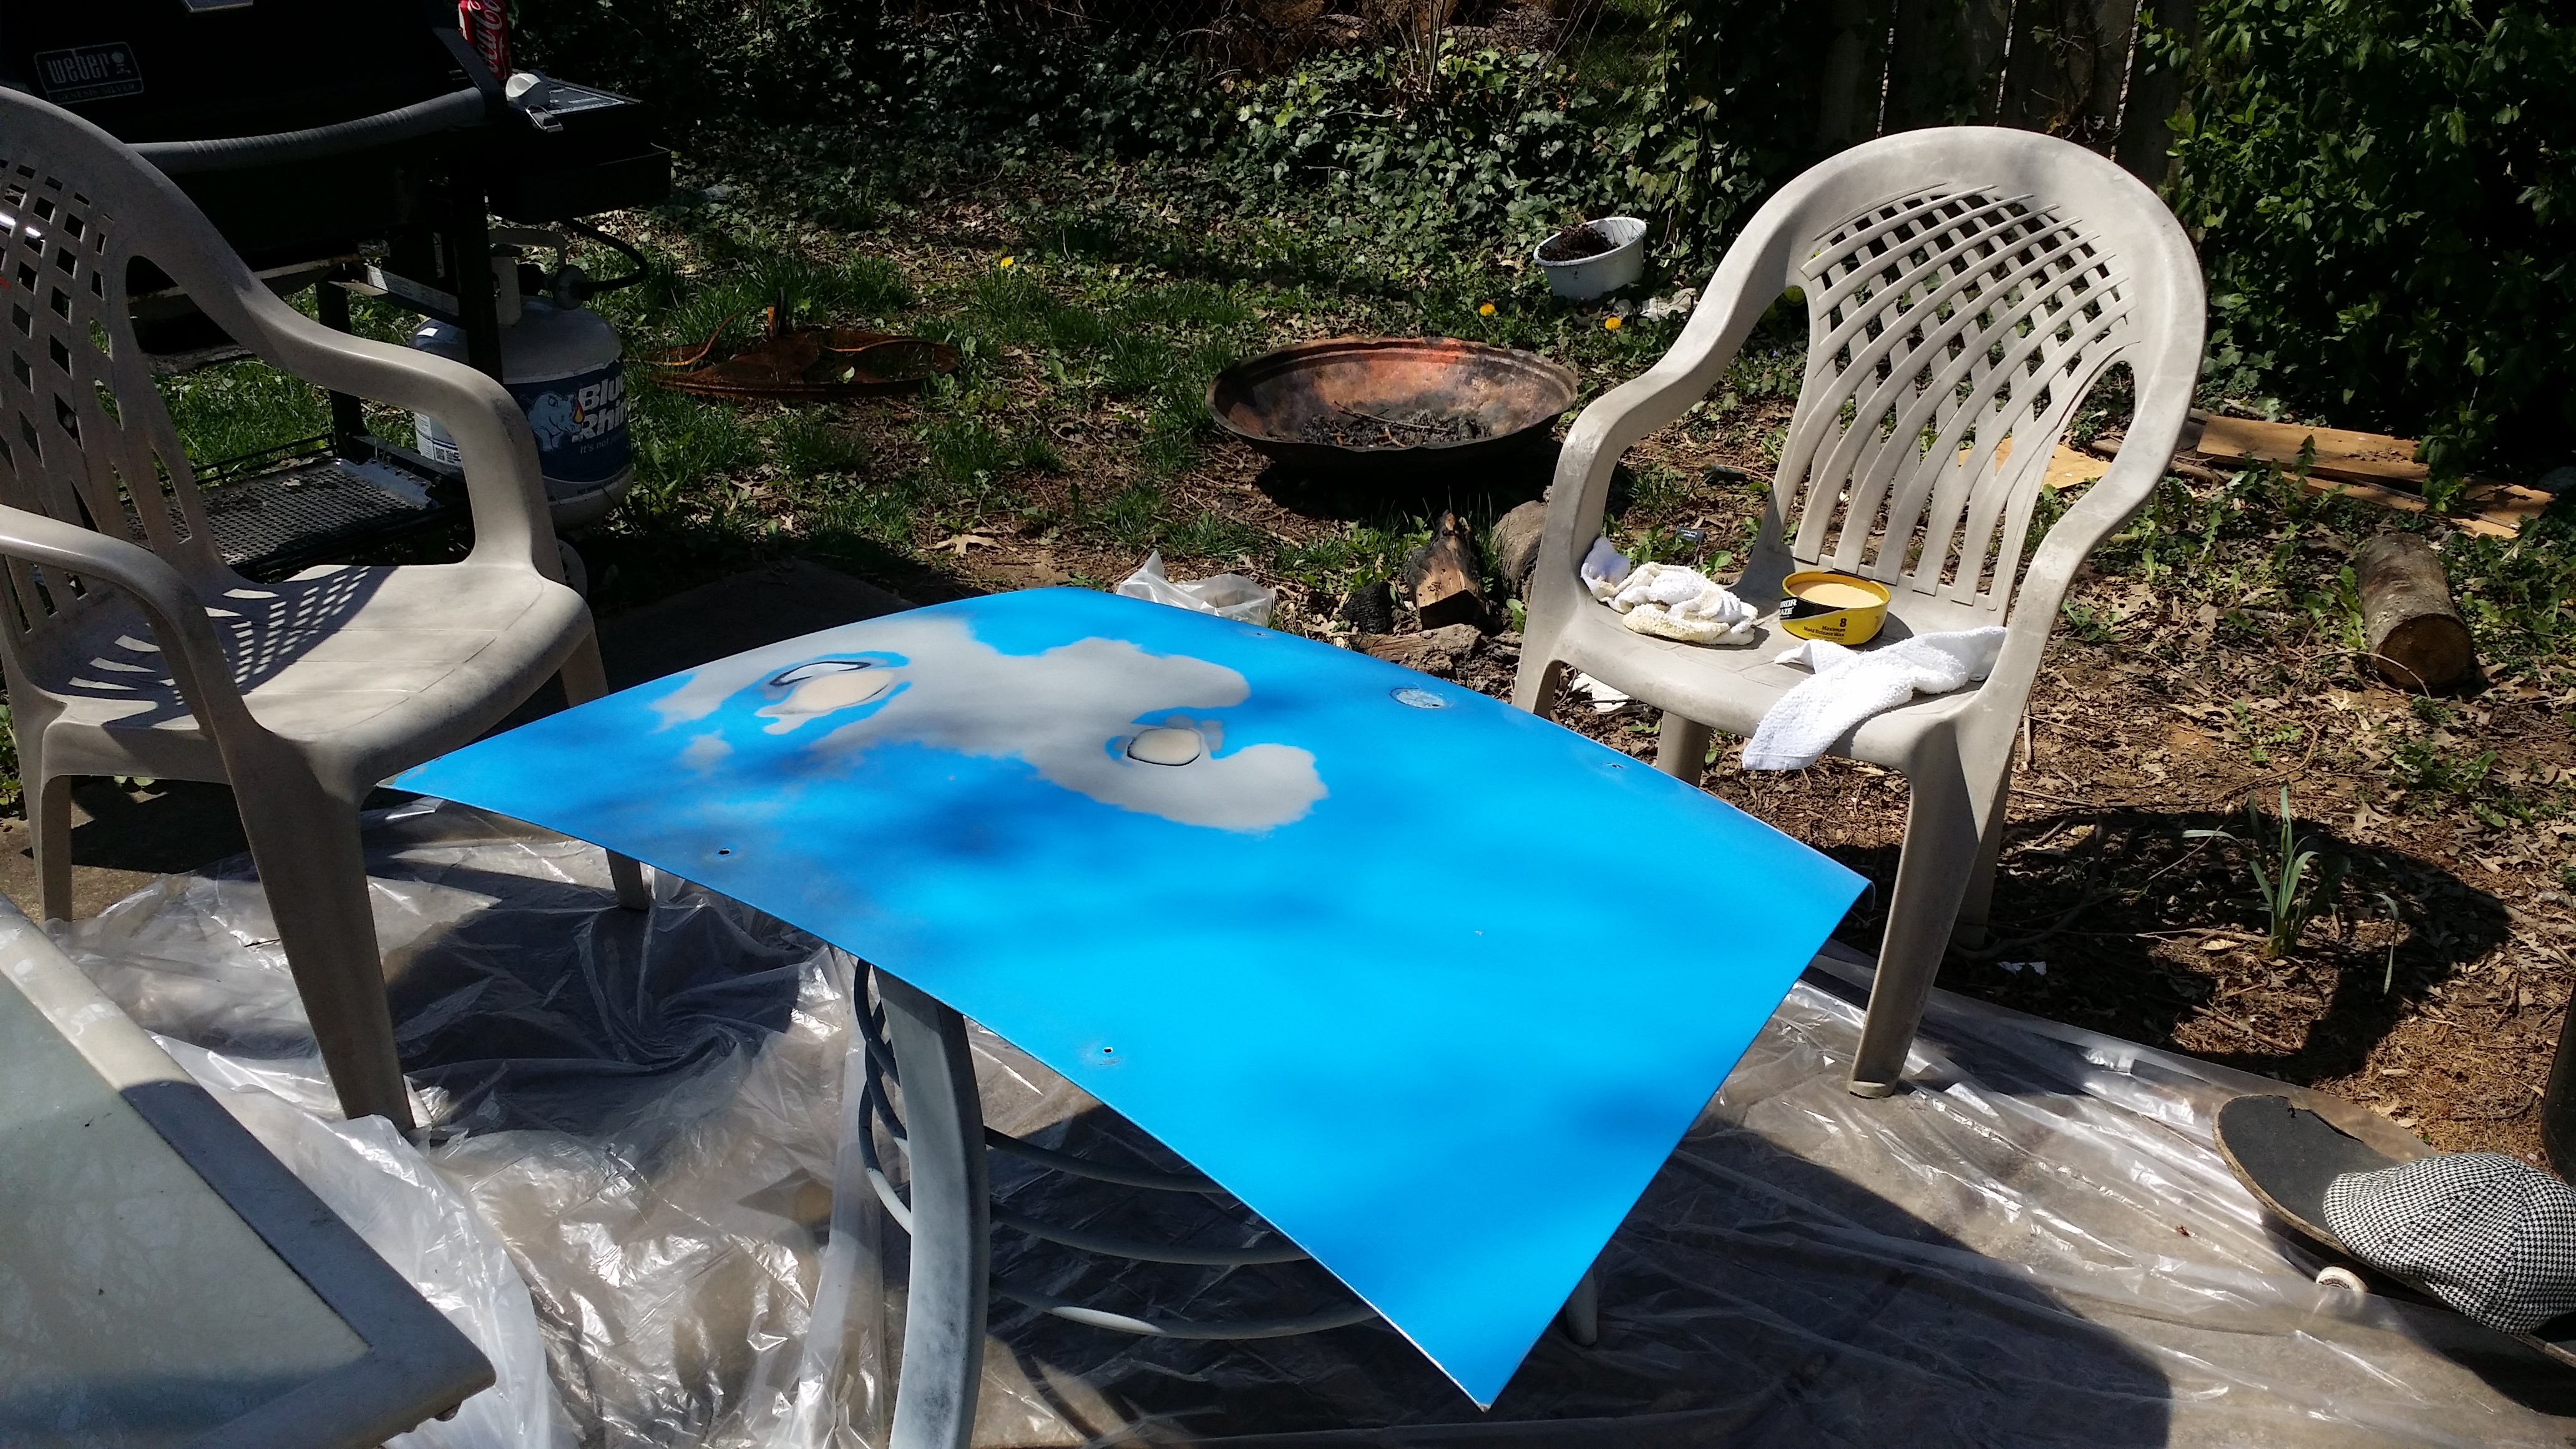
Trunk prepared for mold construction
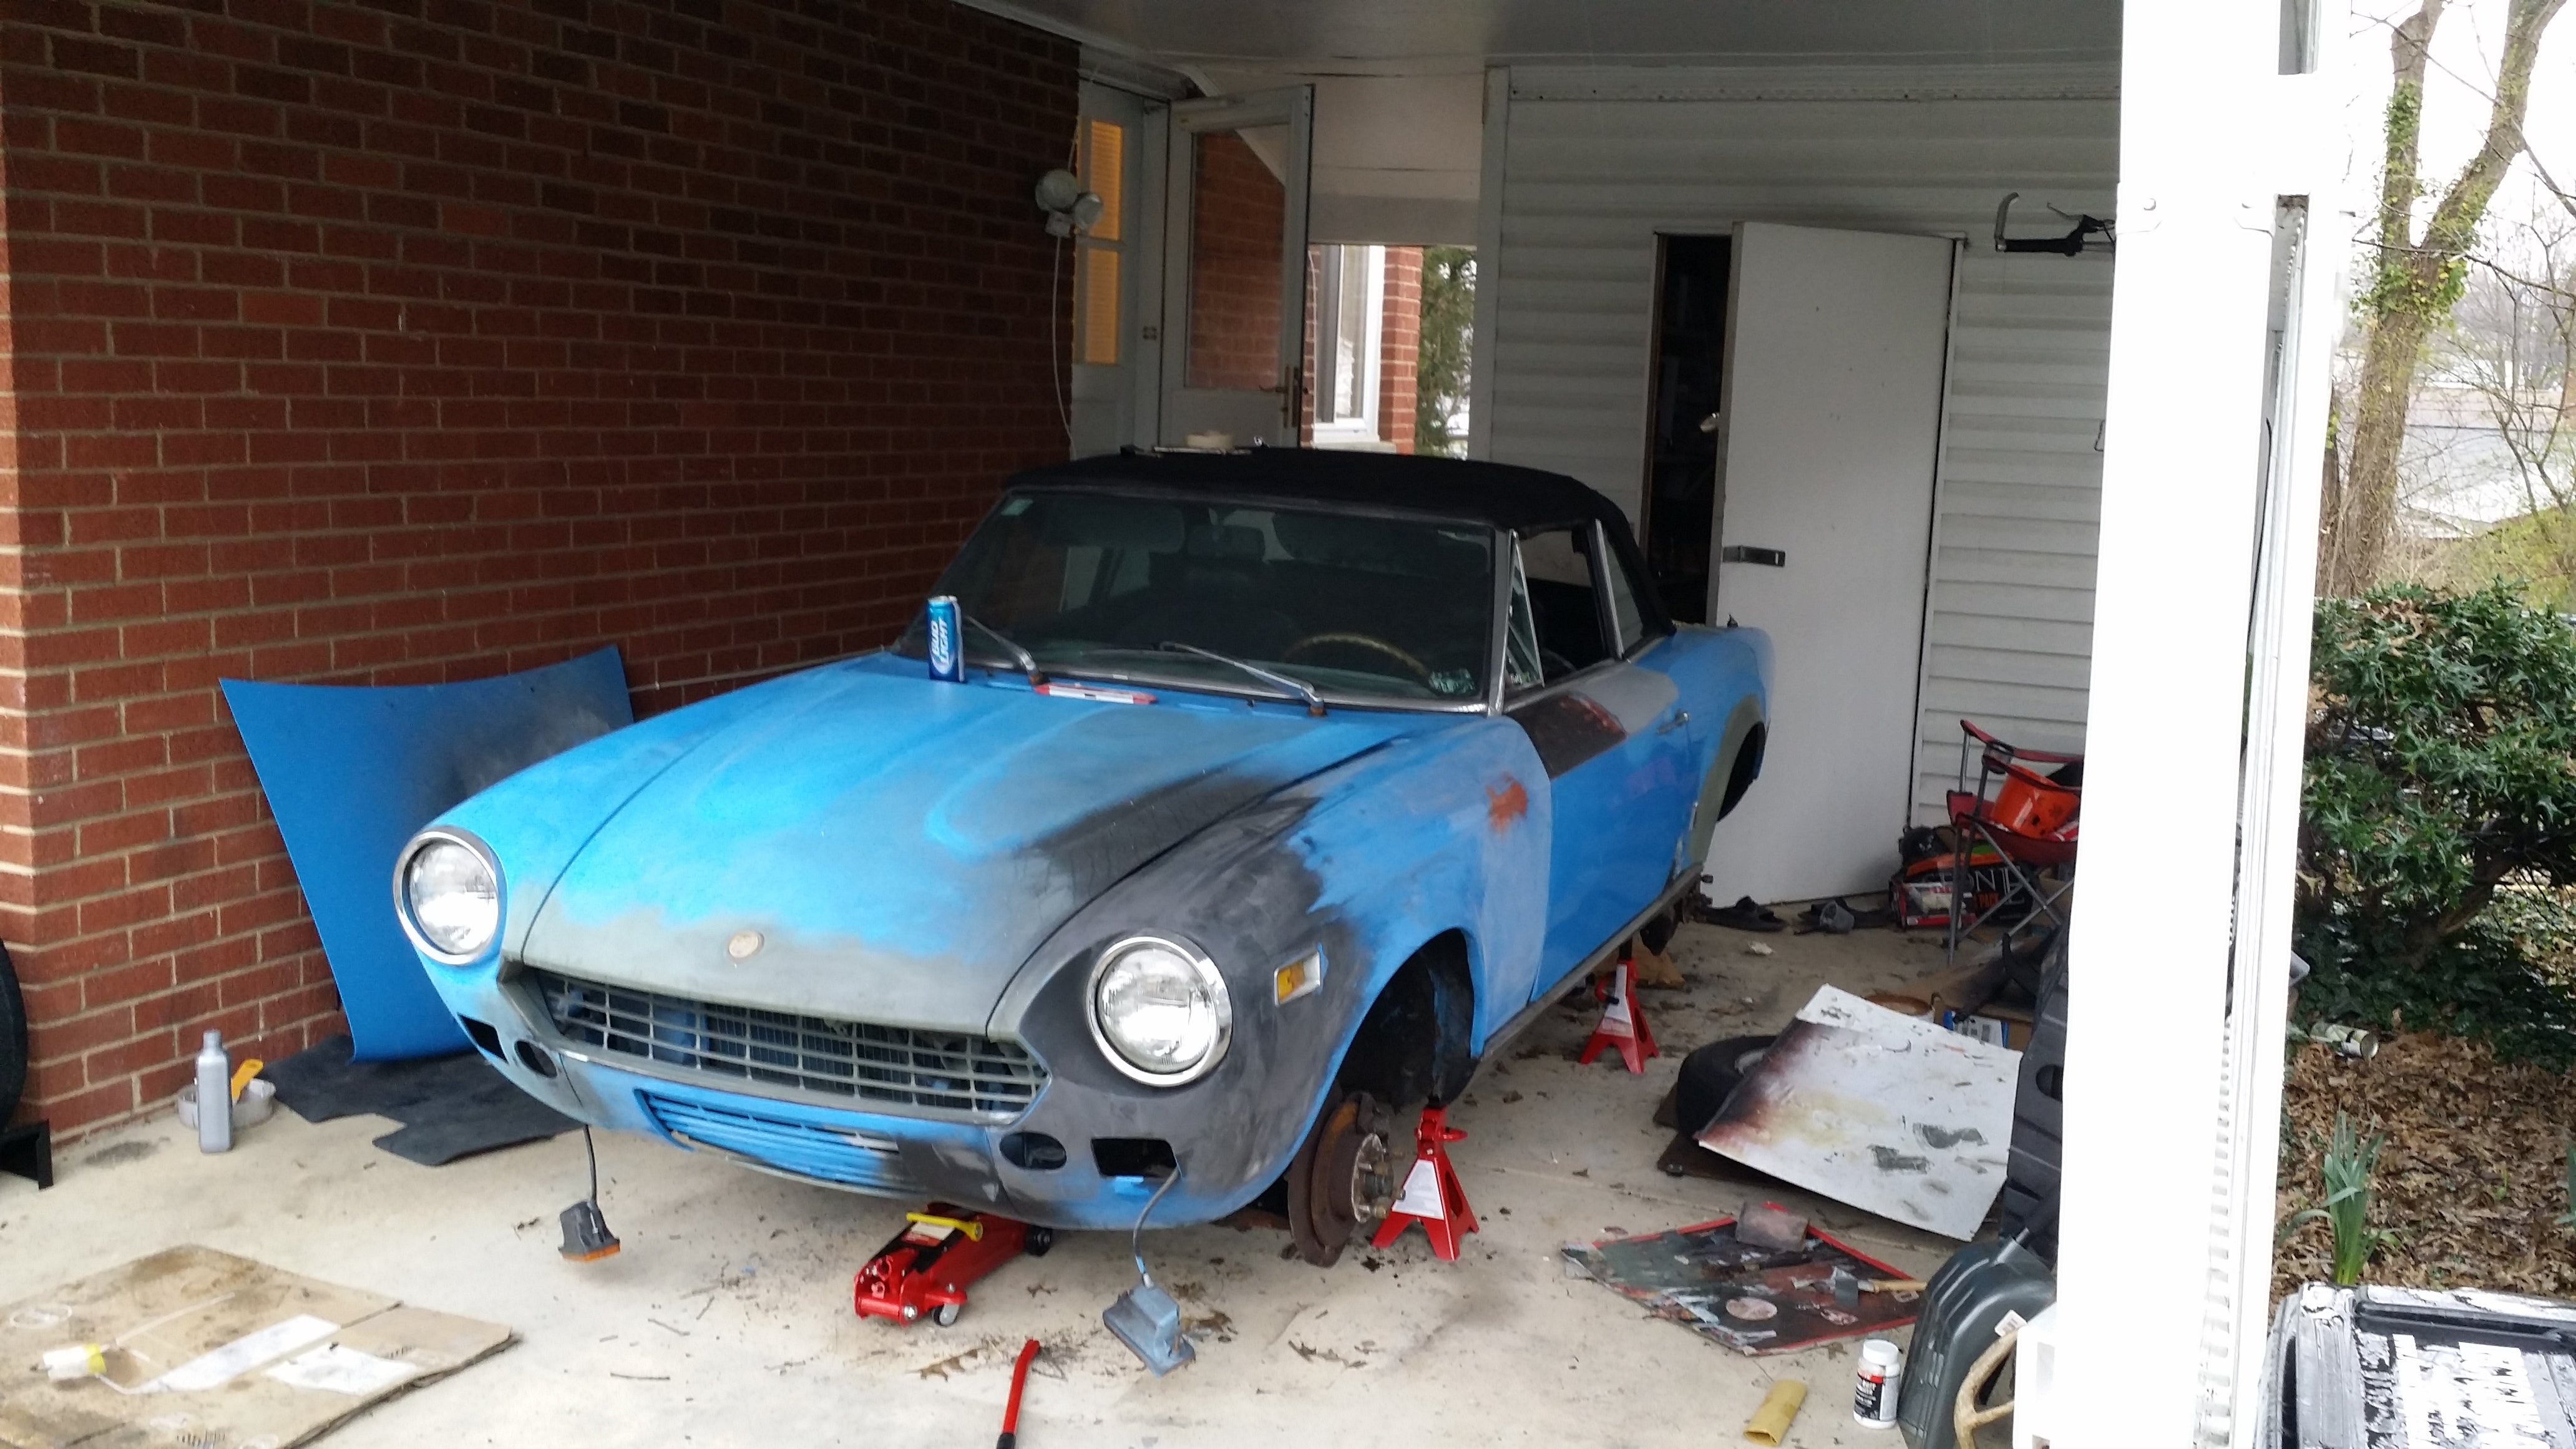
As you’ll note above, I decided to start with the trunk. No, the car did not come with the “electric cow” paintjob— that’s a combination of bondo, primer, and hours of sanding. Ok, Jalops/Oppos, I gave you a picture of a car part, now name that project car!
First thing I’ll draw your attention to— behind the trunk, you’ll note a can of wax. That’s a “mold separating” wax. I suppose this is as good a time as any to describe your materials requirements and process to make a fiberglass mold.
Materials: Original part (sheet metal & paint), Bondo (for resurfacing/imperfections), sandpaper (you’ll need to prep the whole part with 600 grit or higher), Fiberglass Matt or Weave (I used 4.2 oz), 2 part slow-cure epoxy, PVA separating agent (or equivalent), GLOVES (pierce resistant)
Process:
1) Surface Prep: Make the surface even and smooth via Bondo application, sanding, Wash with dish soap and water. Repeat until you can rub a wet cloth over the surface without picking up paint or bondo particles. The picture above shows the trunk after this preparation
2) Apply Wax: You need to apply several coats of wax, just as you would on a painted car. Wipe on with circular movements, skim a towel across the top to level the wax, and use circular motions to work the wax into all crevases and pits. The part should be perfectly smooth at the conclusion of this step, just as if you were running your finger along a freshly painted, factory original part. I used 6 layers of wax.
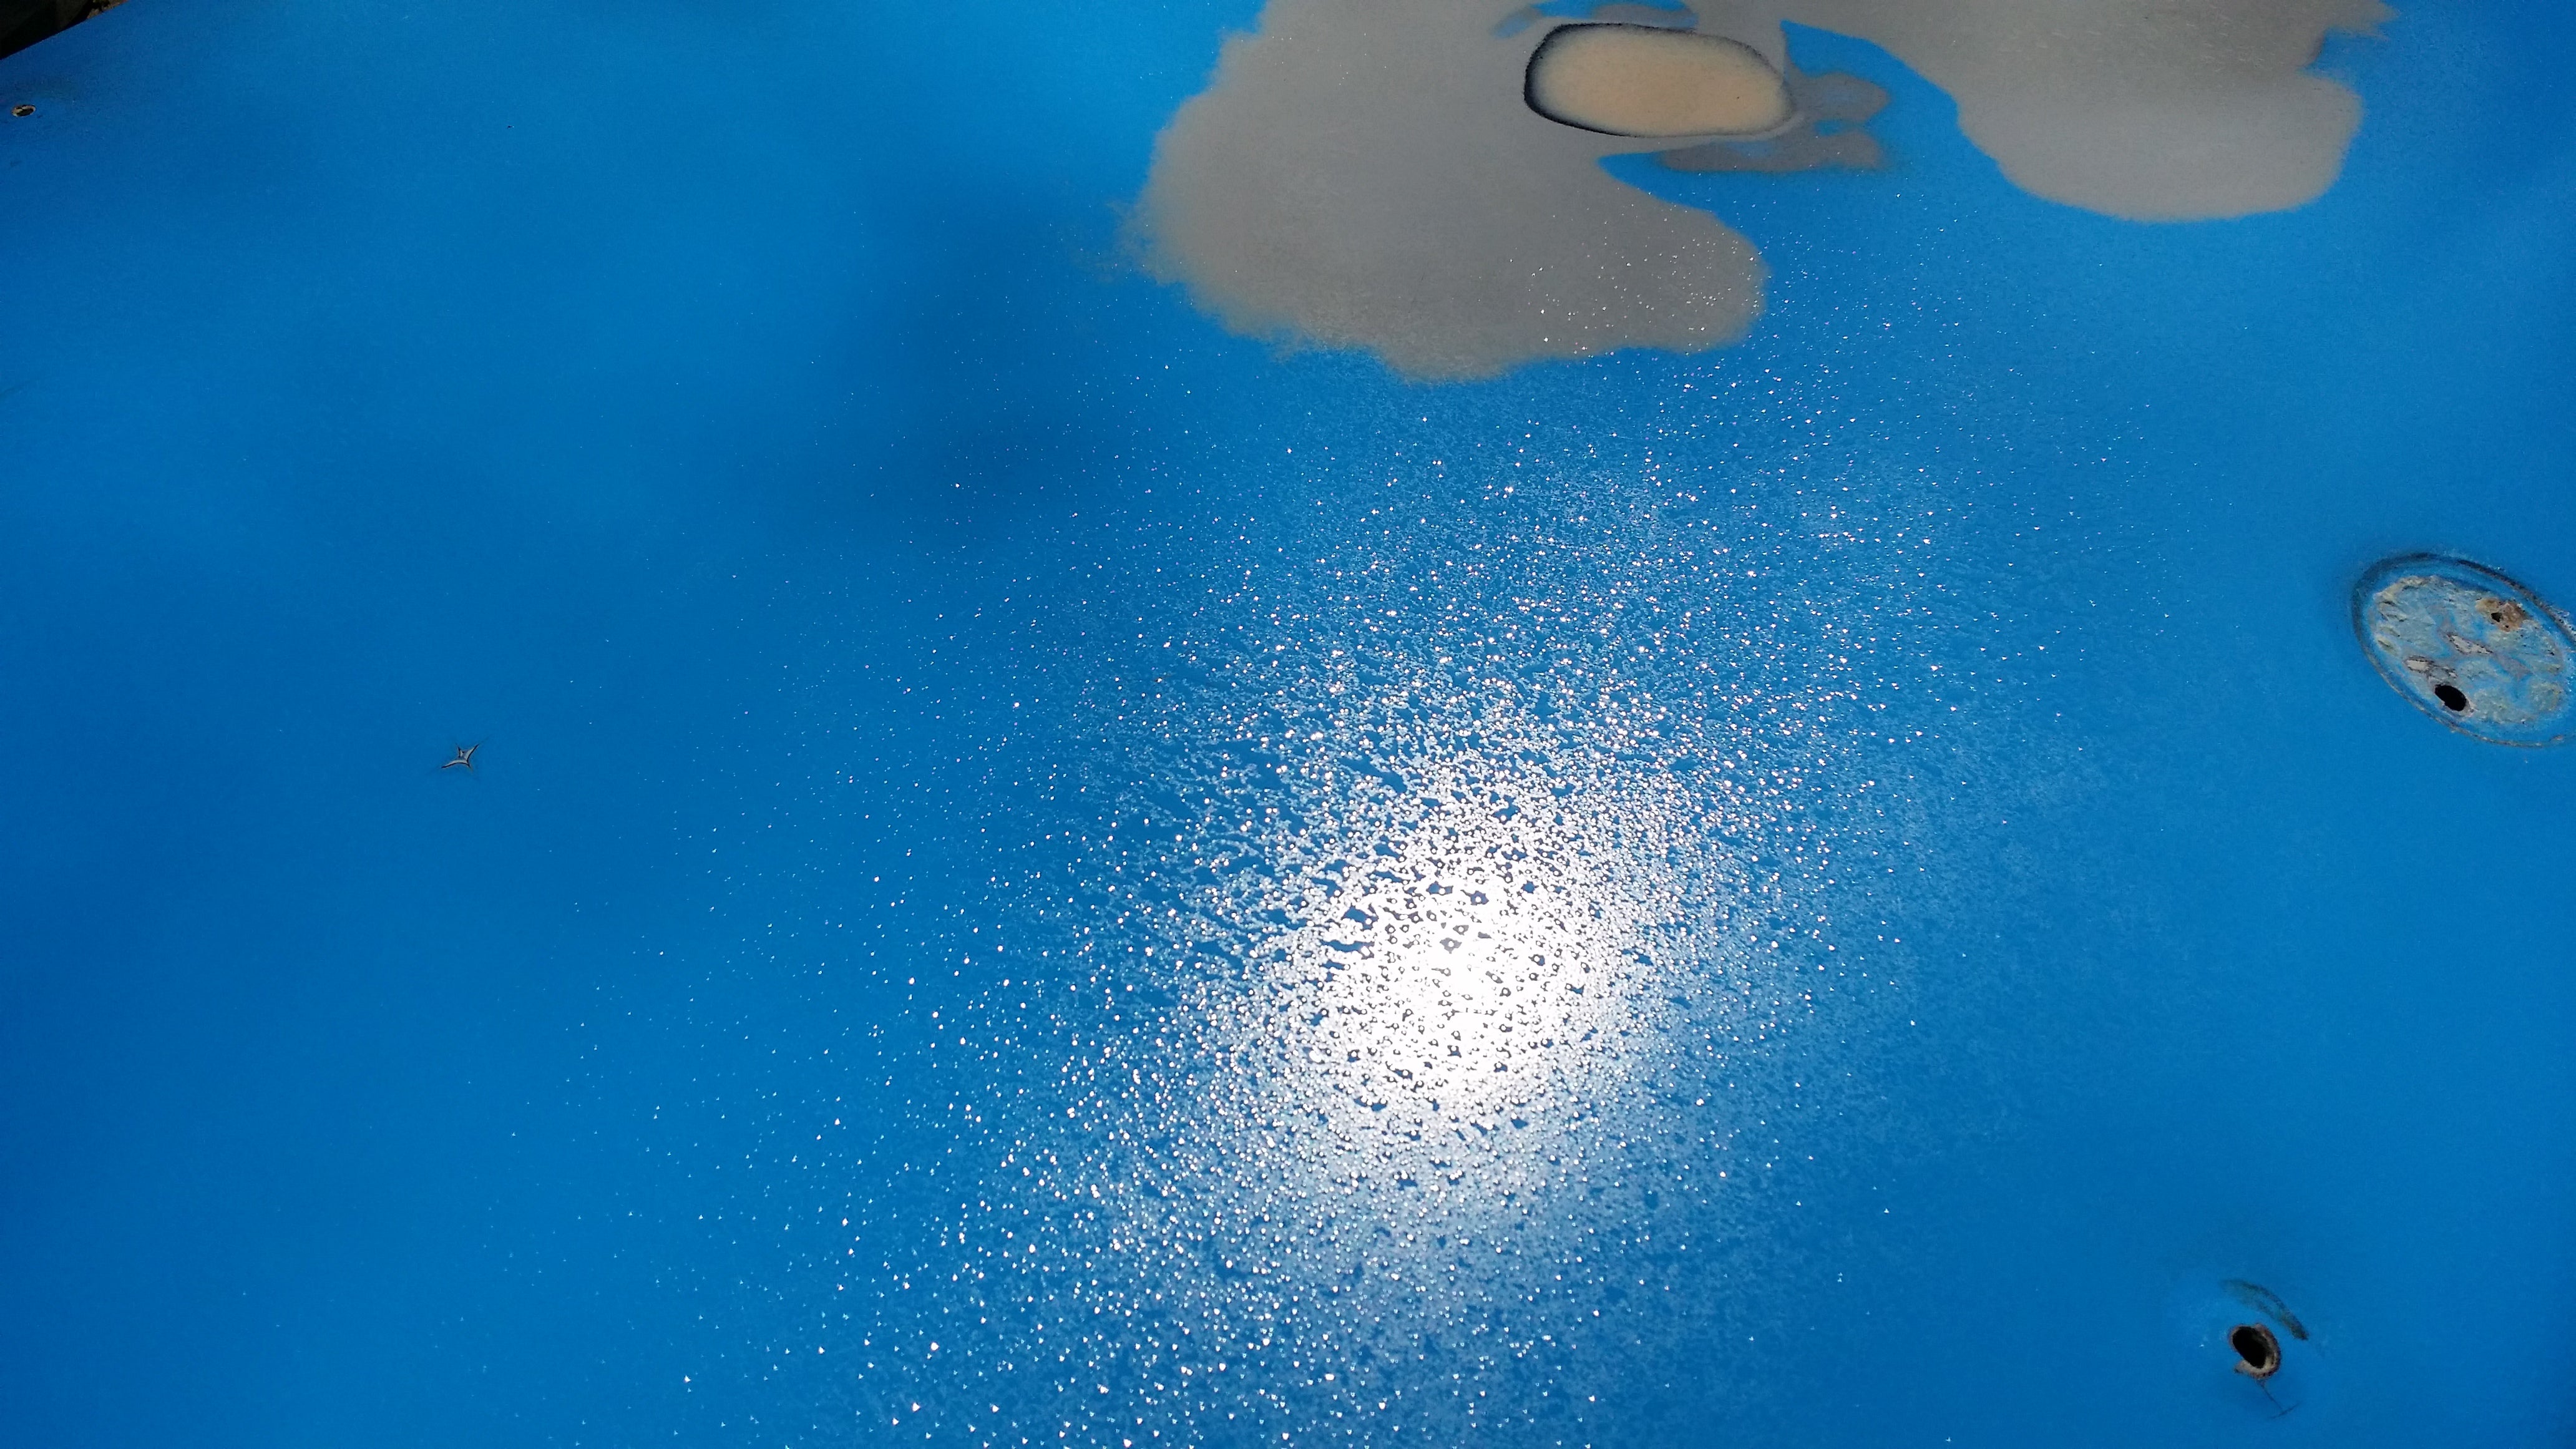
3) Apply PVA: PVA is a separating agenty, that forms a thin film. Very useful for the creation and first use of a mold, when the wax layer is at its most porous. I decided to substitute high-hold hairspray for PVA, as I thought it would be easier to apply without running. In retrospect— stick with the PVA! Below, you can see the hairspray applied to the surface— it dried relatively flat but did glop together far more than I would have liked.
4) Now we will begin layering the part with fiberglass. Cut several fiberglass sheets to a size that allows at least 2-4 inches to extend past the part. Set these aside in a manner that will make them easy to pick up with gloved hands.
5) Mix the epoxy by stirring for at least 30 seconds, and apply it directly on the top of the fiberglass weave. As you add epoxy, you may see “bubbles” or dry looking spots form on the fiberglass. Since we’re making a mold, and the output will be based on the surface quality of the mold, it’s essential to work out all these bubbles on the first layer. The entire sheet should look wet, without any pools of liquid forming on top of the fiberglass.Below, you can see the trunk with the wet cloth draped over top of it. Note how the weave becomes transparent.
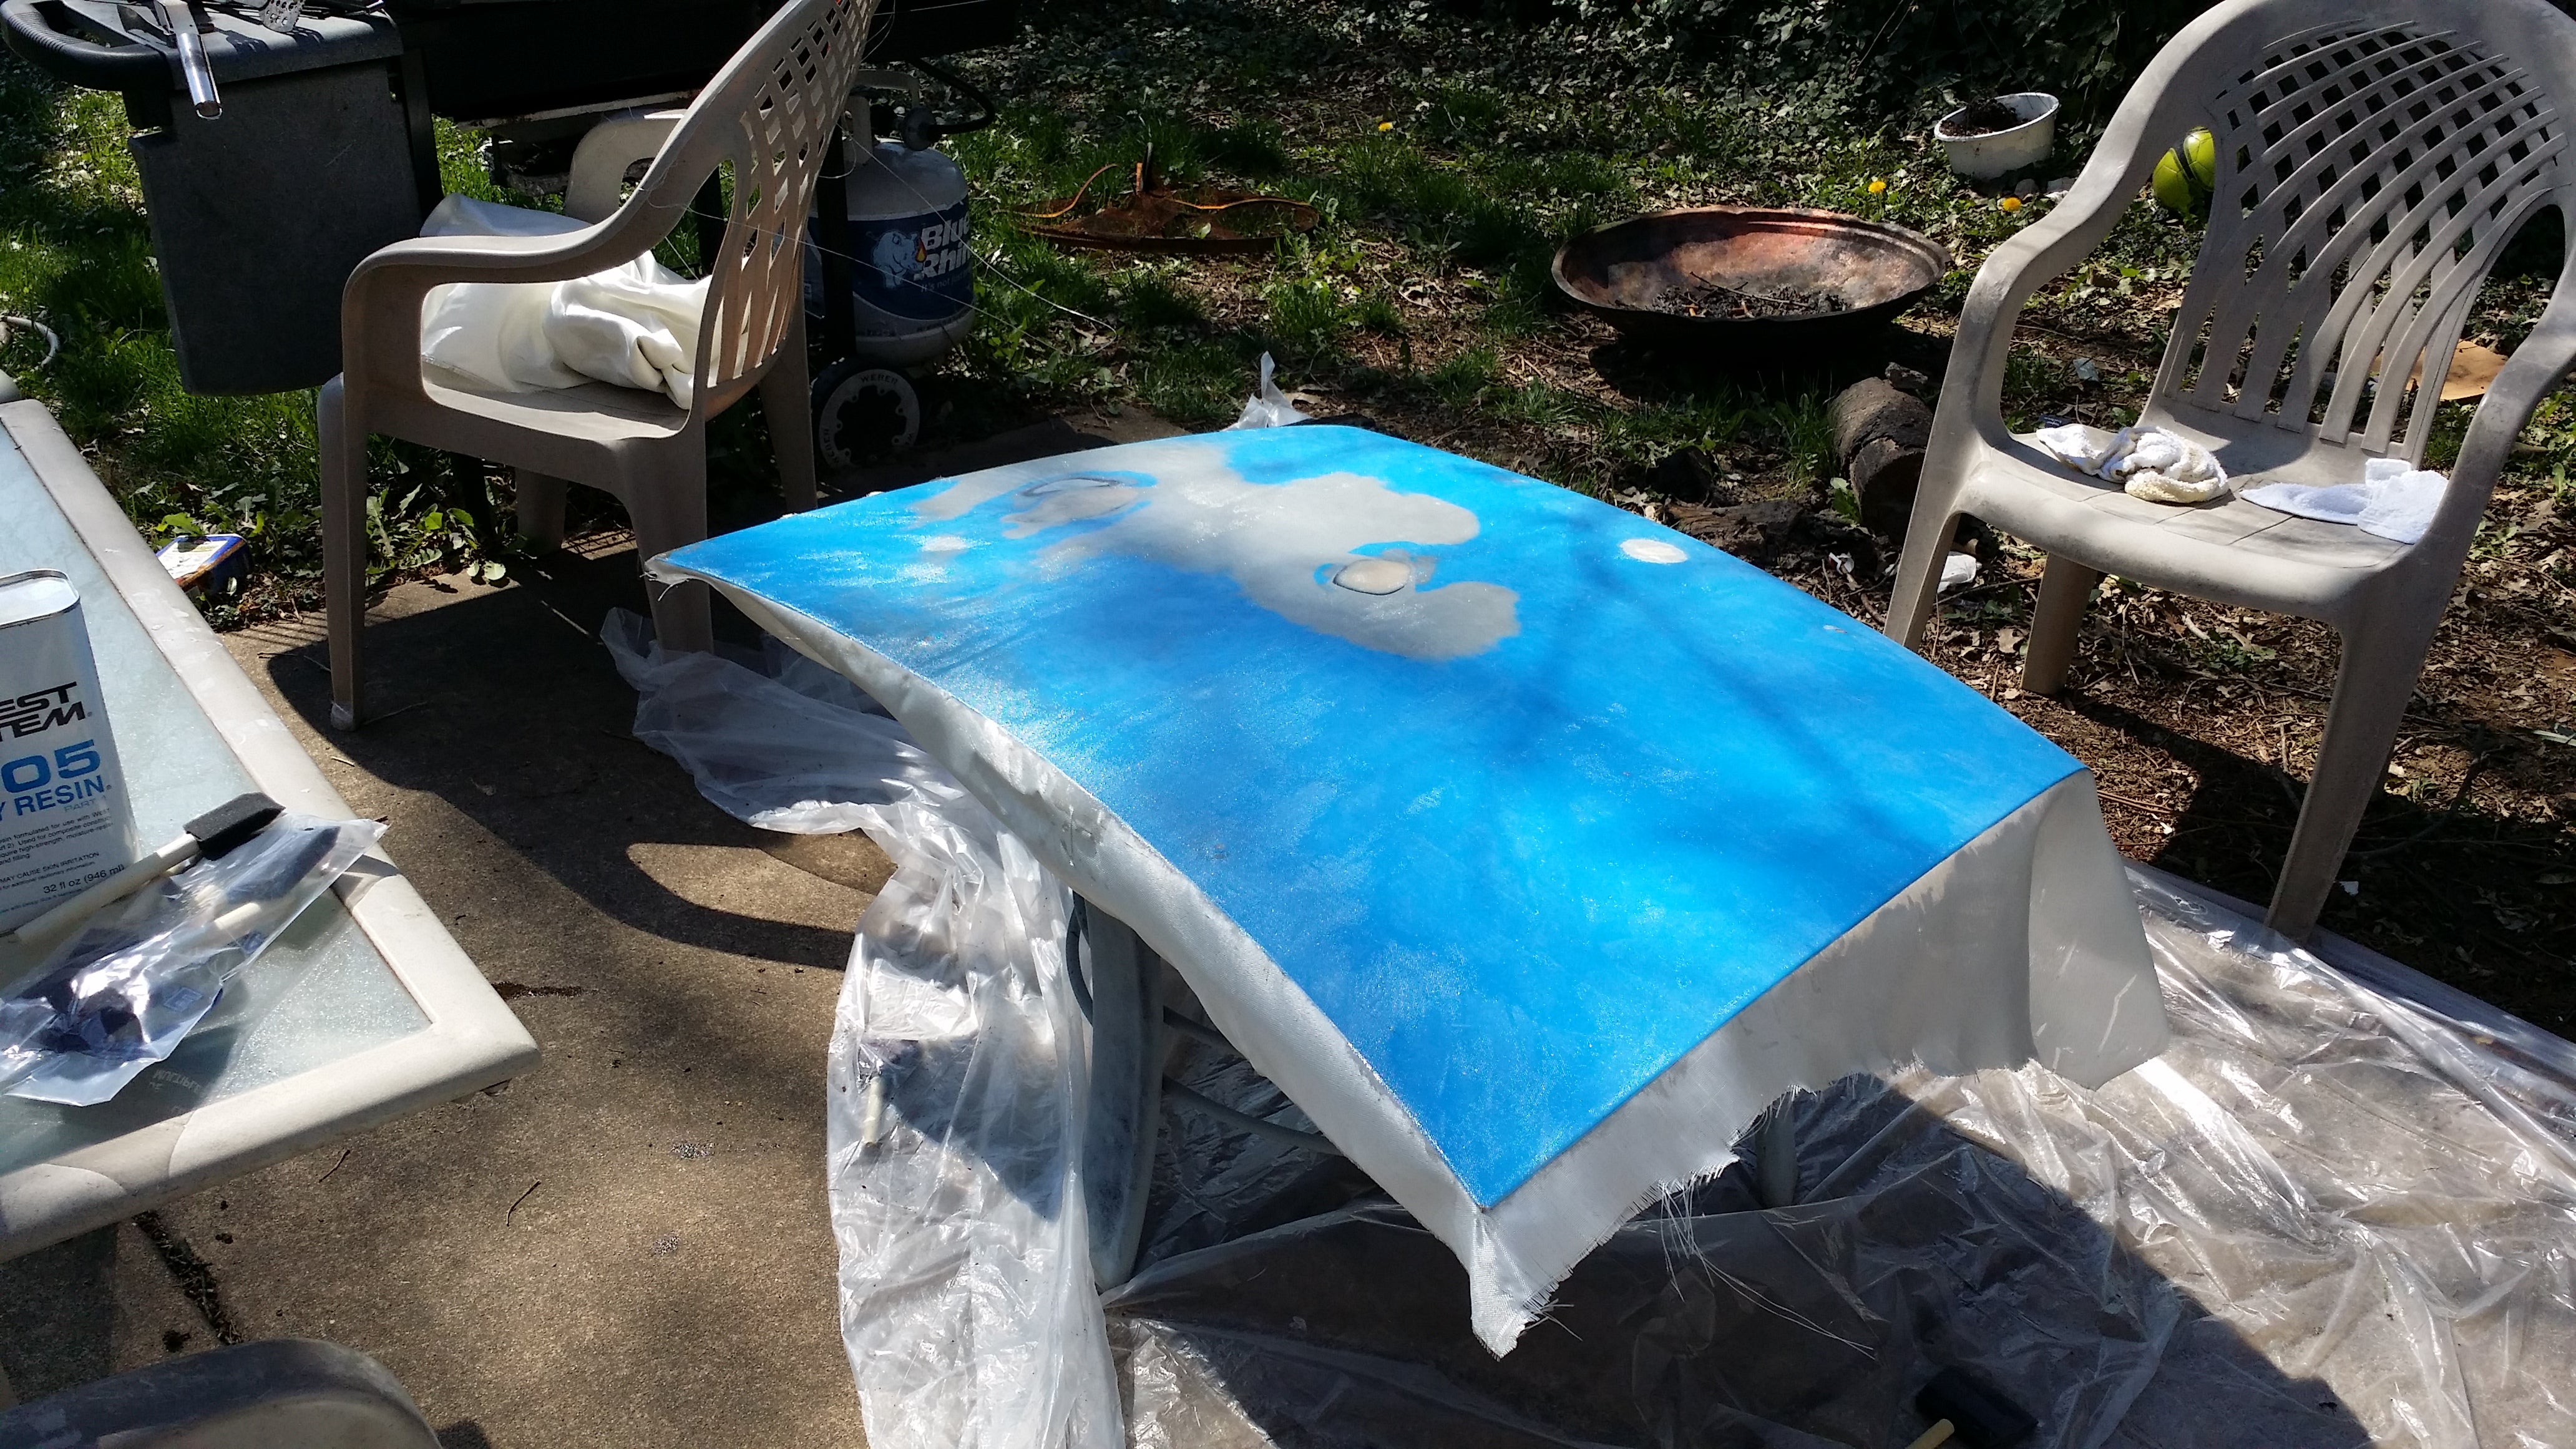
First Layer Applied
6) Use an applicator sponge to remove as much of the excess epoxy as possible. Grab the next fiberglass weave sheet and layer it over top of the already applied sheet. Follow the same process, working any bubbles out from the middle towards the edges.
7) Repeat this process for each layer. Subsequent layers require less dedication to eliminating bubbles, as the mold surface has already been created by the first layer. I used three layers, and worked out 100% of the bubbles on the first, 95+% on the second, and about 80% on the third.
8) Add structural reinforcements to give a 3-dimensional structure to the mold. As you can see in this image, I used some pieces of flexible foam, and layered them with another layer of fiberglass.
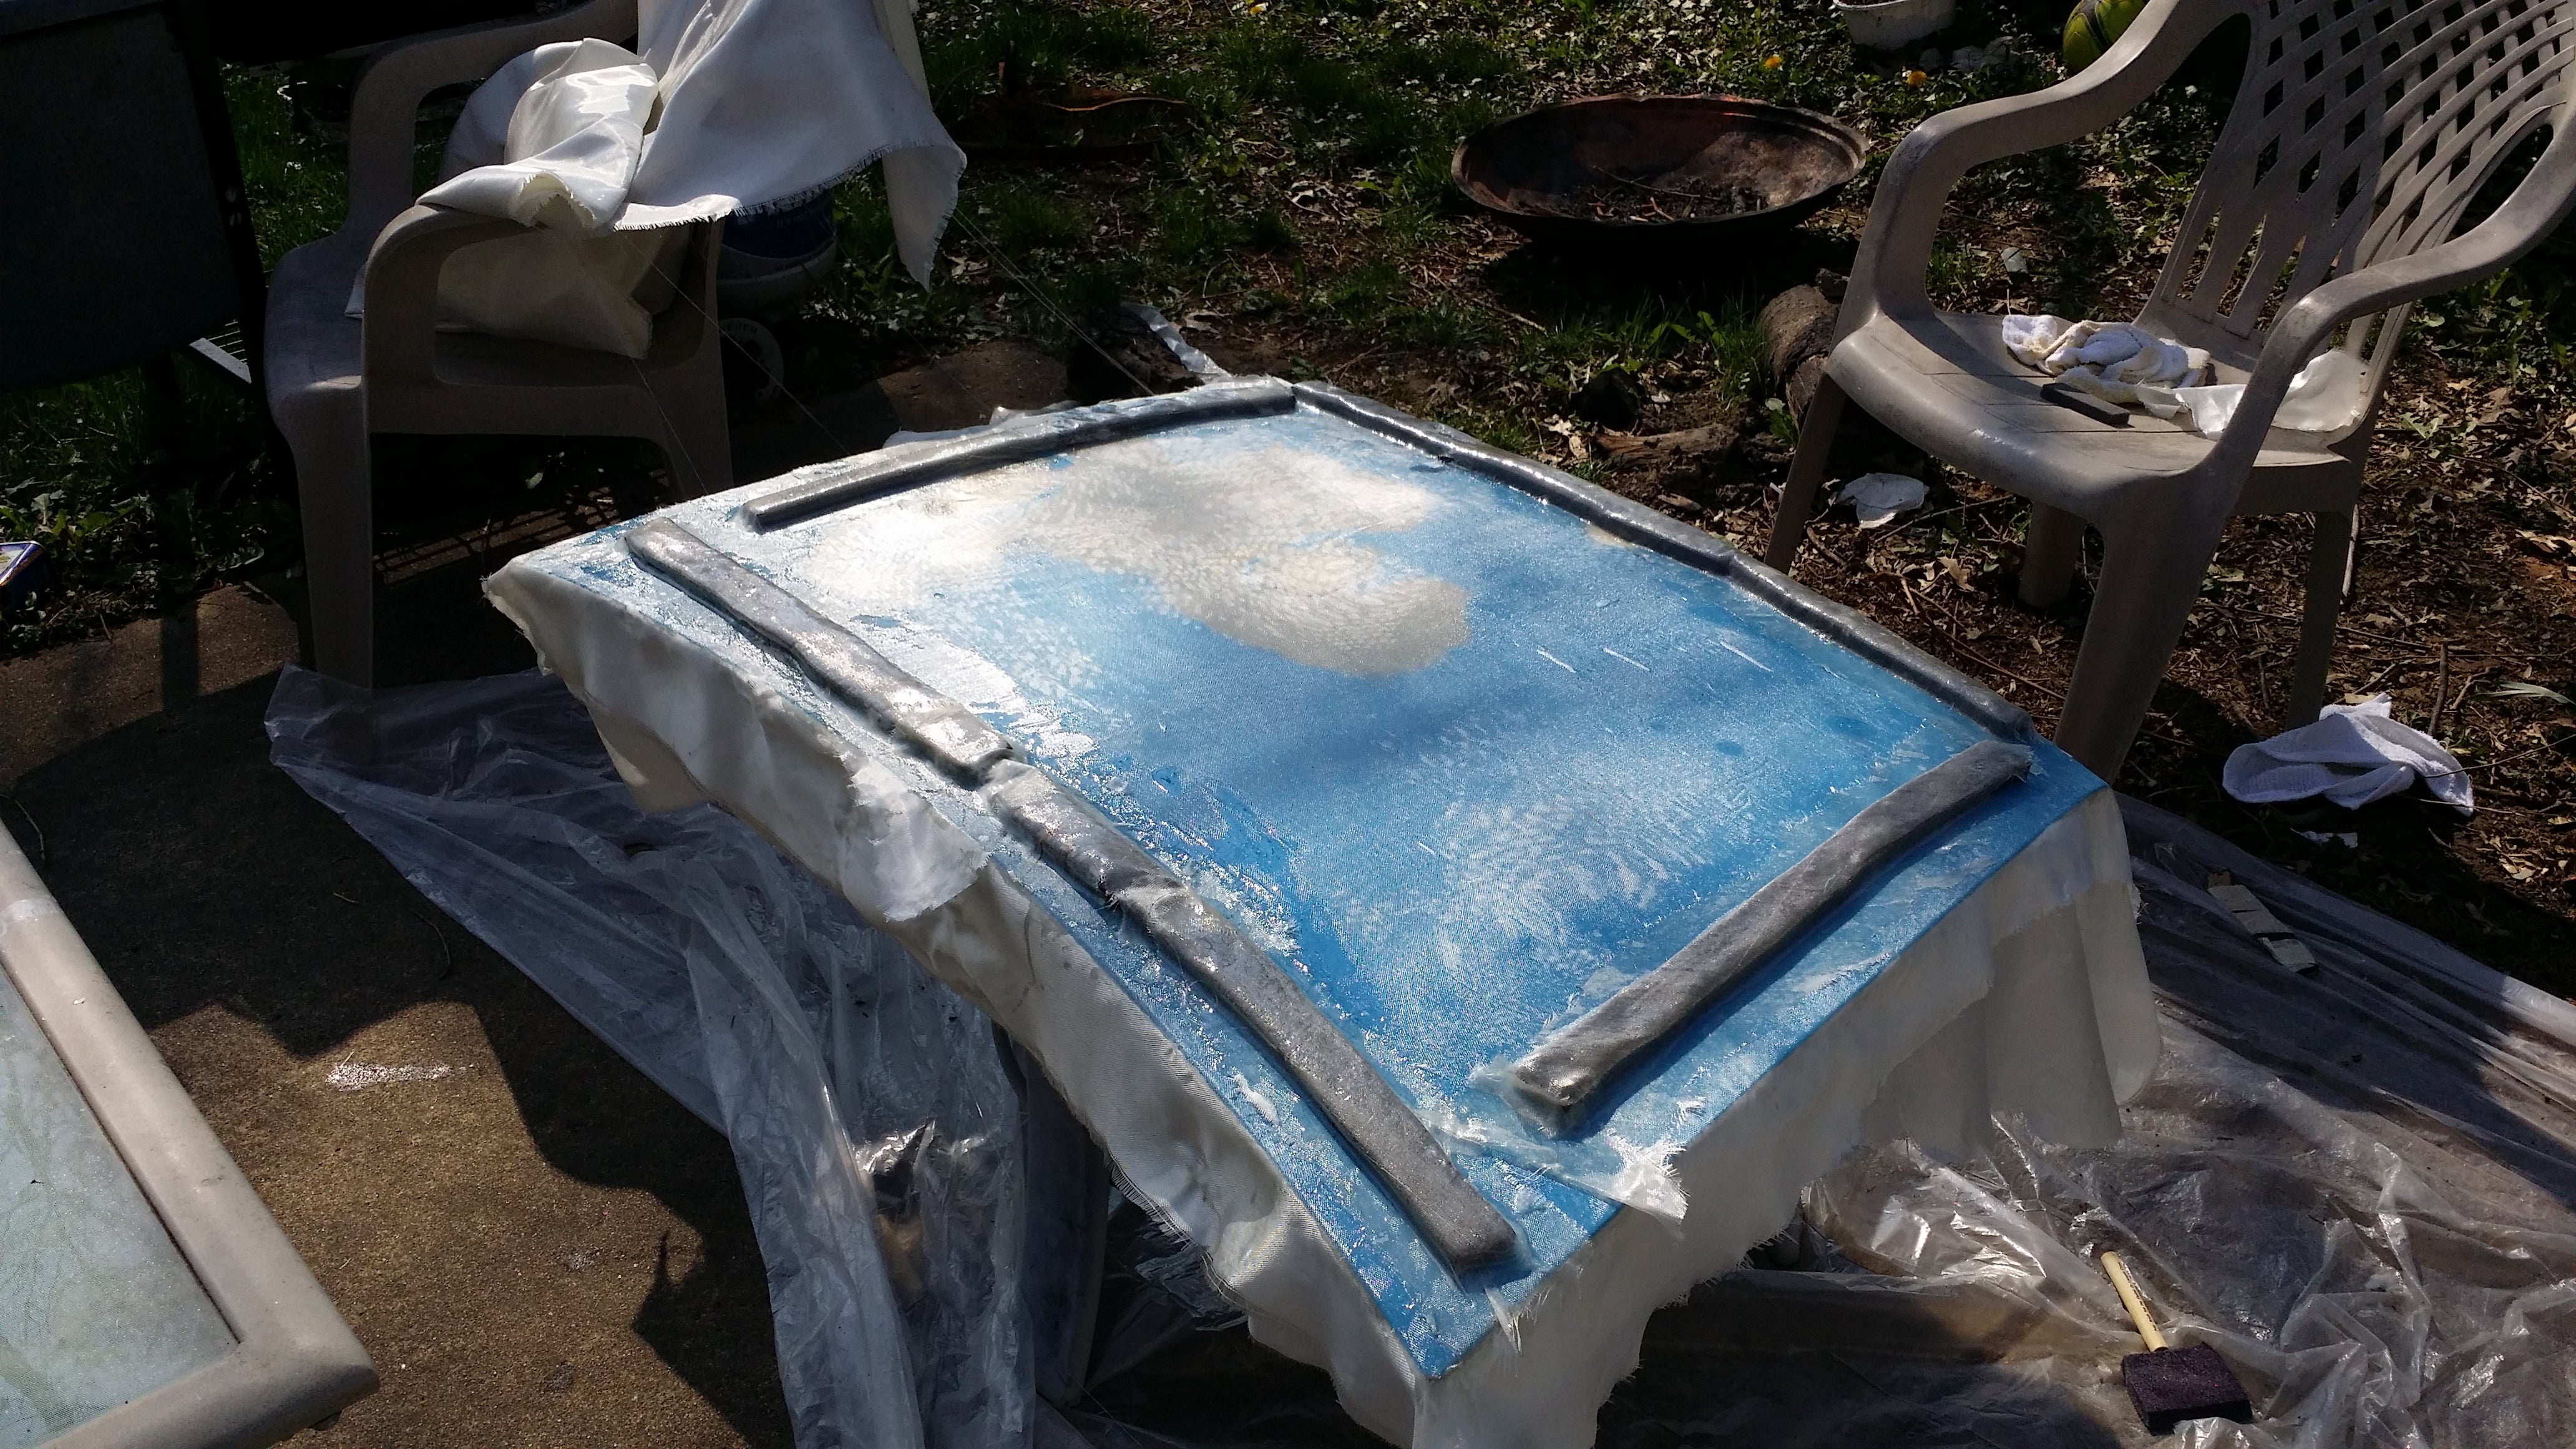
No, the black is not carbon fiber....
9) Wait 24 hours for it to cure.
10) Cut around the edges using an x-acto knife. As I cut around the edges with this particular mold, I could see bubbles start to form as the mold easily separated from the surface of the trunk lid.
11) Separate the mold from the part. You’re done!
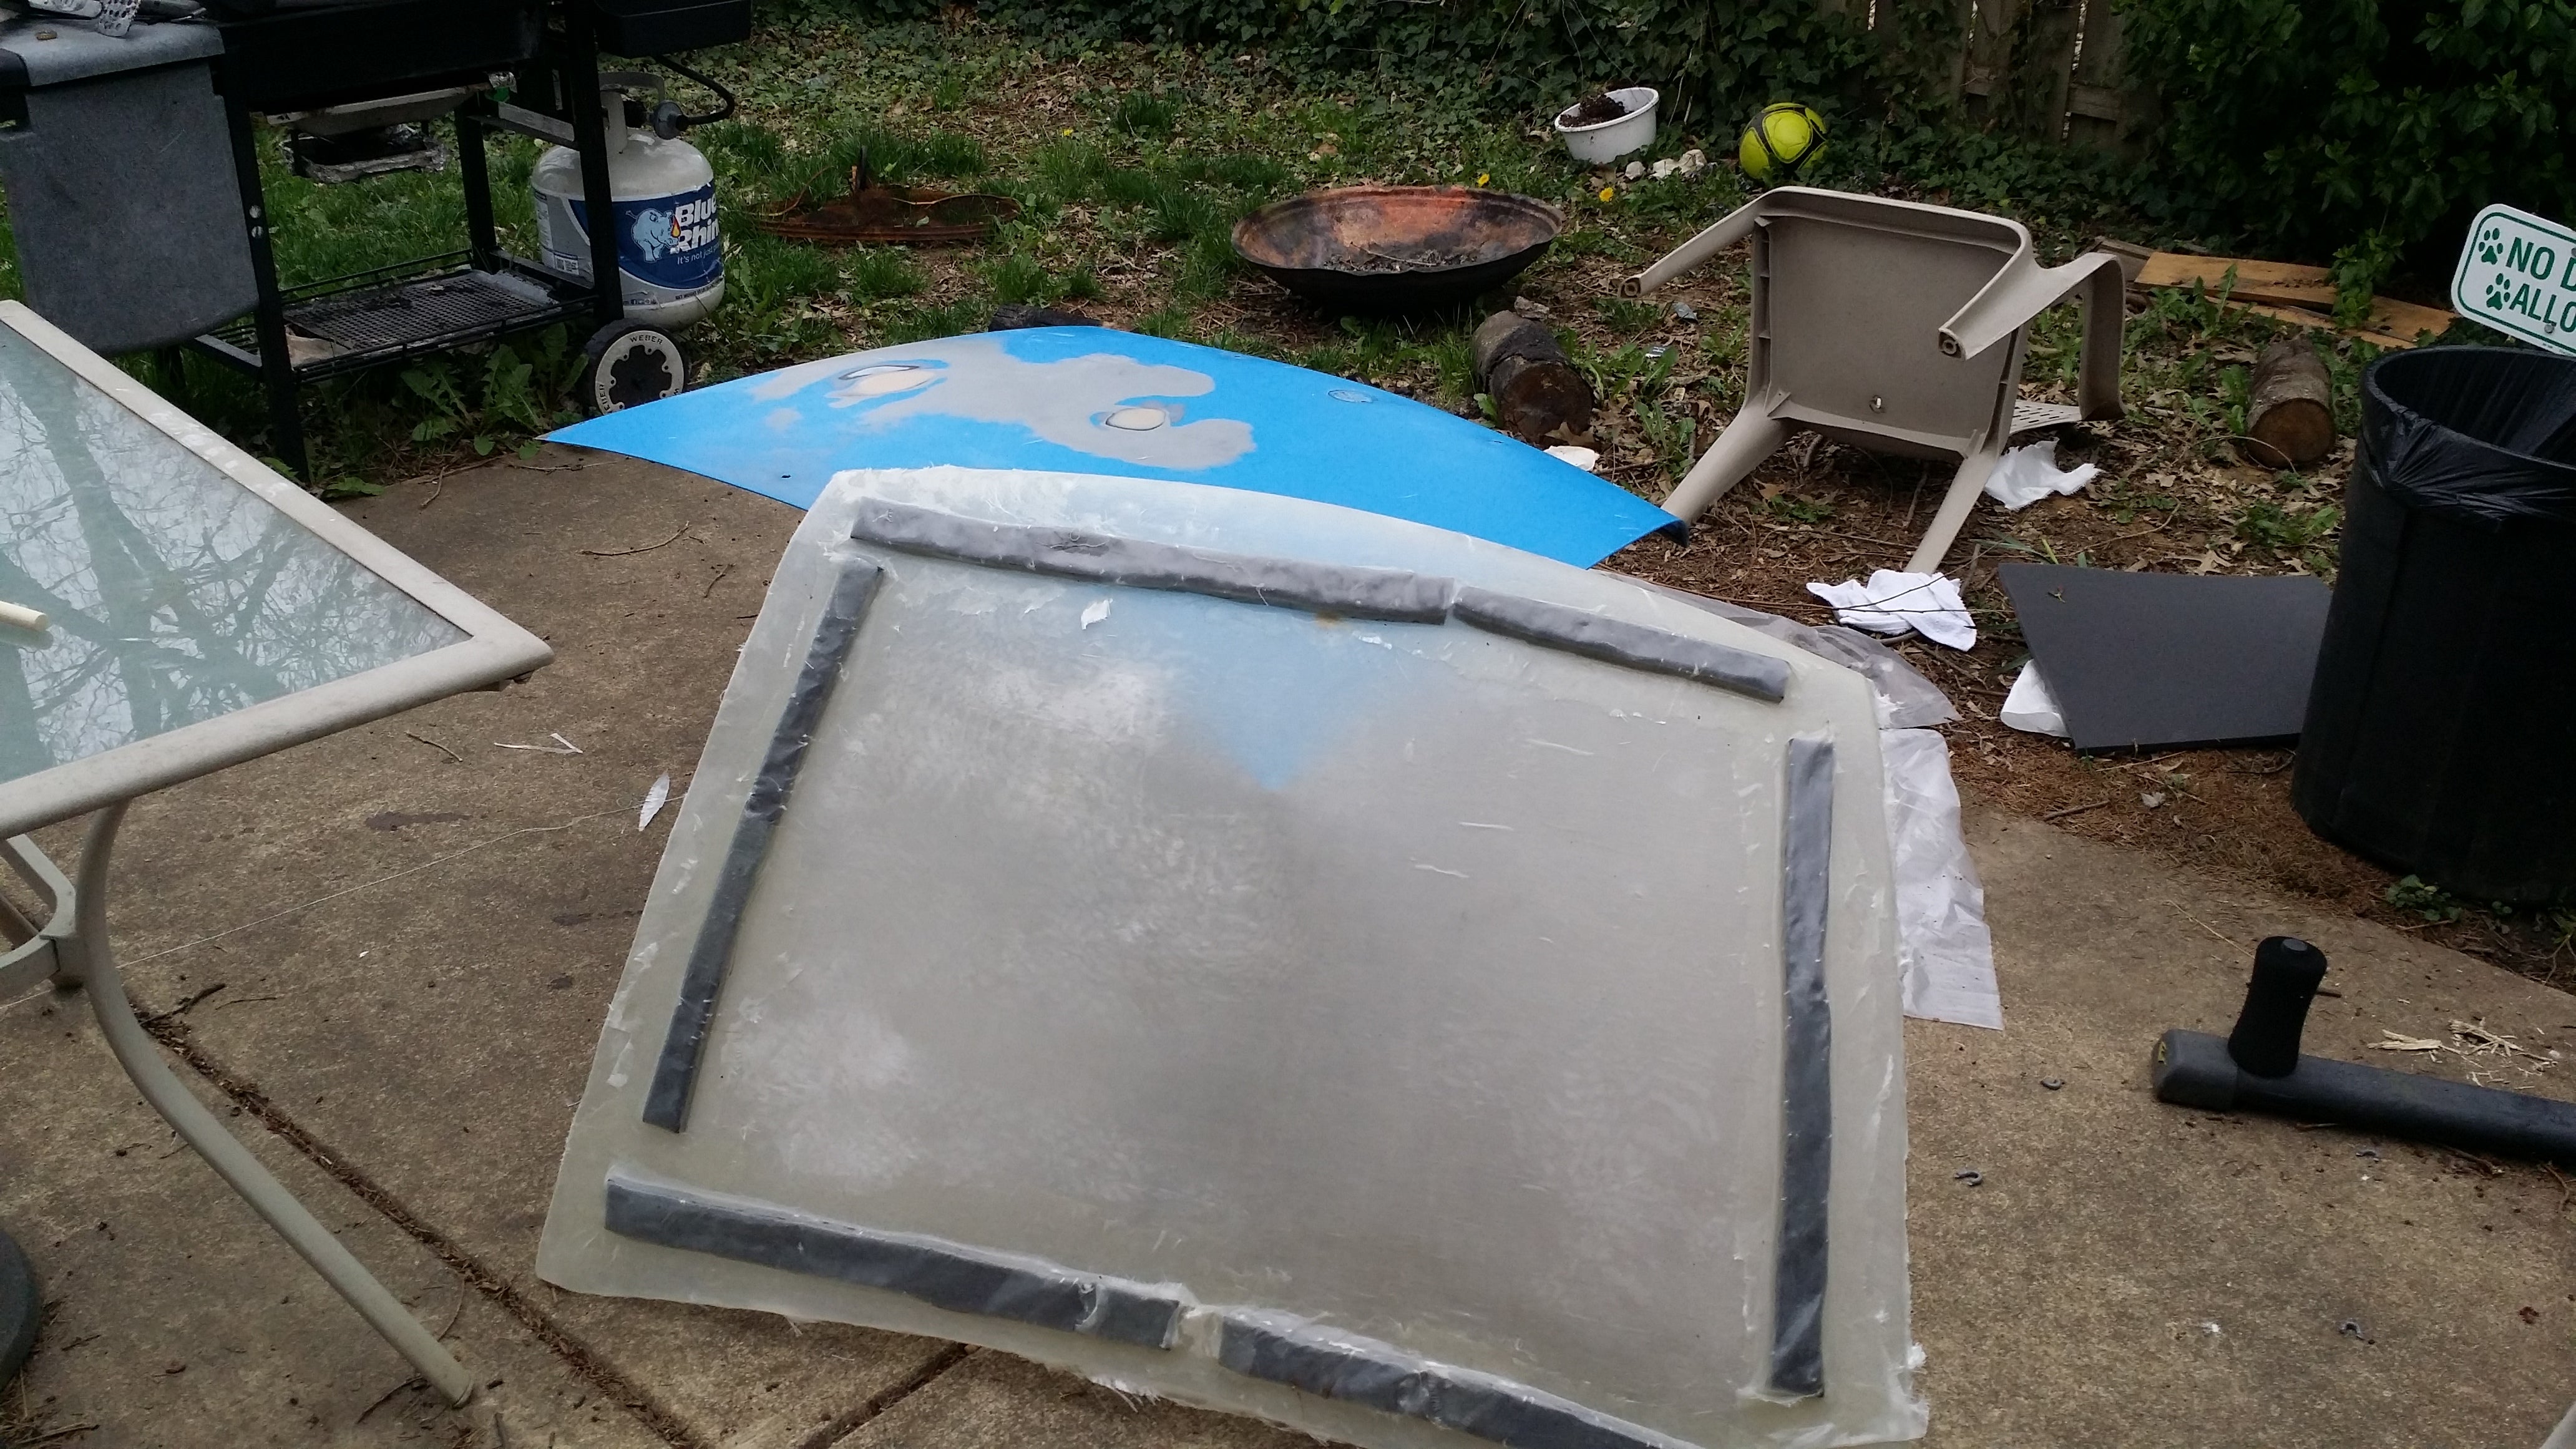
So how did it turn out? Pretty much perfectly, very smooth surface, some slight indention where there were holes for a previous luggage rack. I still need to add a little more rigid-reinforcement to the mold, it’s got a little more flexibility than I’d like.
Now that I’m done with the trunk mold, it’s time to move on to the hood and doors. I’ll be making the replacement hood, trunk and doors from a Black/Blue Carbon/Kevlar weave that should match the factory paint color pretty well. I expect much lamentation and cries of sacrilege, because as far as I can tell nobody has made carbon even so much as a CF hood for the car I’m fabricating these for...
Feel free to ask any questions— or if you have a better approach, would love to hear it!
Edit:
I took the time last week to finish reinforcing the mold using some paint stirring sticks and trim the mold. It’s plenty rigid now, and ready to use.
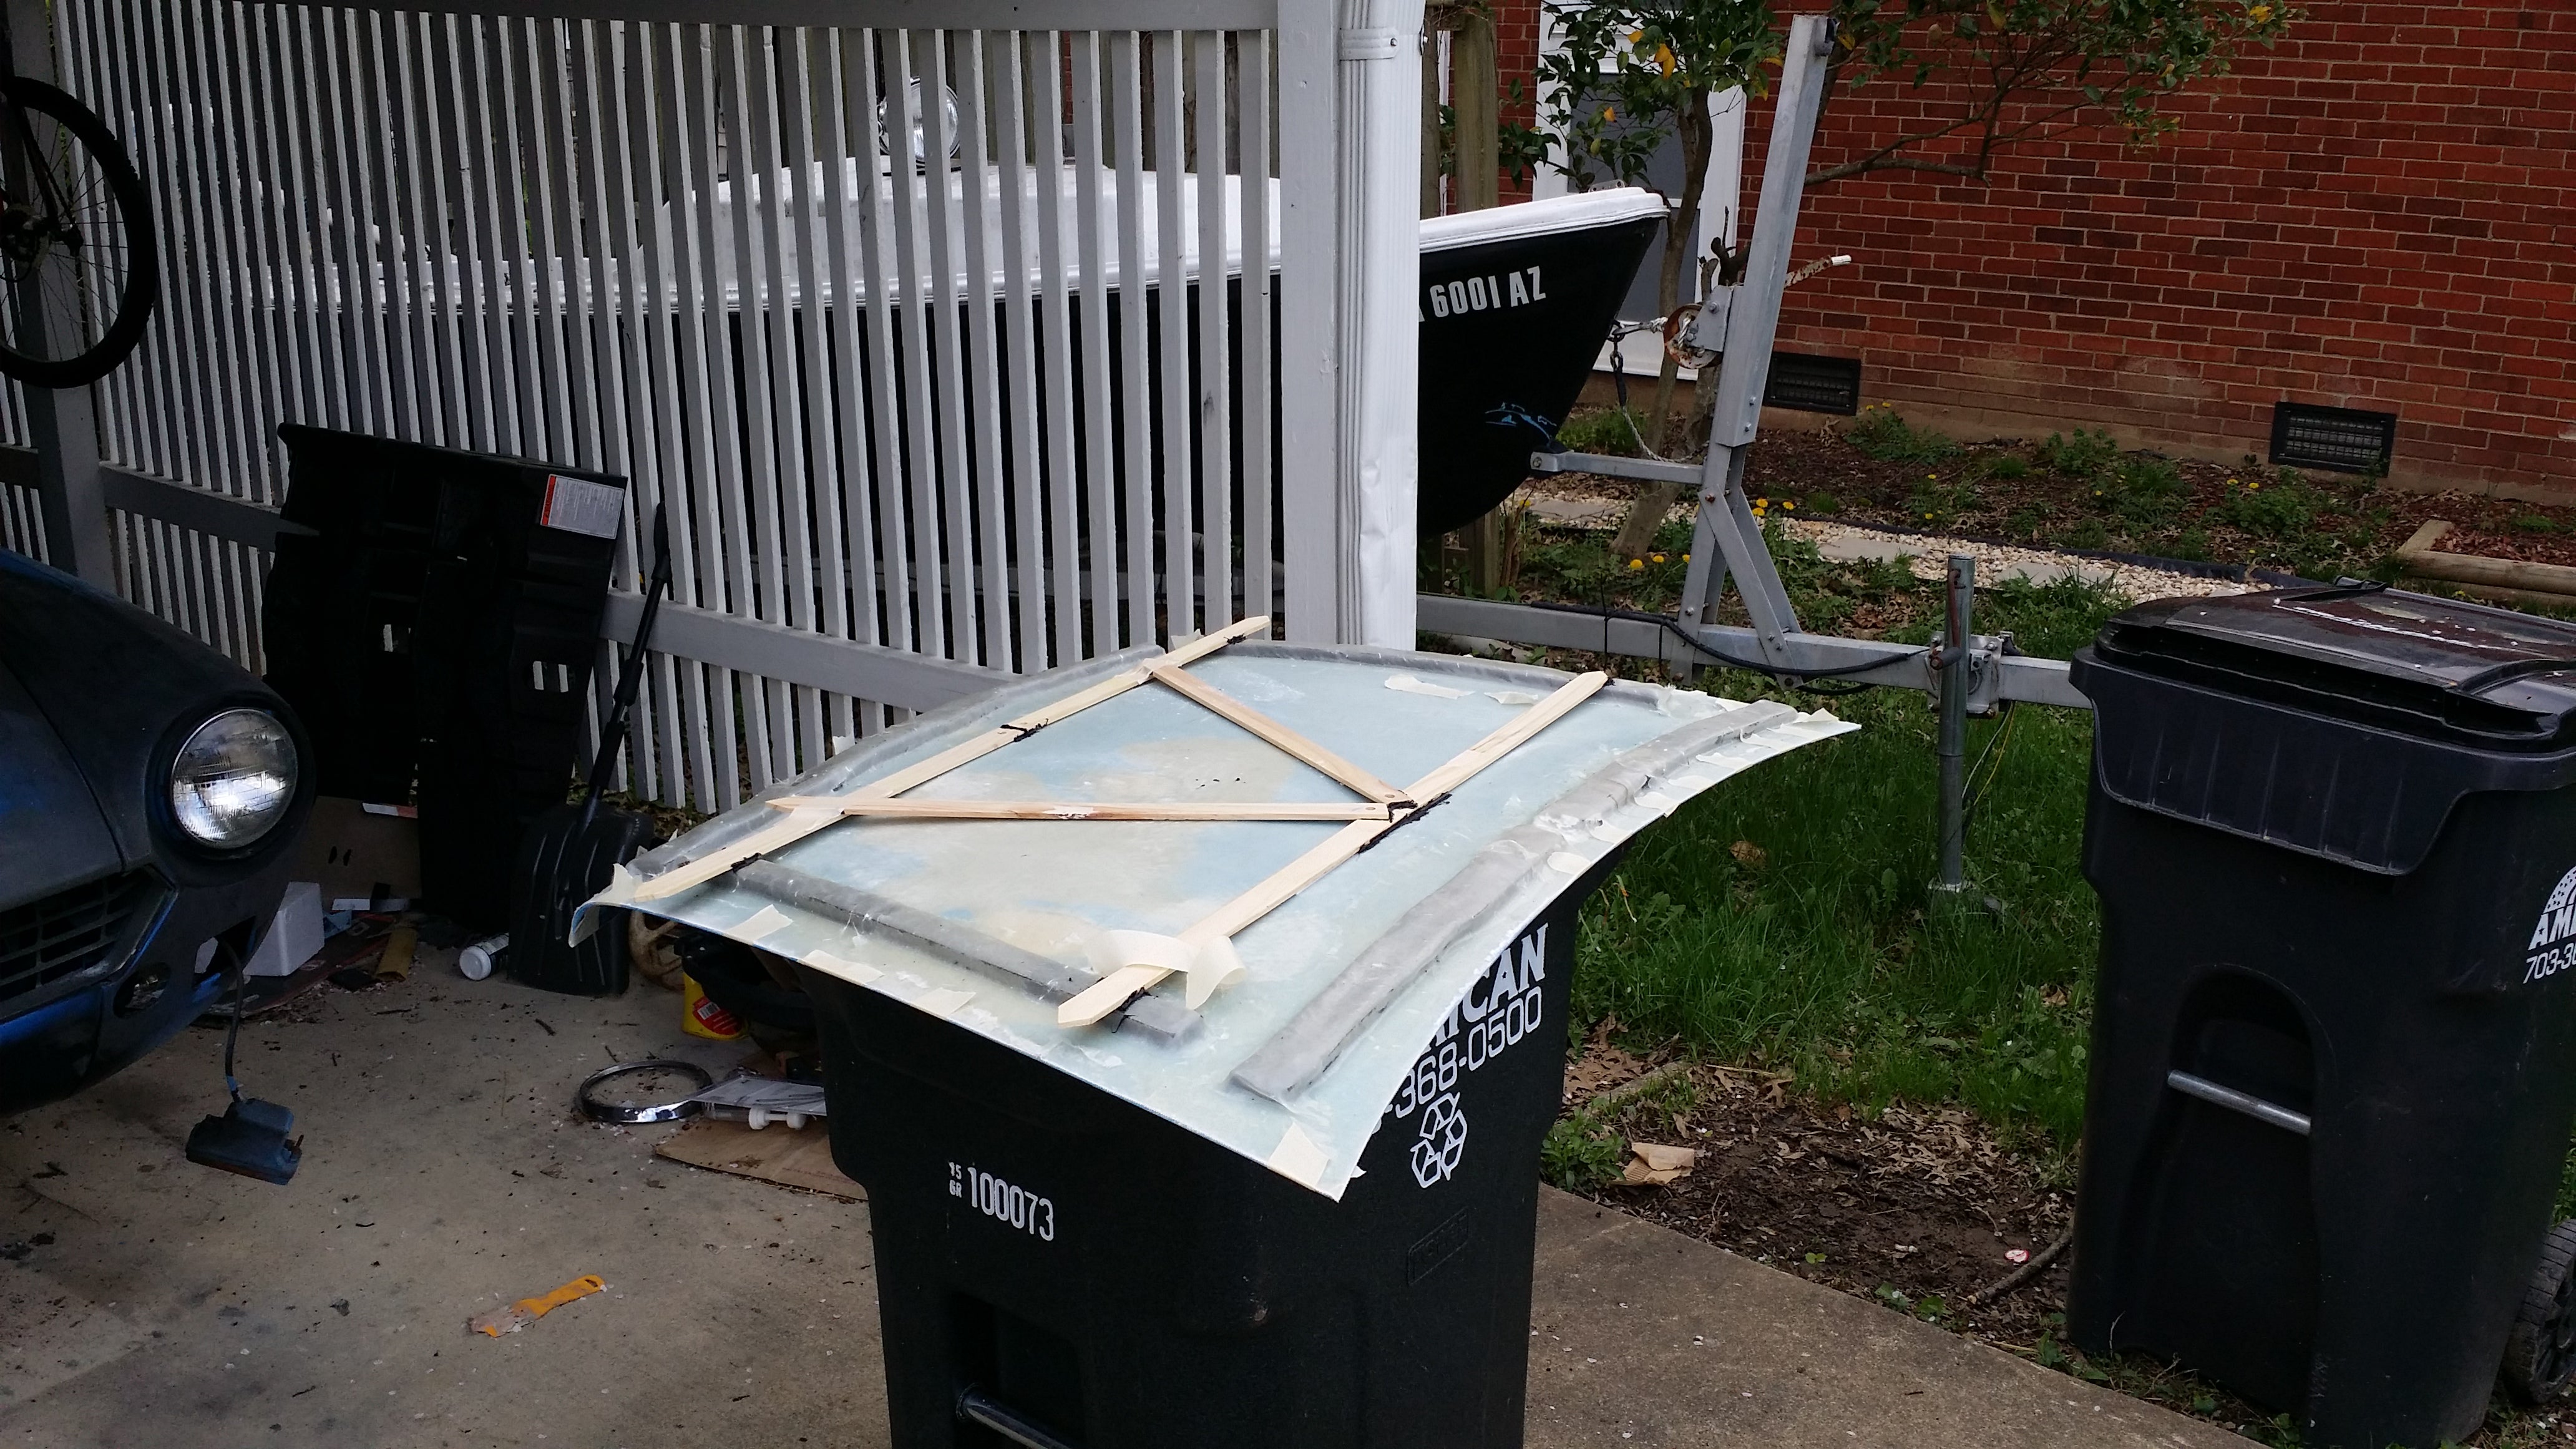
 'Wägen, EPA LOL
> InfinityAero
03/31/2016 at 16:11 |
|
Fiat 124 Spider
 InfinityAero
> 'Wägen, EPA LOL
03/31/2016 at 16:42 |
|
Winner, winner, chicken dinner!
 'Wägen, EPA LOL
> InfinityAero
03/31/2016 at 17:04 |
|
I just started restoring a ‘78. :)
 Master Cylinder
> InfinityAero
03/31/2016 at 17:23 |
|
Cool, thanks for the post. Making things from FG/CF is fascinating to me. Would love to see another when you lay up the new parts.
 InfinityAero
> 'Wägen, EPA LOL
03/31/2016 at 17:30 |
|
Nice, I’ve got a ‘77, picked her up this past fall. I’m going to try to do everything myself... except electrical, I hate electrical work.
Have a little rust where I’m cutting out cancer and welding in new sheet metal (behind doors, passenger shock tower), but for the most part it’s in good shape, and mostly original by the look of it. Motor runs like a champ, but haven’t had a chance to test much due to the suspension/alignment, so that’s priority 1 right now. Can’t wait to get back to”rolling resto” status ASAP.
 InfinityAero
> Master Cylinder
03/31/2016 at 17:36 |
|
Definitely will do, I’m hoping to get a friend by to help, maybe one with a full lighting & video setup. Likely be doing that after the suspension & painting so maybe around late May / early June.
It’s remarkably easy and cheap if you have the time and knowledge. The molds will cost about $20/piece to make, production parts around $100, and I’ll be able to reuse the molds and patterns to make more if people with old Fiat Spiders are interested...
 Master Cylinder
> InfinityAero
03/31/2016 at 17:45 |
|
Looking forward to reading it. I played around with fiberglass a bit when I was in high school, which is well over a decade ago now. I was planning on buying fiberglass fenders and a hood for my 944, but maybe I will give making my own a shot. I do prefer when I can DIY instead of spending money, and they’re not complicated shapes...
 InfinityAero
> Master Cylinder
03/31/2016 at 17:55 |
|
Nice. If you’re making them from glass, you can get a good 8oz weave cloth for $5/Sq yd or less. My goal is to make the hood <10 lbs while still structurally sound enough to avoid vibrations at high speeds, which will require the pricier $30+/Sq yd carbon or carbon-kevlar. I’ll keep em unpainted tho, so it requires something “pretty” anyways, and clearly materials are a fraction of cost for the aftermarket options out there. Plus, they tend to be 20+ lbs, I can beat that.
 'Wägen, EPA LOL
> InfinityAero
03/31/2016 at 21:01 |
|
Nice! I found a bit of rust to fix in the floors, but my shock towers are solid and so is the body. Someone added later pini trim to it, so I threw all that out. My plan is to totally rebuild over the next 18 months. New interior with corbeau classics, built motor from midwest124, kyb shocks and lower springs, bumperettes in place of the tubes... Going for a cruise/autocross build. Should be sweet when done. I picked mine up in August and drove it for a month before tearing out the carpets over the winter. They are fun little things - just wish it was easier to find wheel options.