 "StudyStudyStudy" (jesterjin)
04/23/2015 at 15:05 • Filed to: 240z, project car
 10
10
 6
6|
"StudyStudyStudy" (jesterjin)
04/23/2015 at 15:05 • Filed to: 240z, project car | 10
| 6 |
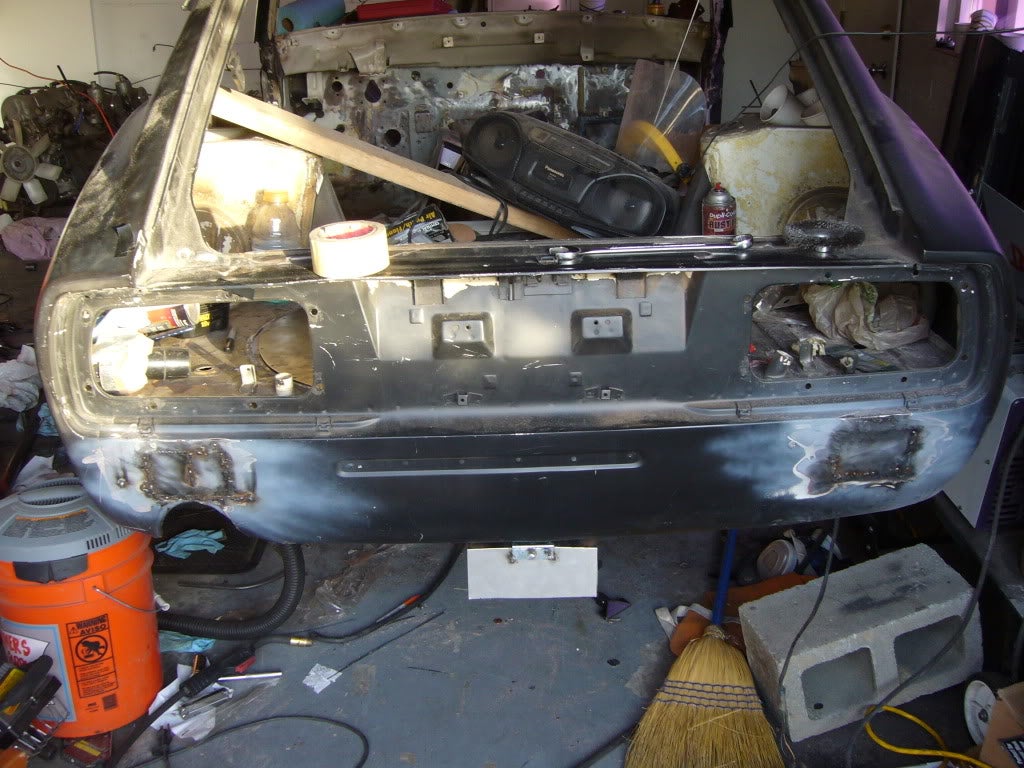
With the front chassis modifications nearly done for the time being, it was time to move to the rear and onto one of the big cross roads - fuel.
The PO had mentioned that the gas gauge did not work and suspected a bum float. So the rear tank was going to have to be removed. Given the penchant for these tanks to have a rusted pickup meant sourcing a used tank in good condition and replacing all the fume/evap hoses and tanks, or it would be to simplify and run a fuel cell and run an entirely new fuel system. I spent days contemplating my ordeal. Cons to a fuel cell would be that it would just be a plastic tank, fuel would slosh, it would cost money, need fabrication, etc etc. The benefit was a bigger capacity, a clean tank, new lines, no evap system. In the end a trip to have my old fuel tank looked at solved my dilemma. The shop said that he found flowers growing inside of it. That meant it had enough sediment and somehow enough light and water to grow, or.... an entire whole flower managed to find it’s way into the tank. Given the fact all that sediment would have plugged up the lines, I figured to replace everything and go with a fuel cell. I knew the immediate setup was going to be running the factory carbs. I decided that I was going to run carbs and it wouldn’t matter the hose size if my restriction at the carbs was 1/4 so I built the system to go from 8AN to 1/4 inch hardline and kept all the hoses low pressure (the worst decision you can make ever....).
First thing first, time to remove the spare tire well to make room for the larger fuel cell. Electric sheers made quick work of the clean metal.
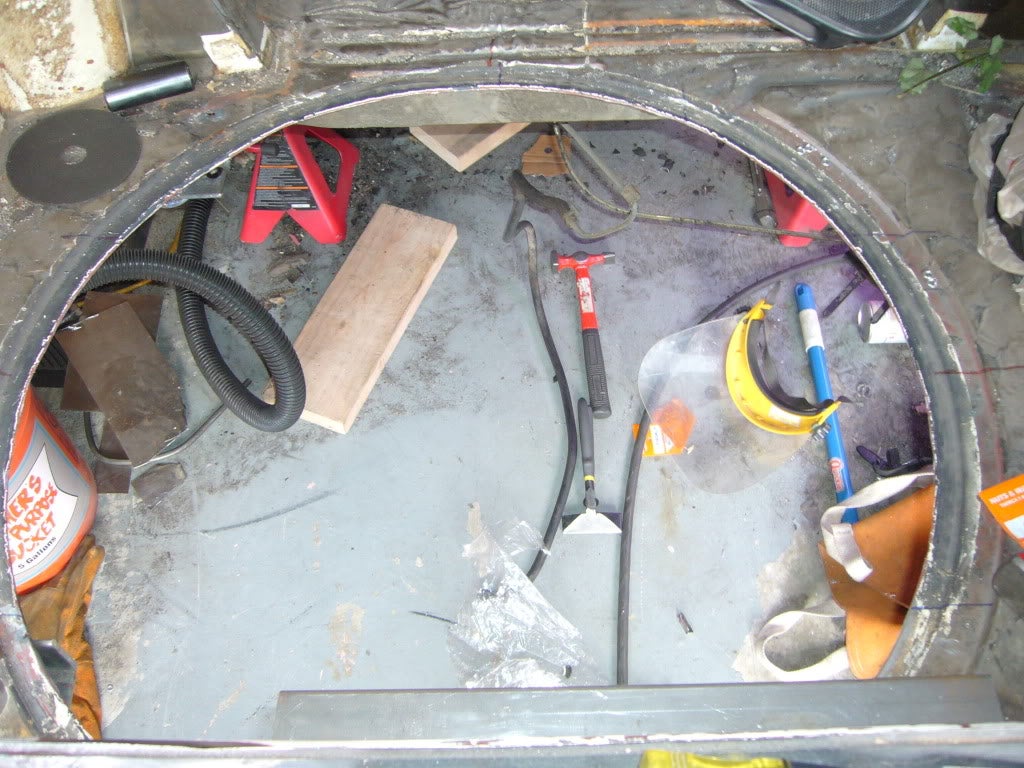
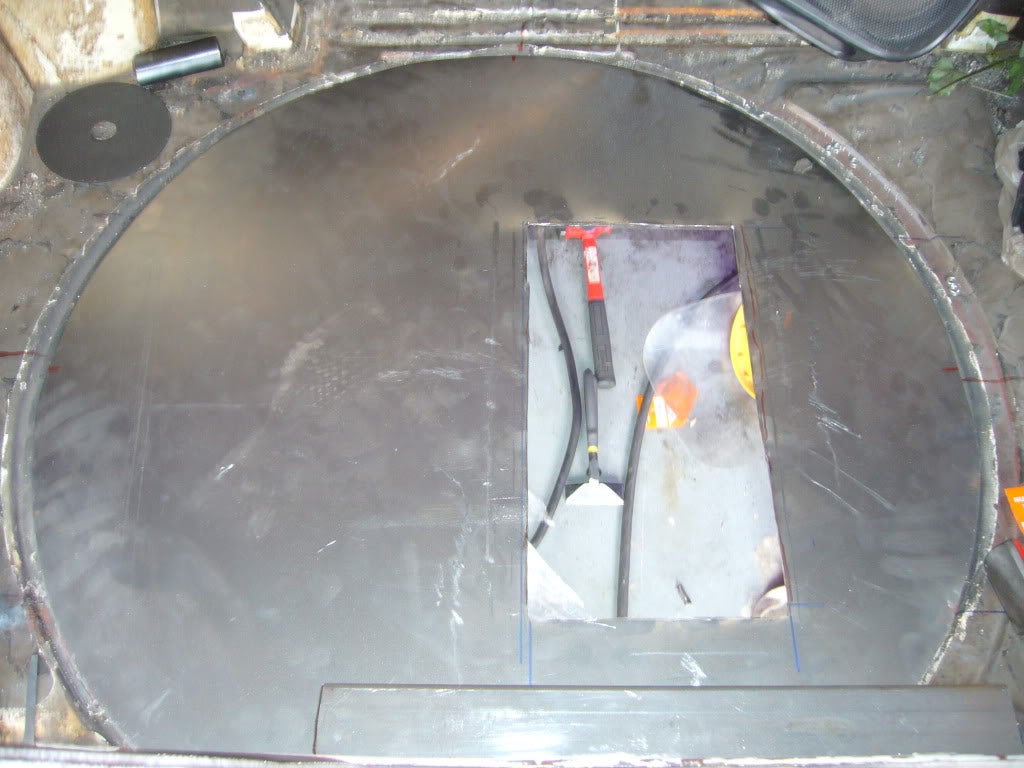
After pulling out the wheel well, we made a patch with the cutout for the trap door for access to the fuel cell.
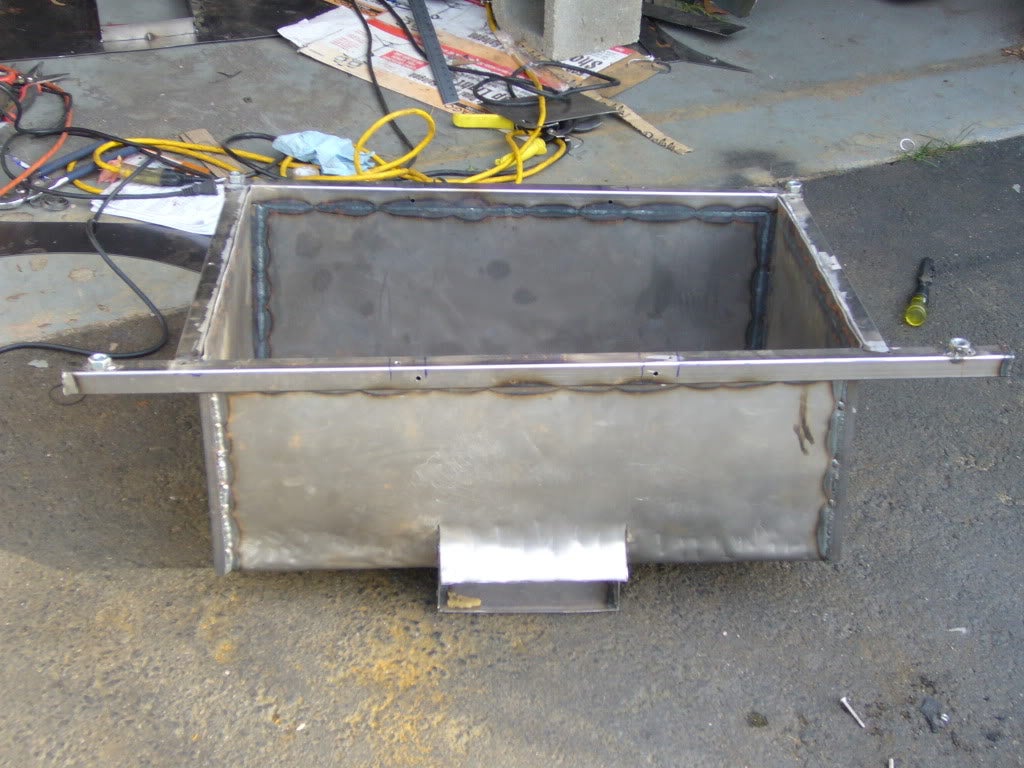
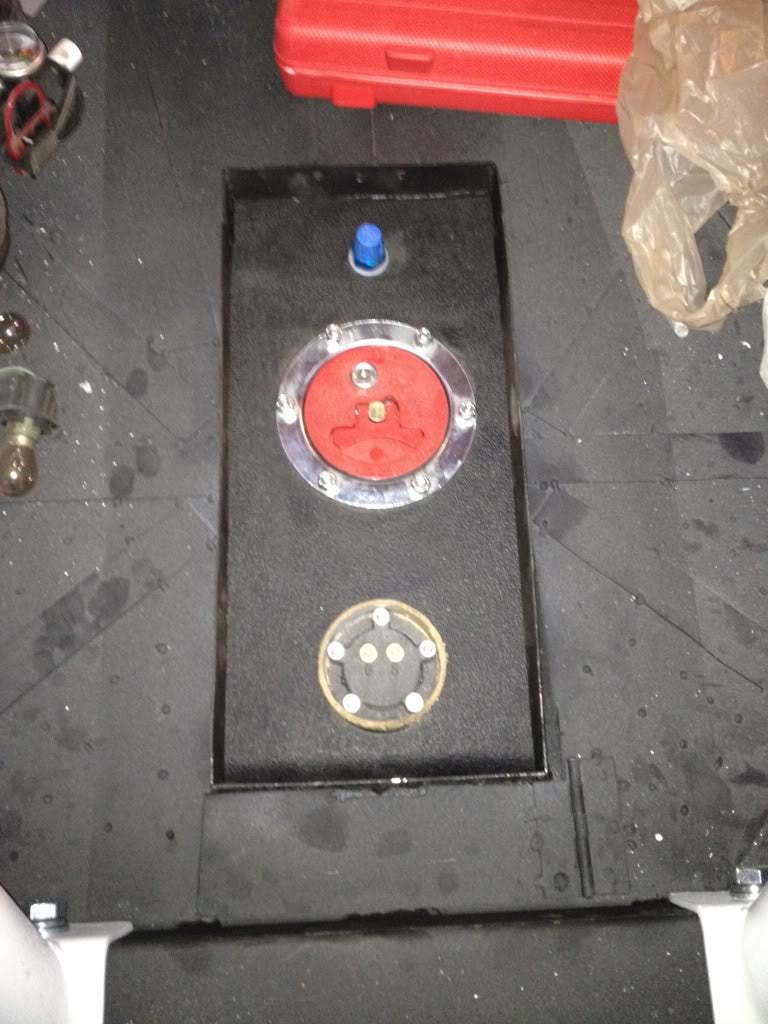
I decided that given the fuel cell was a plastic unit without a rubber bladder, I should just go ahead and build a shield/road debris deflector for it. Unfortunately the piece was too big for my little metal brake so I had to bend it to shape by hand with a hammer and a cinder block. It came out pretty square, but it definitely warped during welding.
Added cover with the mounting nuts.
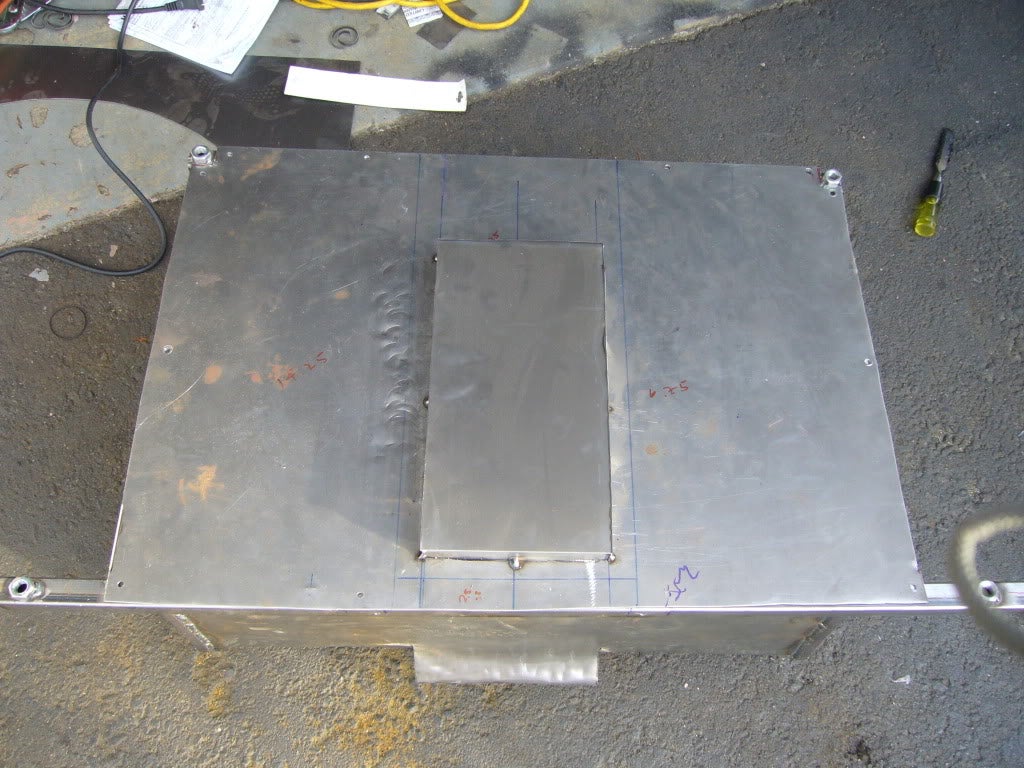
Fortunately it still fit the fuel cell nicely, onto the test fit.


Added some reinforcement to keep the panel from buckling or vibrating.
Keen viewers may notice an enlargement of the fuel cell access door (measure twice cut once..., then measure again and cut again cause you measured incorrectly the first two times).
Yes very messy floor I know. The fuel cell door looked quite out of place as well.
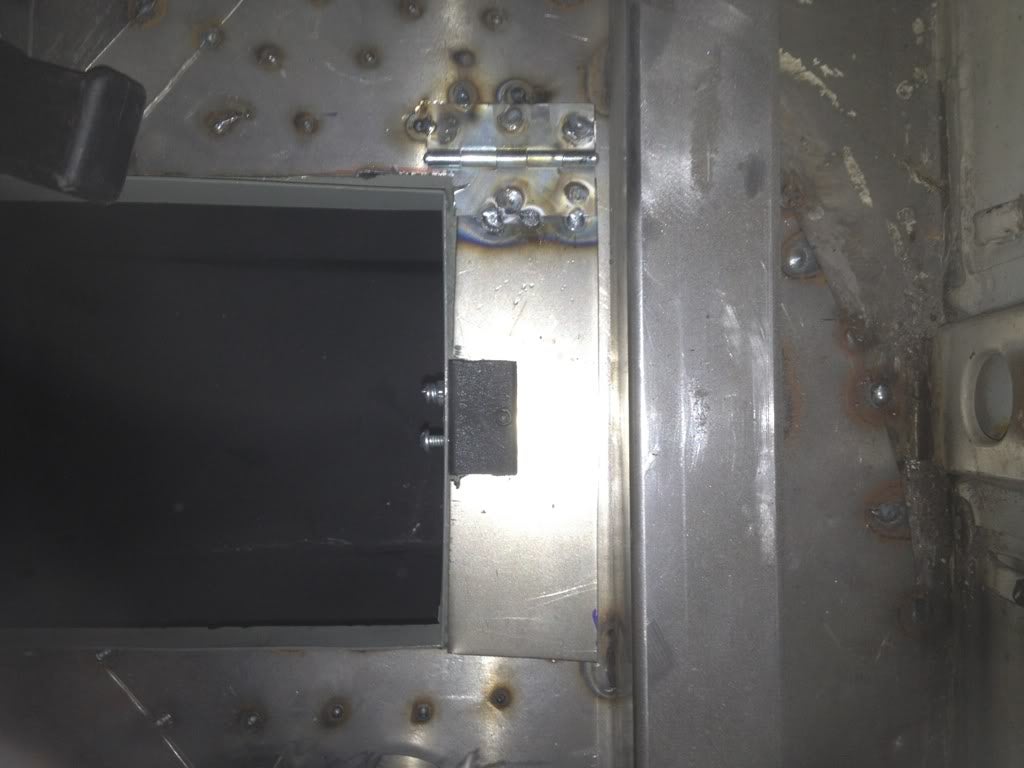
Some captive nut trickery had to be employed to allow for an eventual removal of the fuel cell while still having locking tabs to be able to seal off the fuel cell from the cabin.
With a quick squirt of paint it disappears quite nicely.
Lessons learned:
The adage measure twice cut once is true, but prior to that I think it should be make sure of what you are measuring three times. So plan 3 times, measure 2 times, cut once.
Sometimes it may be better to wait for access to a bead roller rather then pounding your way into a square box.
Welding generates lots and lots of heat. When welding thin metal make sure to move around and allow things to cool.
When welding large dimensions it may be advisable to put a frame inside to assist in retaining shape.
Costs:
200 - summit fuel cell
150 - sheet metal and bars for fuel cell box
50 - miscellaneous hardware for box
Subtotal: 400
Total spent: 6665
!!! UNKNOWN CONTENT TYPE !!!
!!! UNKNOWN CONTENT TYPE !!!
 MonkeePuzzle
> StudyStudyStudy
MonkeePuzzle
> StudyStudyStudy
04/23/2015 at 15:13 |
|
The adage measure twice cut once is true, but prior to that I think it should be make sure of what you are measuring three times. So plan 3 times, measure 2 times, cut once.
and I always make it so much more work for myself
1: measure twice
2: draw out the cut line
3: doesn’t look right, measure two more times
4: cut wide of the line
5: cut less wide of the line
6: cut on the line as I should have the first time
so measure 4 times, draw twice, cut three times.
 Lumpy44, Proprietor Of Fine Gif
> StudyStudyStudy
Lumpy44, Proprietor Of Fine Gif
> StudyStudyStudy
04/23/2015 at 15:21 |
|
Really liking this build! Love all the updates too! Keep it up!
|
StudyStudyStudy
> MonkeePuzzle
04/23/2015 at 16:28 |
|
7. Then realize you cut it to short setup welder
8. Weld on extension
Repeat 1-8
|
MonkeePuzzle
> StudyStudyStudy
04/23/2015 at 16:29 |
|
9: give up and sell as scrap/parts on craigslist
|
StudyStudyStudy
> Lumpy44, Proprietor Of Fine Gif
04/23/2015 at 16:31 |
|
Appreciate it greatly!
Yes, I’m trying my best to keep the momentum in the posts. Kind of a hard personal challenge, but it is enjoyable to give some elaboration and words to the mountain of pictures I have taken.
Will do, getting close to the more interesting content.
|
StudyStudyStudy
> MonkeePuzzle
04/23/2015 at 16:33 |
|
10. Lie awake at night being haunted by the loss.
11. Forget and start again.
12. Repeat 1-10.