 "BJohnson11" (brettjohnson01)
10/23/2013 at 21:50 • Filed to: truck project, Garage Mechanic
 2
2
 17
17
 "BJohnson11" (brettjohnson01)
10/23/2013 at 21:50 • Filed to: truck project, Garage Mechanic |  2 2
|  17 17 |
Ok ya’ll it’s time for the first installment in garage mechanic lessons. The test subject of all these posts is going to be my 1974 Chevy C10 with a 454, ScarJo. That’s why the posts are going to be tagged both “Garage Mechanic” to follow the posts and “truck project” to follow ScarJo. Today’s how to is about INTAKE MANIFOLD INSTALLATION, CARB INSTALLATION, RESETTING TIMING, and then, CELBRATORY BEER DRINKING. I’m going to try to be both witty and informative, and while I consider myself both of those in person, we all know the internet translates humor poorly. That, and I’m an engineer, so I don’t have great writing skills.
Ok. So step one, remove all the old shit. That means disconnecting all the vacuum and fuel lines going to it (try to have a vague idea of where these go for later), remove the throttle return spring, and all stuff like that. Unbolt the carb, look at it funnily, then put it in the garage. It’s a Quadrajet (I know I know, some purist is going to get their panties in a bunch because ‘Dude, the QuadraJet is the best all around carb. Just get a professional to rebuild it and tune it for you for $600 and you’re set. Definitely don’t spend half that on a new Edelbrock unit!!!’), so you might be able to sell it back to said purists. Then, unbolt the intake manifold. Oh, but first, take the distributor out. To do that, just undo the bolt that holds that tab down, and pull the dizzy out. Ya know, pull the spark plug wires out, disconnect everything. Oh but BEFORE you pull the dizzy off, use a sharpie and mark on the valve cover approximately where the vacuum secondary port points out as well as where the number one point on the dizzy is. This will help get timing approximately in the right place later.
Ok, so everything except the intake manifold is off now. I don’t even know why I’m taking so long to explain all this. Just get unbolt everything. You should be done with two beers when everything’s off. But fine, unbolt the intake manifold and continue. Once all the bolts are out, get a friend, because this bitch is heavy. Lift out the cast iron unit, and set it aside. Or tie it to some chain and make a boat anchor, you’re choice.
Alright. Now you’re two beers deep and realize that you took off way more than you were expecting. I mean, shit, you can see your camshaft! That can’t be good. Get a vacuum though, and vacuum up any debris. Also, get a utility knife blade and scrape off some of the garbage that’s built up on your intake port surface on your heads. Keep a buddy holding the vacuum so that you don’t drop debris down in the engine. If you do, no worries, we’ll do a coolant and oil flush later.
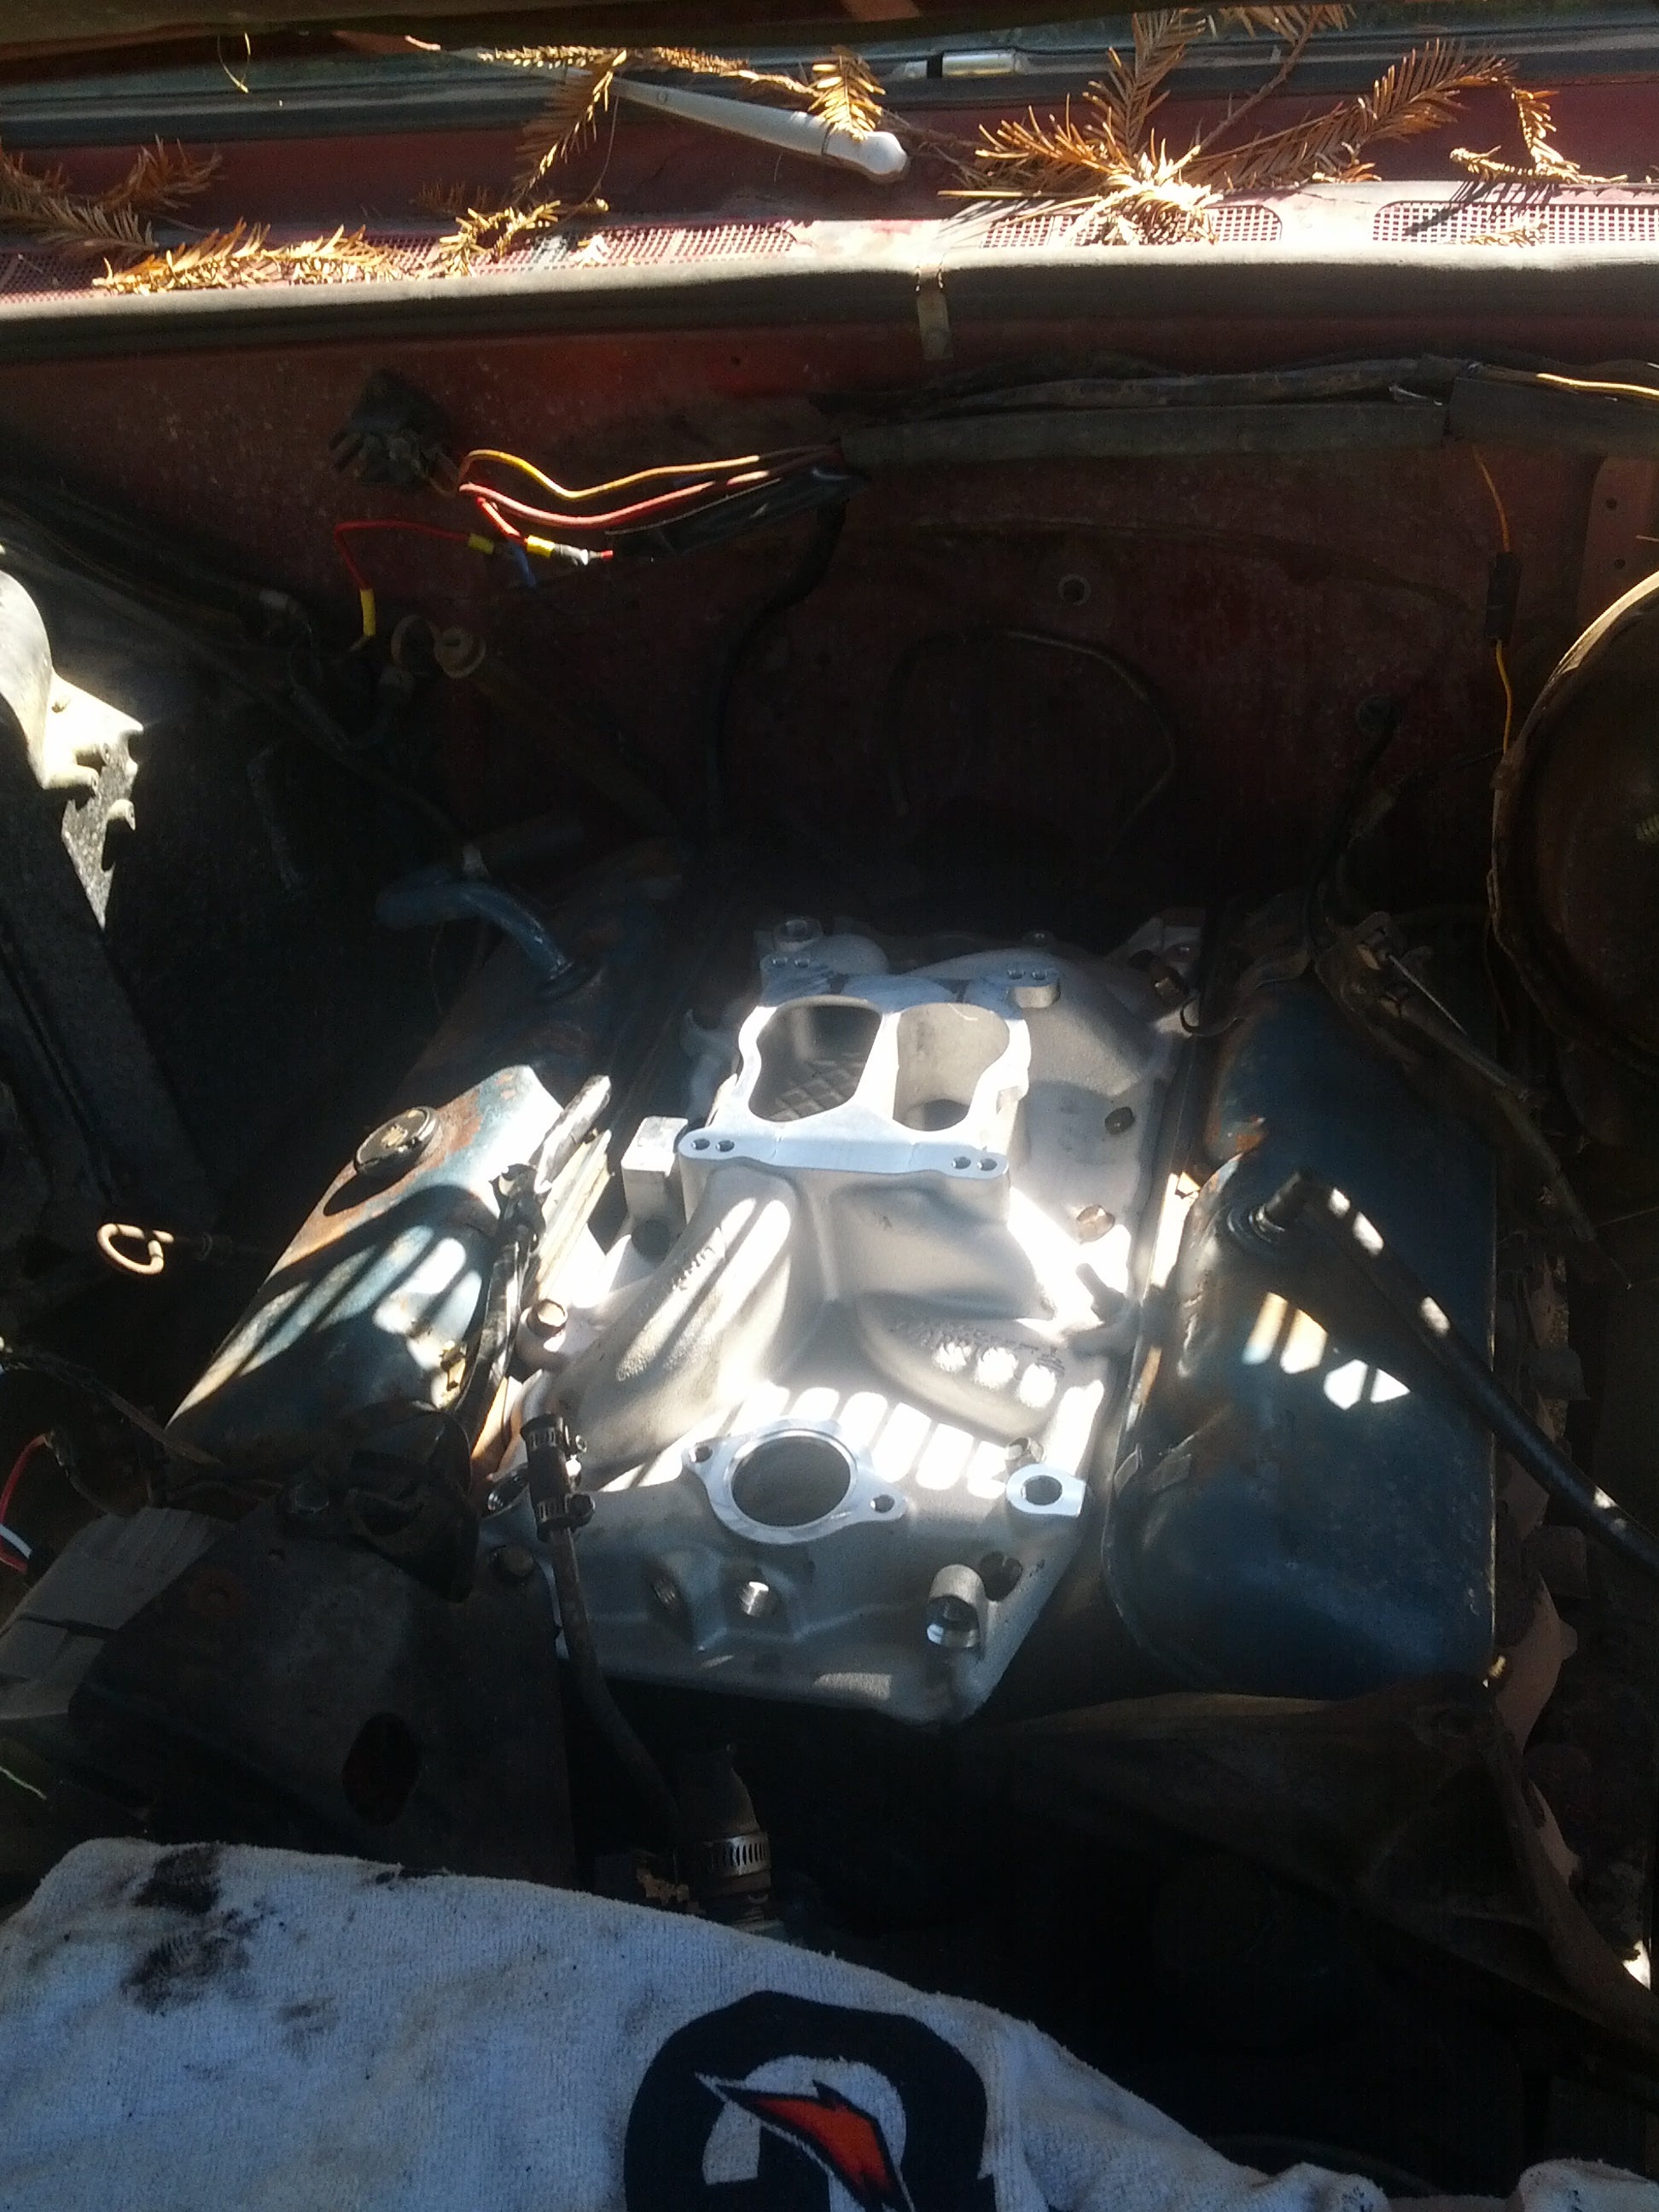
So now you have a clean head surface, and a shiny new aluminum Weiand intake waiting to go on. Oh, you got an Edelbrock? Ok fine. You have one of those. Now, go get your intake manifold gaskets (I used Fel Pro units, they’re nice). Read the instructions. My gasket set came with cork end gaskets. So I was planning on using them. BUT FIRST, read the instructions that came with your new intake. They say DO NOT use the cork gaskets. Ok, I guess I’ll trust the intake’s instructions. Put a dab of black RTV (silicone sealant) on the bottom of the gasket surface, line up the ports and the bolt holes and all that and make sure you have the right gasket. Then, follow instruction, but in general apply about a ¼” thick bead of silicone along the front and rear seal surfaces. Apply extra at the corners between the front and the side gasket surfaces.
Before everything dries, drop the new intake in. You can already tell this is making your car better because it’s about 20 pounds lighter than the stock manifold. And you can do it without friends. Thread in all the bolts without torqueing to spec, then torque to spec. This is important because you need to have no vacuum leaks in your engine.
Alright, time to start putting things back on. I think now would be a good time to get the timing figured out, because the carb isn’t in the way. That’s not what I did, but for the sake of a good writeup, we’ll do timing now.
So, the engine needs to be at Top Dead Center (TDC). If you’re lucky like me, your engine has a harmonic balancer with timing marks. If not, I can’t help you. At least not now. So, everybody knows an engine has 2 TDC’s right? Oh you didn’t know? Ok, no worries. So TDC is when the number one piston is at the top of it’s stroke. Because engines have 4 strokes (intake, compression, combustion, exhaust), the piston will be at the top of it’s stroke twice—once after compression and once during exhaust. To get the engine to TDC at it’s compression stroke, which is where it needs to be to set timing, you need a buddy. You crank the engine over either by hand or with the starter, and have your friend hold his finger over the number one spark plug hole. When air starts being pushed out that hole, you’re on the compression stroke. Stop turning the engine over, and crank it over by hand until the 0 degree timing mark on the harmonic balancer lines up with the 0 degree mark on the timing plate. This is TDC on the compression stroke. Pat yourself on the back, this is an important step. Grab a beer. Sip. Move on.
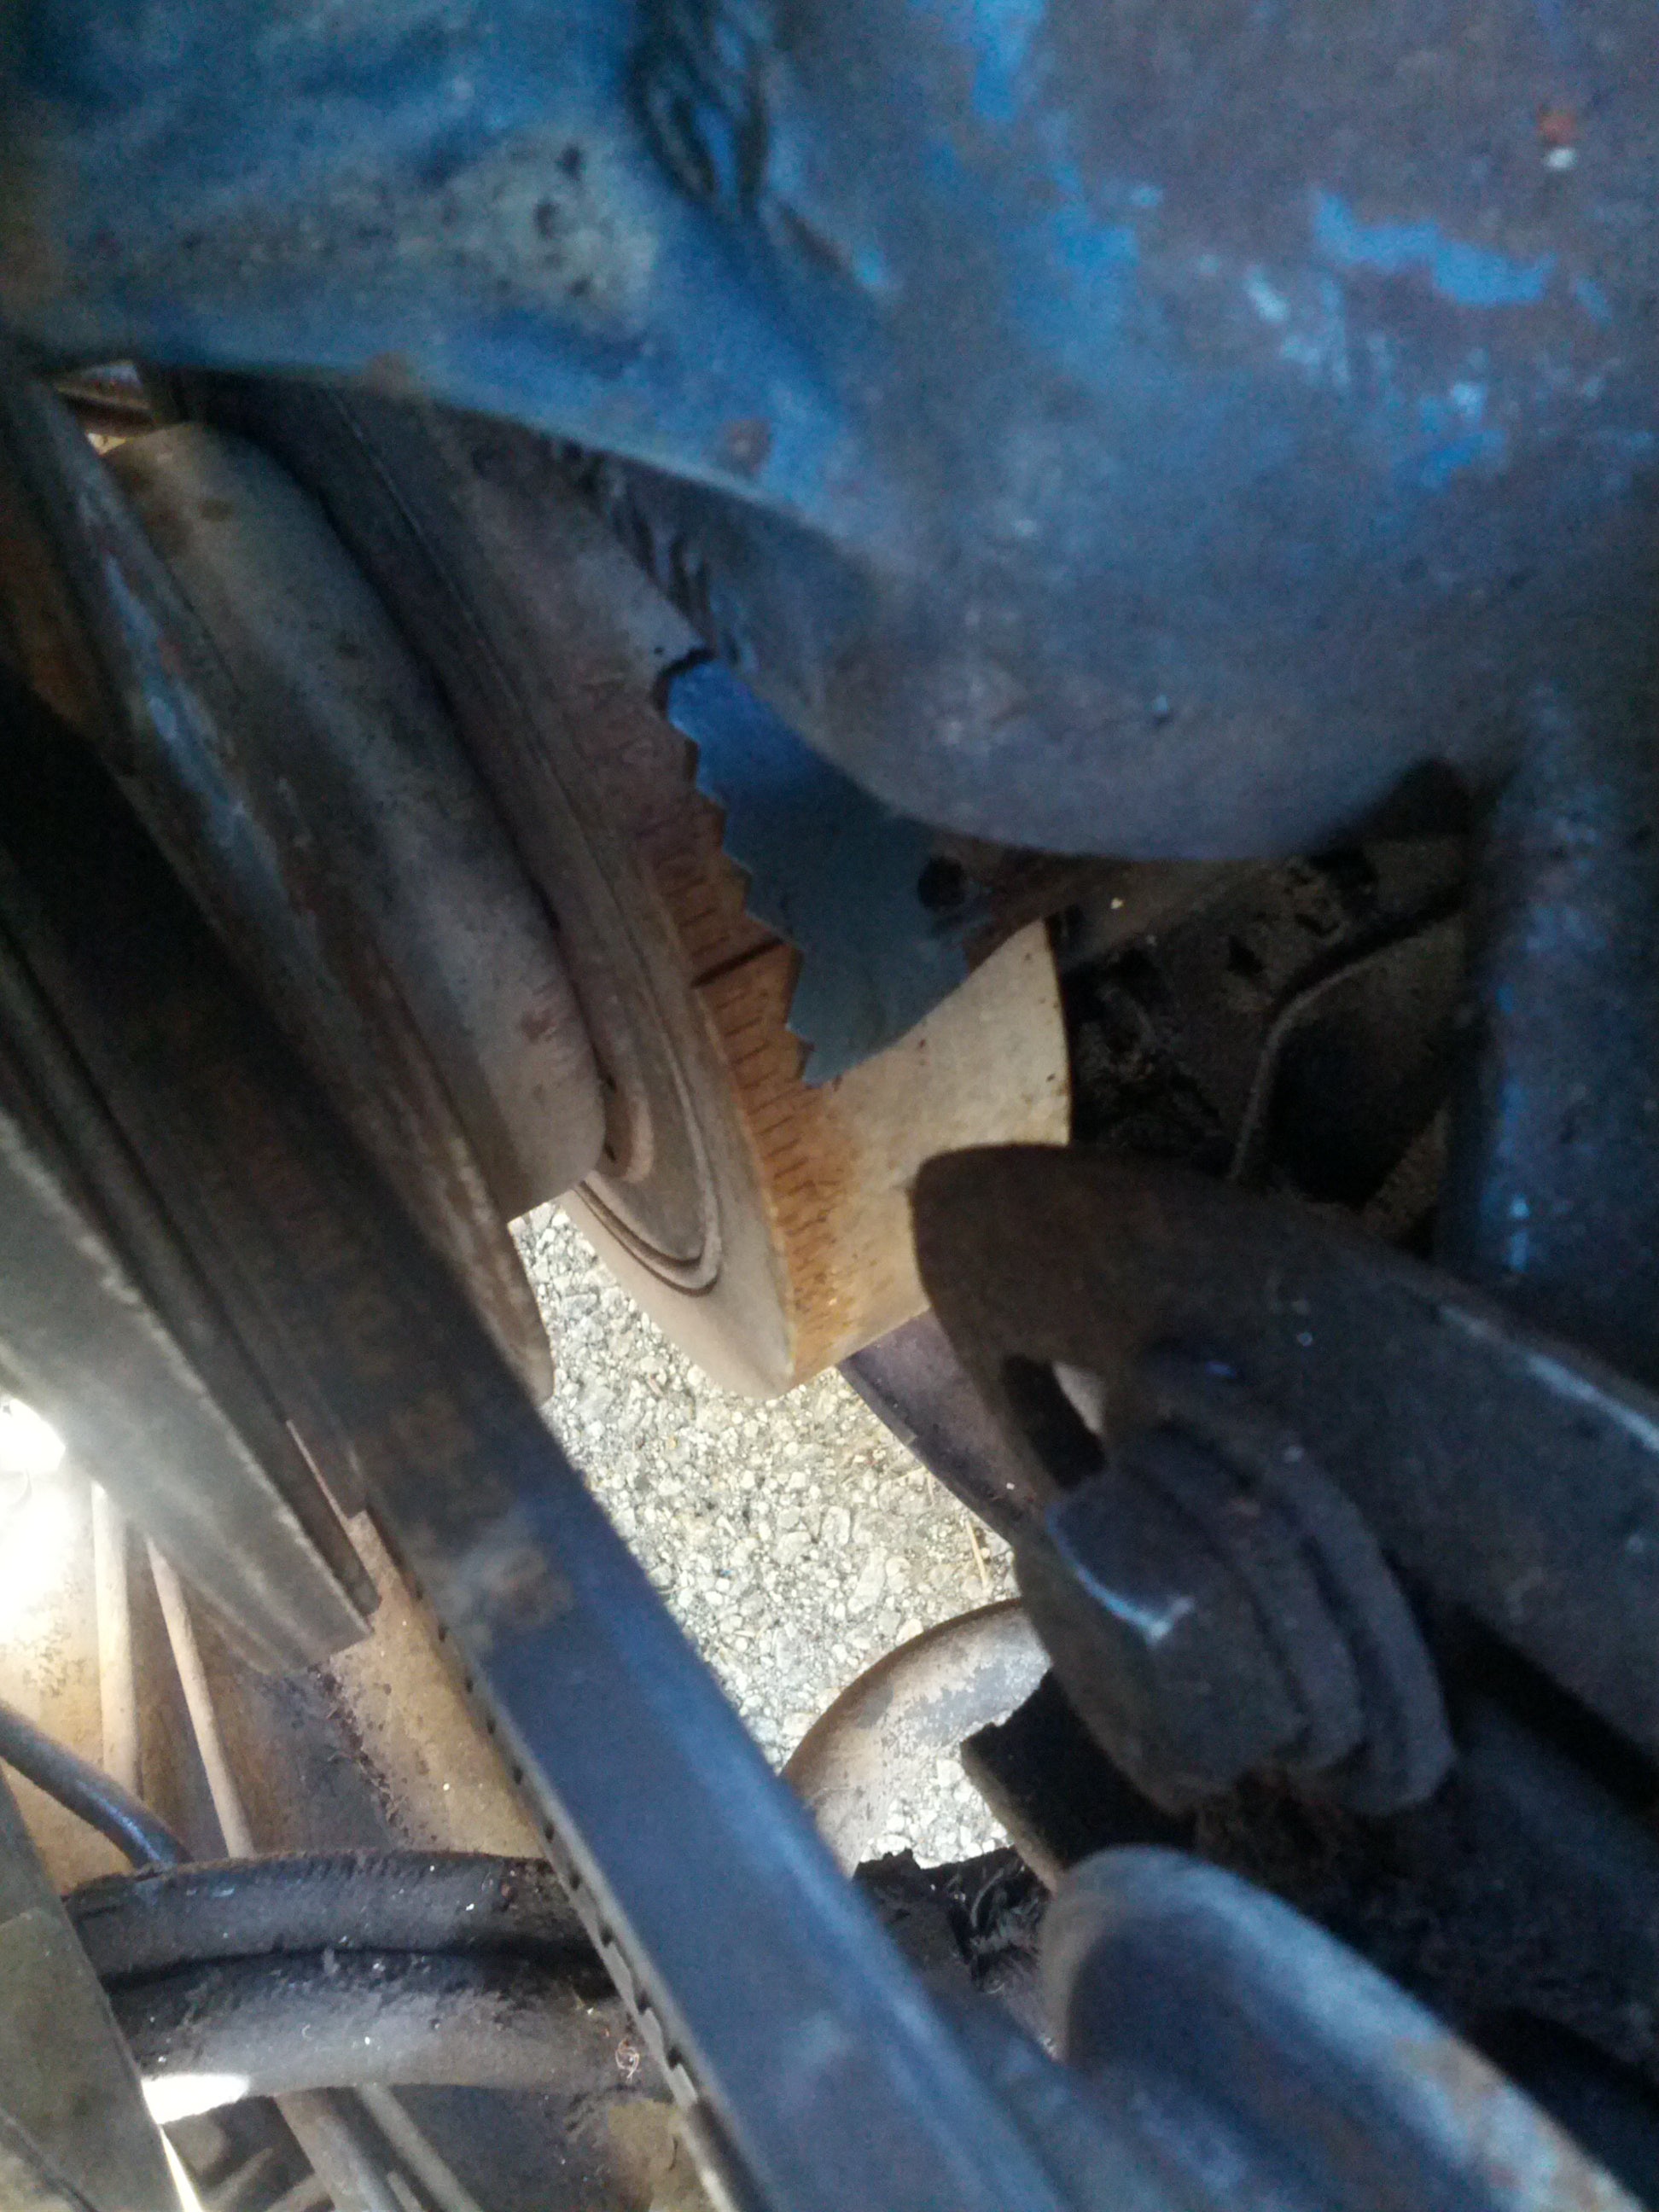
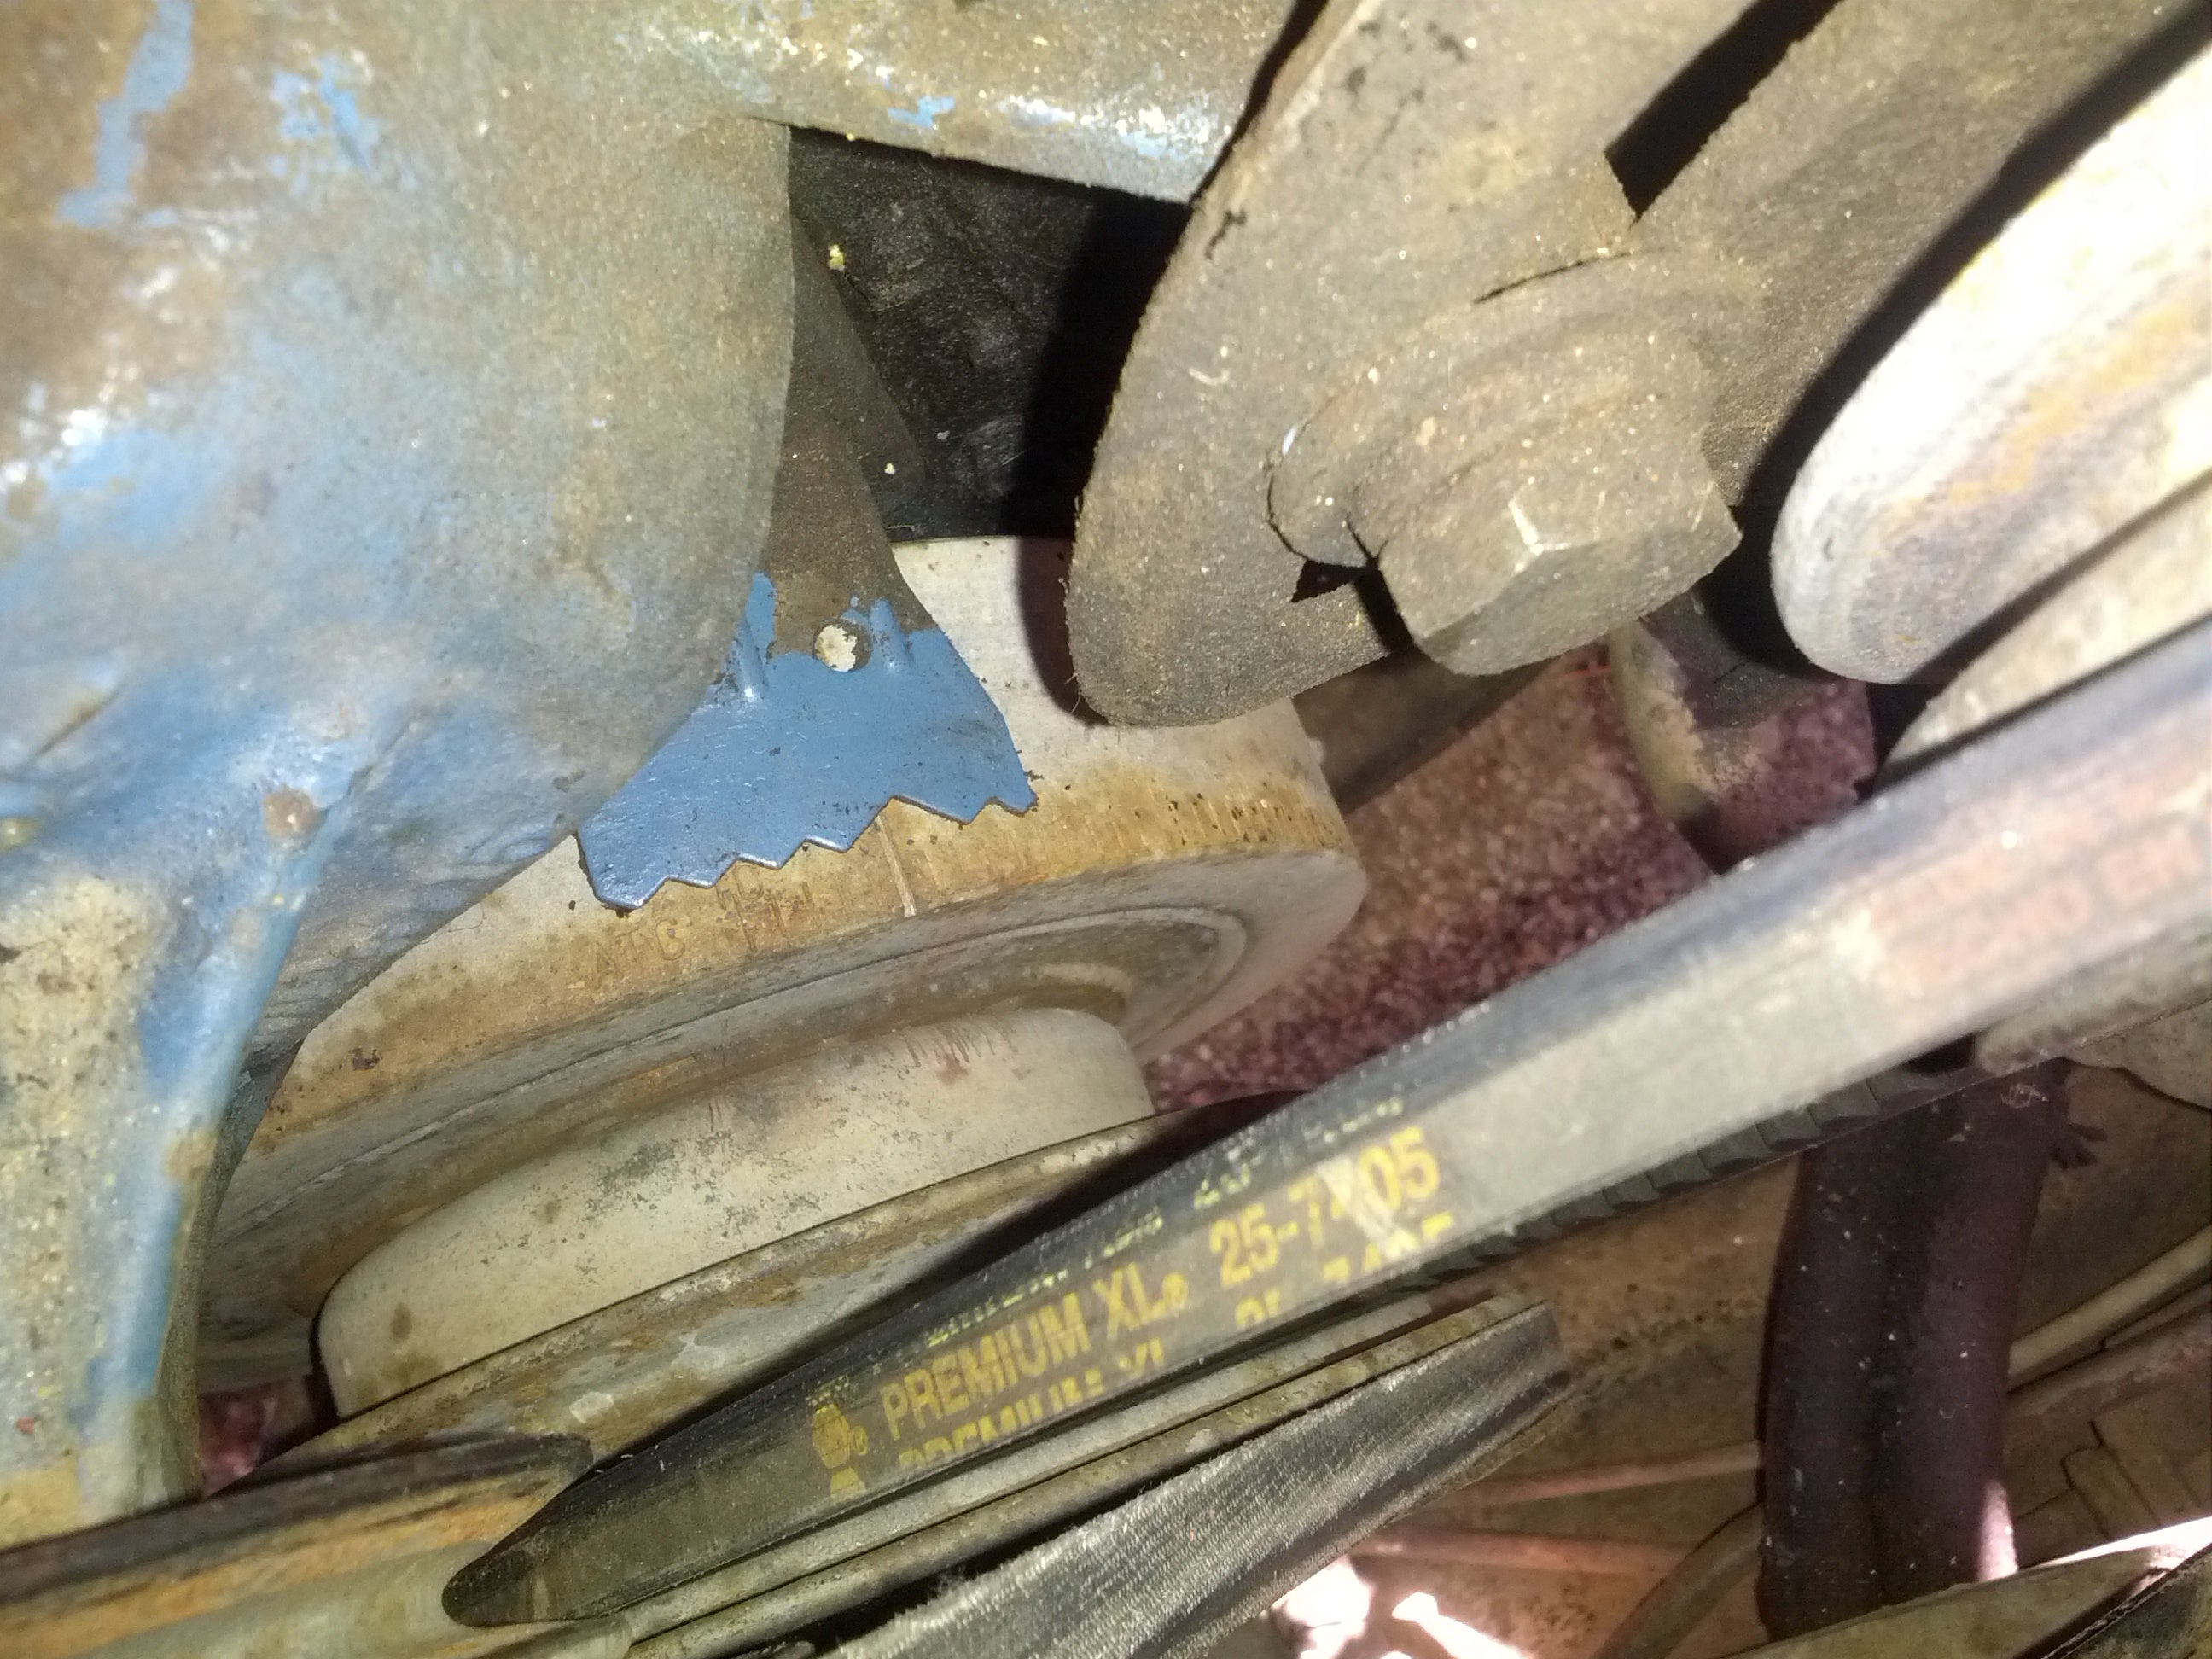
So look in your Haynes manual or equivalent book, and see that when the number one piston is at TDC, the rotor on the distributor should be pointing at the point for the number one spark plug. Your distributor is out of the engine now, so go ahead and set it in so that it’s pointing in the right place. Now, if your distributor makes no sense like mine, it will have this little flat keyway in the end of it. This keyway drives the oil pump.
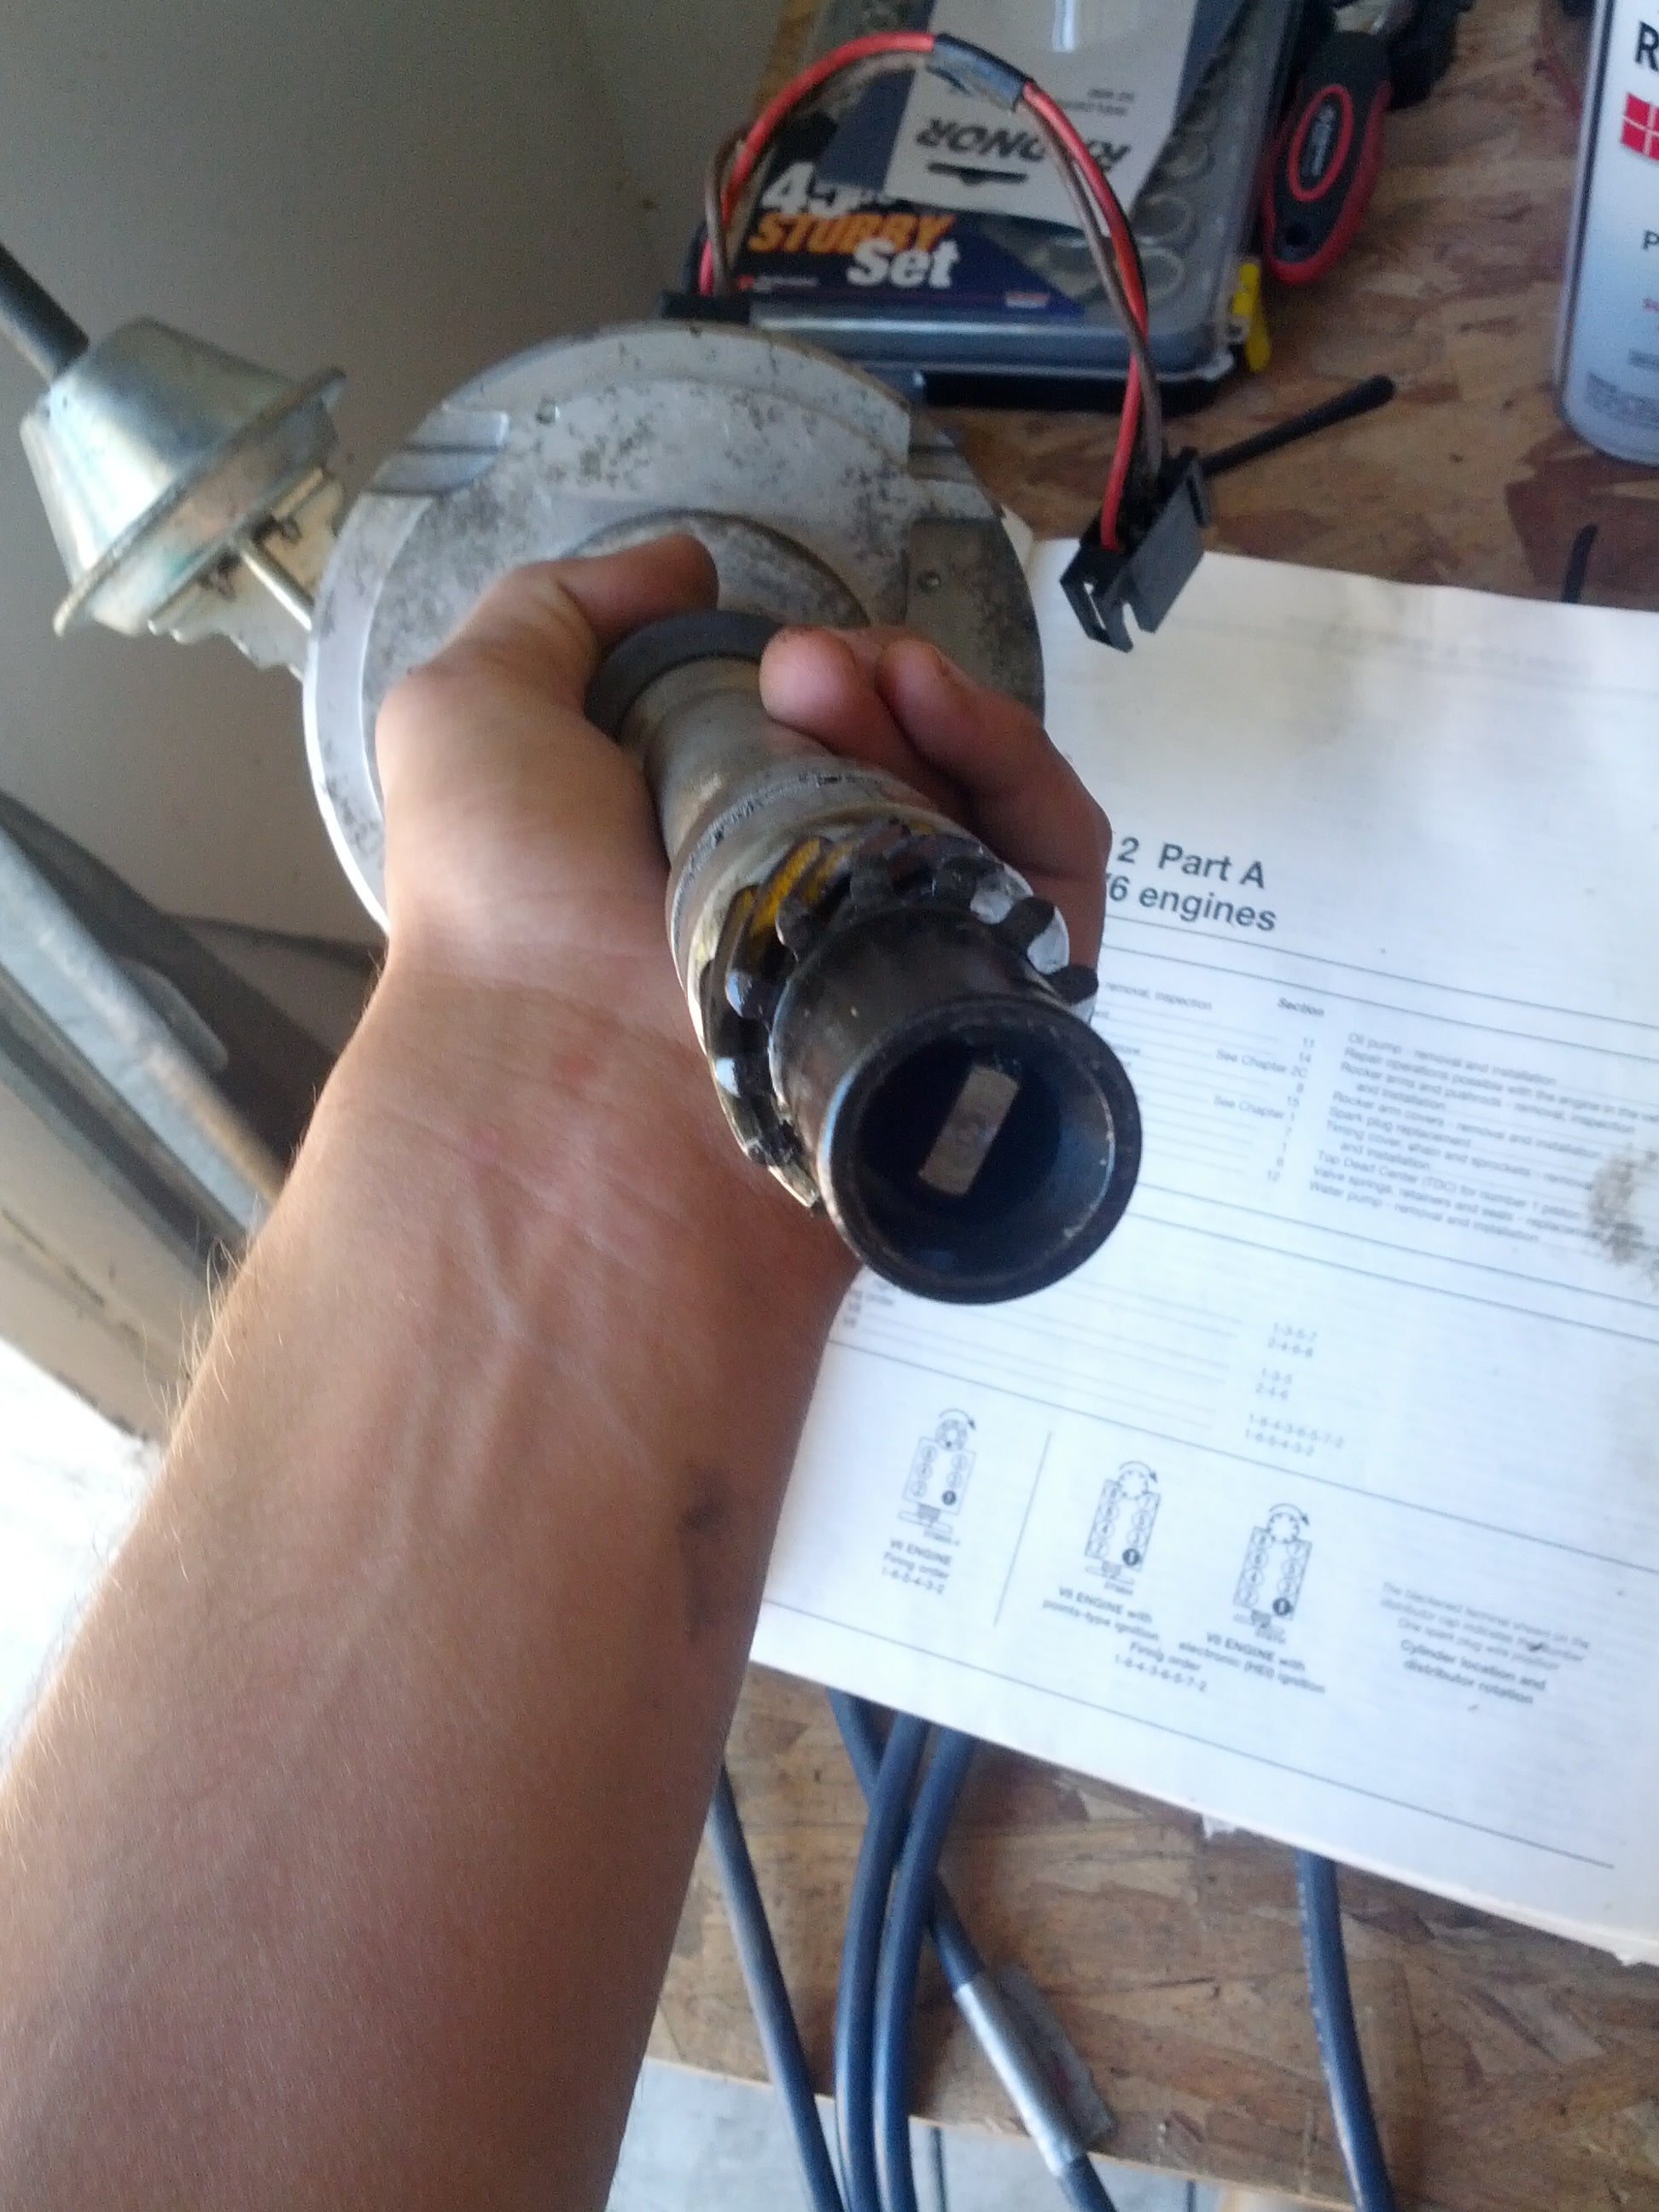
Thing is though, it prevents the distributor from sitting down all the way. So spin the rotor around a bunch, twist stuff, and in general just fuck around. I’m serious. I have no idea what I did to get the dizzy to sit down all the way in the right place. It kept getting hung up, then out of nowhere (after plenty of twisting), it sat down. Ok, weird, but awesome, that’s done. When you put the dizzy cap back on, realign the vacuum port with your sharpie mark to get timing within a few degrees.
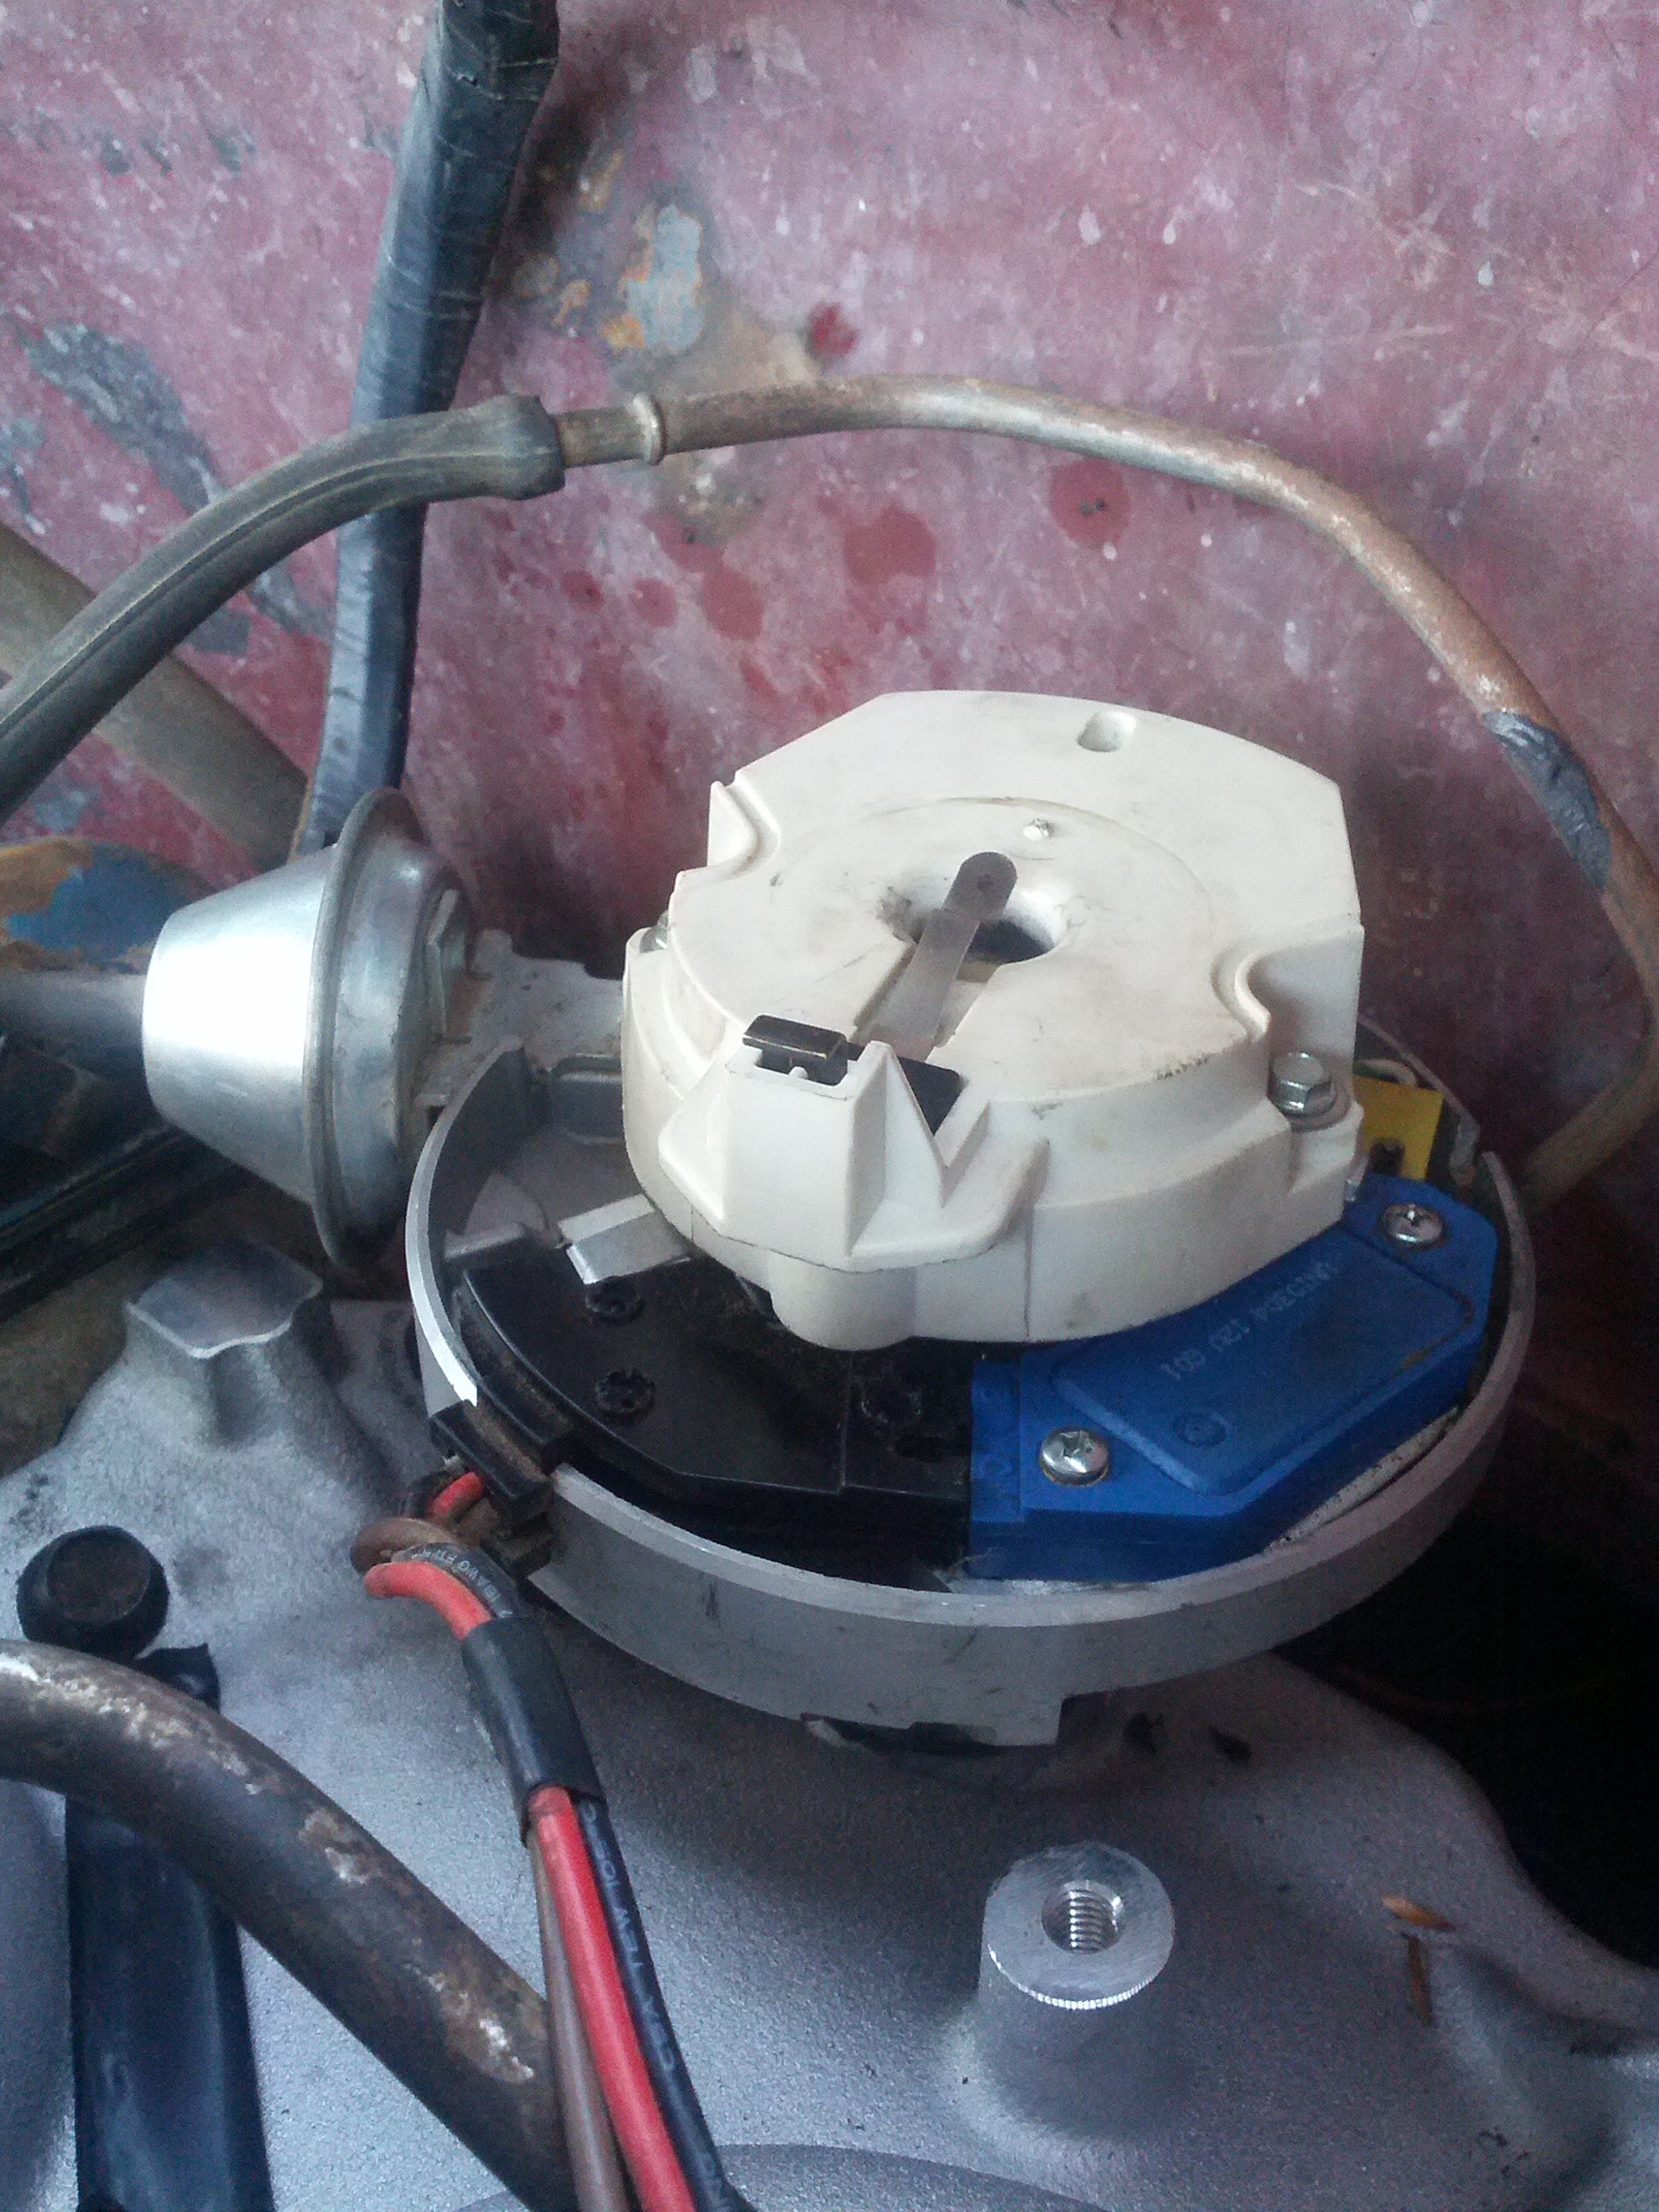
And quite frankly, that’s the hardest part of it all. Now, take your shiny carb, bolt it on, and try to remember where the hell all those vacuum lines are supposed to go. Yea, I told you you should remember. For anyone that cares, I went with a 750 cfm Edelbrock 1411 Performer Series carb. It cost about $320, and ran right out of the box. Get them all hooked up where you think they need to go, and then call it good. Wire up your new electric choke (seriously, if you get a new carb, spend an extra like $10 and get one with an electric choke. Being able to not have to sit in your truck and feather the throttle till the engine warms up is AWESOME). Connect fuel lines, make sure everything is back on, and sit back, enjoy a beer, and look at all the cool shiny shit on your engine. Go ahead, take a picture or two.
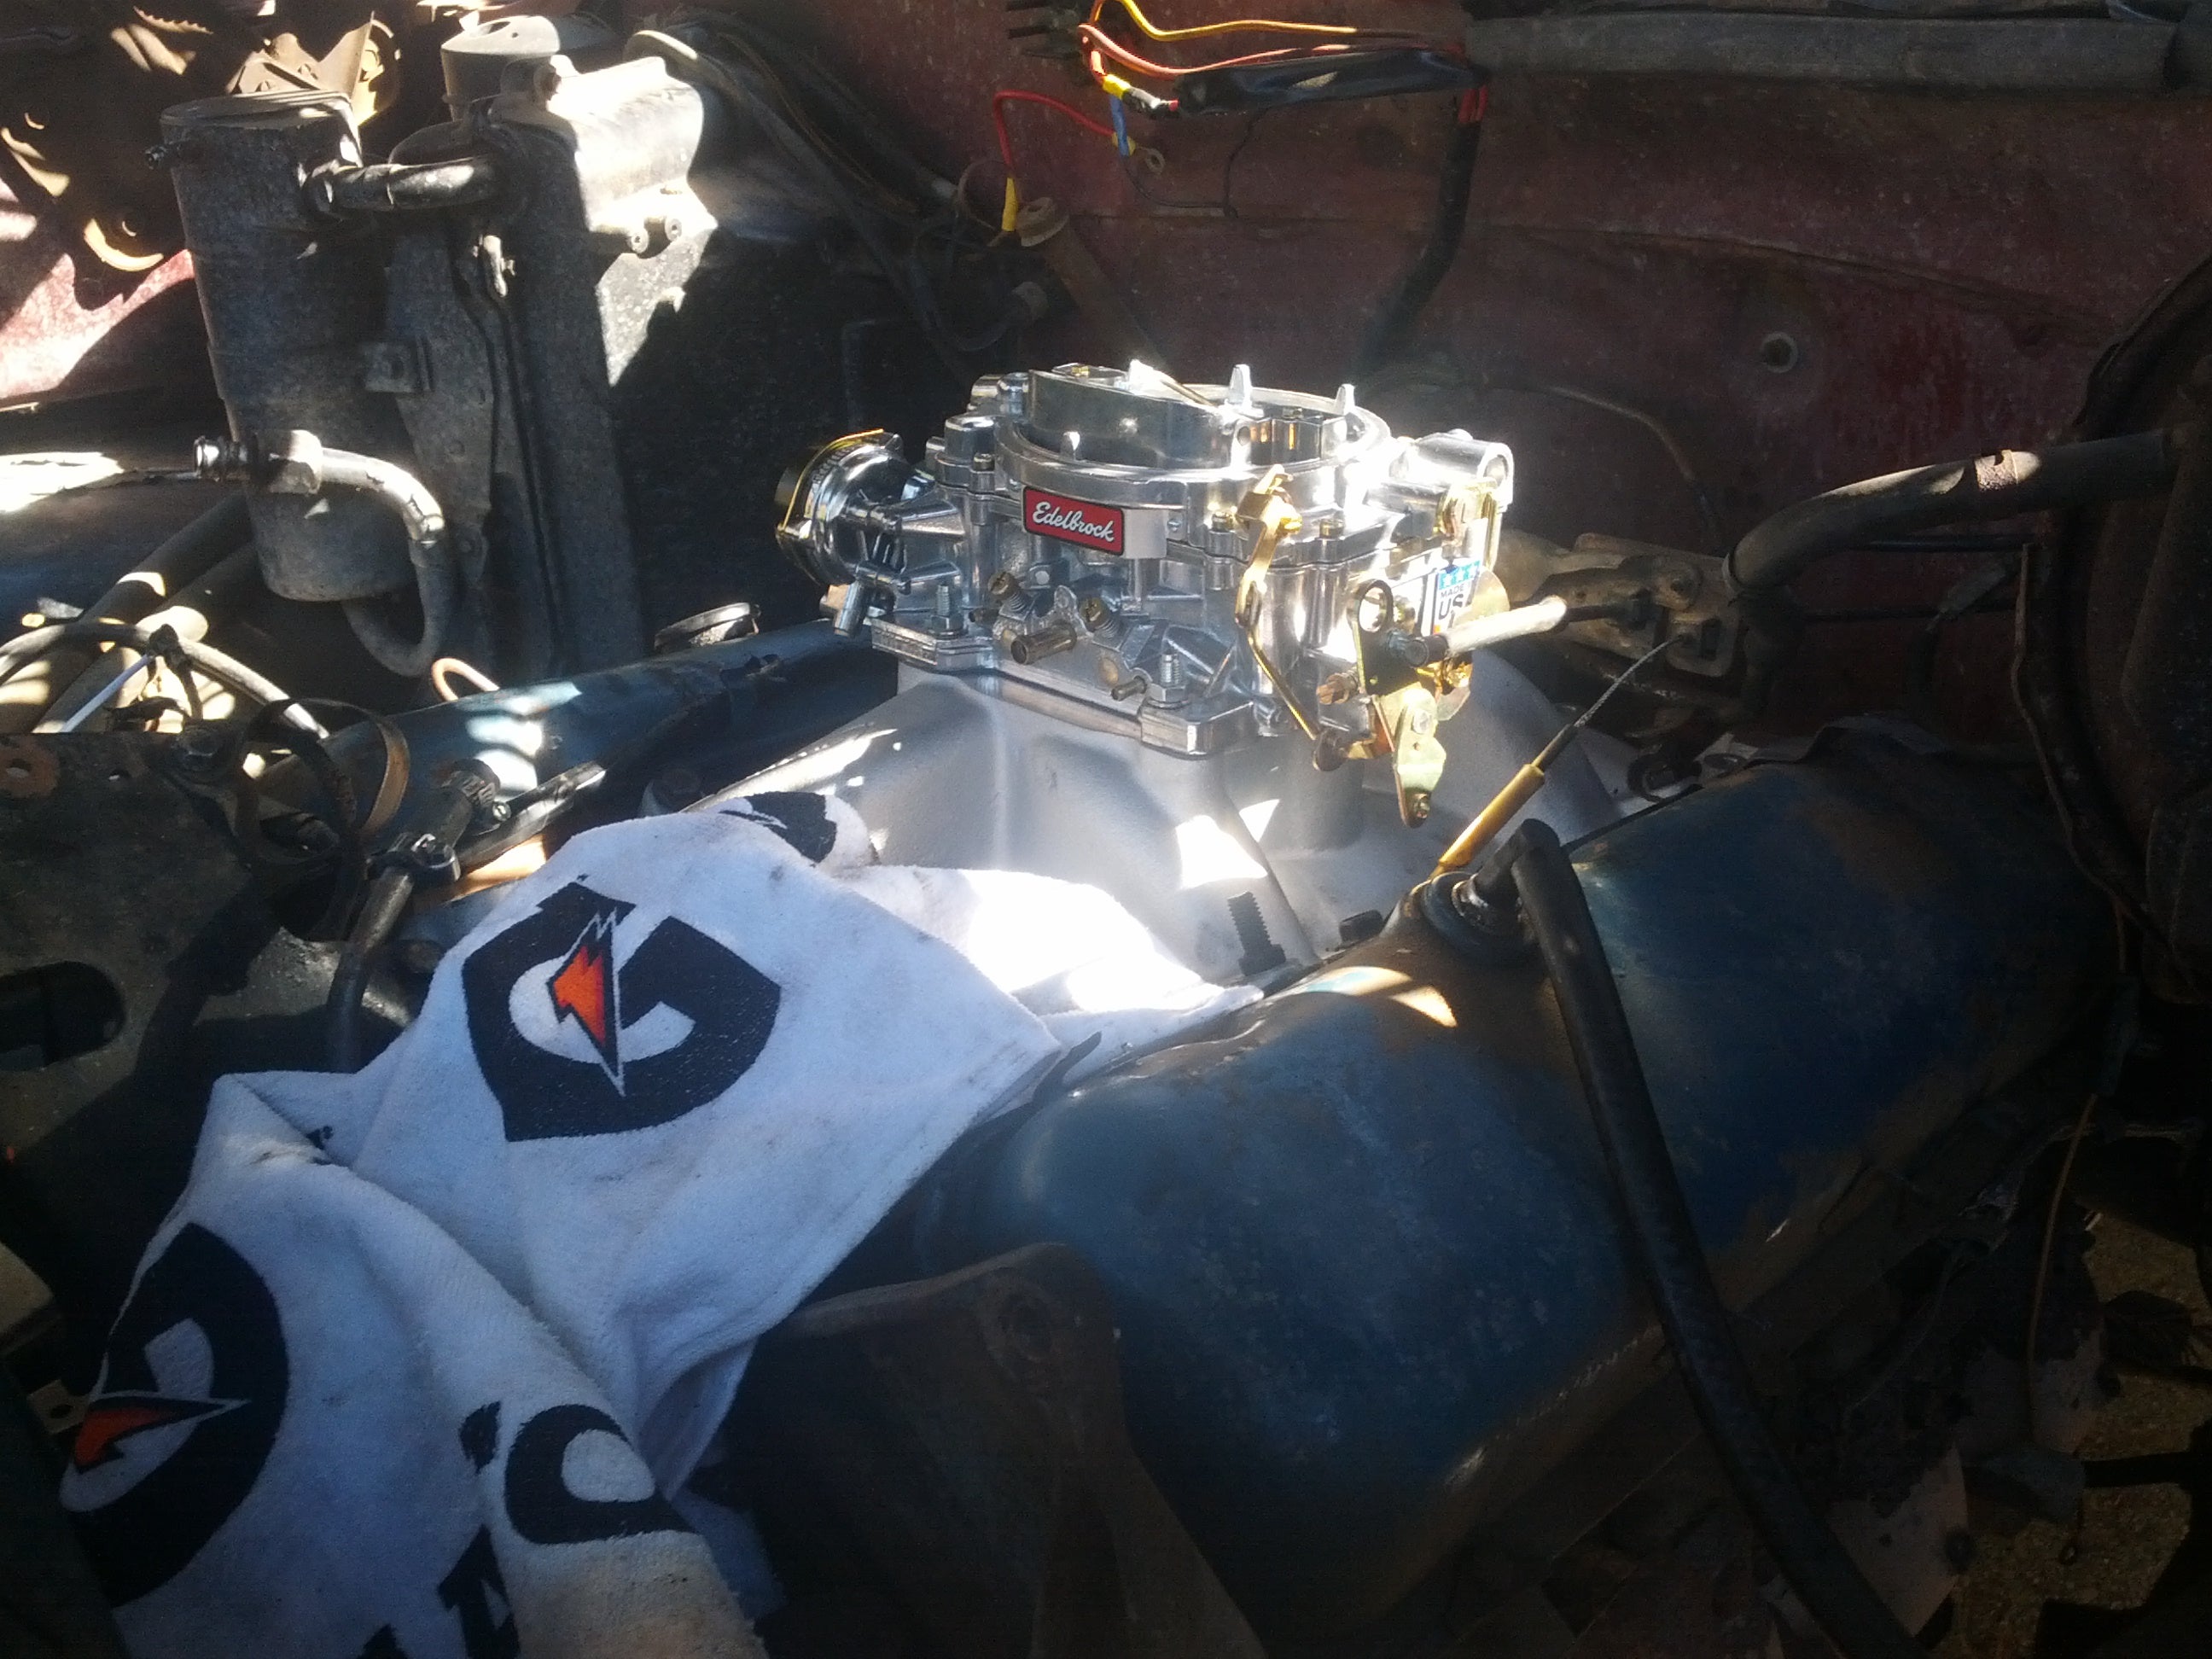
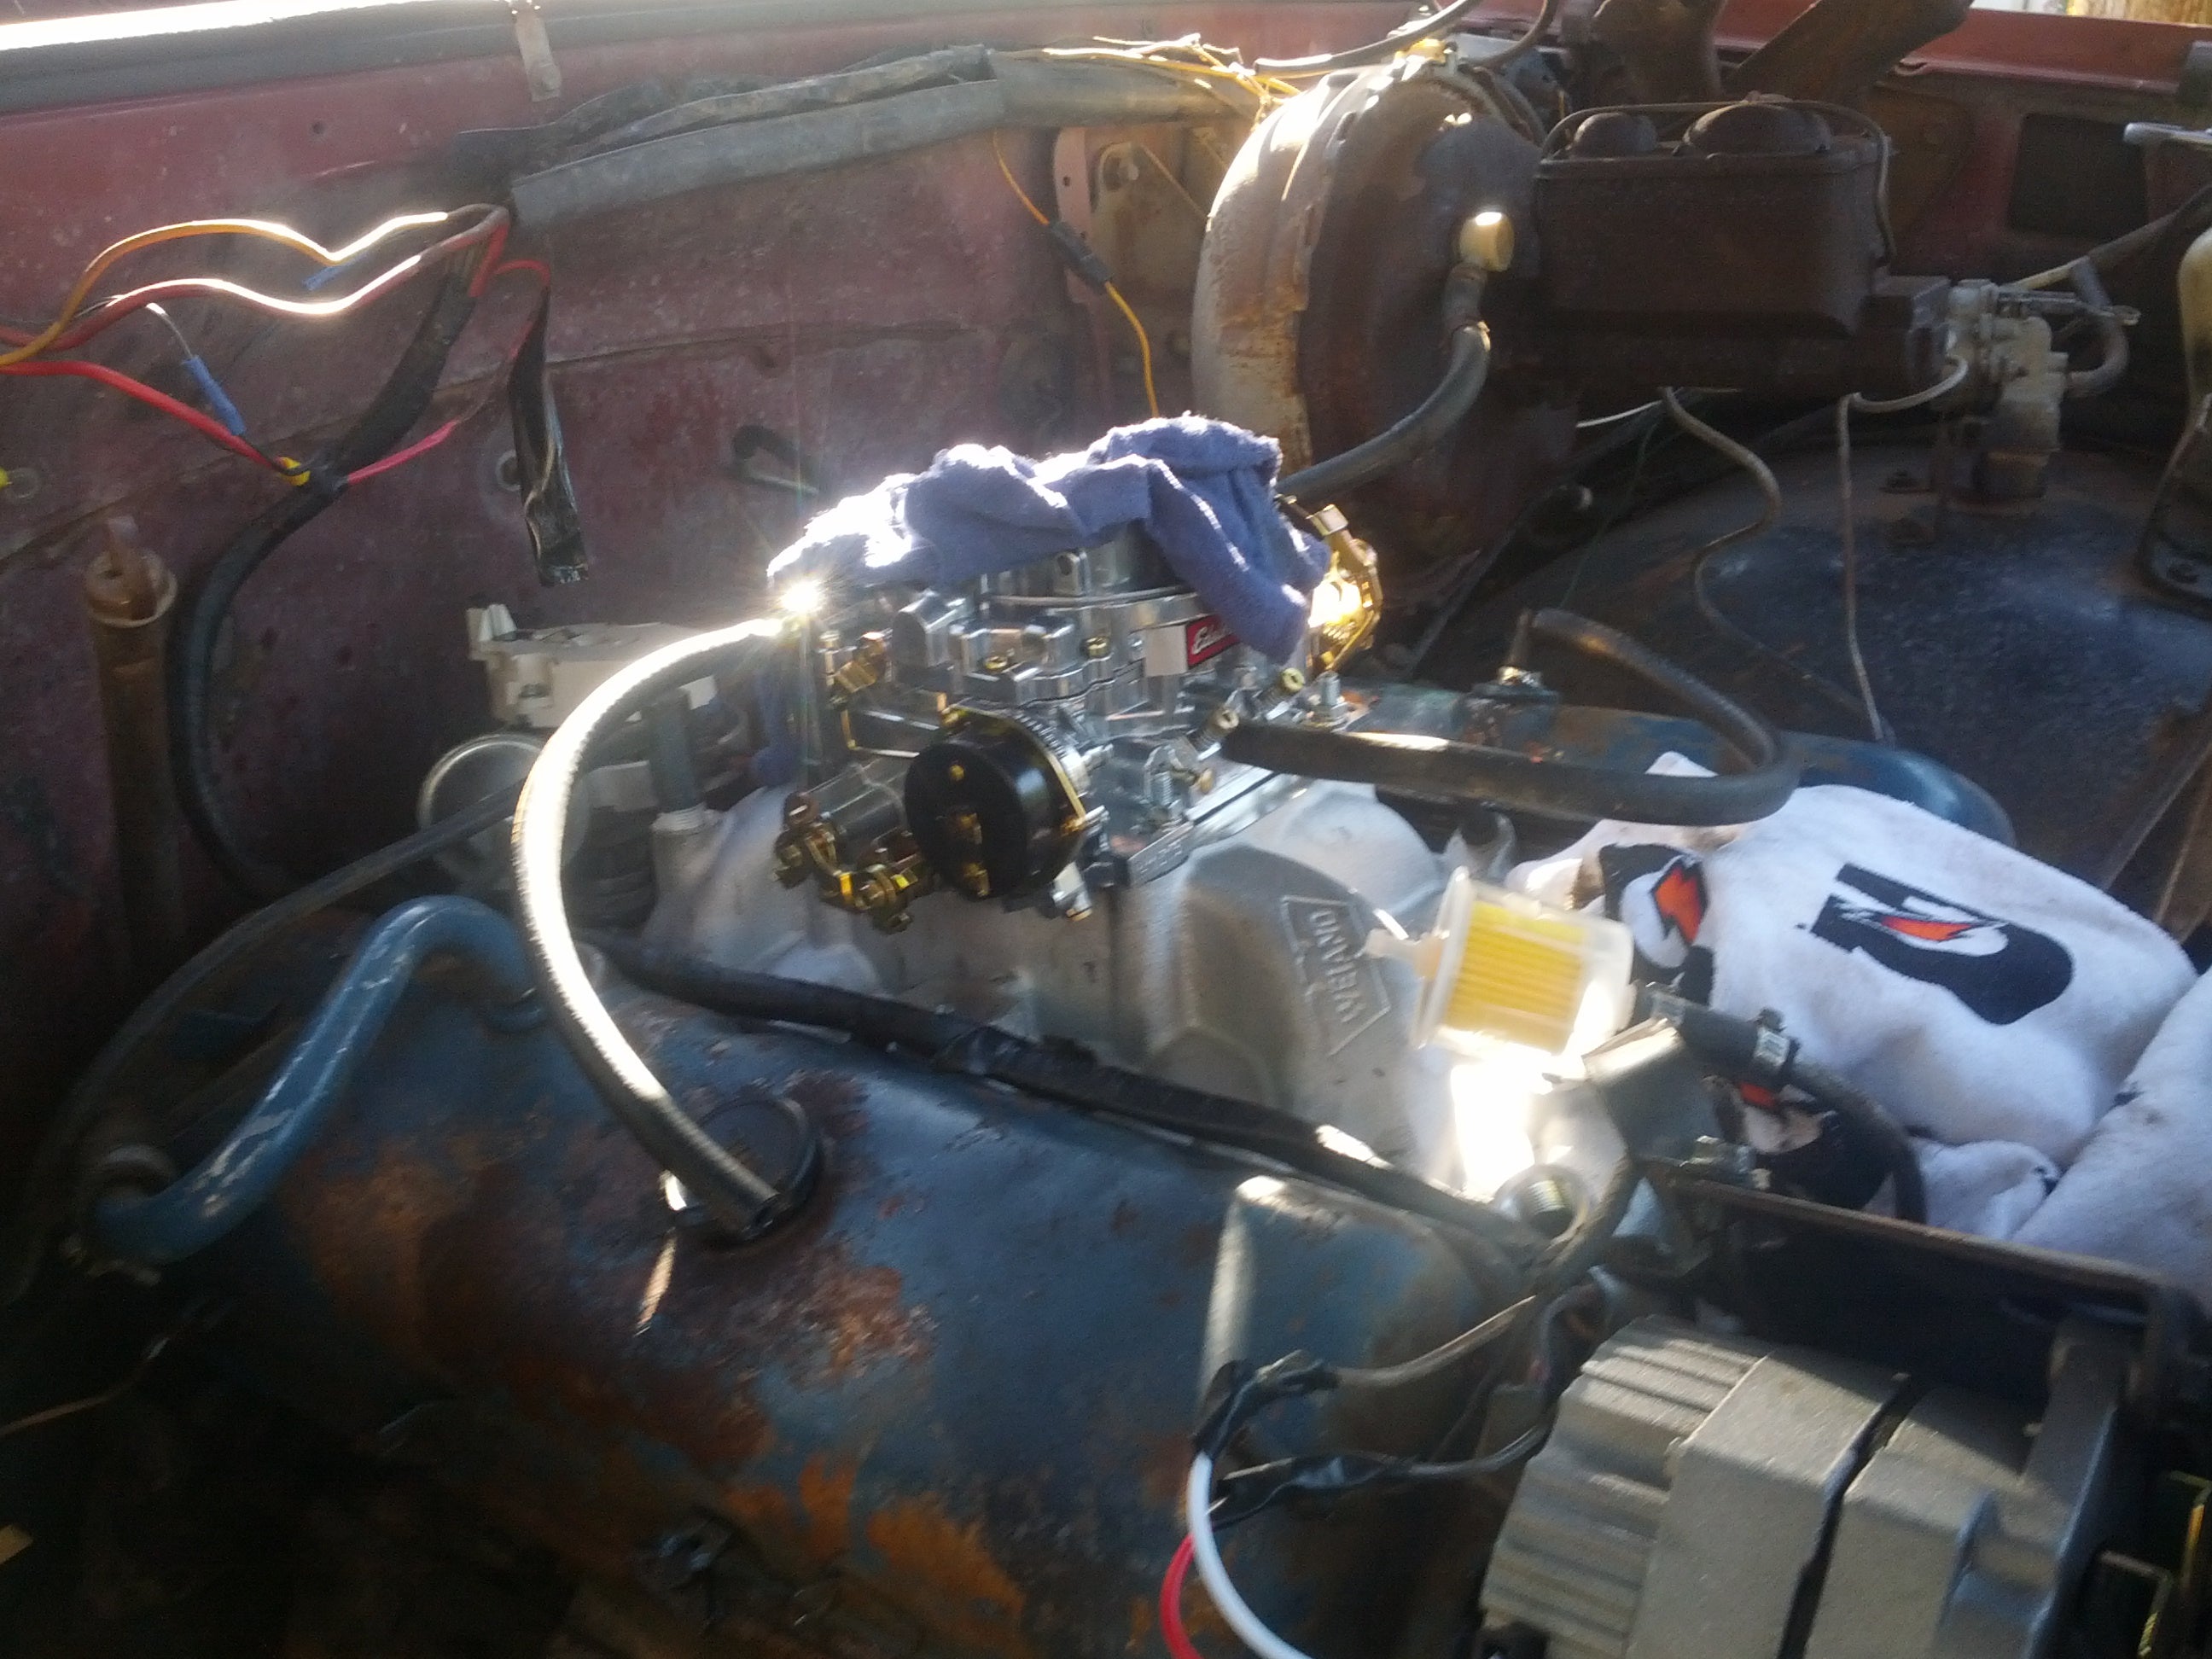
Connect the new spark plug wires back on in the right order (1-8-4-6-3-5-7-2 if you’re a BBC guy and now have that memorized). Oh yea, put the spark plugs in first.
One last check, make sure all you need connected is connected, and then start praying. Or doing some sort of ritualistic dance. Or just drink another beer. Connect the battery (Shit, that should have been the first step. Ok, start over and disconnect the battery). Turn the key. It most likely wont start right away because fuel needs to get to the carb. Keep cranking. Listen. Does it start right up? Cool, you guessed timing right! If not, twist the dizzy a little, and try cranking again. It started this time, didn’t it? Hell yea it did, because you’re a badass garage mechanic. Drink plenty of beer. And take a video. And then try to do a how-to writeup for Oppositelock.
Next week (these won’t be weekly. They’ll just be whenever the hell I want) we’ll go over actually timing the engine. Because while it started, that’s just a ballpark estimate. You need a timing light and a buddy or two to get it timed right.
That’s all for now. Hopefully this was informative and or entertaining for someone. If not, whatever. I’ve had a few beers by now, and I could care less.
Enjoy my video.
 Birddog
> BJohnson11
10/23/2013 at 22:11 |
|
You lost me with the Edelbrock "Carter" carb.
Edelbrock also sells a Qjet but really a 650 Holley with a garage rebuild would beat both hands down.
Good choice on intakes.
When that Carter starts throwing fits you'll have an easy time swapping a man's carb on there and actually be able to enjoy that big block.
 Birddog
> Birddog
10/23/2013 at 22:13 |
|
 BJohnson11
> Birddog
10/23/2013 at 22:19 |
|
Yea yea yea, Edelbrock vs Holley showdown. I thought about the Holley unit, and was very close to getting it, and down the line, when I do a more performance build on the engine, I'll think about a new carb.
As of now though, the engine has the "horrible" peanut port heads, and even with the new stuff and the huge displacement, will probably put out less than 3750 horse and 450 lb-ft. So when I do cam, heads, and whatever else, I'll think about a different carb.
Other than that, how did you like the writeup? I'm curious if people actually want to read these things in the future.
 Birddog
> BJohnson11
10/23/2013 at 22:42 |
|
Peanut ports? I thought those were reserved for HD trucks. I'd swear you should have had the same oval port open chambers that the LS4 had.
Either way. It was an entertaining post.
I look forward to updates.
 BJohnson11
> Birddog
10/23/2013 at 22:46 |
|
Nope. The 454s in the C10s came with the peanut port. I verified with a head casting number just to be sure. I'm pretty sure all 454s that weren't in cars had the peanut ports.
And thanks. Glad you liked it.
 desertdog5051
> BJohnson11
10/23/2013 at 22:59 |
|
"...but in general apply about a ¼” thick bead of silicone along the front and rear seal surfaces. Apply extra at the corners between the front and the side gasket..."
There is no need to apply that much silcone. Most people apply way too much sealant. It can infiltrate the internals and cause oil pump/bearing damage if it goes into the circulation system.
 BJohnson11
> desertdog5051
10/23/2013 at 23:04 |
|
Yea. Maybe. Thickness is a horrible descriptor for a bead of silicone. My 1/4" thick was width, but not height. Someone could lay down 1/4" thick bead and it's also 1/2" tall (unrealistic, but possible), and that would be way too much.
I just followed what the instructions said. I understand the causing internal problems argument though, and it is certainly valid. Realistically though, you'd have to put either way too much or way too little to have internal/vacuum problems.
 Birddog
> BJohnson11
10/23/2013 at 23:05 |
|
That's wild. When I built my (former) Camaro we snagged a 454 from a 76 Suburban and it had straight up Ovals.
No thanks needed. Just keep updating.
 BJohnson11
> Birddog
10/23/2013 at 23:24 |
|
Hmm. Guy must've thrown some stock oval heads on. I'm thinking about doing that. A guy in my area was selling a bare set for $100. The peanut ports though make good Streetable heads. All low end power but nothing over like 5000 rpm.
If you're interested you can look back through my other truck project posts and see what I've done so far.
 desertdog5051
> BJohnson11
10/23/2013 at 23:25 |
|
When I used to build motorcycle engines, Silicone showing around the gasket surfaces was a no-no. I found that just a skim of gasket sealer was adequate and did not show. I watch these "car shows" on Saturday and I am appalled at what they do with silicone sealant. You do not need that much to be effective. But I am more of a perfectionist than most, I guess.
 Birddog
> BJohnson11
10/23/2013 at 23:52 |
|
They're killer low end heads for sure. If you're playing Red Light Commando that's all that matters. More than 5k is a lot to ask of any BBC without Rectangular ports or good Oval aftermarket heads.
I've spent the last few years in a turbo four banger love fest. I kinda miss the thump of a well done Big Block.
Hell I have tomorrow off and a few Keystones left. I may just look your other posts up.
 BJohnson11
> Birddog
10/24/2013 at 00:08 |
|
Yea. The plan is to keep it a low budget street/strip car. I'm in college after all so don't have too much money (read; almost none) to blow.
The other posts aren't like this one. Just highlight what I've done with the truck so far.
 MontegoMan562 is a Capri RS Owner
> BJohnson11
10/24/2013 at 12:42 |
|
Nice work.
I would say that if you had a ford windsor block you could save your self a lot of hassle!! I did my 68 Montego's carb and intake. Don't need to pull the "dizzy" as you call it. Saves a LOT of effort. side note- those cast iron intake manifolds are crazy heavy.
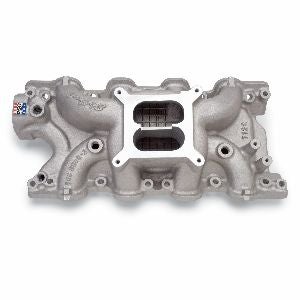
I'll show some pics from my build, but it's hard to see the "dizzy" so I'll attach a blank manifold from the web, you'll see near the thermostat housing that theres a notch for the dizzy without it going THROUGH the manifold, hey ford did something right!
Just got the manifold in:
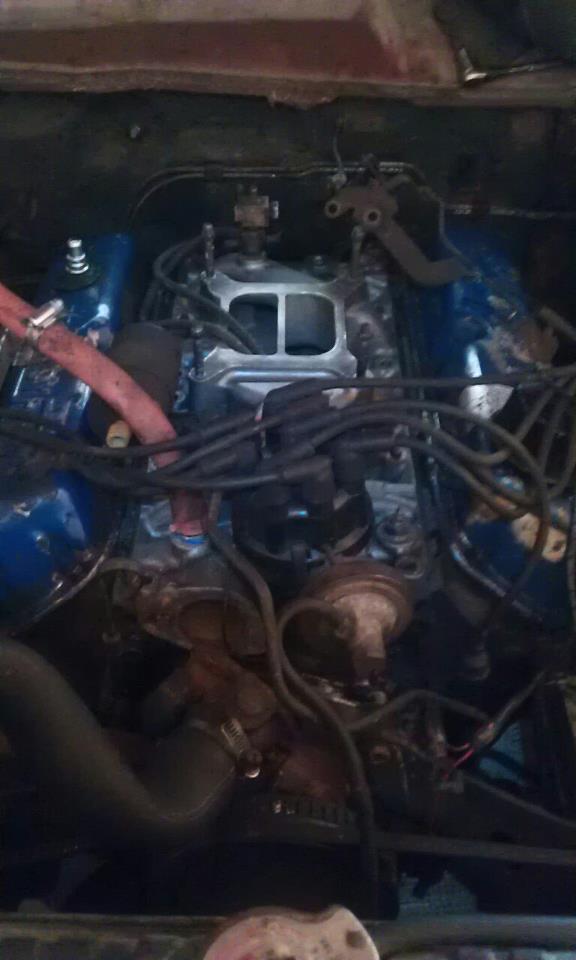
Carb on:
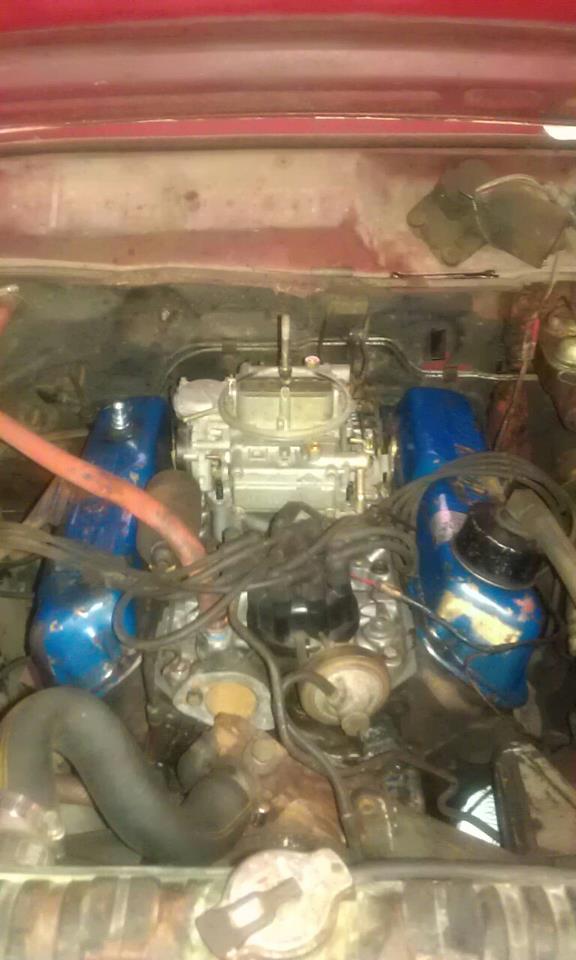
All done:
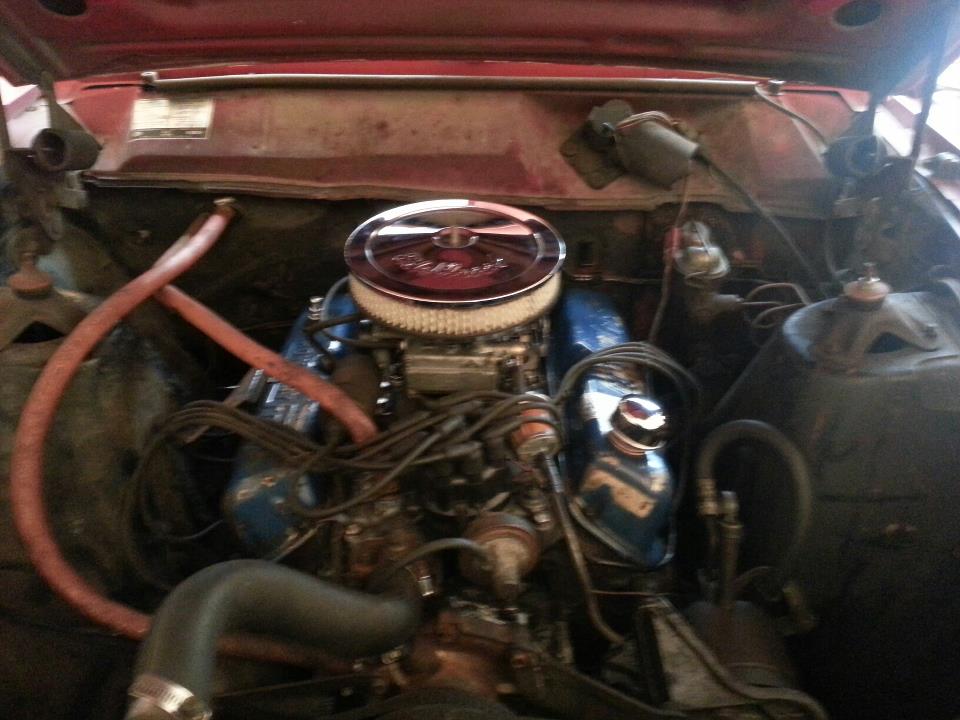
I will say it's not the easiest thing in the world to get the manifold out without removing the dizzy, but it can be done and it can save u a bunch of effort because you don't re-time. P.S. I'm jealous of your air cleaner, looks great.
Here's that blank manifold:
 Spike_africa
> BJohnson11
11/03/2013 at 20:55 |
|
I liked it, but no list on the intake used unless I overlooked it. Also my biggest pet peeve is when people usebto small or way to large of an air filter. You need a bigger one to fill out the engine bay more. Bring on a better cam and heads!
 BJohnson11
> Spike_africa
11/03/2013 at 21:00 |
|
Its a Weiand Street Warrior. And yea, air cleaner is a little small, but I liked the black finish, and it was the only one that had that. Plus, for a truck 454 that doesn't make power over 4500 rpm, it flows enough air.
Cam will be next, and heads down the line. Next in line though is an exhaust system, which will, if all goes to plan, go in over the three day weekend next weekend.
 Spike_africa
> BJohnson11
11/03/2013 at 21:14 |
|
May I ask why the cam swap before heads? Most people end up over camming and run to small or large of a head. God I was a car show today. So many great classics with big bump sticks running factory iron crap. Any idea on heads or cam yet?
 BJohnson11
> Spike_africa
11/03/2013 at 21:27 |
|
Well cam swap before heads because with my current budget (read; college student), a cam swap is forseeable for the near future (next few months) while new heads are a much bigger ticket item that wouldn't come till much further down the line.