 by "AestheticsInMotion" (aestheticsinmotion)
Published 12/05/2017 at 19:33
by "AestheticsInMotion" (aestheticsinmotion)
Published 12/05/2017 at 19:33
Tags: Miatafications
; Miata headlight shaking
; Assembly
; Flickering
STARS: 15
And today, I finally fixed it.
I’m talking of course, about my headlight shaking. The drivers side headlight has wobbled when going over minor bumps ever since I bought the car, and for a good year I assumed it was an electrical fault causing the light to flicker. Then I installed new coilovers, and noticed that when I set stiffness to max, the headlight was shaking like crazy on even the most casual, laid back drives... Hmm.
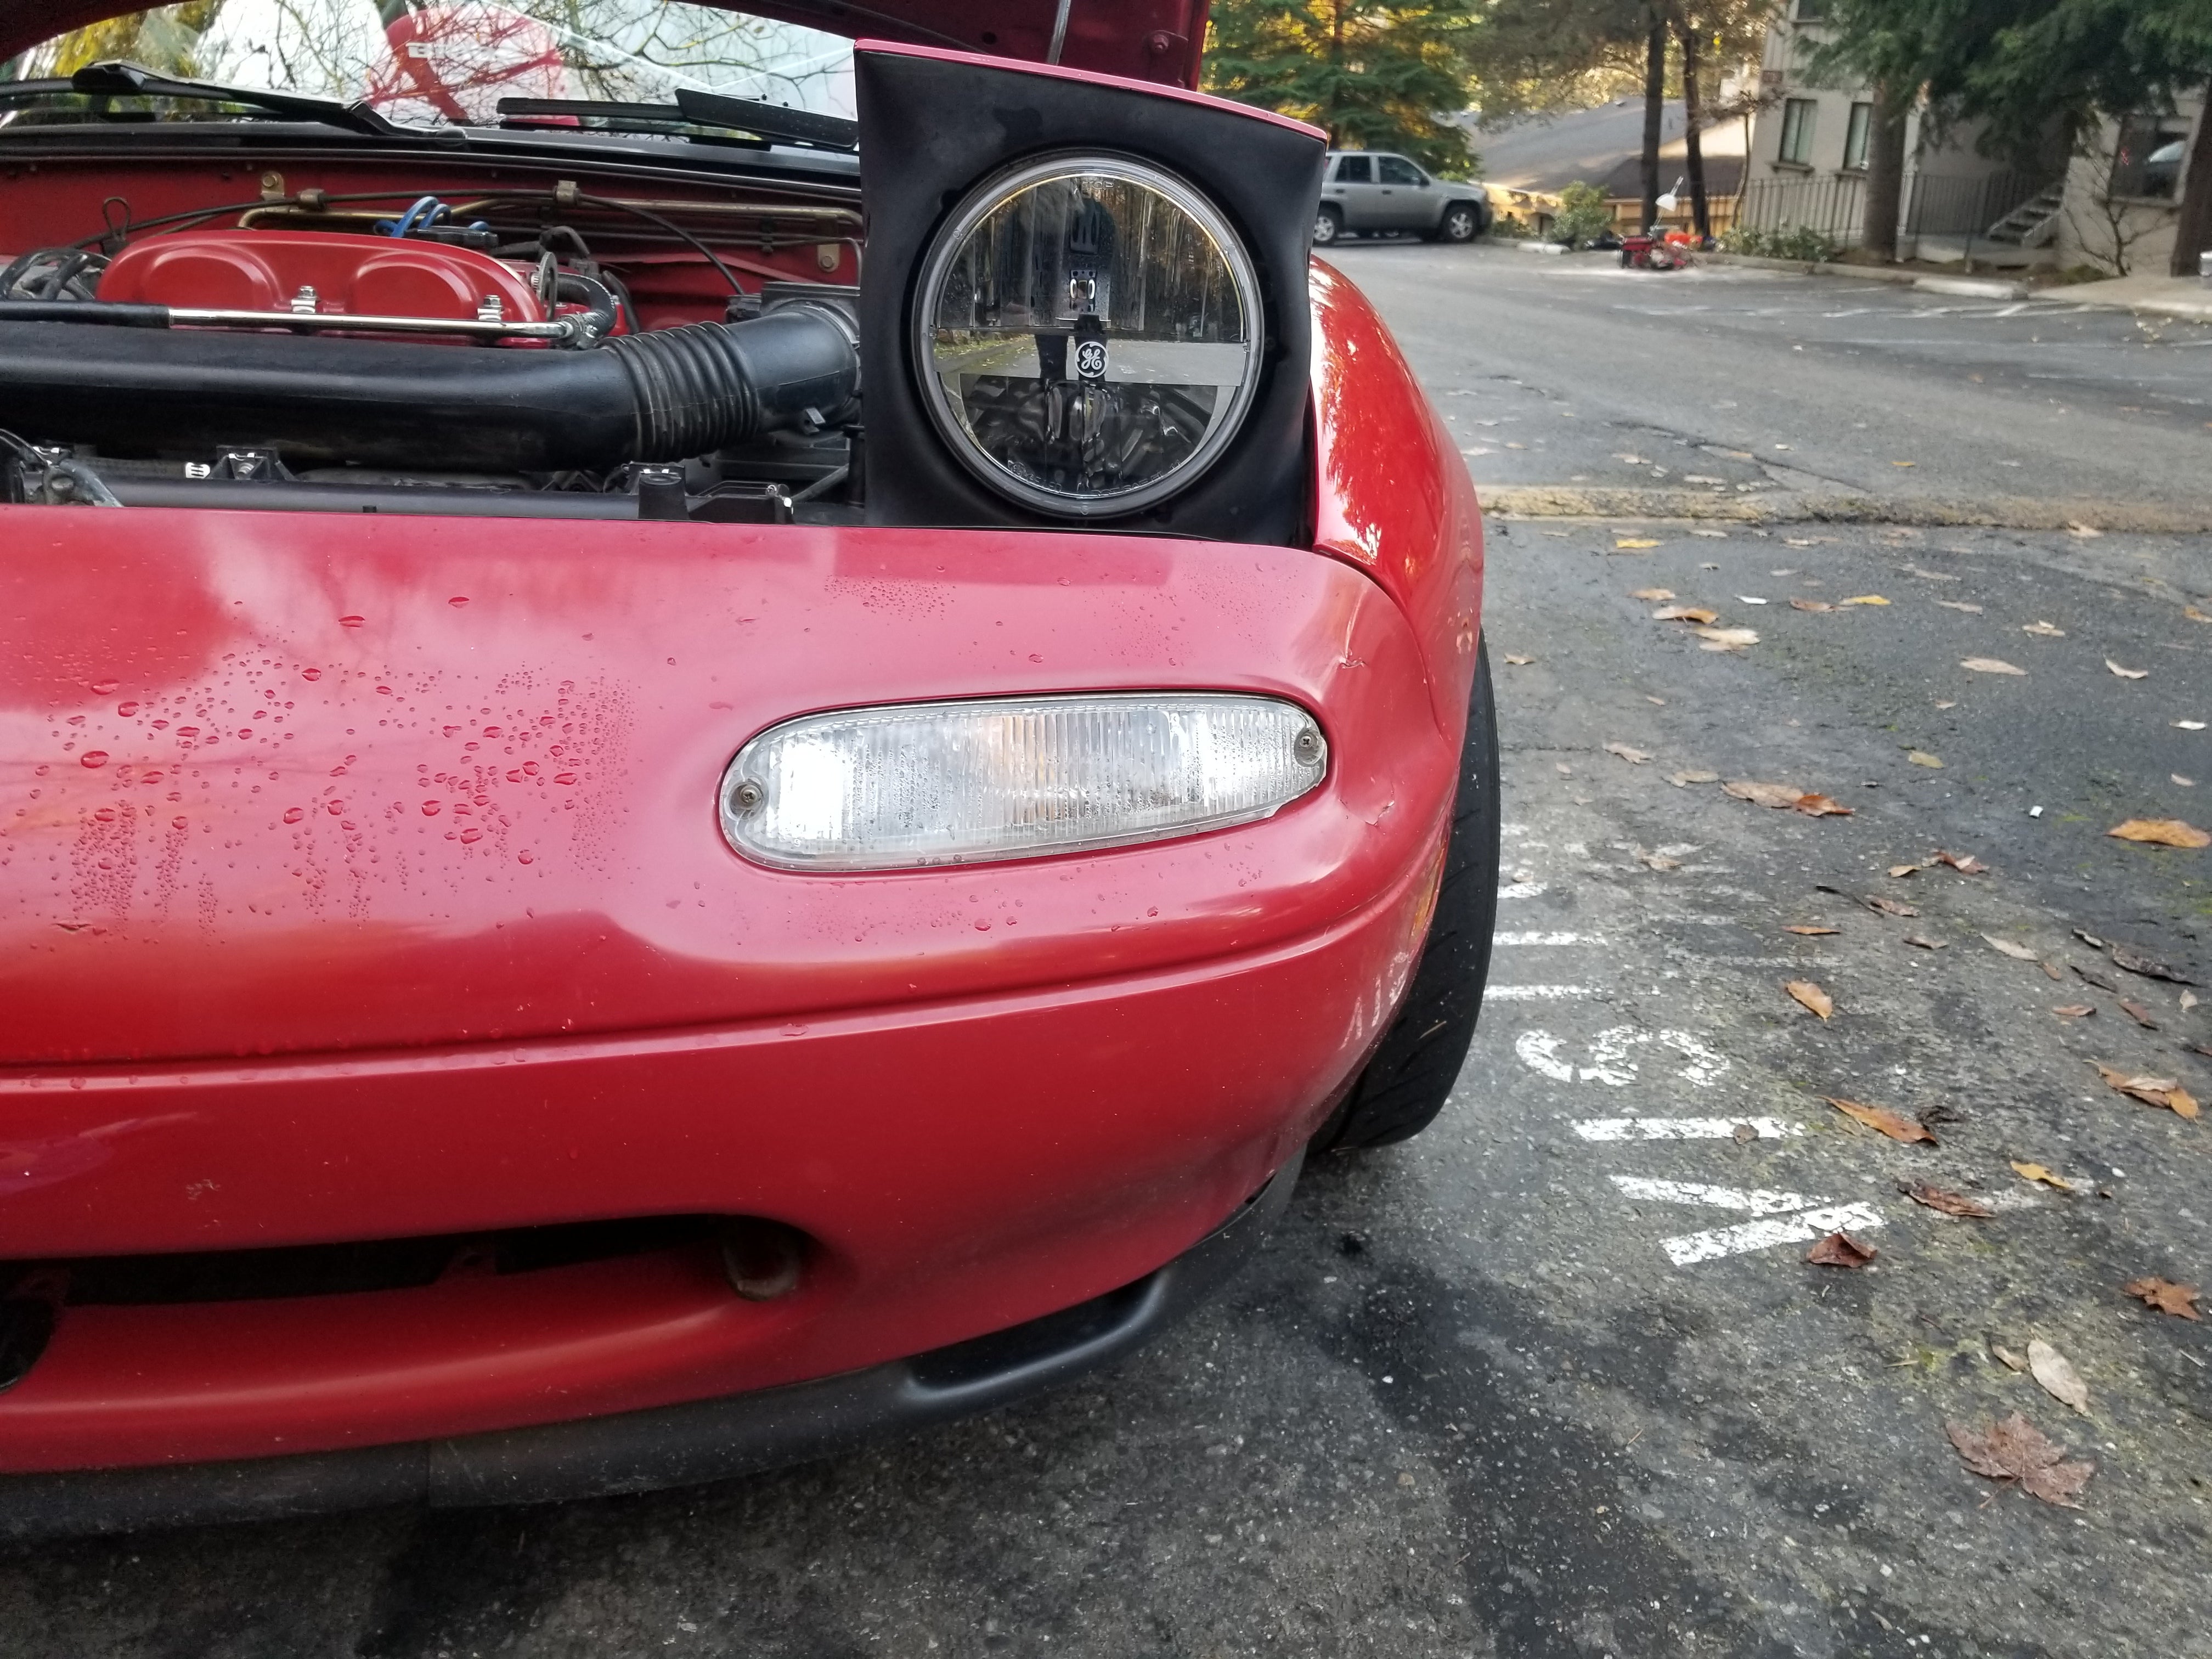
In addition, the old, stock headlights were absolute garbage, so I figured I’d buy new, fancy LED enclosures to hopefully kill two birds with one stone. Well... The lighting upgrade was incredible, but the shakyness remained. That and a few tests while stationary, meant it was a mechanical and not electrical issue. It was time to solve this problem.
Step One - Remove outer casing
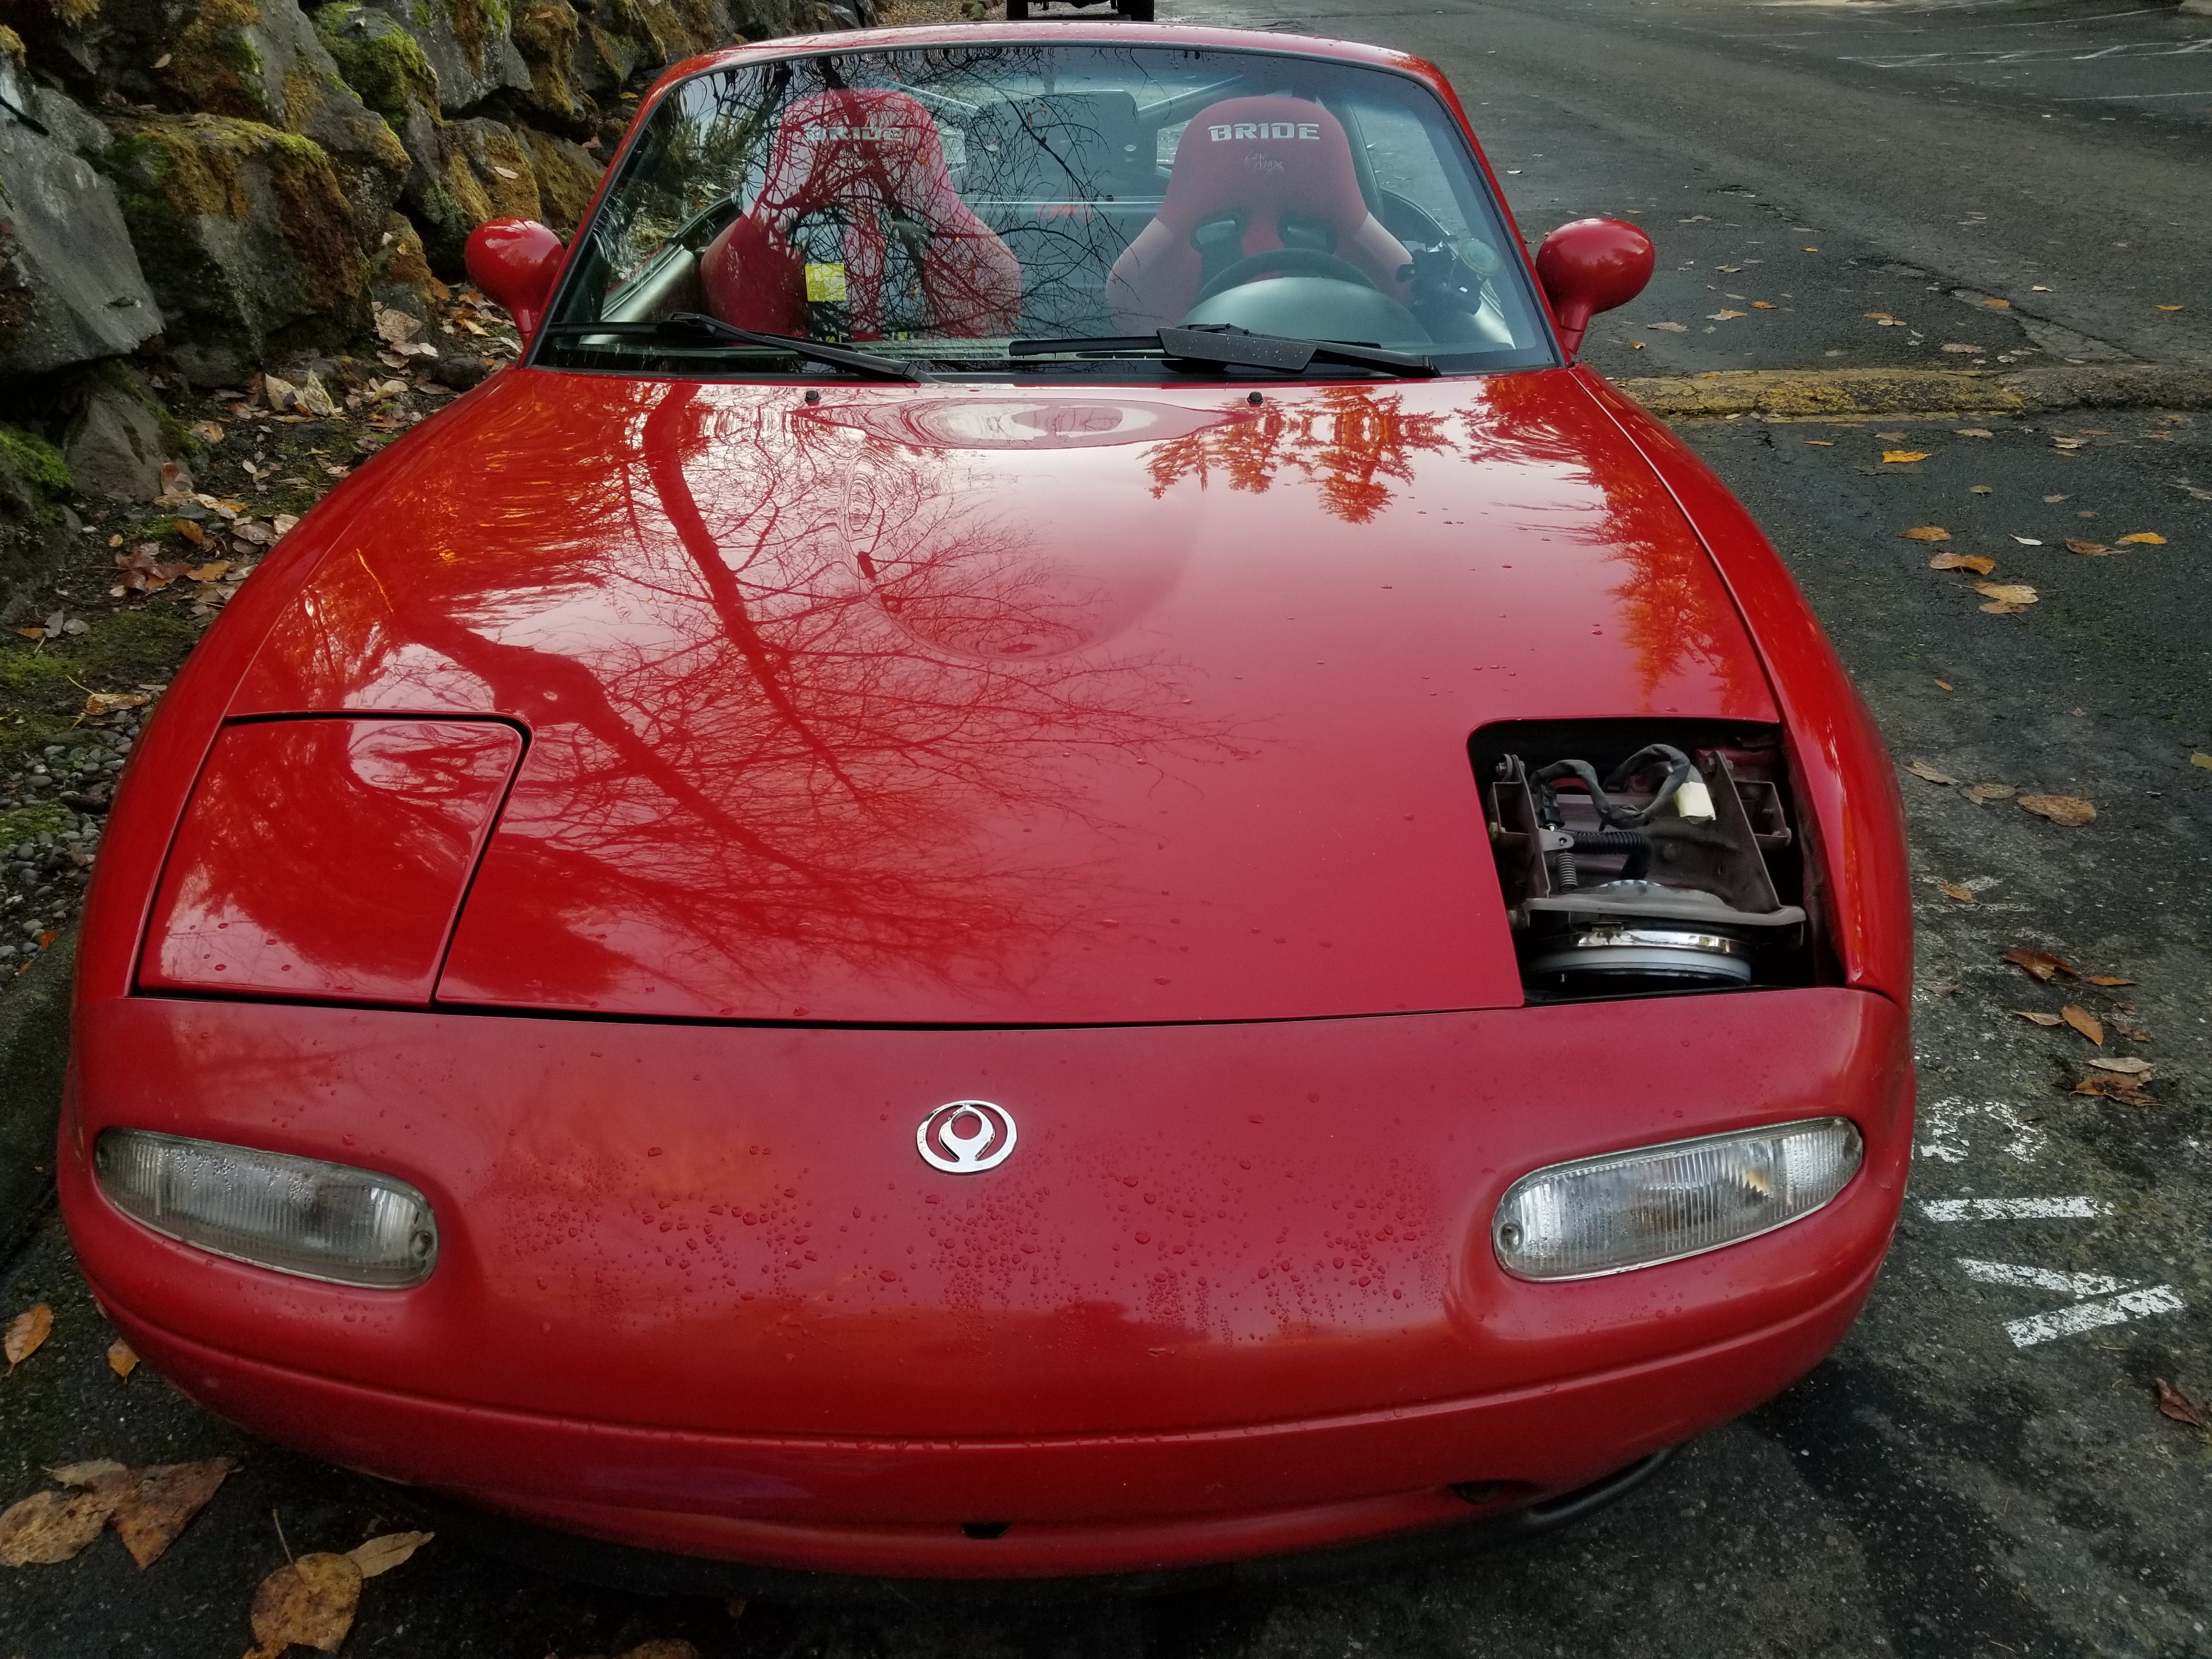
Pinpointing the problem would be a lot easier if I could see the inner workings of the headlight housing. That meant getting all of the covers out of the way! First, headlights go up. Also hood. Second, remove the headlight shroud, a black plastic cover that goes around the headlight and under the body-color headlight cover, designed to keep the elements out. Four screws and some careful jiggling and it’s free. That reveals the four bolts holding the headlight cover in place. They have indentations for a Philips head screwdriver (I mean, a JIS screwdriver) but they strip out instantly so I wouldn’t recommend that method. Once the headlight cover is off, press the pop-up button to lower the lights, drop the hood and consider for a second how the NA Miata would look if it had no pop-ups and the hood was instead a perfect rectangle.
Nightmare fuel.
Step Two - Tighten all bolts on the headlight housing hinge
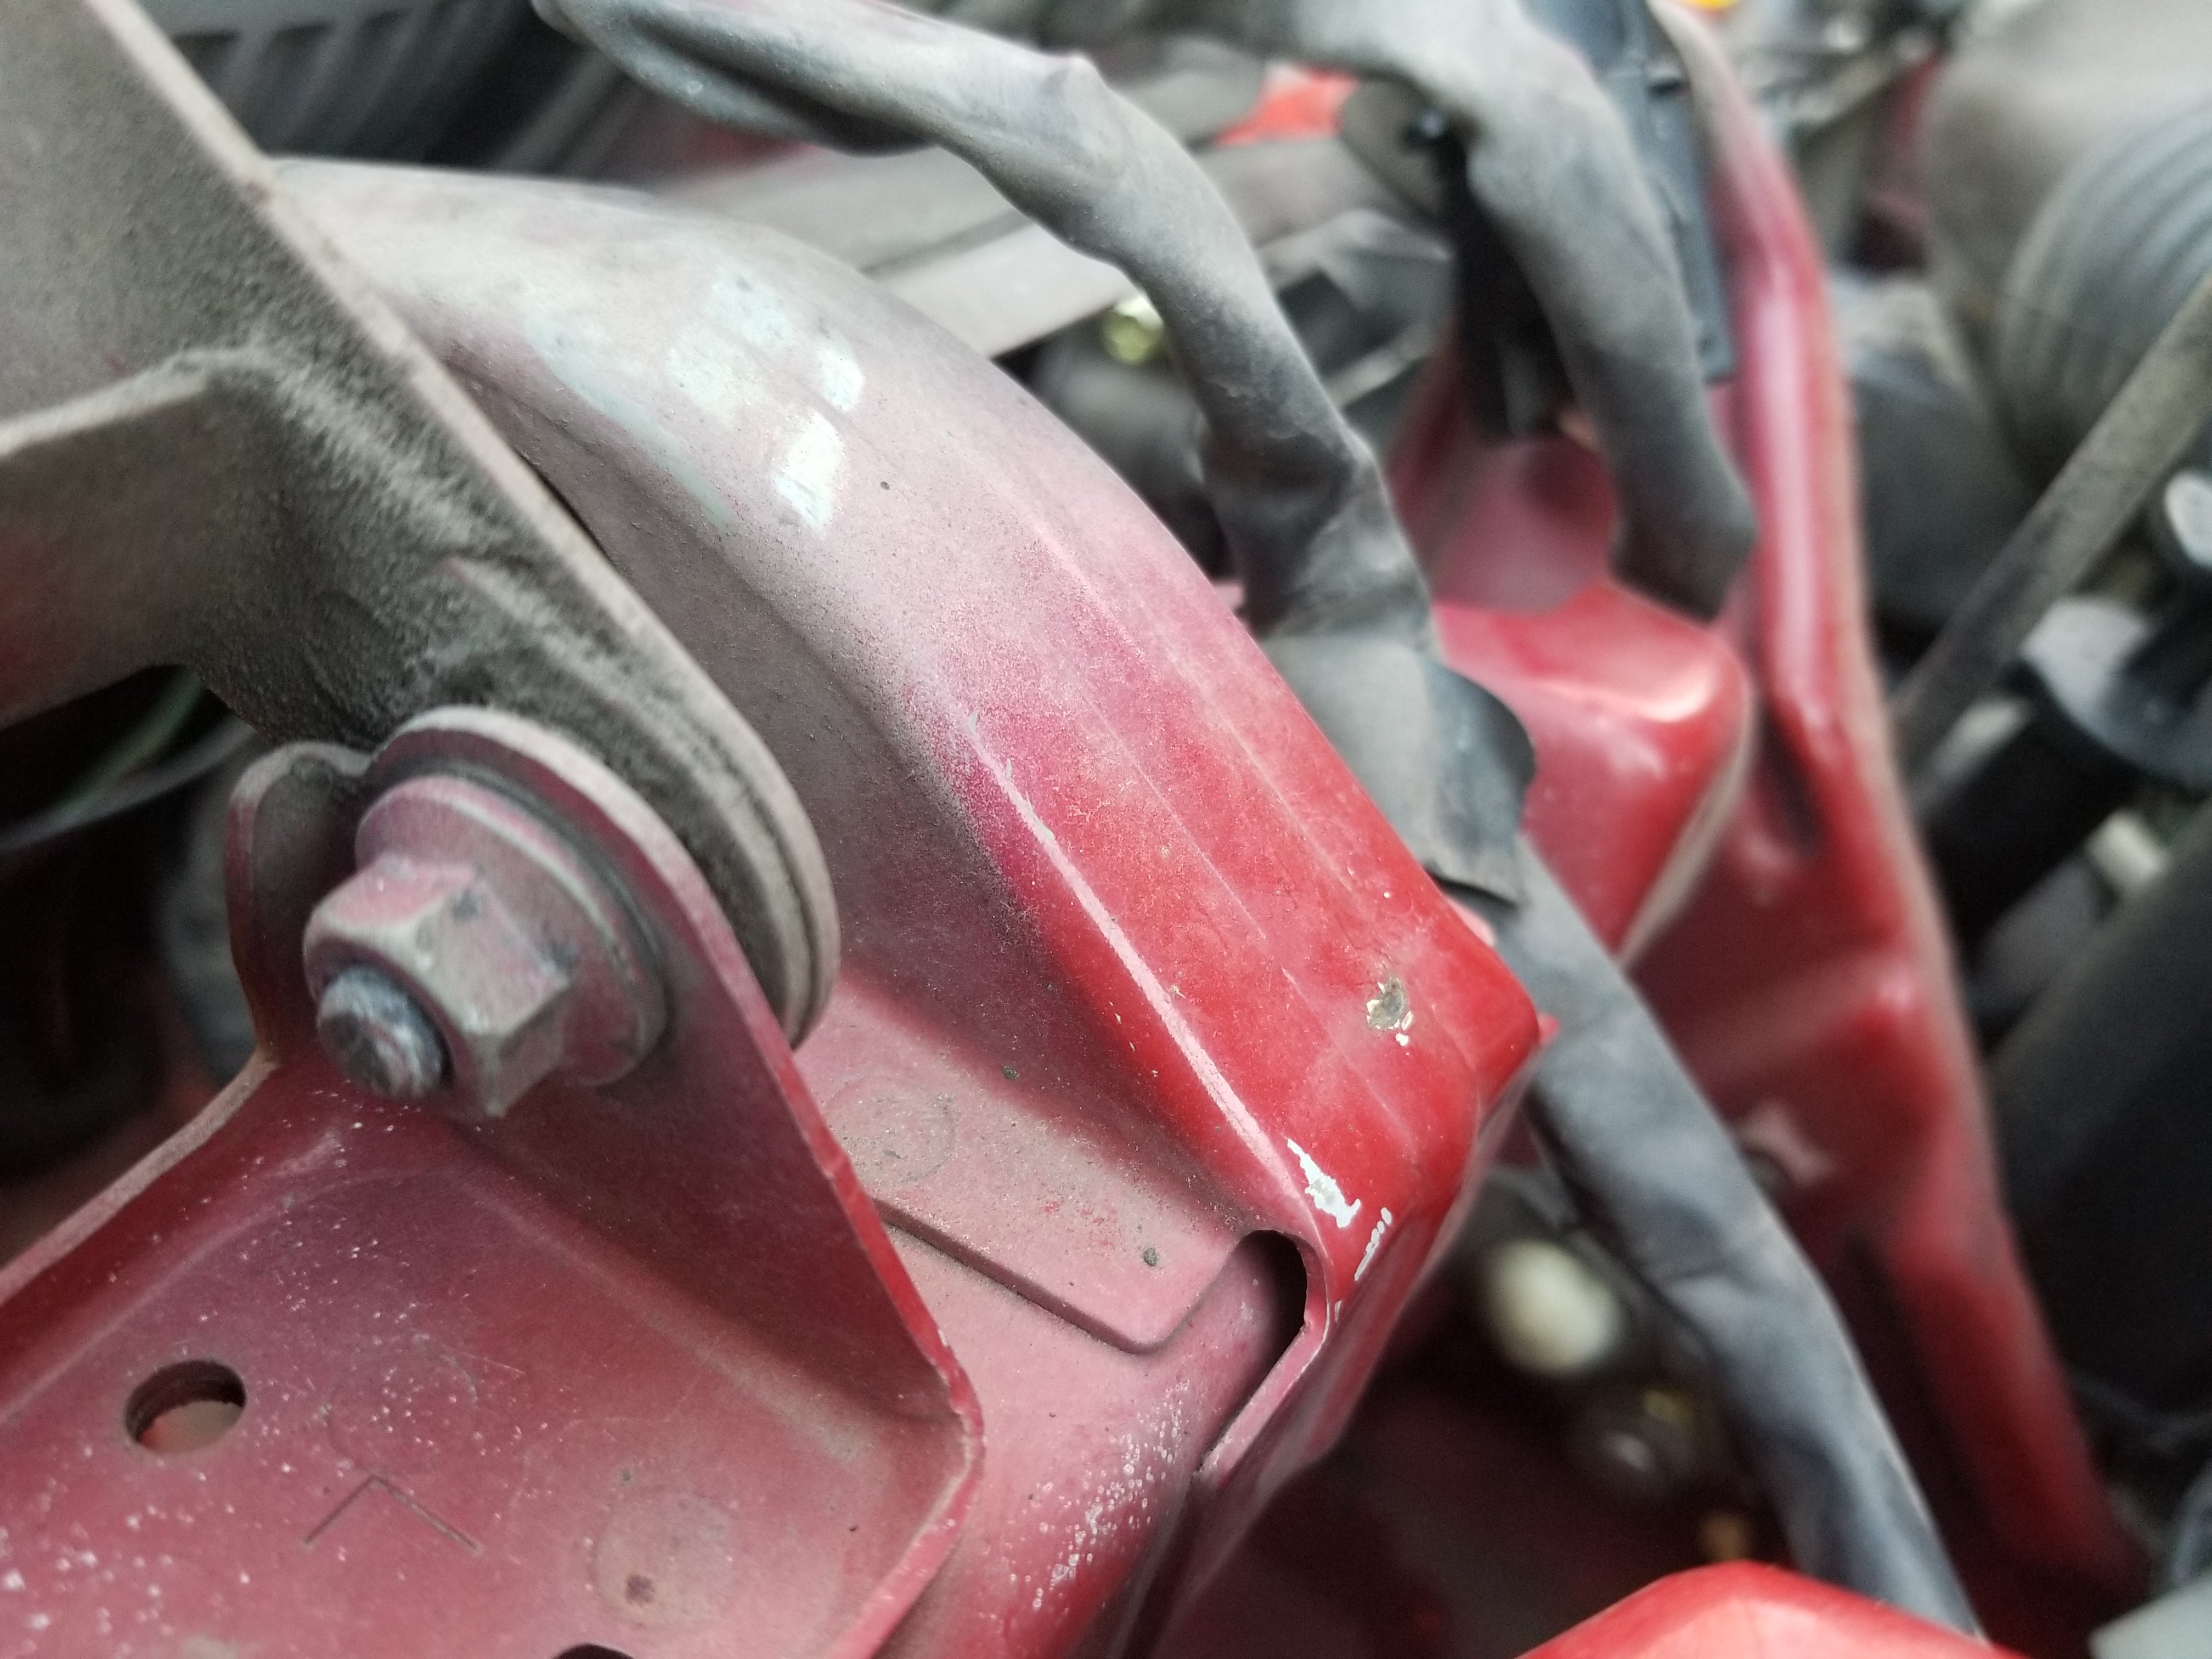
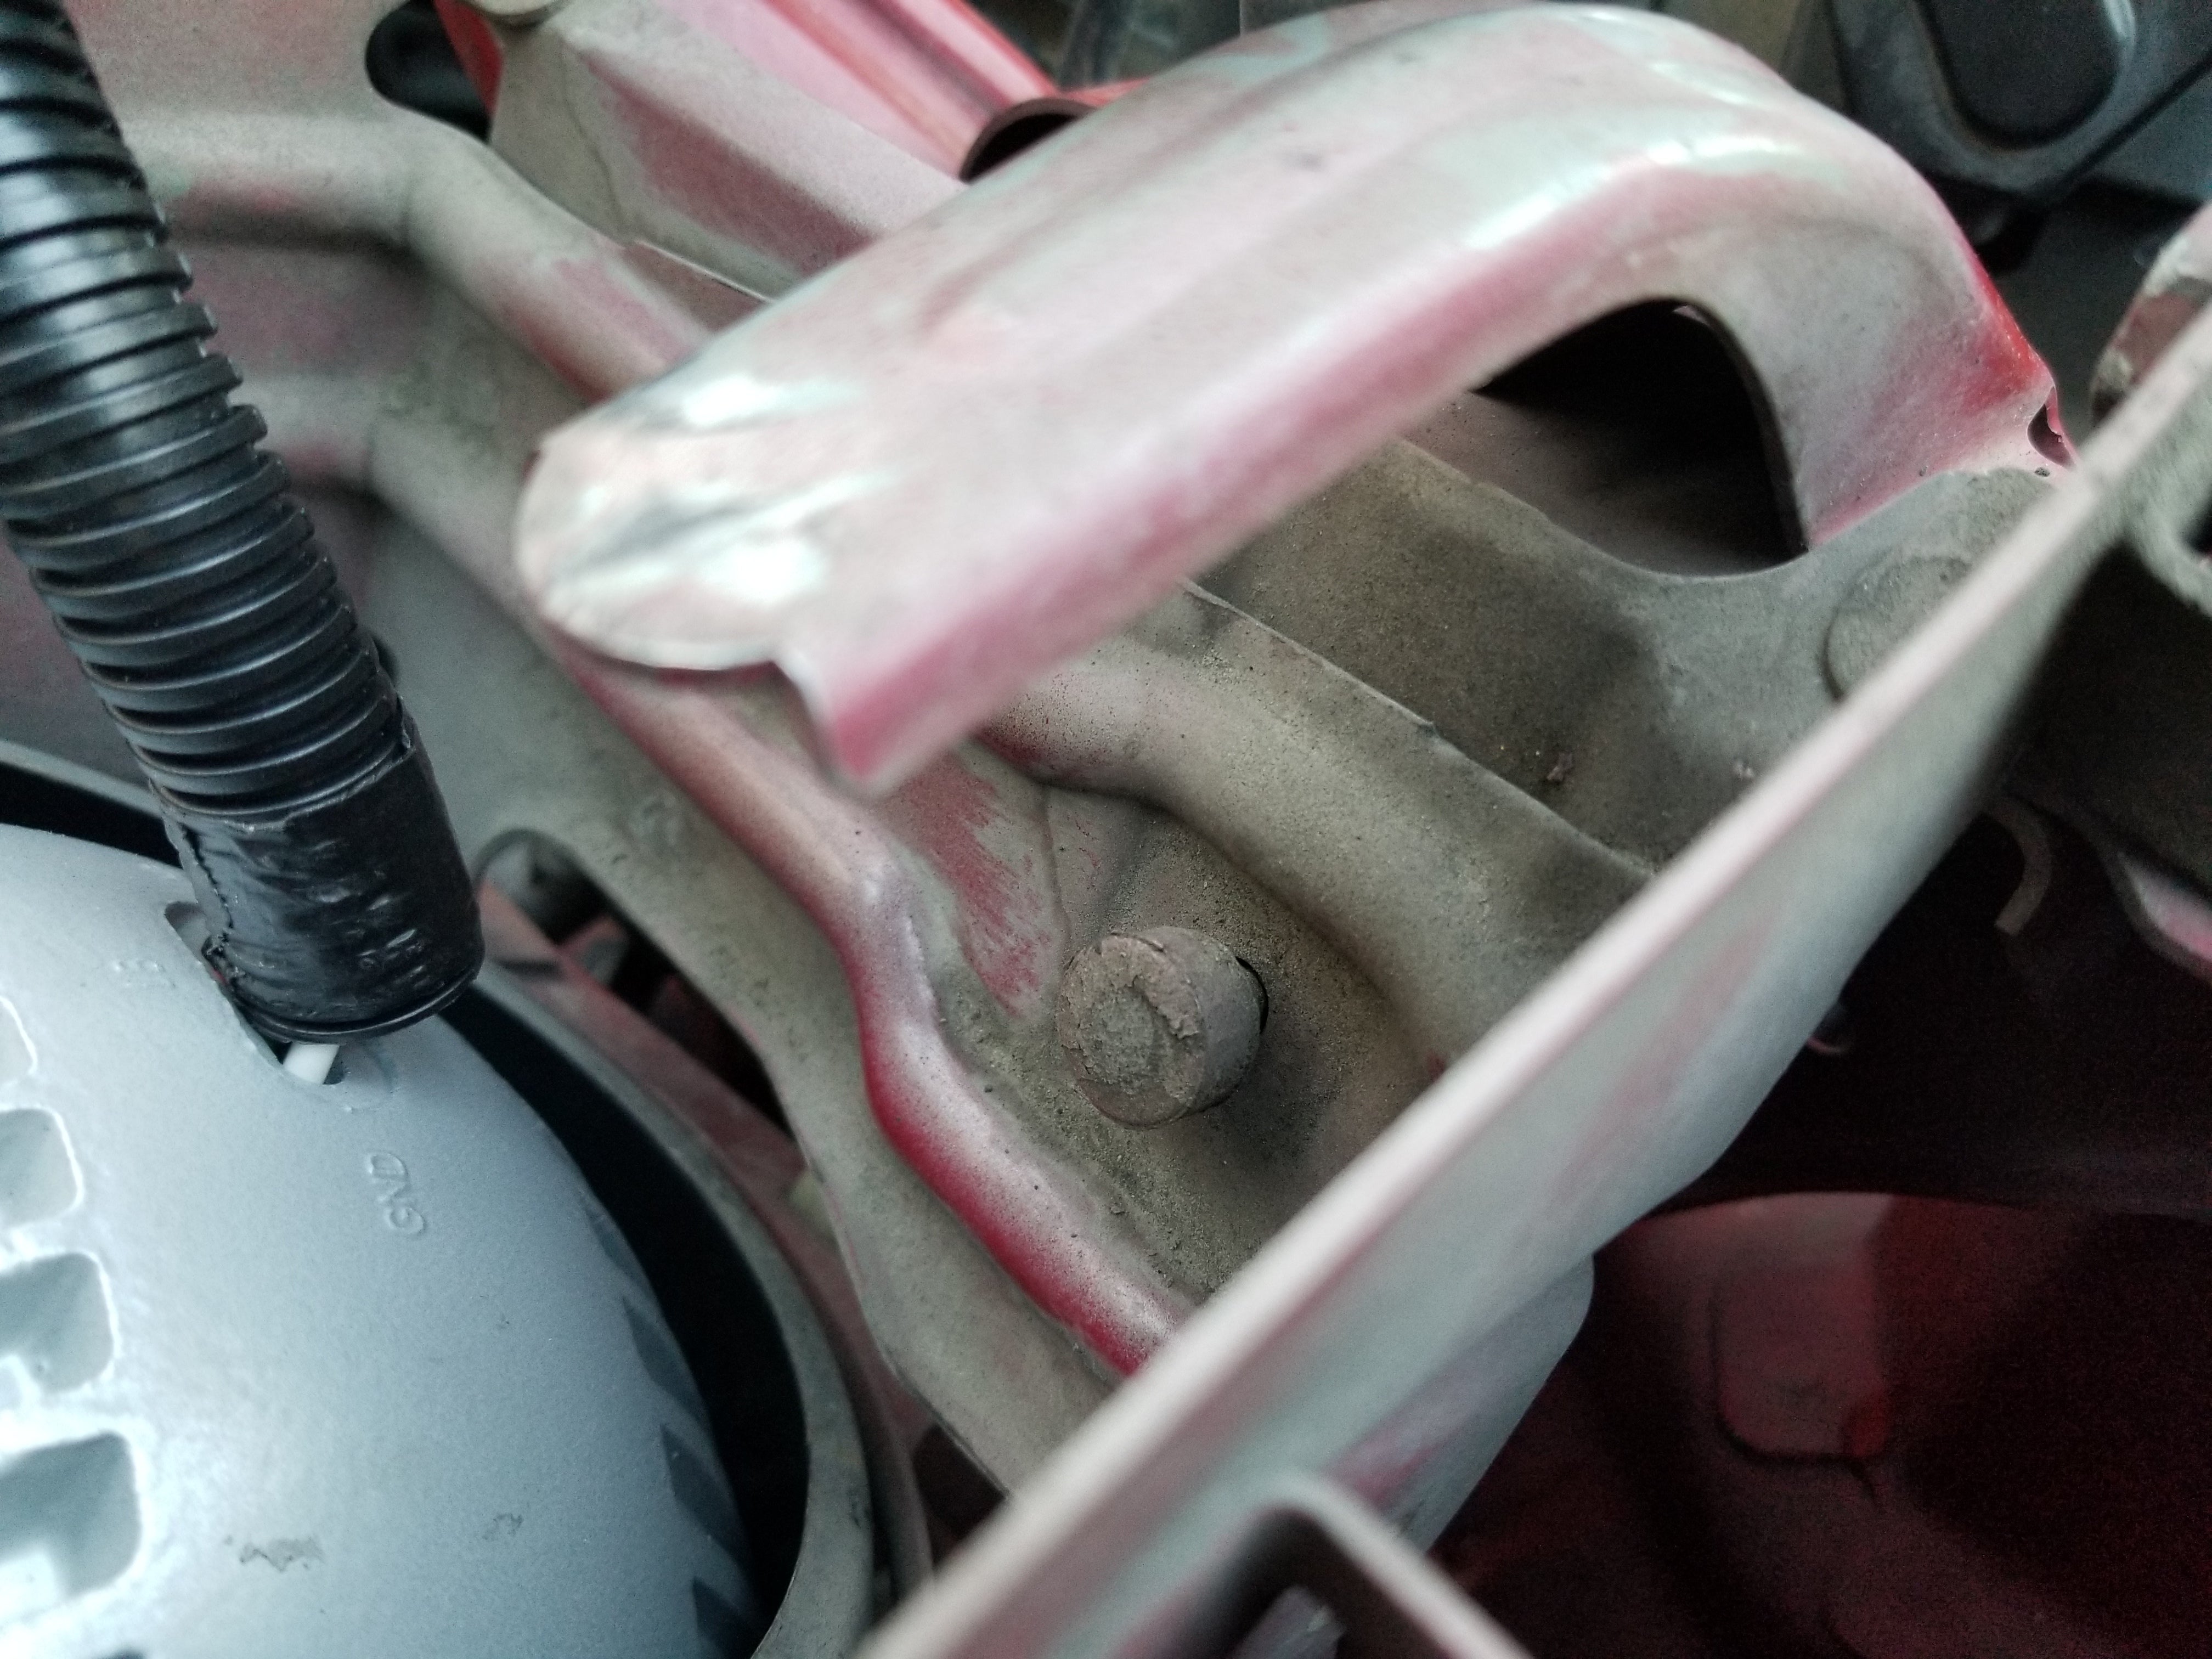
The headlight housing had a lot of slack, easily half an inch of play when in the “up” position. There should be absolutely zero. Therefore my first thought was that something must be loose. Seems logical right? Anyways, the headlight housing connects to the frame at two points—basically a hinge on either side—and a motorized arm pushes/pulls the housing around that hinge to determine whether the housing is in the “up” or “down” position. I tightened the two bolts, one of which you can see I’m the image above.
That did absolutely nothing... So I tried tightening the bolts holding the mechanical arm in place on both the headlight housing side, and the headlight motor side. Again, still wobbly. There were no other bolts I could tighten, so I was beginning to think the frame that the headlight housing was hinged to might just be damaged. This car did have a front-end collision in its past after all.
Step Three - ask yourself what you’re missing. Look closer.
Not ready to throw in the towel, I stepped back and tried to think about this in a different way. The whole reason I was here was because my lights were shaking terribly while driving, which was bad for visibility and looked like something you’d see on a beat-to-shit Chrysler with one hubcap, which is not something I want my poor Miata to be compared to. It was fairly easy to see that a loose driver’s side headlight enclosure was the cause of the problem, but I was at a loss as to how I could get rid of the slack.
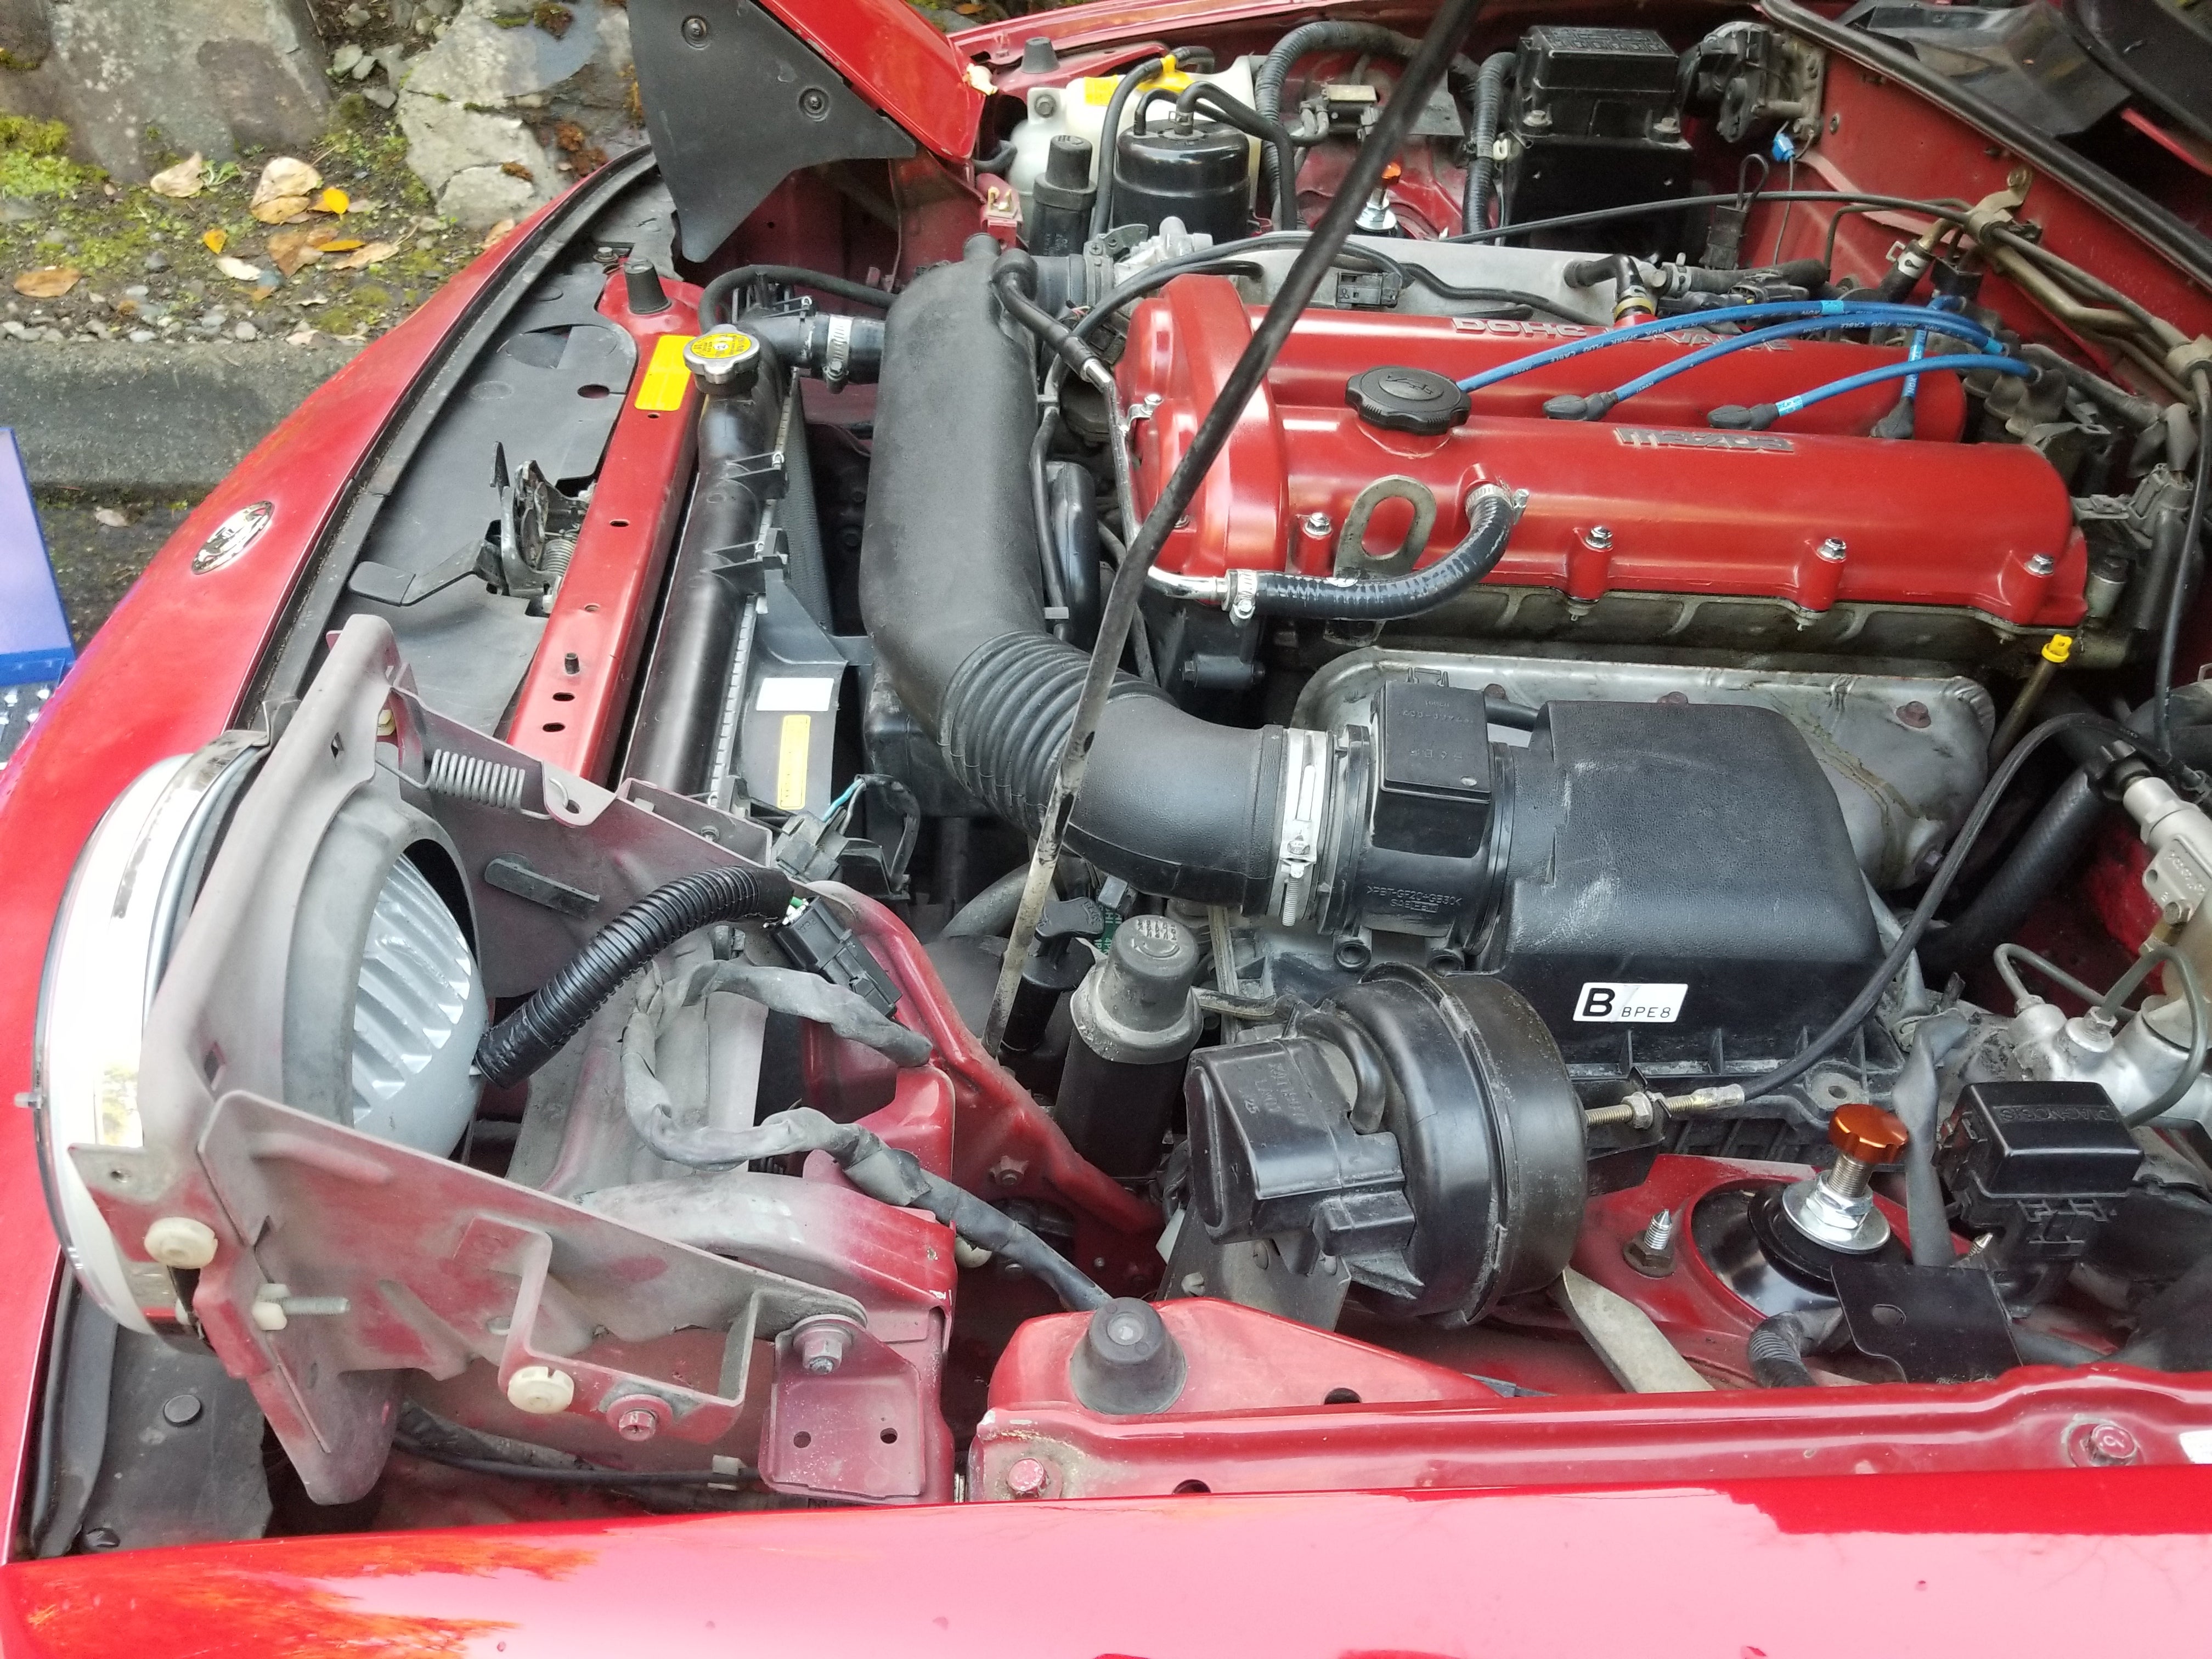
Until I noticed a tiny rubber bumpstop underneath the headlight housing. I did some forum sleuthing and found out that there was a bumpstop to keep movement out of the headlight assembly in the down position, and another bumpstop with the same job for the up position. The down position bumpstop which I found, worked perfectly. The up position bumpstop obviously did not. I also didn’t SEE that bumpstop, because I’d been working with the headlights in the “up” position which completely blocked view of the up position bumpstop. Being the genius that I am, I dropped the headlights with the flick of a switch and found what I was looking for. In the center of the image below you can see a very old, rock hard bumpstop. I these bumpstop are adjustable. Loosen the nut on the bottom of the headlight housing, and you can twist the bumpstop to raise it up a few millimeters. My nut was stripped, because of course it was. So instead of raising the bumpstop... I “lowered” the surface that the bumpstop was supposed to make contact with. The long out-of-focus metal extension below accepts the rubber stopper, becoming a point of contact between the headlight housing and frame, eliminating movement. I duct taped some leftover flooring underlay to the bottom and raised the headlights. Success! No more wobble!
Ended up spending two hours on what I seems like an incredibly simple fix I’m retrospect, but that’s how it works I guess. Took the opportunity to also properly align my headlight covers in relation to the hood and bumper, which was another minor irritation about the car. All in all I’m super excited to drive without flickering headlights, and equally excited to have started and finished a project on my own without breaking something haha
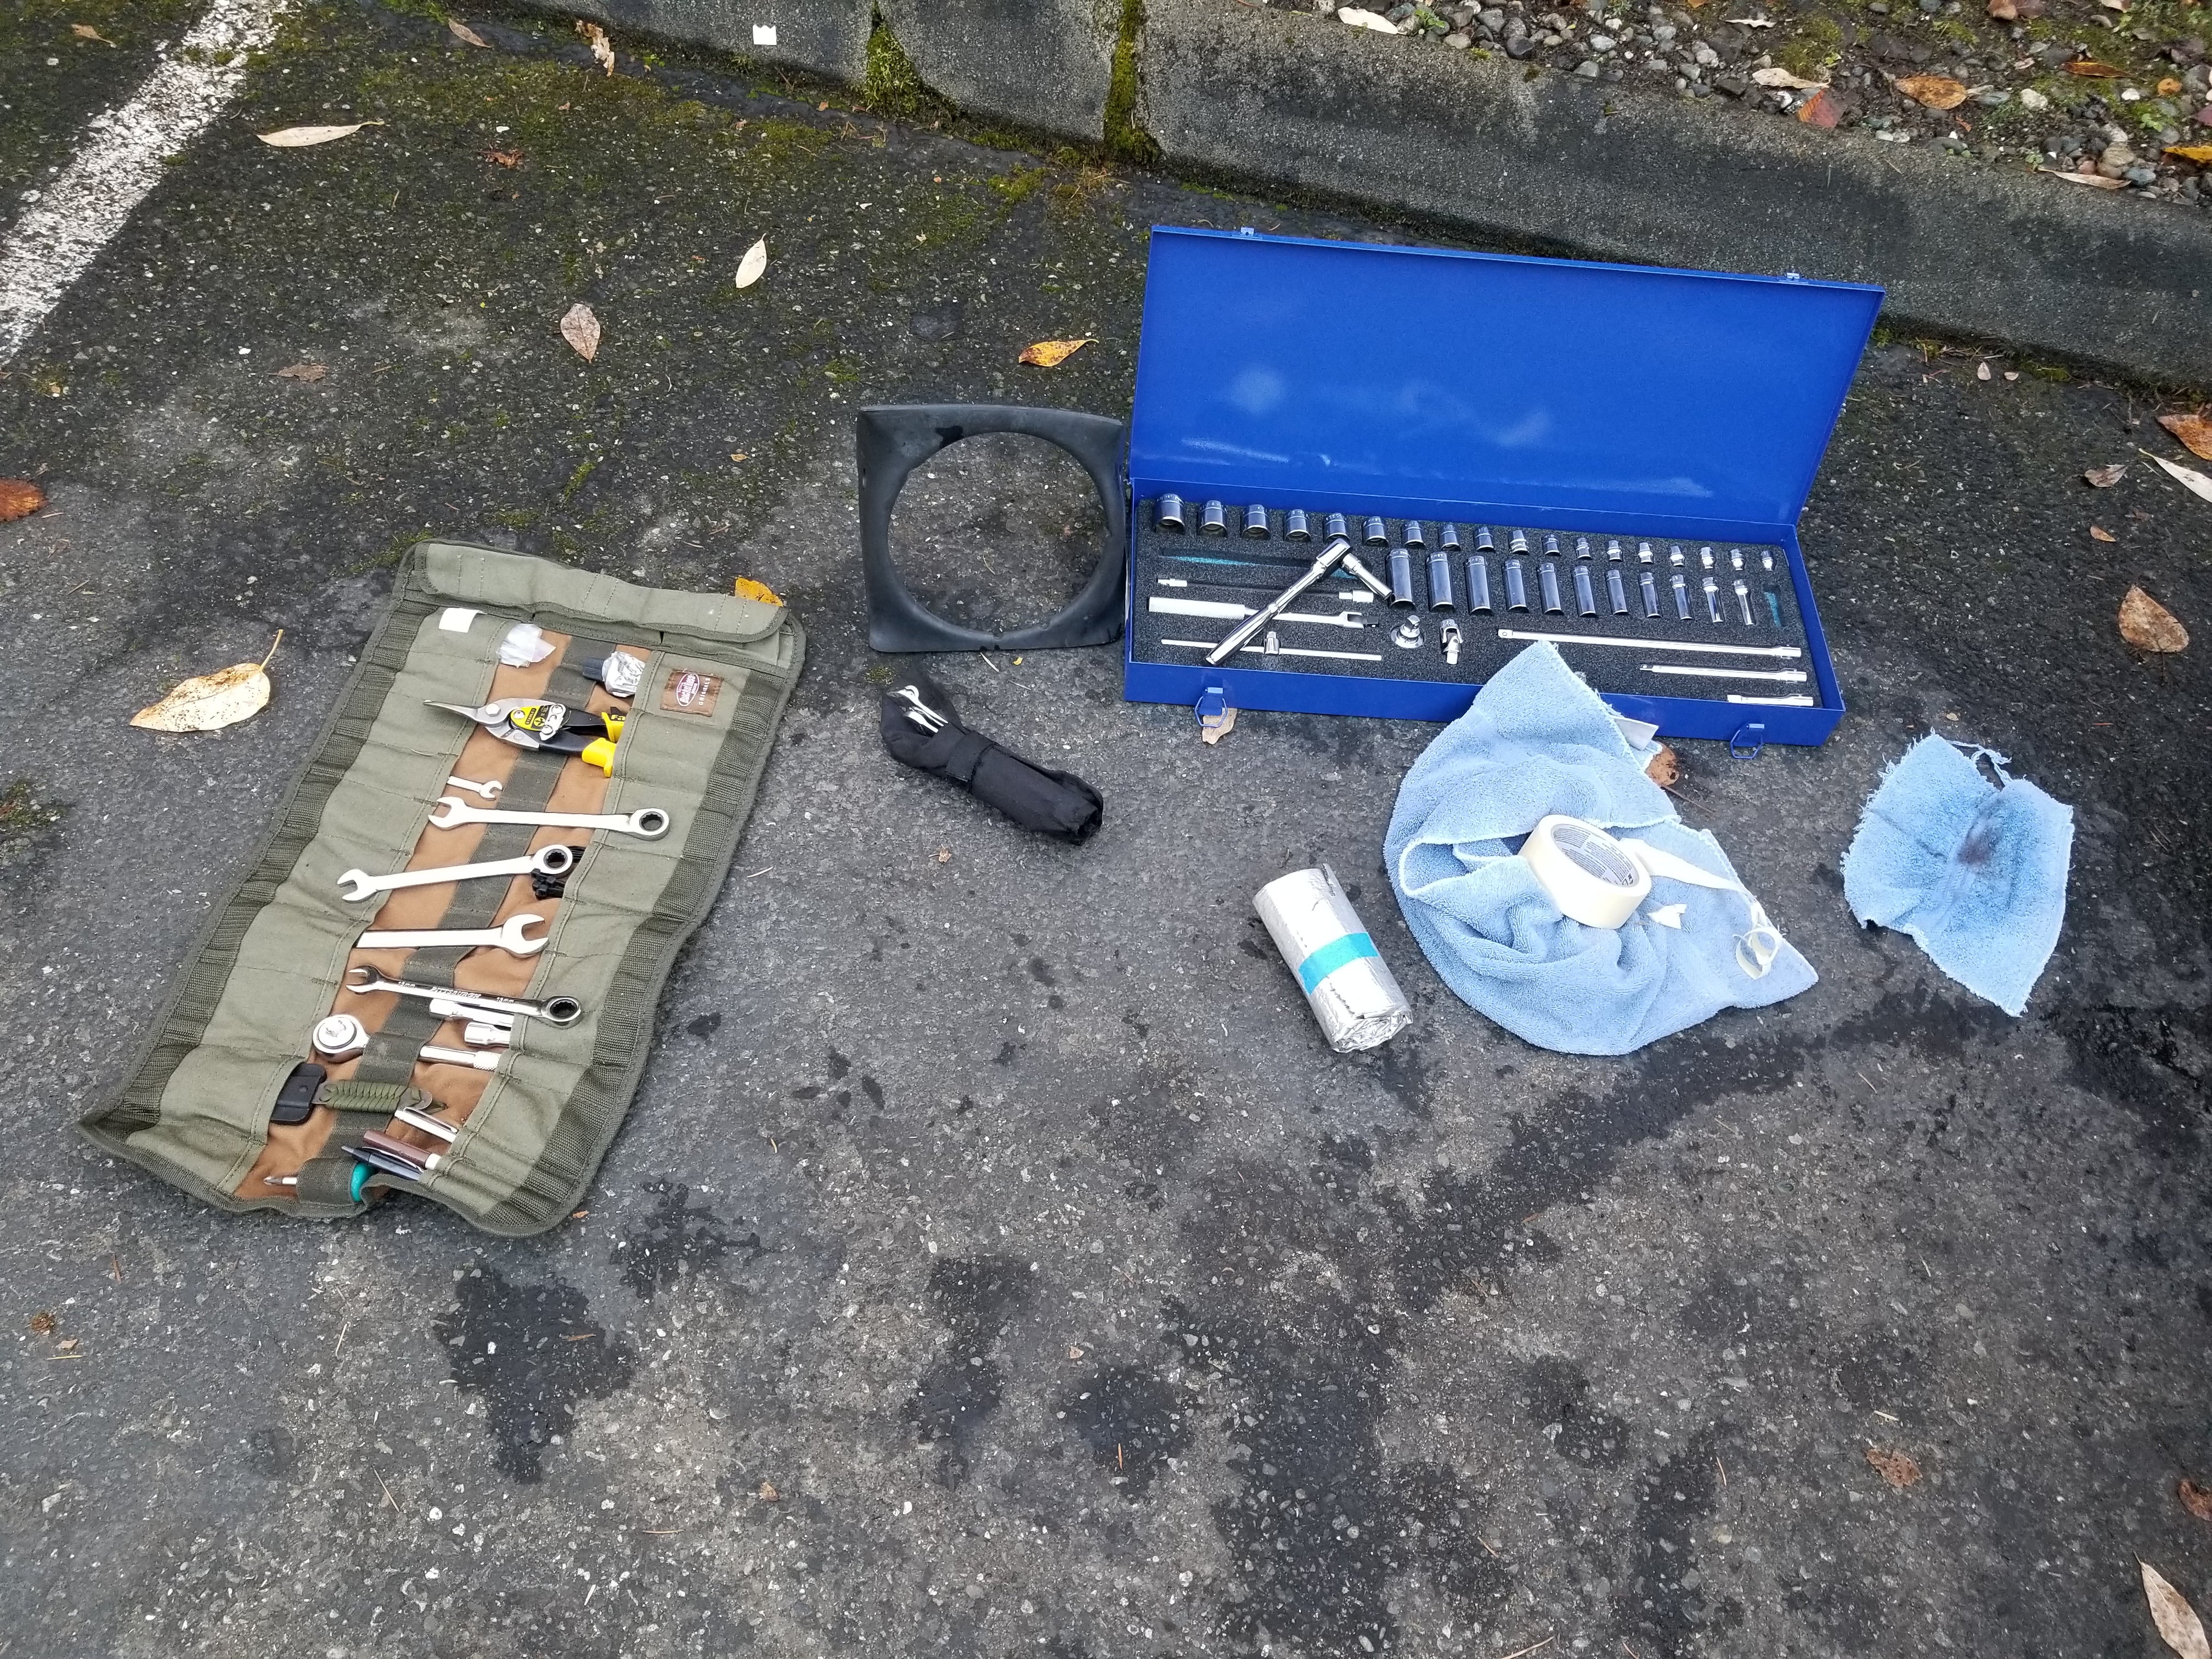
This was also the first time using the new socket set. Having a set with everything I’d need, all organized in front of me is a game changer. My only complaint so far with the Williams set is pretty minor. The ratcheting mechanism is super quiet, and I miss the loud clicky sound I’m used to with various Craftsman socket wrenchs. Like I said, minor!
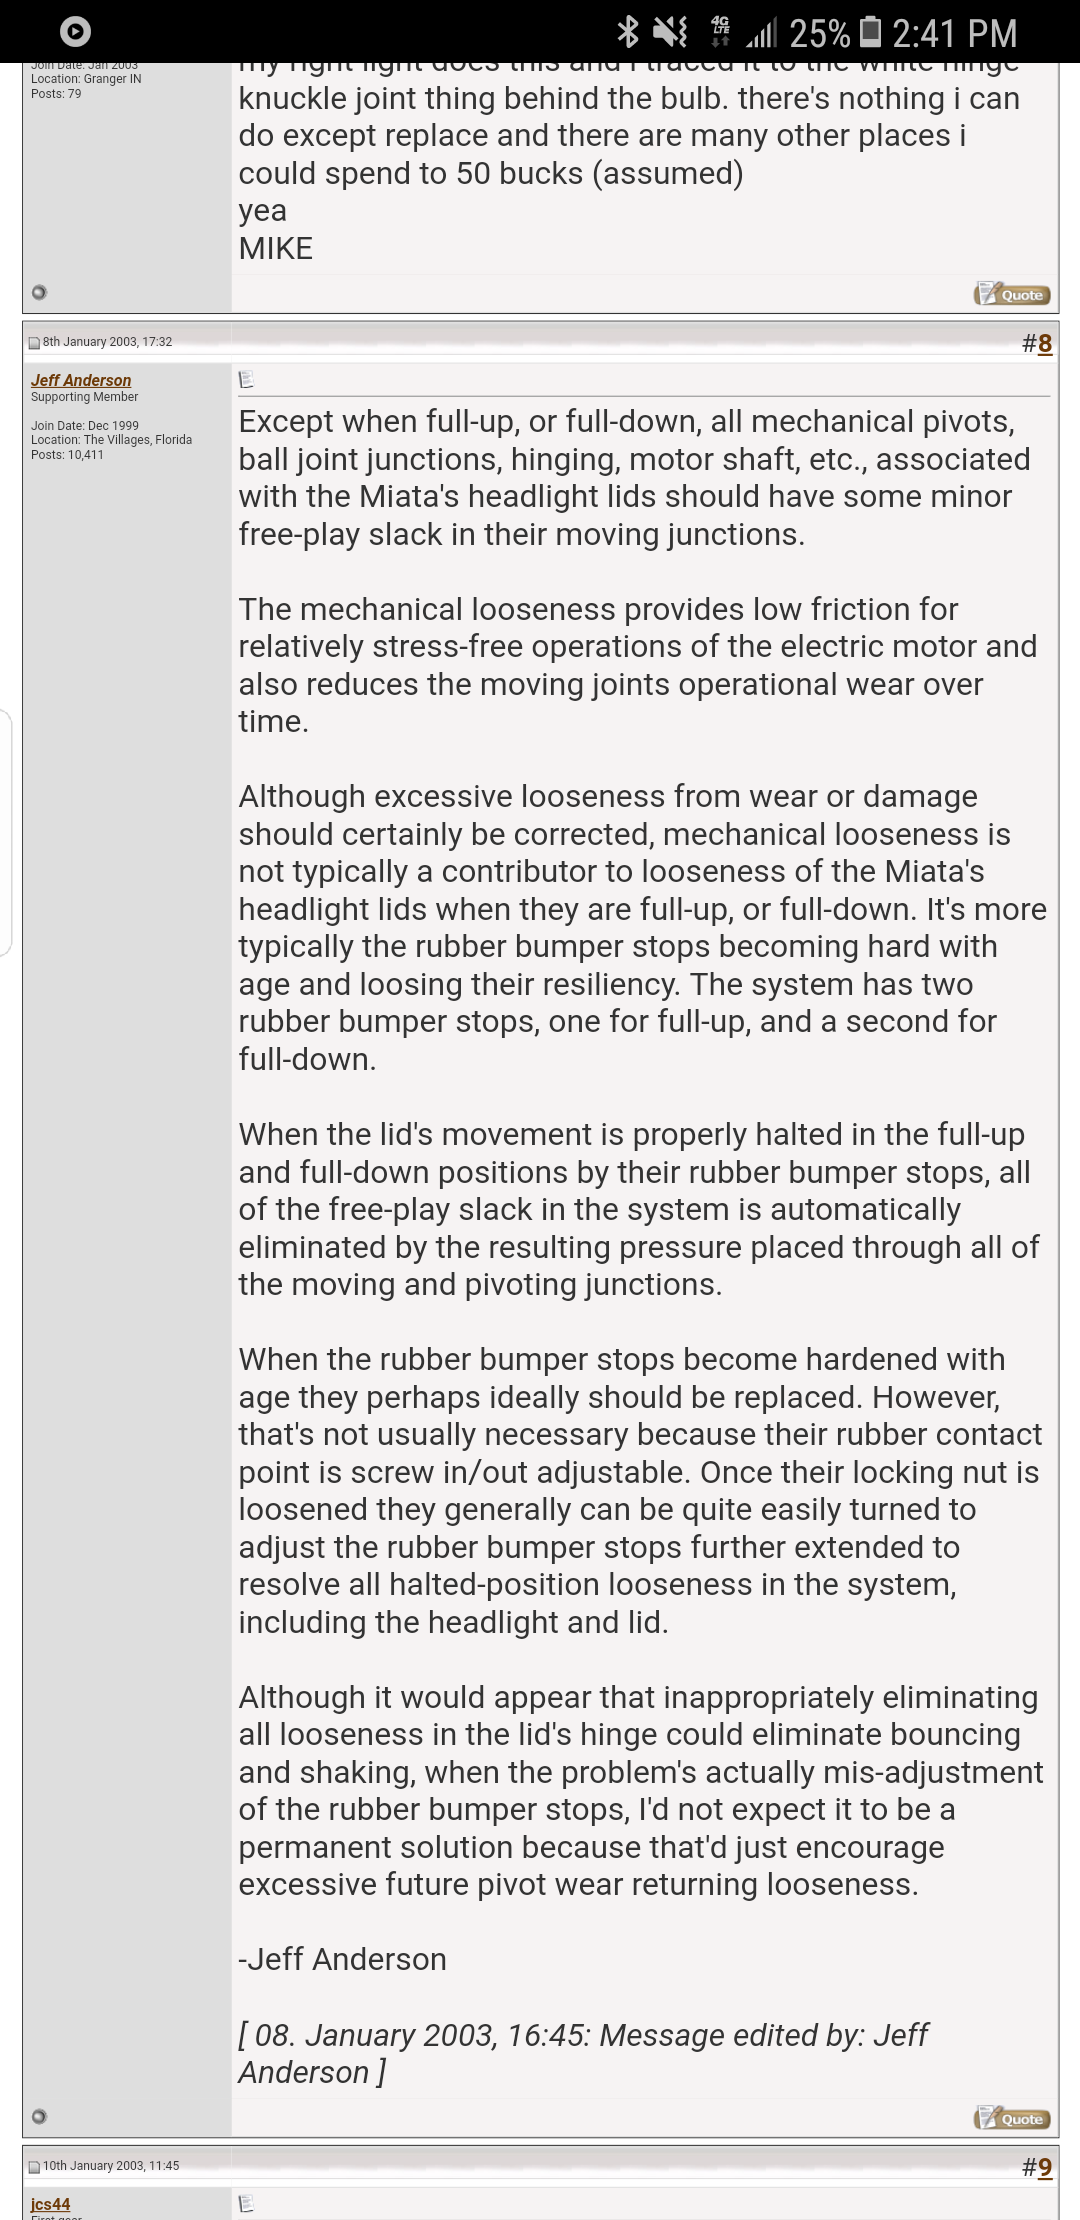
Last but not least, shout out to the dude on this forum for writing up such a wonderful reply. Look at all the info this post. The detail. The explanation. The explanation behind the explanation. It’s beautiful
 "Chariotoflove" (chariotoflove)
12/05/2017 at 19:41, STARS: 9
I am amazed at how I can leave the simplest of repairs for months or years until I finally take the 10 minutes it takes to actually do it. Yours took a bit longer, of course, but you’re still a hero.
Also, people who take the time to post truly detailed, useful guides on the web for anonymous strangers are modern day heroes.
 "daender" (daender)
12/05/2017 at 19:50, STARS: 1
FYI, you might see a little bit of headlight shaking due to the center of mass of the headlight assembly being altered by the heavier LED unit. It’ll still be worth it because you want as much nighttime vision as possible without blinding oncoming traffic.
Nice work fixing it, I’ll inspect some local NAs next time I meet up with them!
"AestheticsInMotion" (aestheticsinmotion)
12/05/2017 at 19:55, STARS: 1
Luckily the welded on metal tab that the headlight enclosure (now) braces against is pretty sturdy. But yeah the LED unit had to be a good 3x as heavy
 "Wrong Wheel Drive (41%)" (rduncan5678)
12/05/2017 at 19:58, STARS: 4
I always assume that any job will take all day. Forum says 10 minutes? Its all day. Forum says 4 hours? Its all day. Forum says all day? Well shit it might take weeks to finish! Its mainly due to rusty bolts, unclear instructions for simple tasks, or things just not working as planned. But often its just because I am totally unfamiliar with the task. It took me HOURS the first time replacing a brake caliper just because of those stupid allen bolts in the rears. But now I could go from start to finish in like 20 minutes if I have all of my tools in one place.
And I love detailed answers on miata.net. They are quite helpful sometimes! Not too many aholes on there either who are unwilling to help which is nice.
 "LOREM IPSUM" (lorem---ipsum)
12/05/2017 at 19:59, STARS: 4
I got halfway through reading and chuckled about the prospect of it needing headlight bearings.
Headlight bumpstops, almost as good.
"AestheticsInMotion" (aestheticsinmotion)
12/05/2017 at 20:02, STARS: 3
Pop-up life isn’t for the faint of heart
 "Ash78, voting early and often" (ash78)
12/05/2017 at 20:02, STARS: 2
Popups are awesome, but a PITA at times.
Glad you got it worked out! Funny how many lighting or heating issues only become clear this time of year, when it’s dark (and cold) so much more each day.
"AestheticsInMotion" (aestheticsinmotion)
12/05/2017 at 20:09, STARS: 0
This is why when vendors say that their turbo system should be able to be installed in a weekend, I start thinking about what beater car I’ll purchase for the months of non-running miata life.
I finally joined a Miata forum after years of hanging around most of them. I gotta say, despite thier reputation of a bunch of assholes the crew at miataturbo.net is insanely knowledgeable and I’ve never seen an auto forum that’s so good at vetting info and making sure everything is as accurate as possible. That said... I’d probably be crucified if I mentioned my impending stereo install to them lol.
"AestheticsInMotion" (aestheticsinmotion)
12/05/2017 at 20:12, STARS: 1
Isn’t that the truth. Getting my rear defrost hooked up will probably take 15 minutes and yet it’s been six months since getting a new top and I still haven’t tackled it.
I hope to someday be that helpful internet stranger, leading new Miata owners into a bright new world filled with knowledge, pop-up headlights and turboz
"Wrong Wheel Drive (41%)" (rduncan5678)
12/05/2017 at 20:27, STARS: 1
Haha yeah certainly! Whats your current plan for a stereo install? I like my totally ignoring the headunit and just having an amp behind the passenger seat. Its especially easy to wire up in a Miata with the battery being in the trunk and that cubby hole/pass through behind the seat. Plus I had the equipment laying around so it was literally plug and play. My phone makes a better headunit anyways and a simple potentiometer as a volume knob makes it have a physical control.
"AestheticsInMotion" (aestheticsinmotion)
12/05/2017 at 20:32, STARS: 0
I bought a custom passenger footwell sub enclosure that a guy on the forums makes. That has an 8 inch sub wired up, and then I have Polk DB components that will go in the doors. Maaaaaybe someday I’ll build a box for the parcel shelf to hold additional speakers, but it would be tricky sealing it with the rollbar.
I have a super tiny 4 channel amp that will go in the passenger airbag cubby and a retrosound head unit because it was the only well-reviewed retro looking Hu with modern features that didn’t cost $6000. McIntosh stuff is insane!
"AestheticsInMotion" (aestheticsinmotion)
12/05/2017 at 20:33, STARS: 0
Also I didn’t realize the NB had the pass through too!
"Chariotoflove" (chariotoflove)
12/05/2017 at 22:56, STARS: 0
We need a promised land with pop up headlights.
"Wrong Wheel Drive (41%)" (rduncan5678)
12/06/2017 at 11:02, STARS: 0
Although I think it might be more difficult to access now with the rollbar in the way. I think the mounting plate is like right in the way of it. Or at least getting the carpet up to access it is harder. I could be wrong though.
"Wrong Wheel Drive (41%)" (rduncan5678)
12/06/2017 at 11:06, STARS: 0
Ive got the Polks that you are talking about, they are great! I was very happy with those versus the Alpines (non component, tweeters on the cone) they replaced since now my tweeters are in the right location facing my ears. But overally they are MUCH clearer anyways. I am pushing 150W RMS to each speaker which drives them pretty well.
But yeah anytime someone puts a subwoofer in a Miata you definitely get people who would never understand lol. I just cant deal with even less space in the car so I would not do that. Plus the acoustic environment of a Miata just will not do it justice. In the subaru though I definitely want some dual 10" subs or something, that would be sweet.