 by "Urambo Tauro" (urambotauro)
Published 10/02/2017 at 12:00
by "Urambo Tauro" (urambotauro)
Published 10/02/2017 at 12:00
Tags: Saab 900
; project
; wrenching
STARS: 6
The list of work needed to get this thing back on the road is growing.
For $600, you can’t expect much. Back at Ron’s , we had hooked up a jumper battery and shot some ether into it to get it started. But beyond that, we pretty much just eyeballed the rest of the car to try to anticipate what else it was going to need. In addition to there being a fuel delivery problem, we saw flat tires, a dragging exhaust, and of course, rusty brakes.
But that’s not all. A second attempt at starting the car resulted in a sudden failure somewhere in the ignition switch assembly. Something had physically broken loose, and the key just rotated limply back and forth in its cylinder.
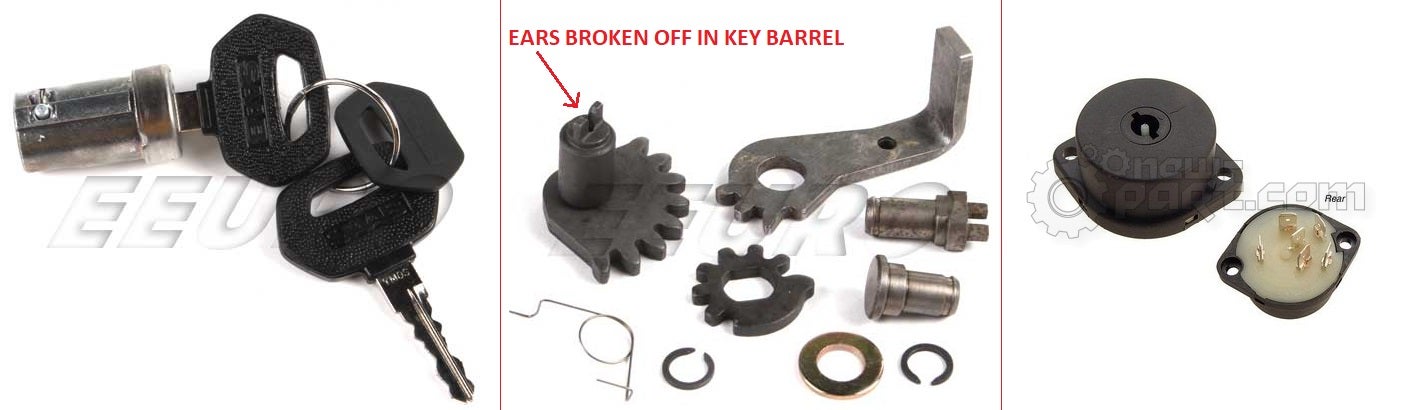
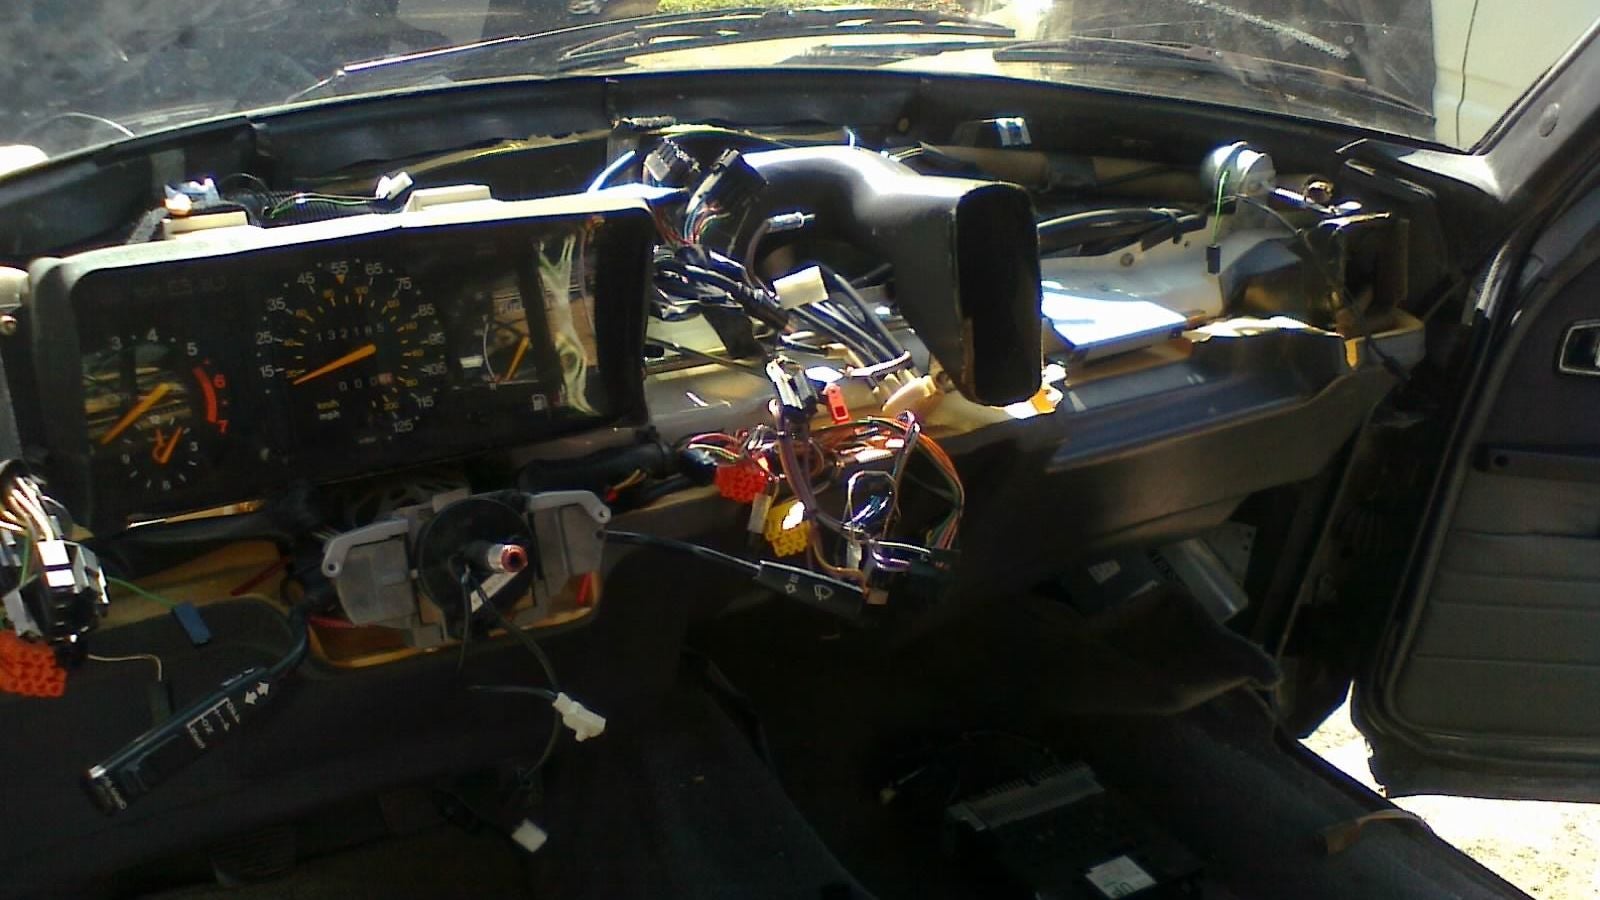
So we removed the seats and console to investigate. Saab’s ignition switch assembly consists of three major components: the key barrel, a set of gears, and then the contact switch cylinder. Lo and behold, two little ears atop of one of the gears had broken off, rendering the key barrel unable to turn the switch.

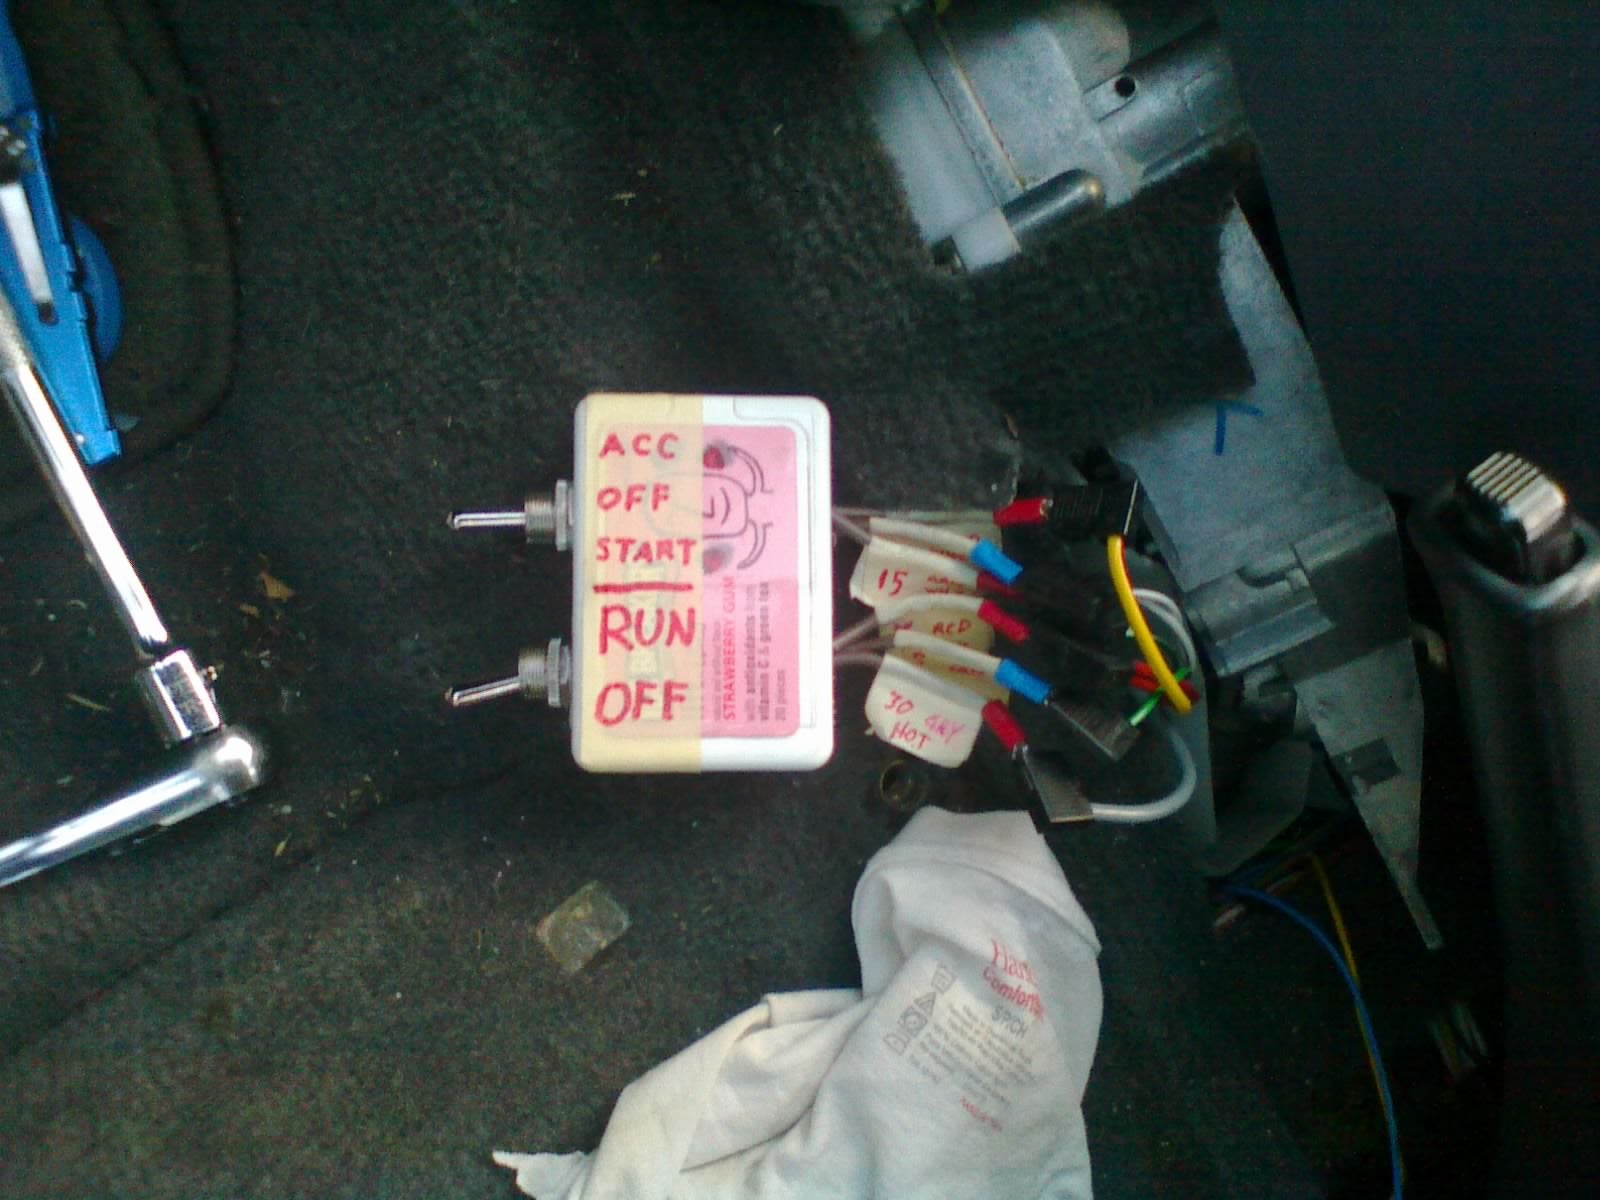
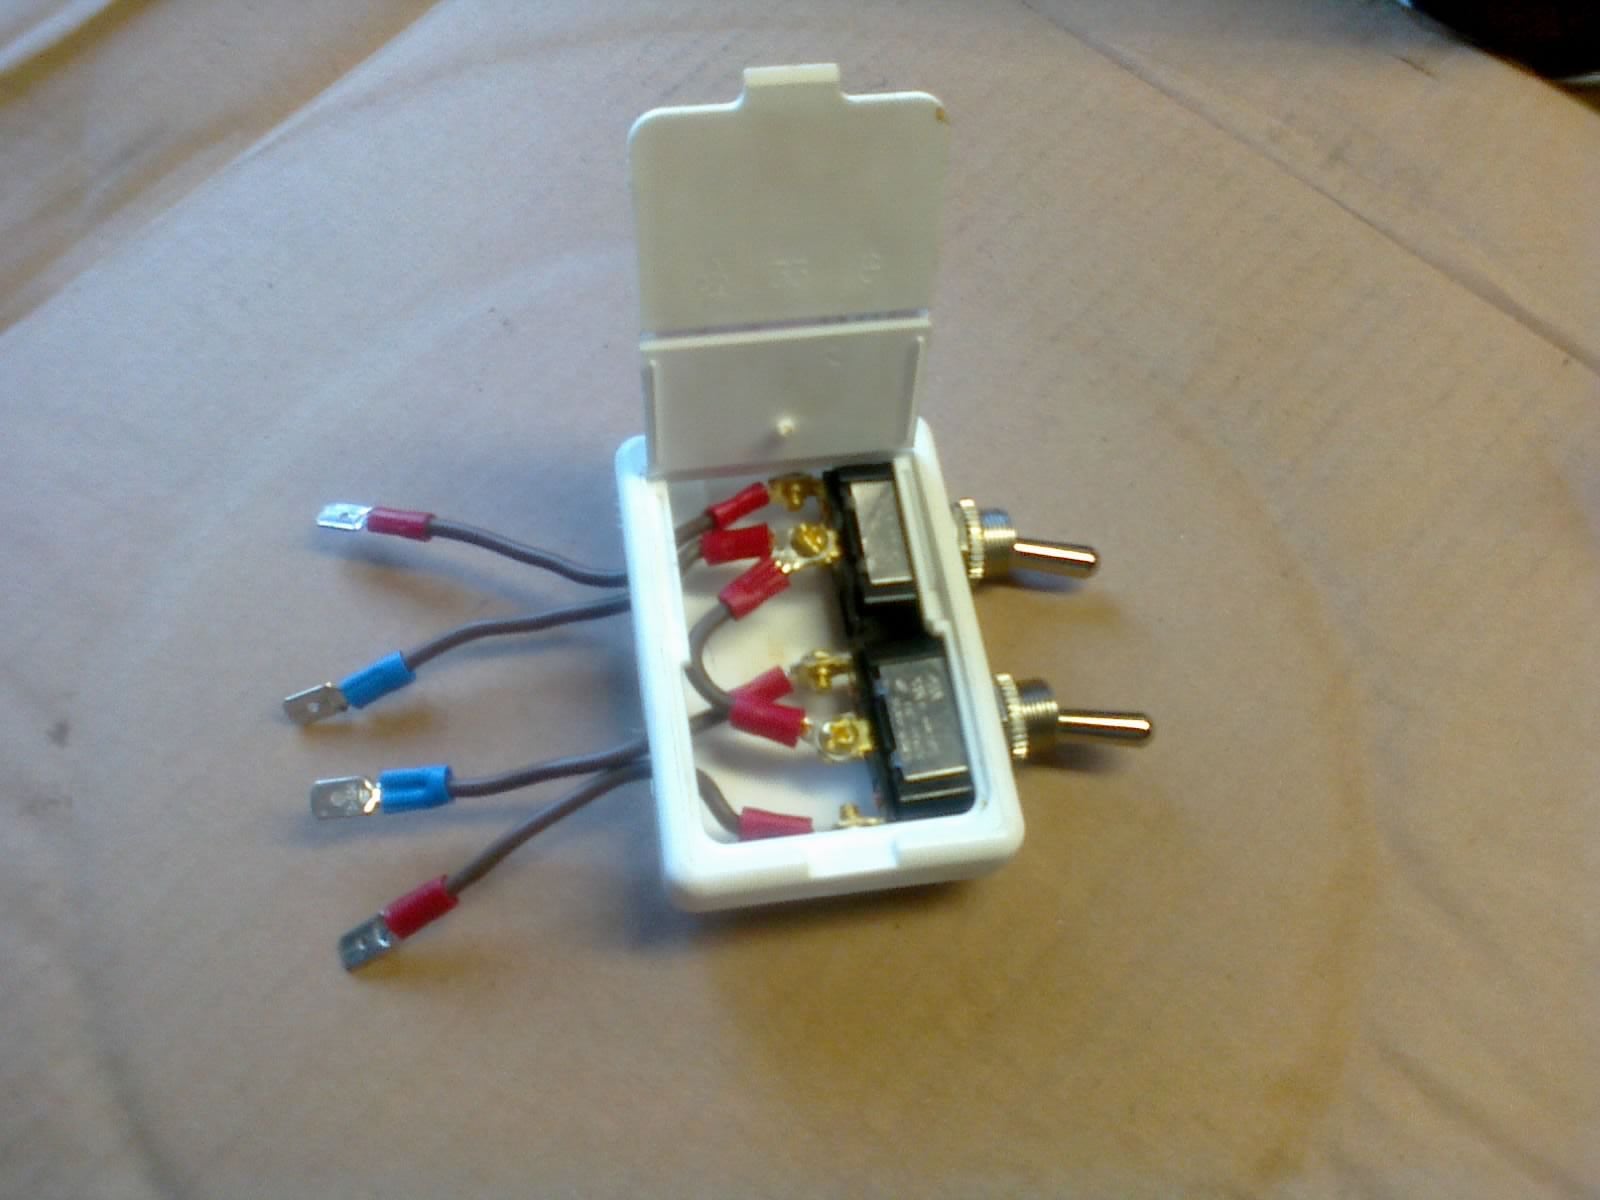
As a temporary measure to get by until we can get a new gear, I went ahead and built a temporary ignition switch box out of an old gum container. Meanwhile, my brother went to the local junkyard to pick up a cheap used battery, so that we wouldn’t have to keep using my jumper box.
With a battery and a functional ignition switch, we started investigating the rest of the electrical system. With the switch allowing power to the accessories, we found inop horns, inop headlamp wipers, inop brake lamps, and TWO problems with the fuel system.
The fuel pump would not kick on at all. Partly because no power was being sent to it, and partly because the pump itself was dead. Even with a direct supply of power jumpered to it, it still wouldn’t turn on.
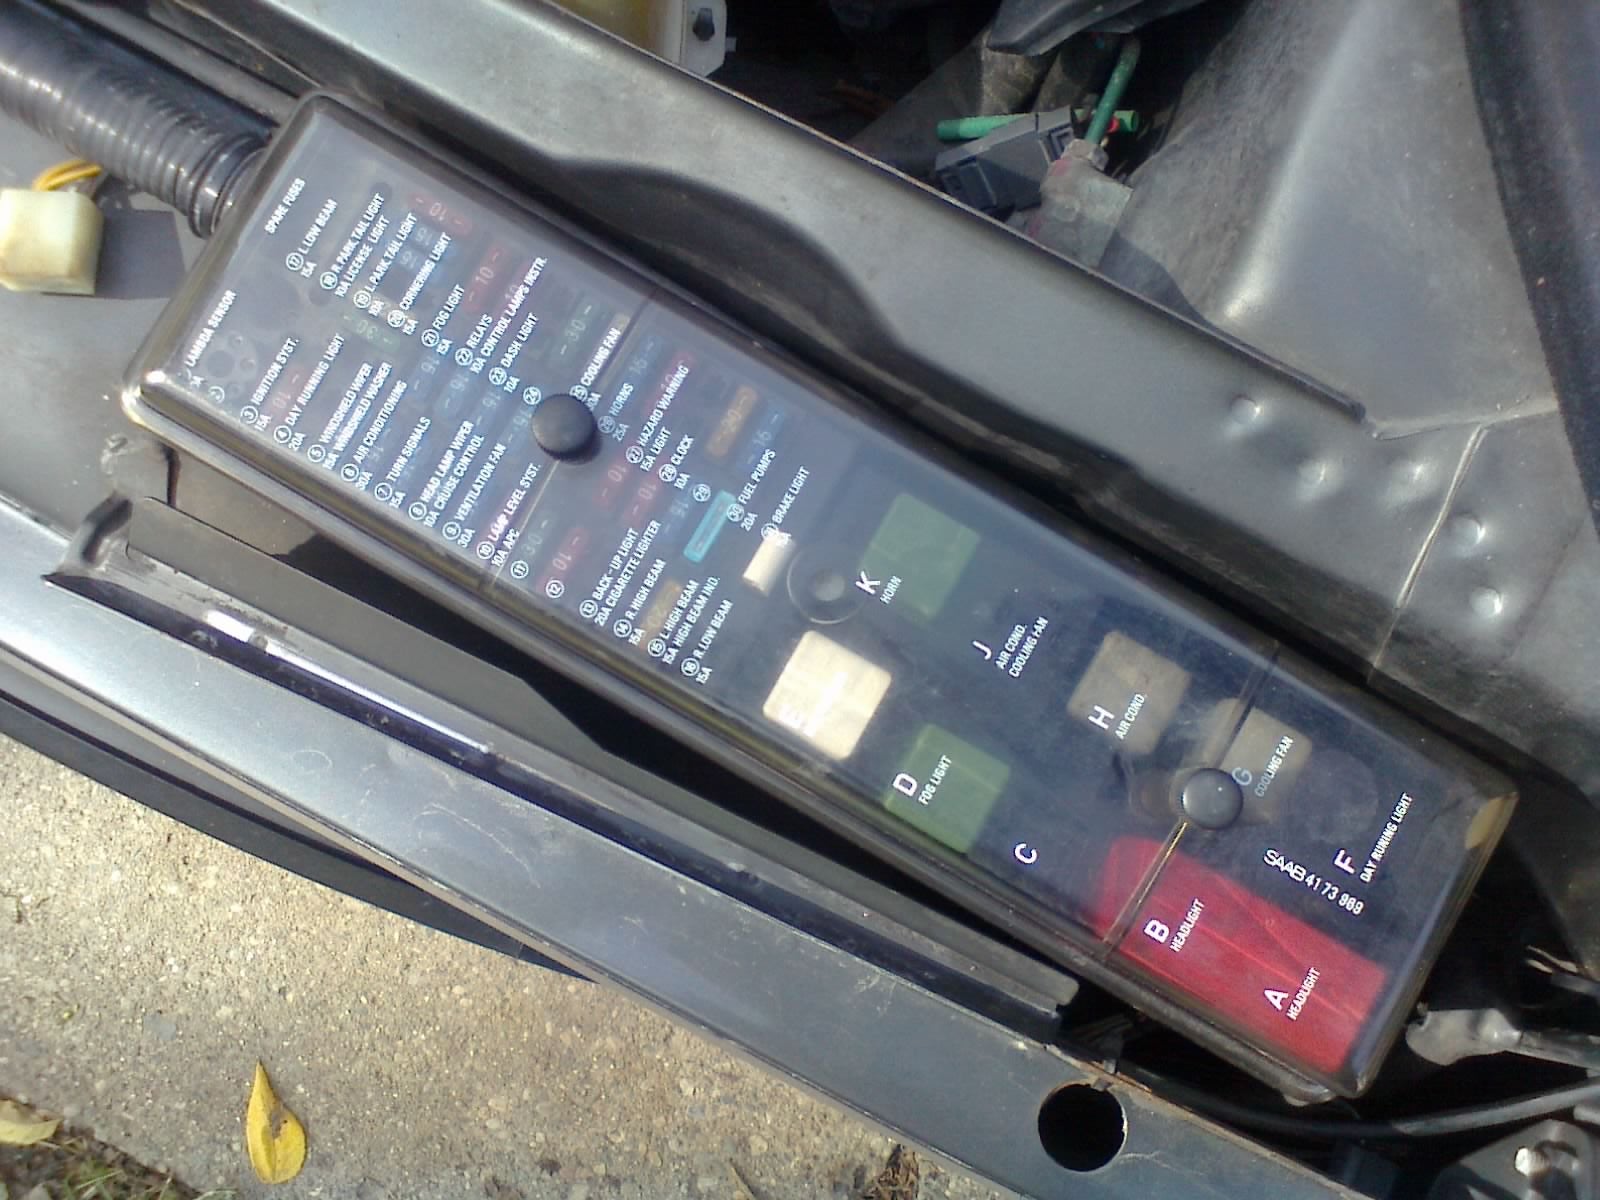
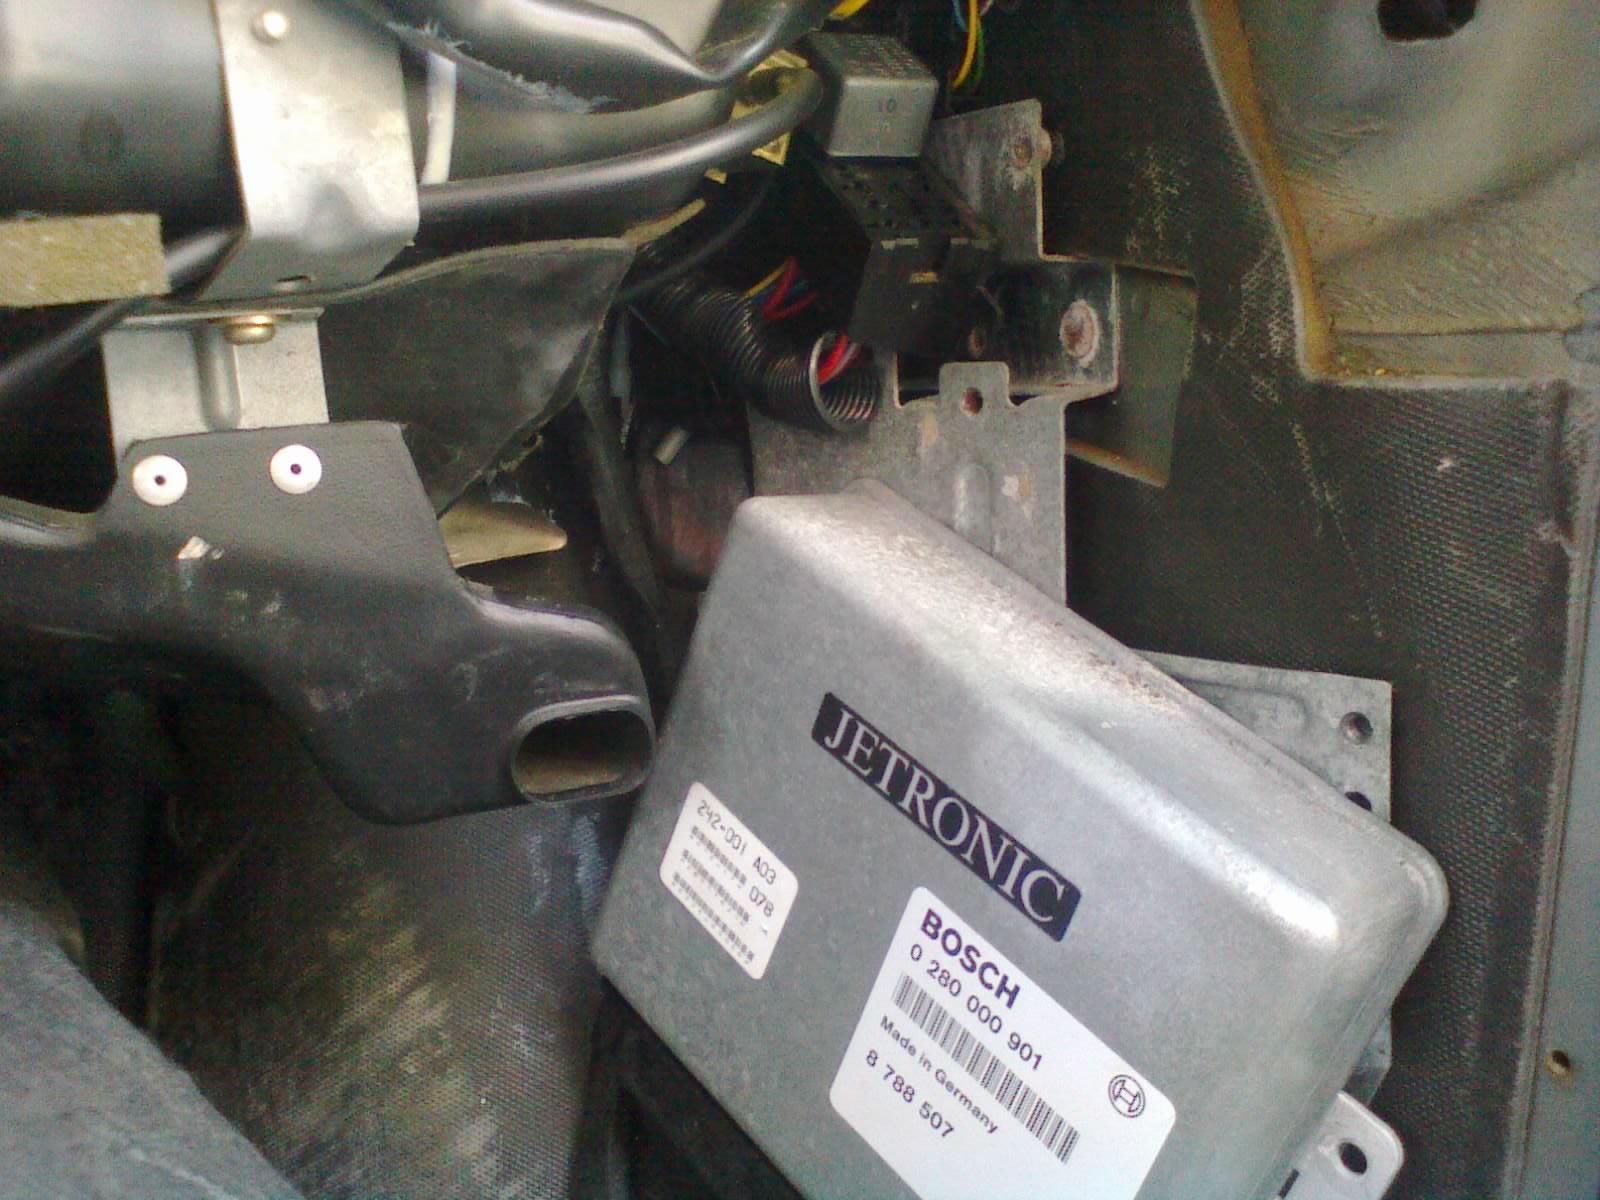
Saab built a wonderfully organized and labelled fuse panel that handles most of the power distribution. But even though it contains the fuel pump fuse, the two fuel system relays are tucked underneath the dashboard with the LH Jetronic module. Unable to figure out a way to easily access those relays, my brother set about pulling the dash apart.
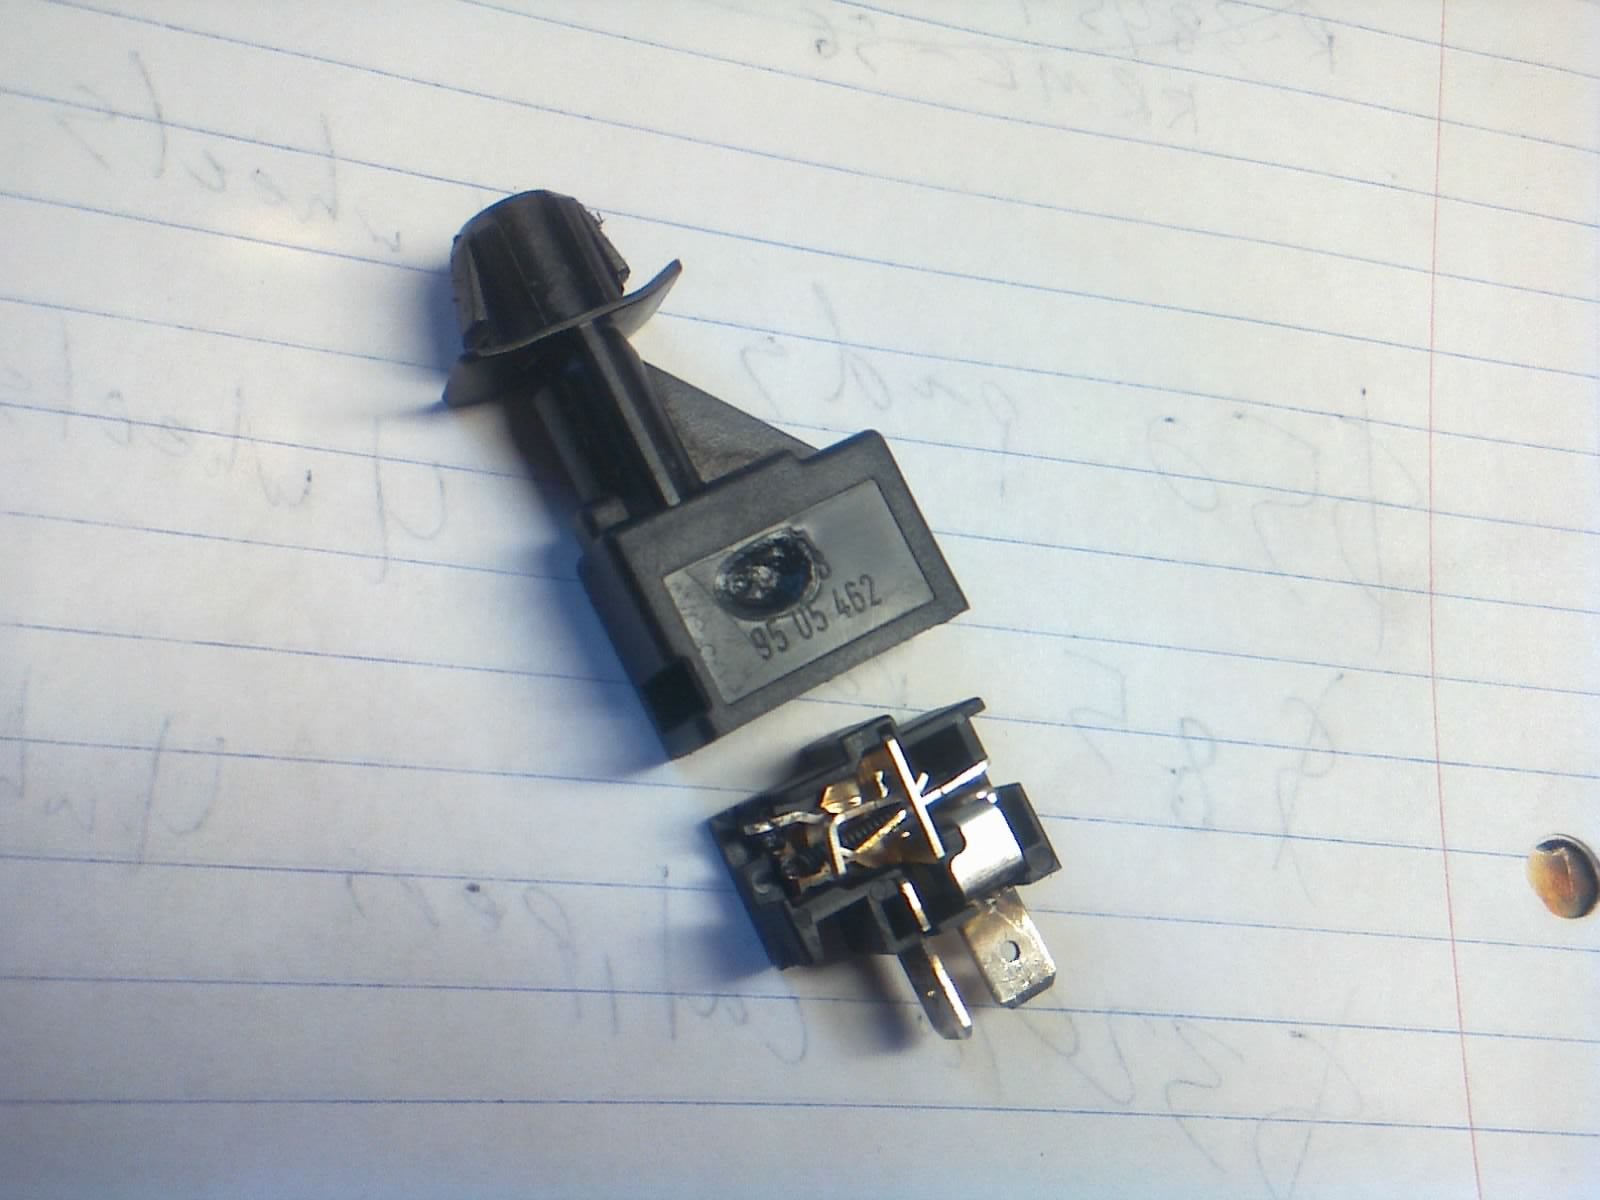
Good thing too, because the brake lamp switch was no walk in the park to get to, either. Not only was the plunger stuck inside the switch, but the switch body was a little warm (!). And once we had it out, we could see a melted spot right in the middle.
We’re going to try to leave the other obvious stuff for later. Exhaust can wait, and there’s no need to get brakes and tires until we’re ready to get the car rolling. Top priority right now is getting that fuel delivery issue sorted out. Once the engine can run under its own power, we can see how it runs, and find out if there are any issues with the cooling system. *fingers crossed*
For now, we’ve got the first round of parts to go hunt down, and some circuits to trace. Stay tuned!
 "shop-teacher" (shop-teacher)
10/02/2017 at 12:21, STARS: 3
The gum starter is pretty brilliant!
"Urambo Tauro" (urambotauro)
10/02/2017 at 12:25, STARS: 5
Thanks! I’m really pleased with how it turned out. Here’s an in-progress potato pic from before I finished adding all of the wires:
 "sony1492" (sony1492)
10/02/2017 at 13:01, STARS: 0
That sounds like equal parts fun and struggle. Mostly because electricity and wiring is basically magic
"Urambo Tauro" (urambotauro)
10/02/2017 at 13:13, STARS: 1
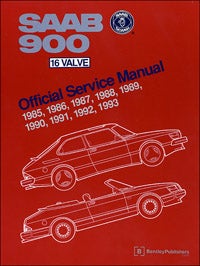
Fortunately, my brother picked up a real good service manual. Seriously, this thing put Haynes/Chilton books to shame:
 "LimitedTimeOnly @ opposite-lock.com" (limitedtimeonly)
10/02/2017 at 13:22, STARS: 4
This is Grade “A”, high-quality oppo here. Thanks for sharing!
 "Rustholes-Are-Weight-Reduction" (rustholes-are-weight-reduction)
10/04/2017 at 10:20, STARS: 1
How to hotwire any pre-90's car :)
"Urambo Tauro" (urambotauro)
10/04/2017 at 10:49, STARS: 0
Spade connectors make it a clean job, too haha.
 "Saabing" (saabing)
10/22/2018 at 16:49, STARS: 0
Thanks for that picture. I’d like to replicate the gum-box starter. The pictures suggest you have a three-way switch on the top and a two-way switch on the bottom. Using the inside-the-box picture above, we can number the five contacts from top to bottom and associate them with the various ignitions wires (e.g., 30 gray hot). Is #5 attached to the box itself or the side of the lower switch (in which case, presumably, the top of the first photograph is the bottom of the second)? It would be a great help if you could explain which wire goes where. Many thanks in advance for your help.
"Urambo Tauro" (urambotauro)
10/22/2018 at 18:41, STARS: 0
Before I get too carried away here, l et me reiterate that the above progress pic (4 wires) is a simplified version of th e finished product (6 wires), pictured below . Also, disregard the blue and red spade connector coloring. It doesn’t mean anything, except that I ran out of one size and started using another .
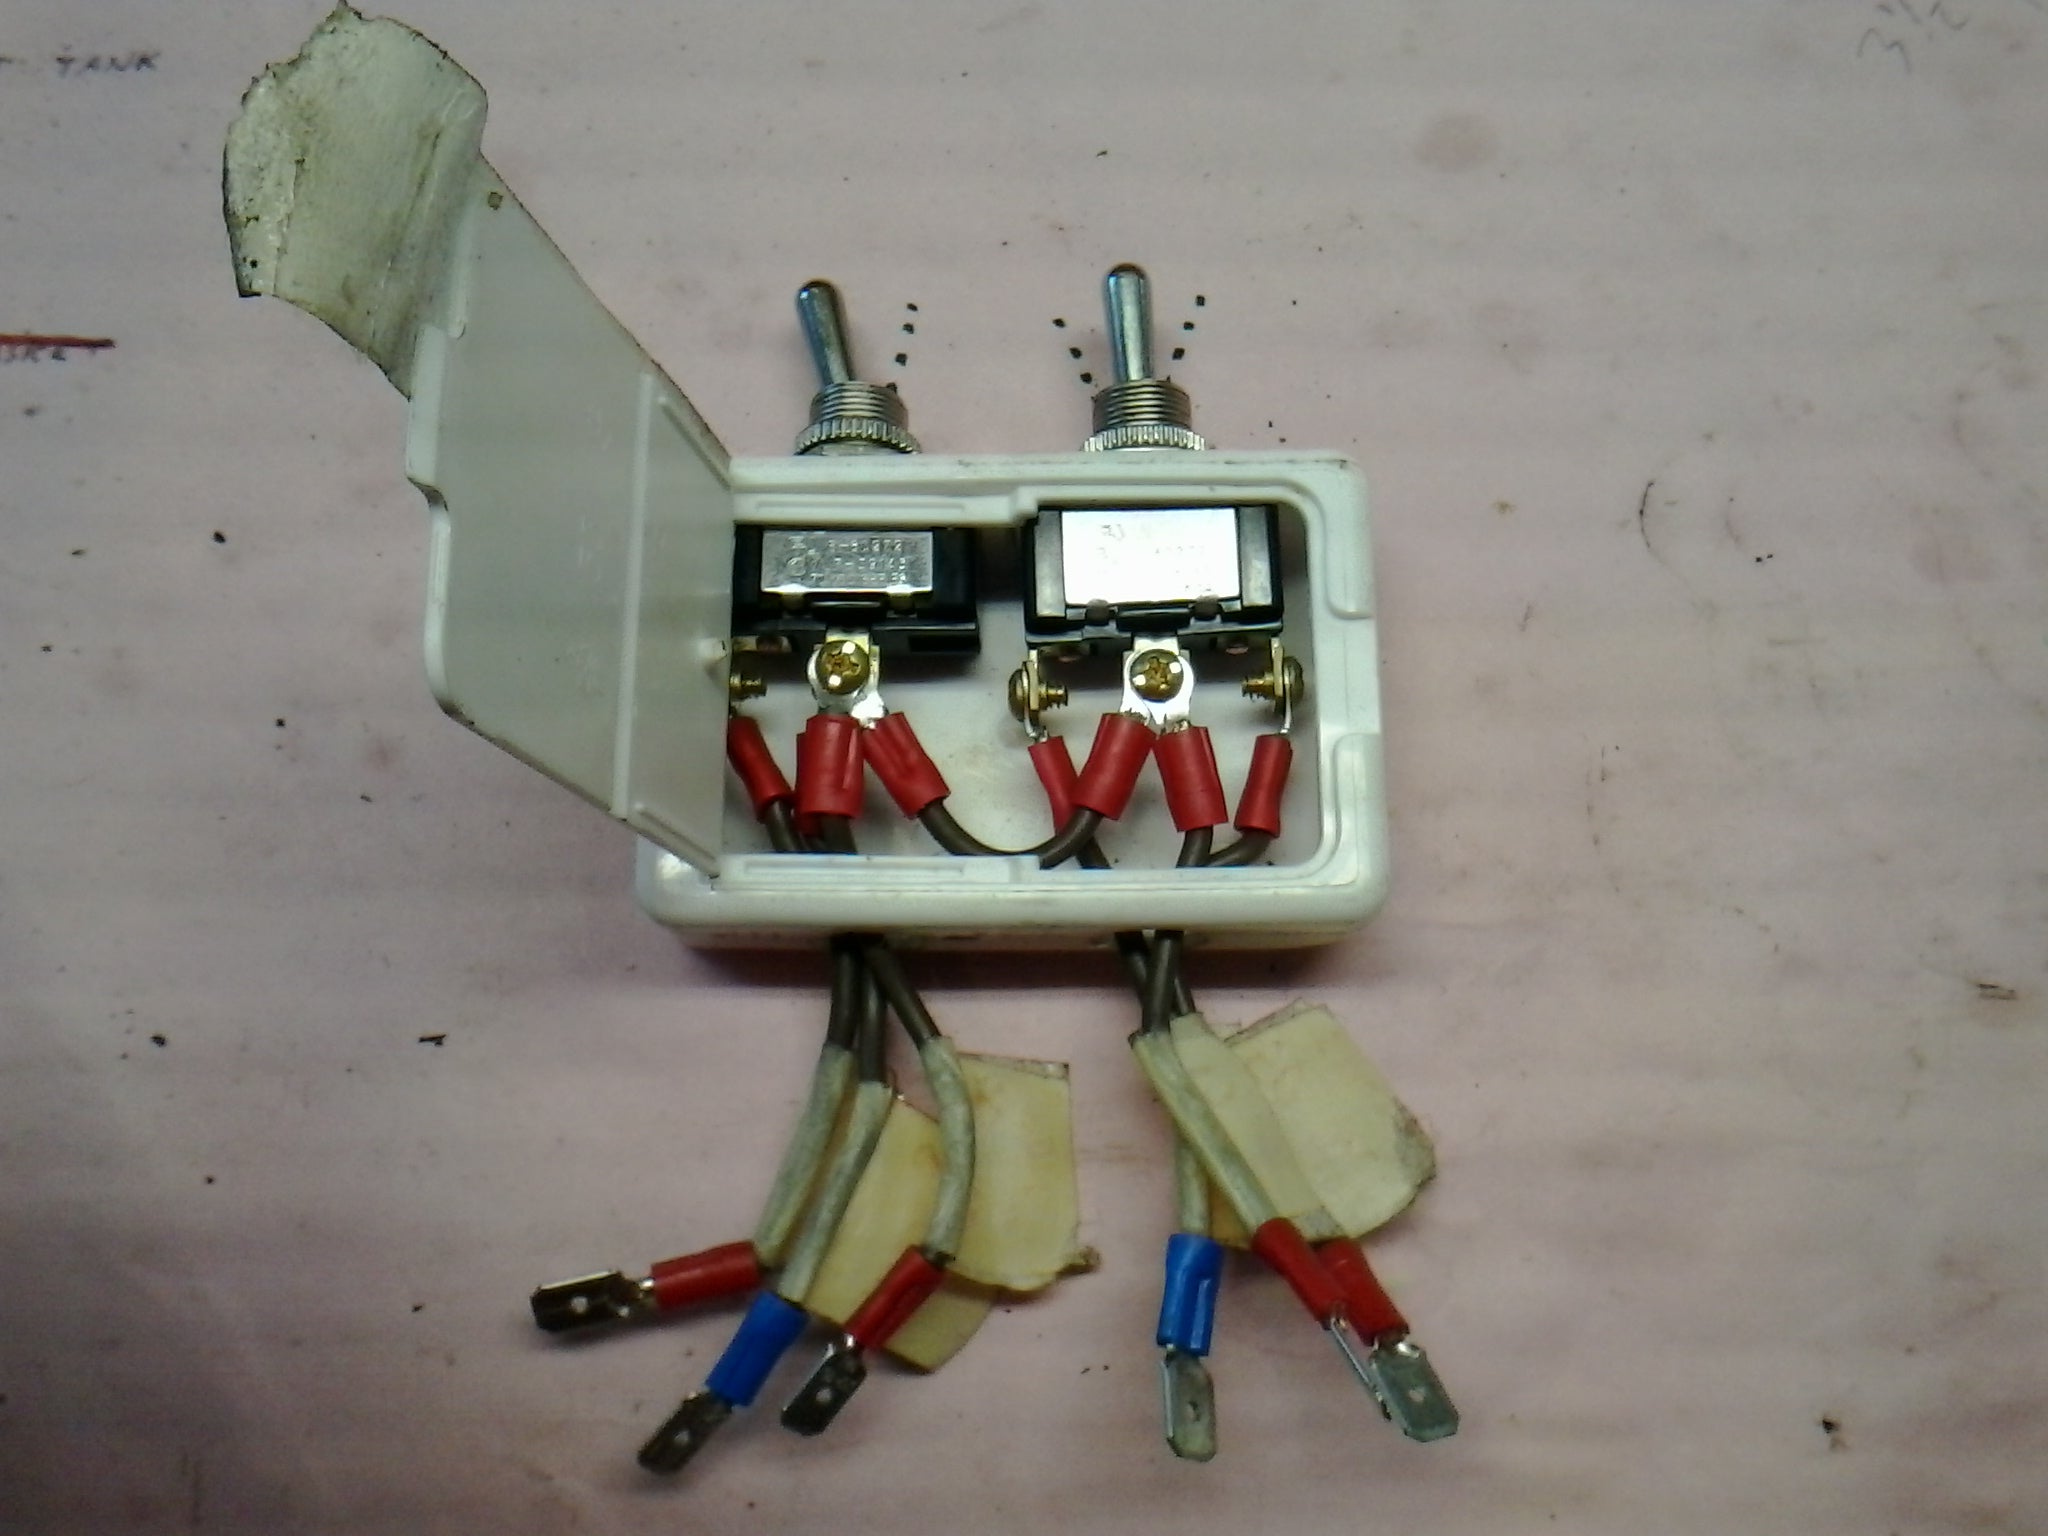
As indicated by the marks drawn on the bench paper here , the switch on the left has two positions, while the one on the right has three. The left one is just a simple ON/ OFF switch , while the right one is ON1 /OFF/ON2 . It doe s n’ t perfectly mirror how th e Saab’s original switch is wired, though . For one thing, t he right switch really doesn’t need to have its own OFF position. An ON1/ON2 switch would have been fine there, cutting power to accessories while cranking the starter and vice-vers a .
T he 4-wire pic is fine if you want to refer to it. T he 6-wire one just happens to have a couple of extra RUN leads, for the purpose of connecting to the rest of the Saab’s ignition s witch wiring. But they don’t necessarily all need to be plugged in, as t his box was always meant to be temporary .
"Saabing" (saabing)
10/22/2018 at 23:00, STARS: 0
Many thanks for your rapid reply! This photograph is helpful. Now all I need to know is which of these wires connect to what... If we go left to right, could you detail which terminal connects to which ignition wires? I have Bentley’s, but it’s much easier and faster
to ask someone who’s been there before.
"Urambo Tauro" (urambotauro)
10/22/2018 at 23:25, STARS: 0
No offense (I really mean that) but as you can probably
imagine, I’m a bit
lee
ry of describing exactly how to hotwire a specific car to a stranger over the internet. But if you’re
already invested into the project enough to
have the Bentley book, I figure
you
’re probably legit. So
I can at least drop enough hints to point you in the right direction without leaving behind a walkthrough for somebody else to find
.
BTW, what are you working on? Just want to make sure I’m not jumping to conclusions here haha. I get the sense that you’ve probably got a 900 too , otherwise you would have said something by now. If it is a 900, and you’ve got the Bentley book, jump to page 371-7. I t lays out which circuits need to make connections in each key position.
If you have any other questions feel free to ask, just understand that I feel the need to avoid being too explicit on this particular subject .
"Saabing" (saabing)
10/23/2018 at 03:17, STARS: 0
Hmm. I’d never thought of this as hotwiring, though I suppose technically it’s true. To do so, though, one would have to first remove the ignition and then deal with the wires. I’d think people would be more likely to open the hood and hotwire the engine. Not my area of expertise, but doeasn’t that work for all cars? The diagram of the key positions is also easily found on the web (in color, even!)
As for my story, I have a 1989 non-turbo 900. When its CPS failed I replaced the distributor with one from a turbo to use the Hall sensor, which means my wiring’s a little odd - but that’s another story. Back to the ignition: Saabs are wonderfully engineered in most respects, but the keyhole is vertical, which means it’s perfectly positioned to catch whatever debris might be nearby. (I heard that the engineer designing it had a broken arm or something, so chose that placement rather than on the steering column - but I digress.) At one point I spilled grapefruit juice into the keyhole. Panic! But, as it turned out, there’s no electrical connection with the hole, so nothing bad happened - at that time. Then, when the juice dried, leaving a sticky residue, the key became hard to turn. I went at it with solvents and a pair of pliers. There seemed to be some movement, and then - SNAP! - something broke. It wasn’t the key. The ignition itself had broken. Rather than purchasing a replacement ignition switch only to have it eventually go bad again, a neighbor helped me bypass it altogether, installing a toggle switch and a contact switch. That worked, but I failed to get around to properly mounting them in the dash. (Bad idea to leave things undone.) A few things happened after that: it sat undriven for a long time; some of the wiring came apart; and, one day, my apartment manager required me get the car moving or remove it in short order. A different friend, who’s generally fairly mechanical but who’s not one to read manuals, said that given the emergency he would wire it as if it were being stolen. Given the emergency, I allowed him to do so. He Did Things to the wiring, both inside and out. It didn’t work, and I towed the vehicle to a friend’s place where it’s been given temporary refuge. The failure to run was likely bad gas and that’s been dealt with, but after failing to get it to run (and having the creative re-wiring drain the battery whenever I tried to start it) I tore out the friend’s handiwork and am trying to reconstruct what I had.
Since there doesn’t appear to be a means of private messaging here, the best way to take this offline is probably for me to give you a throwaway
email address. Should you wish I can then send you photographs and/or ID and/or other documentation as you wish.
Write to
advertevader at
gmail
should you care to discuss the car further.
Thanks again!
"Urambo Tauro" (urambotauro)
10/25/2018 at 23:34, STARS: 0
Did you get my e-mail?