 by "whatuptkhere" (whatuptkhere)
Published 08/31/2017 at 06:49
by "whatuptkhere" (whatuptkhere)
Published 08/31/2017 at 06:49
Tags: miata
; mx-5
; mazda
; mazda miata
; mazda mx-5
; cooling system
; radiator
; repair
; overheating
STARS: 1
So, in Australia, it gets hot. Particularly in summer.
My Daihatsu Feroza had completely lunched its engine, with the valves smacking the pistons in an all-out brawl of mechanical disaster.
I was 26 and despite being a massive car enthusiast, I’d never owned a sports car. Not even for a minute. It was time to rectify that.
All the Nissan S-chassis stuff is shagged AND expensive out this way, and I didn’t want something too pricy like an RX-7 or 350Z. I needed something more accessible, and of course - Miata is always the answer.
After skipping on a nice NA in British Racing Green because the seller wouldn’t budge, I instead bought the cheapest MX-5 I could find, settling on this beast for $3000. I’d barely got it home before the diff started whining, the aftermarket alarm keyfobs all failed, and it started overheating.
After replacing the keyfobs and getting an assurance from a local MX-5 specialist that the differential would probably be fine for the short term, I set about fixing the overheating problem. Even just a small hill or any drive over 15 minutes long would send the temperature spiking.
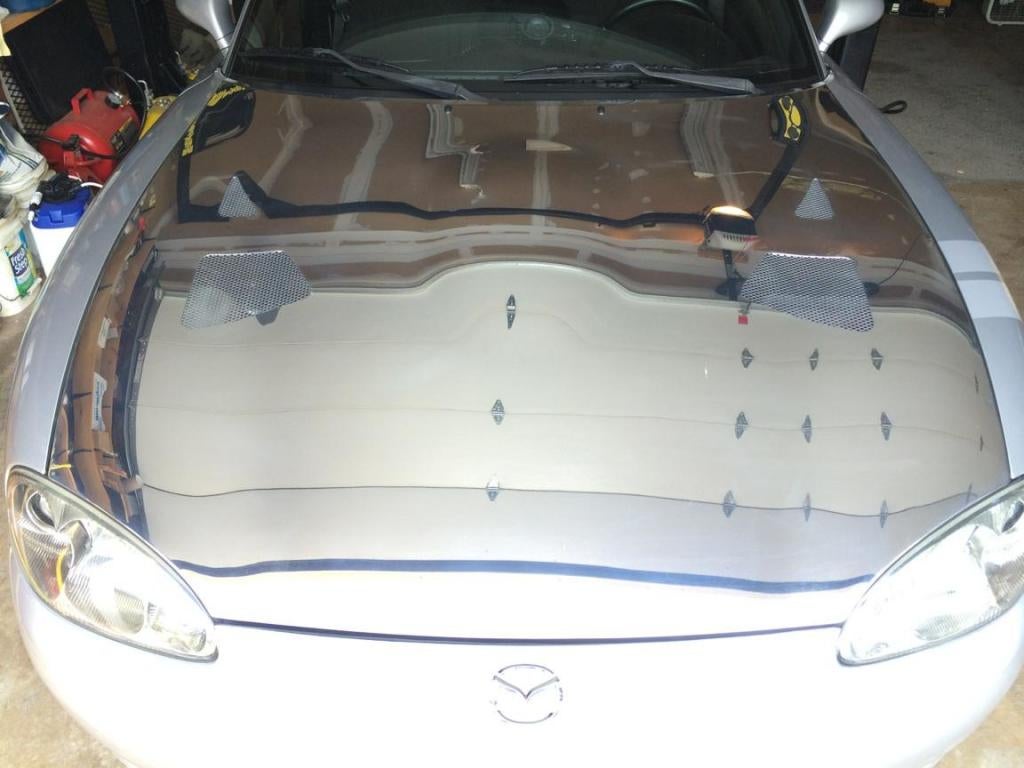
The solution was two-fold - replace the missing undertray, and replace the radiator with a fresh, shiny new one from eBay. They’re awesome and cheap and I can’t recommend them strongly enough to anyone who needs one.
Fitment was easy - the radiator mounted to all the standard factory pickup points and slid into place with just some minor cajoling. Mine also came with an upgraded dual fan setup which should serve me well when I eventually go turbo a year or more down the track. The only drawback is that it makes it hard to set the timing, as the thicker 52mm radiator and new fans leave very little room in front of the engine.
Overall, I highly recommend going with an eBay aluminium radiator when your cooling system fails on one of these cars. They get the job done, and rather nicely, too.
!!! UNKNOWN CONTENT TYPE !!!
 "Wrong Wheel Drive (41%)" (rduncan5678)
08/31/2017 at 08:23, STARS: 1
Get rid of the style bars or “mouse traps” as they are more affectionately called. Also, any rust? If not, then solid find!
 "Phyrxes once again has a wagon!" (phyrxes)
08/31/2017 at 09:08, STARS: 1
What no roadkill style hood removal? Nice find and enjoy.
 "wkiernan" (wkiernan)
08/31/2017 at 09:36, STARS: 1
The occasional overheating problem with my ‘04 Miata disappeared when I got the timing belt replaced, because I had the mechanic replace the water pump too. It wasn’t leaking (yet) but I figured, the part’s cheap, why not do it now while everything’s already off the front of the engine.
New water pump = no overheating, even standing in stuck traffic with the AC running during a Florida summer. That’s with my dinky plastic stock radiator too, so I imagine it would work even better with your fat aluminum radiator. So when you get around to replacing your timing belt keep that in mind.
 "someassemblyrequired" (someassemblyrequired)
08/31/2017 at 09:43, STARS: 1
Undertrays are not that expensive from the main dealer here in the U.S., I think I paid $45 for mine, and a couple of bucks for the hardware. Might be cheaper than ebaying it, was definitely less than the internet places. Does make a surprising difference.
"Wrong Wheel Drive (41%)" (rduncan5678)
08/31/2017 at 13:24, STARS: 1
Definitely, I got this advice from turbo guys since they definitely need all the cooling they can get. Has to do with all the cool air being kept in by the tray since otherwise it would just fall out of the car basically and only hot air would remain
 "daender" (daender)
08/31/2017 at 19:42, STARS: 0
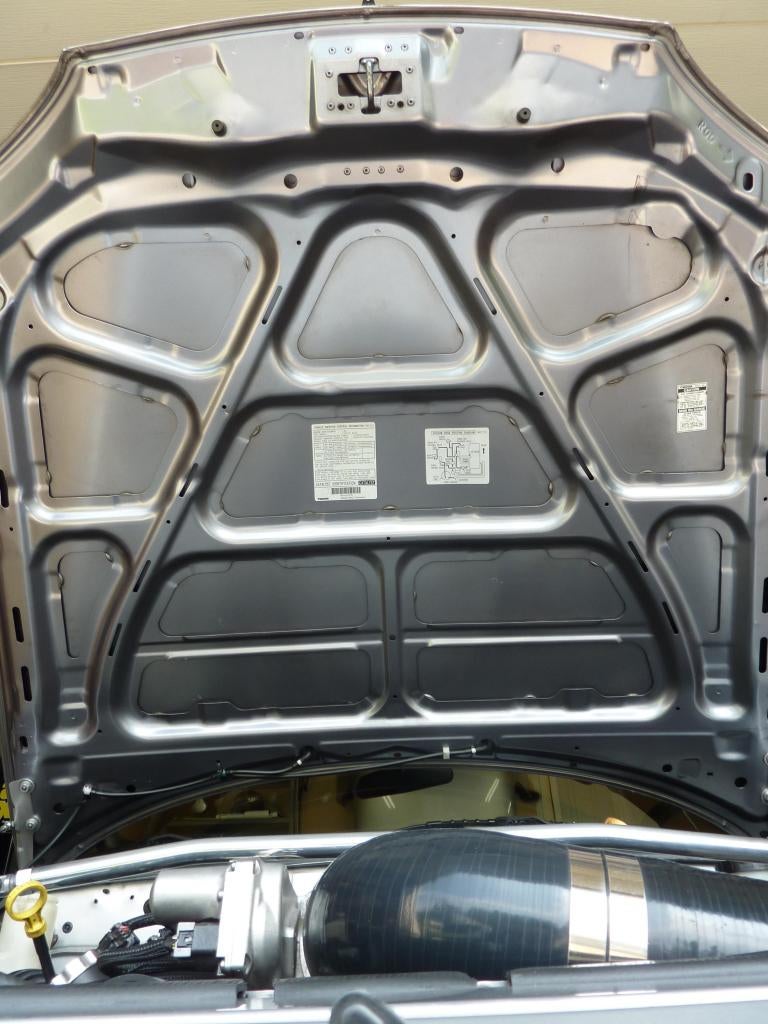
Nice! You might want to consider DIY’ing work to box the airflow to the A/C condenser (and the radiator behind it) or at least close off the top passage around the hood latch. Also, if you need more cooling for track purposes, then consider cutting up the hood using the skeleton as a guide!
You can read that DIY tread here: https://forum.miata.net/vb/showthread.php?p=7034700
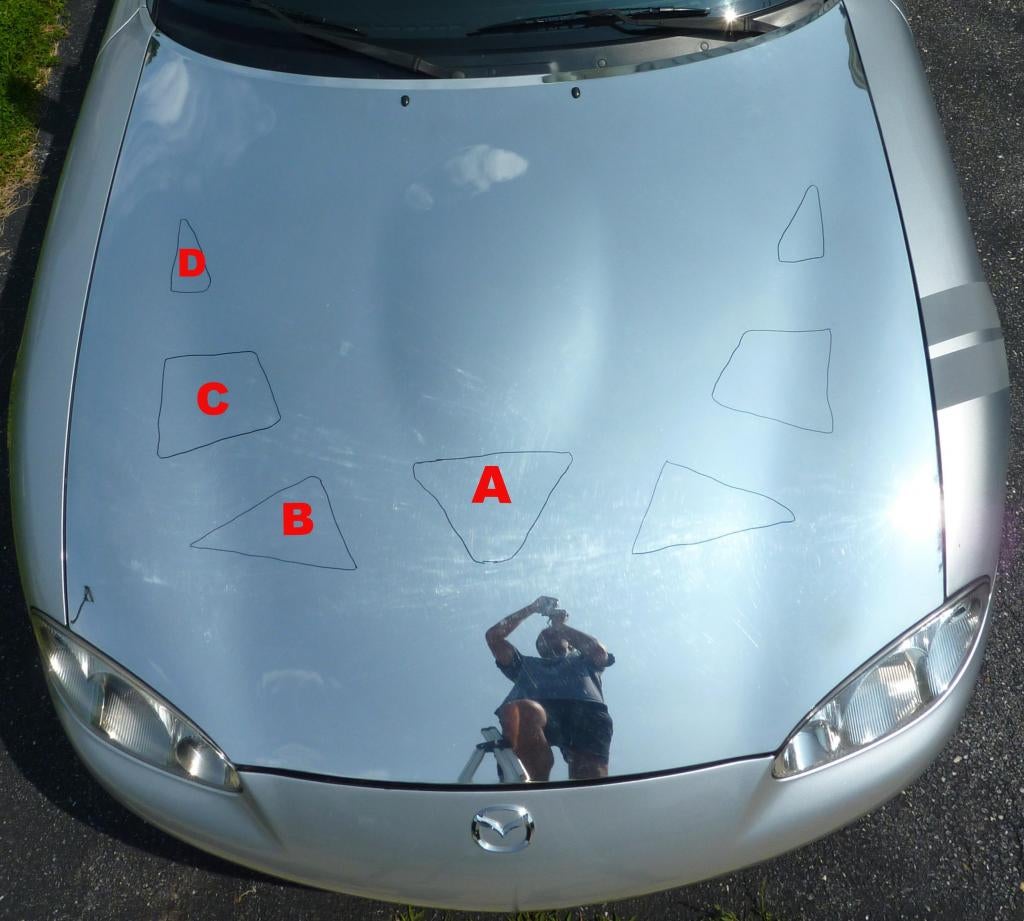
Flyin’ Miata has their own hood louvers kit that helps extract more air but here’s their TL;DR: B, C, and D extract air out from the engine bay like a fire hose, but A is the hardest one to vent. So you could cut out B, C, and D and be fine for the most part. You wouldn’t have to add louvers to it, just some mesh would be enough as this guy down below did on his NB2. That said, make sure your cuts aren’t over electrical bits like the alternator or a fuse box!
"whatuptkhere" (whatuptkhere)
09/01/2017 at 02:23, STARS: 1
No serious rust, just under the battery and some dash components, but that’s pretty common.
Good advice on the style bar. I’m saving up for a proper rollbar from Brown Davis or similar.
I’m fairly happy with it. While it’s a bit of a dog in the body department (lots of missing paint and a few dents), it’s a keeper and I’m making it better one step at a time.
The thing that’s really killing me at the moment is the super dodgy aftermarket alarm install. I hate it and I’m trying to source a stock loom to replace the butchered one that is, IMO, beyond repair.
"whatuptkhere" (whatuptkhere)
09/01/2017 at 02:24, STARS: 0
Cheers! It’s a lot of fun. :D
"whatuptkhere" (whatuptkhere)
09/01/2017 at 02:25, STARS: 0
I scored one second hand from interstate for $100 AUD shipped. Everything’s pricer here, sadly, but I’m glad to have it.
"whatuptkhere" (whatuptkhere)
09/01/2017 at 02:25, STARS: 0
Good advice, I should definitely do that. I’d like to do a coolant reroute in future, too.
"whatuptkhere" (whatuptkhere)
09/01/2017 at 02:26, STARS: 0
Wow, that’s awesome and looks pretty cool too! I may have to do that if the skeleton method works on the NA as well. :D
Some of the track guys have said it helps with aero, too.
"whatuptkhere" (whatuptkhere)
09/01/2017 at 02:27, STARS: 0
How does one cut that neatly?
"Wrong Wheel Drive (41%)" (rduncan5678)
09/01/2017 at 12:04, STARS: 0
Oh man aftermarket alarms are the worst! And it really makes no sense on a Miata since there is no point in locking the car anyways, might as well just skip that whole idea of “security”. I dont even have a key to my passenger door (replaced the door) and the power locks are disconnected/broken so I havent bothered locking mine ever.
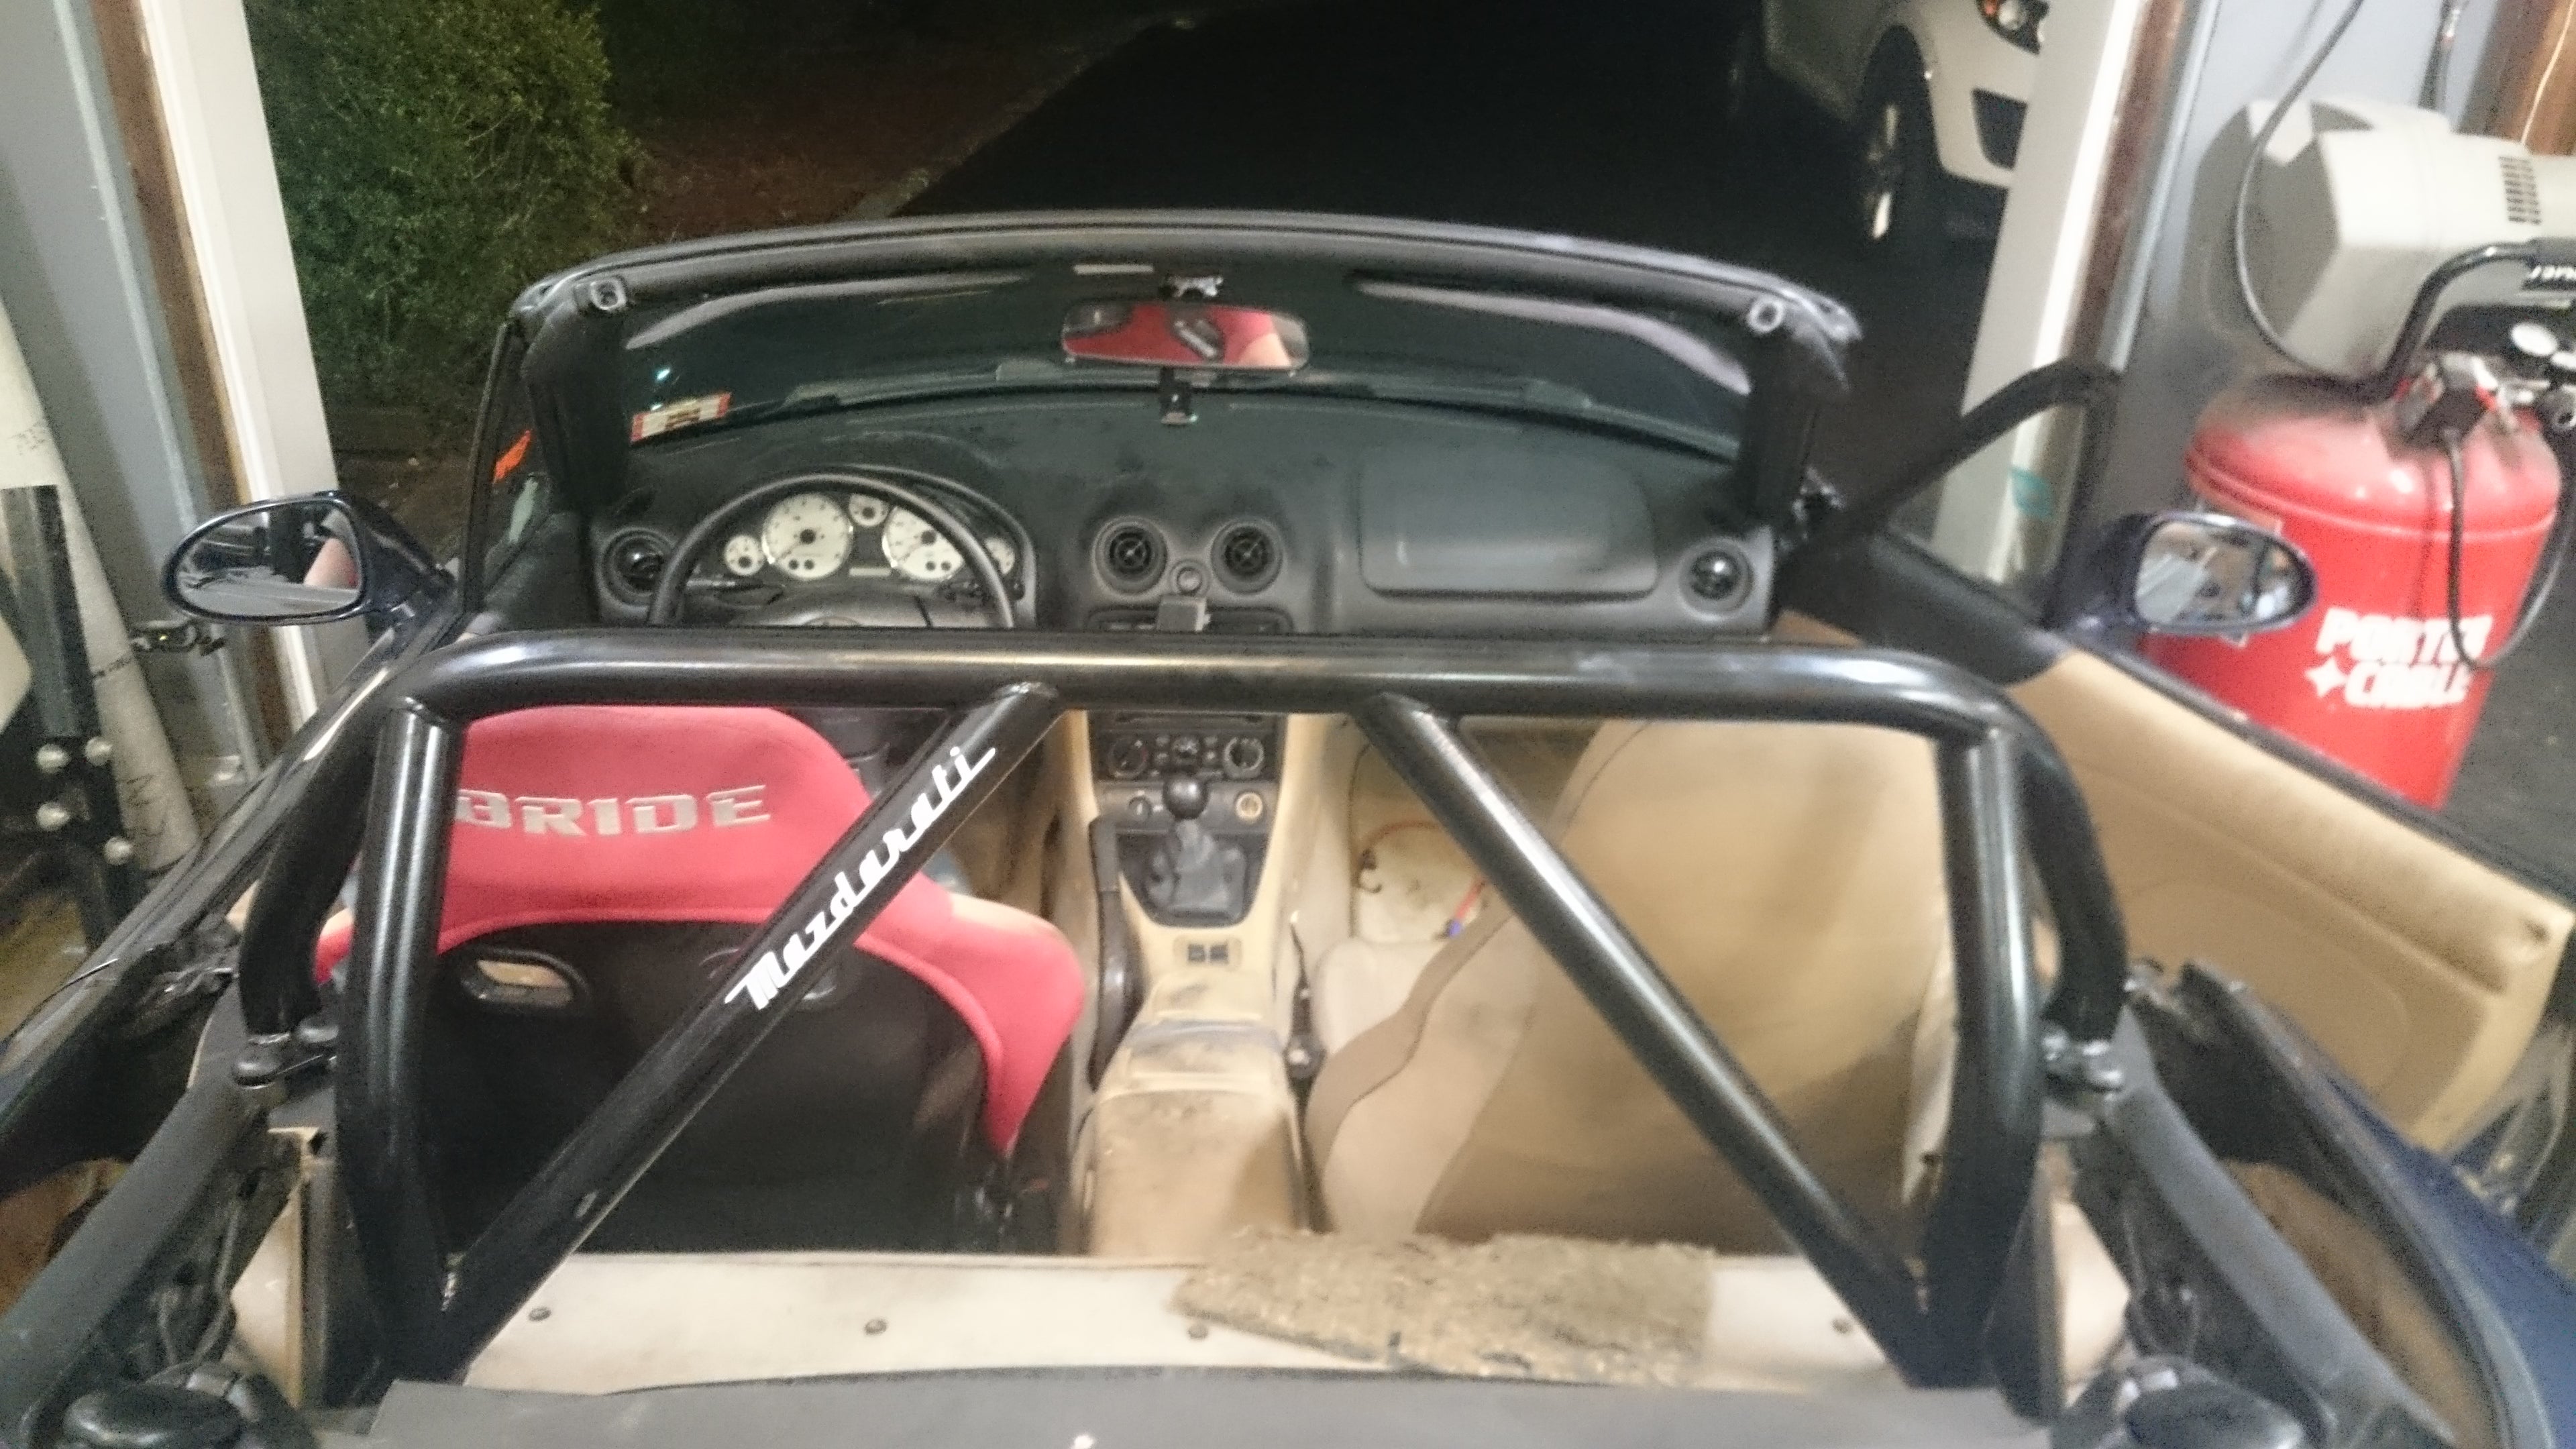
I’m really loving the Boss Frog Roll bar that I have, it sits nice and far back compared to the Hard Dog. This is so that once I put proper padding on it, I won’t be worried about helmetless driving on the street so much. Plus the diagonals are arranged better as well! Too bad Boss Frog went out of business though so its impossible to get new ones.
I’ve heard good things about the Blackbird Fabworx ones as well, that would have been my next choice for sure. Next up is a harness install and then I am ready for track days!
"daender" (daender)
09/01/2017 at 17:28, STARS: 0
I guess lots of patience! Here’re some quotes from that thread about it:
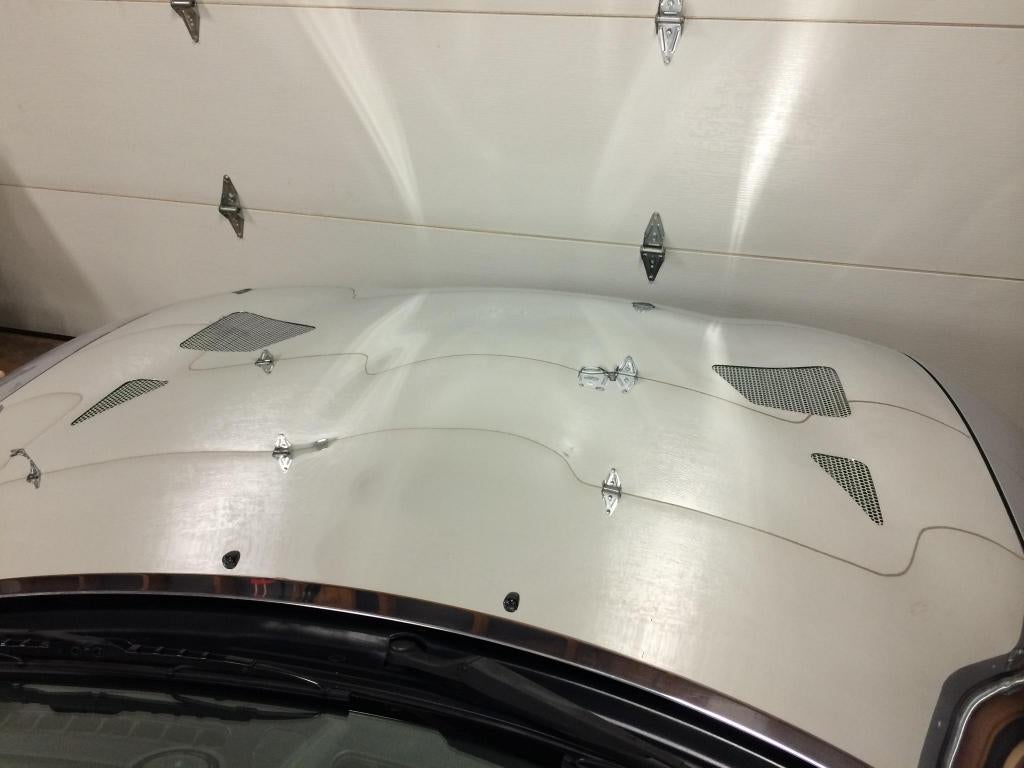
First I trimmed away some of the excess adhesive that holds the hood skin to the skeleton. I stacked up a spacer and a couple washers so that I could put a sharpie in the center and roll it around the hood skeleton. This left me about a 3/8" lip to mount the vents to. I rounded off the square corners by freehand.
Next I drilled a 1/2" hole near the line so that I could get the airsaw blade someone where to start the cut. The airsaw worked really well, it works just like a jigsaw except it reciprocates much faster (10K rpm) and has a shorter stroke. Less of a chance of tearing the thin aluminum hood.
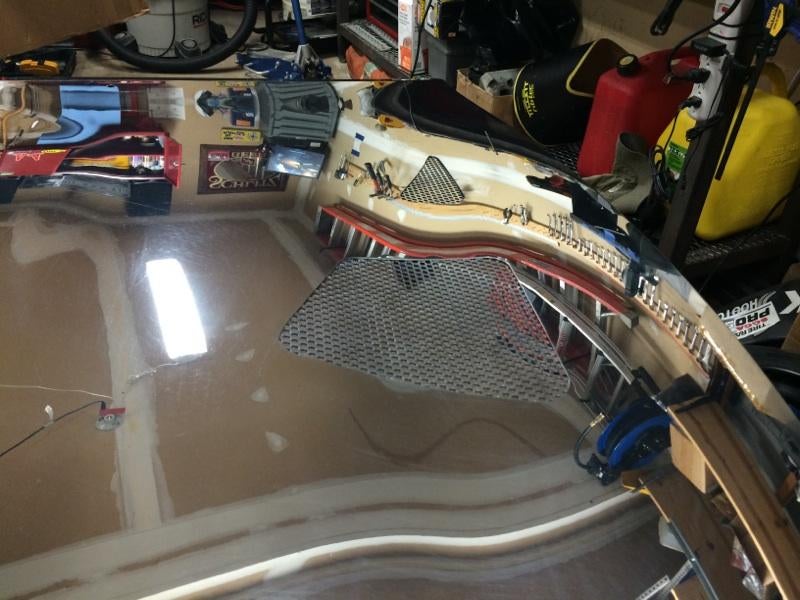
Here’s how it looked after the first cut. Still rough around the edges. I used a circular sandpaper Dremel bit to smooth out the really rough spots, then a fine flat file to straighten out the cuts. Once that was done I sanded the edges down with 800 grit all the way up to 2K grit.
Then I cut the vents. I used the pieces I cut out of the hood as templates. I held them down flat on the mesh then used the same 3/8" spacer with the sharpie to roll around the outside of the templates to mark my cuts. Once they were cut they needed to be bent slightly to match the contour of the hood. This took a while, but it’s critical to get them perfect or else you’ll end up with big gaps between the vents and the hood skin.