 by "MR2_FTW - Group J's resident Stig" (MR2_FTW)
Published 08/17/2017 at 09:49
by "MR2_FTW - Group J's resident Stig" (MR2_FTW)
Published 08/17/2017 at 09:49
No Tags
STARS: 8
Once the front suspension was together, I took a few days off from working on the car until the rear parts arrived. Is there anything better than getting car parts in the mail? I submit that there is not.
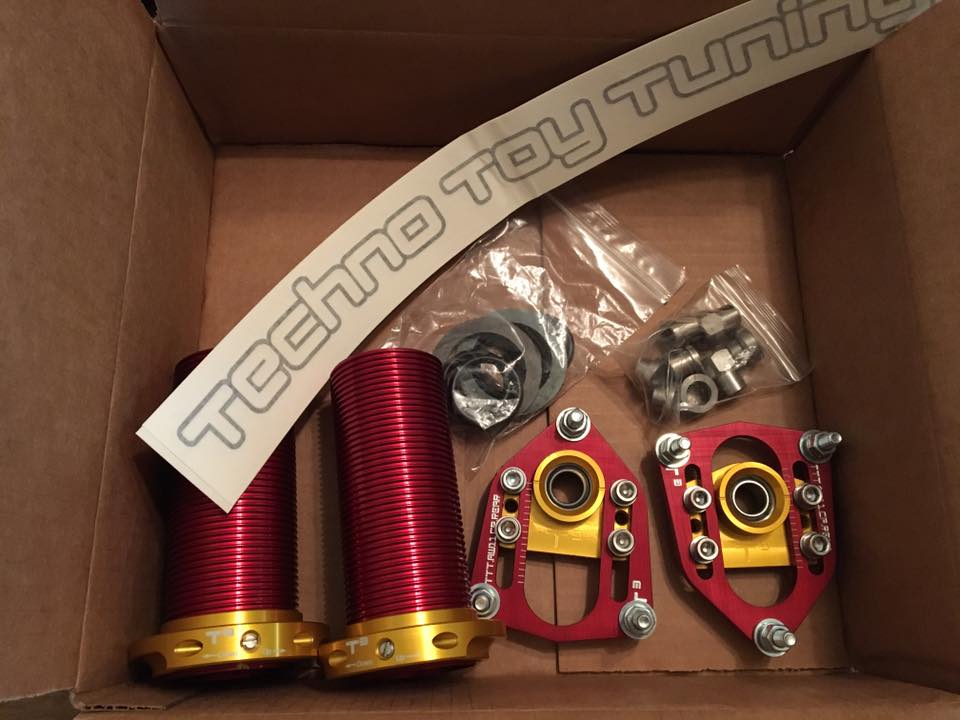
An interesting thing to note - the FX16 rear camber plates say “AW11" on them because, like so much else on this car, they are the same. I did have to reverse the center sections though, as they were set up backwards.

And here it is on the car. Final parts combination - FX16 GTS rear housings, top sections cut off, AW11 front top sections welded on for proper length and gland nut thread. AW11 front Koni adjustable shocks, T3 coilovers/camber plates with 350lb/in springs.
For more content like this, check out Daily Downshift
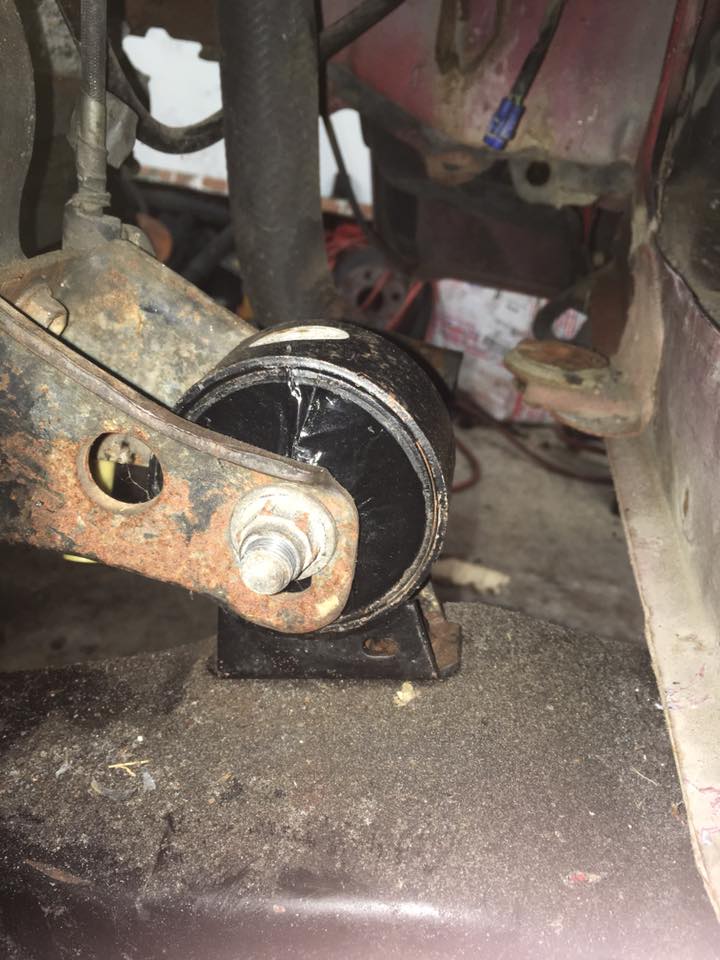
Remember the motor mounts that got filled with polyurethane? Those were installed as well. I hope they hold up as well as ones I’ve made in the past.
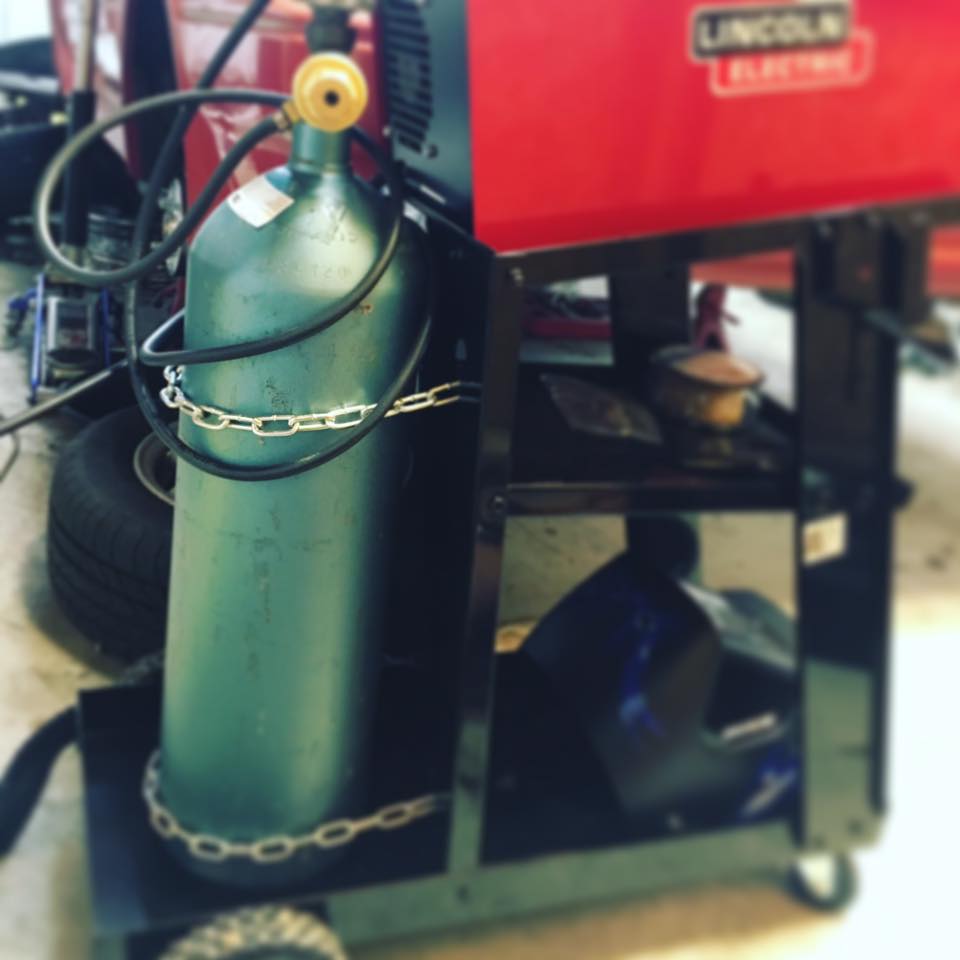
As I was redoing all the welds on the exhaust manifold, I ran out of gas. Not terribly excited about the possibility of running out mid-project again, I swapped out my 20lb bottle for a 40lb one. Time to rock and roll.
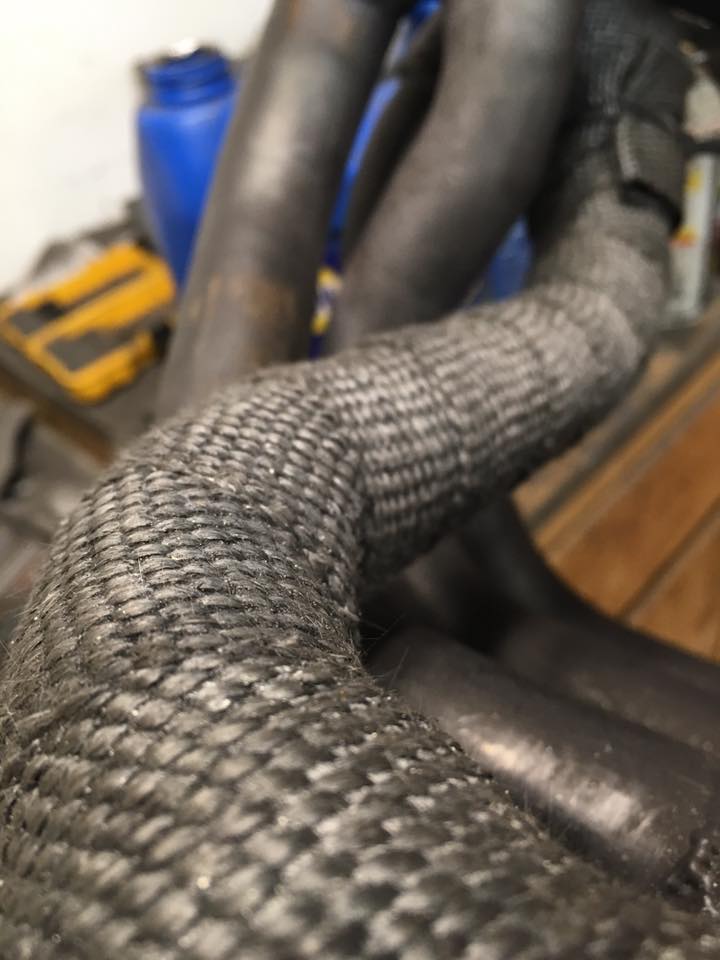
With the welds significantly improved, it was time to add some wrap to help keep underhood temps down.
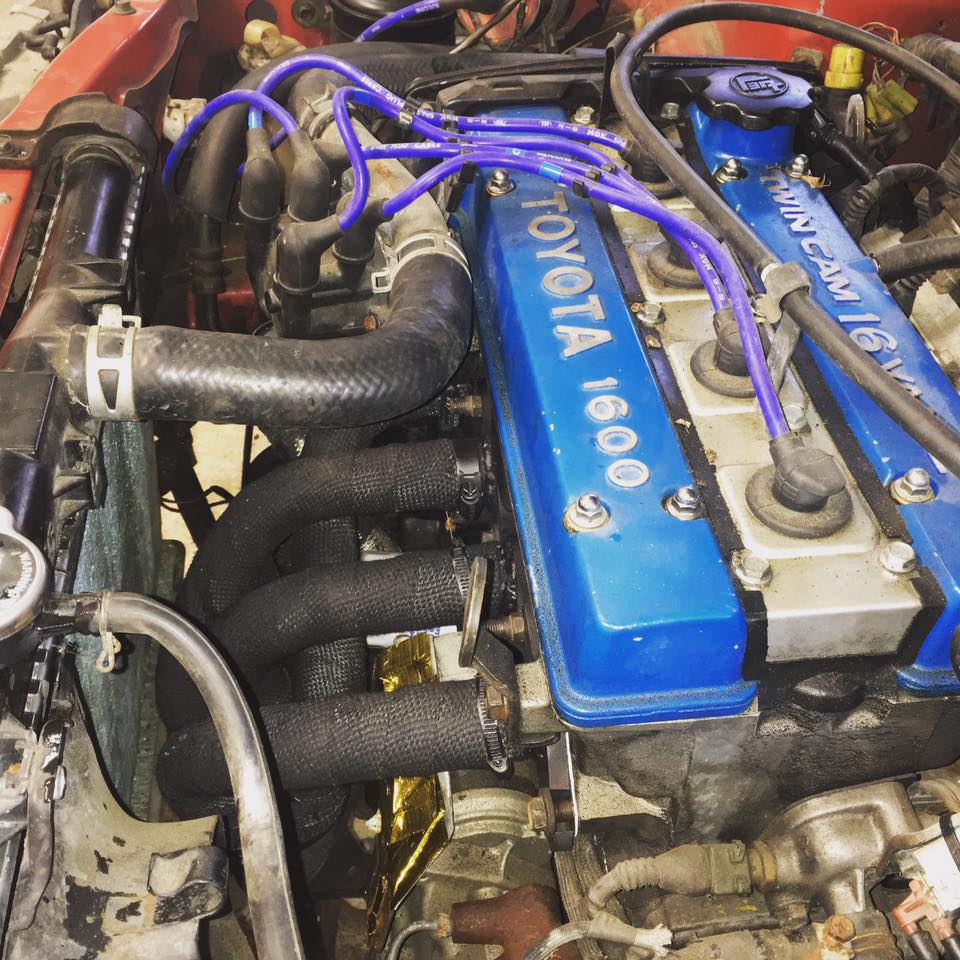
The manifold fit great, clearing the starter and the radiator, just. Now the trickiest part will be making a downpipe so the rest of the exhaust can connect to it. That will be part of a later post.
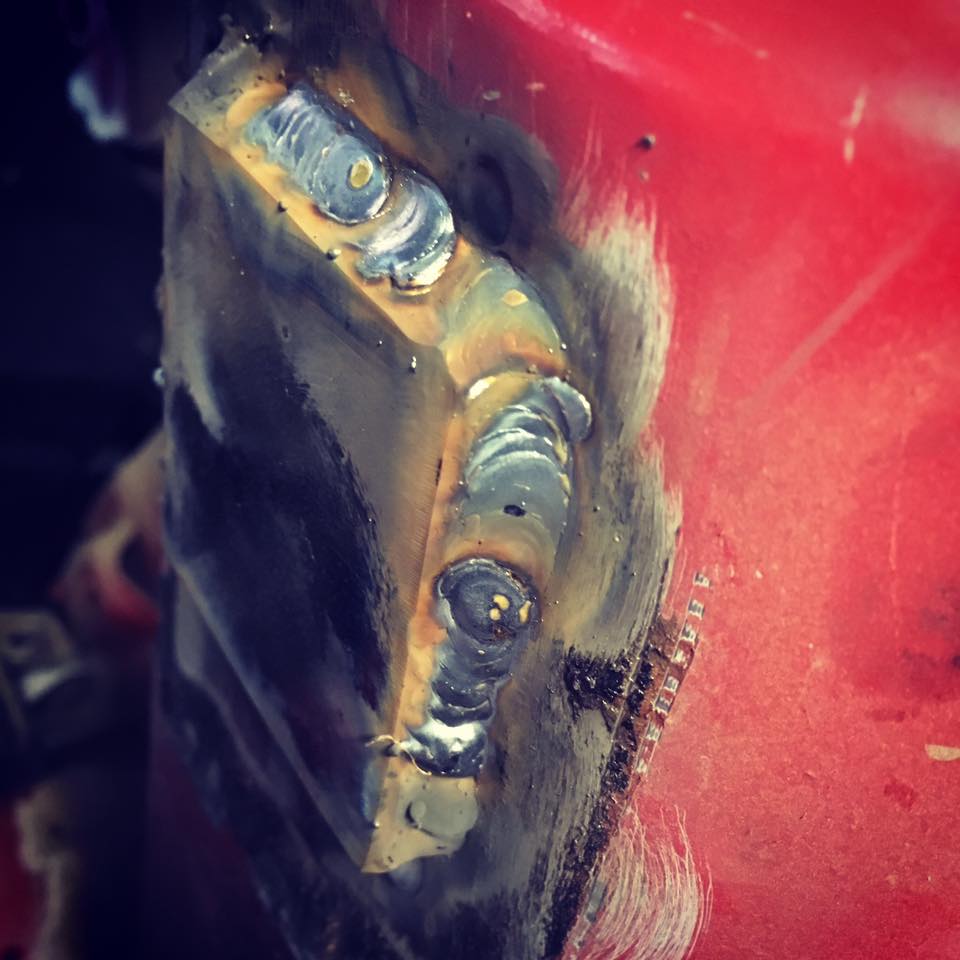
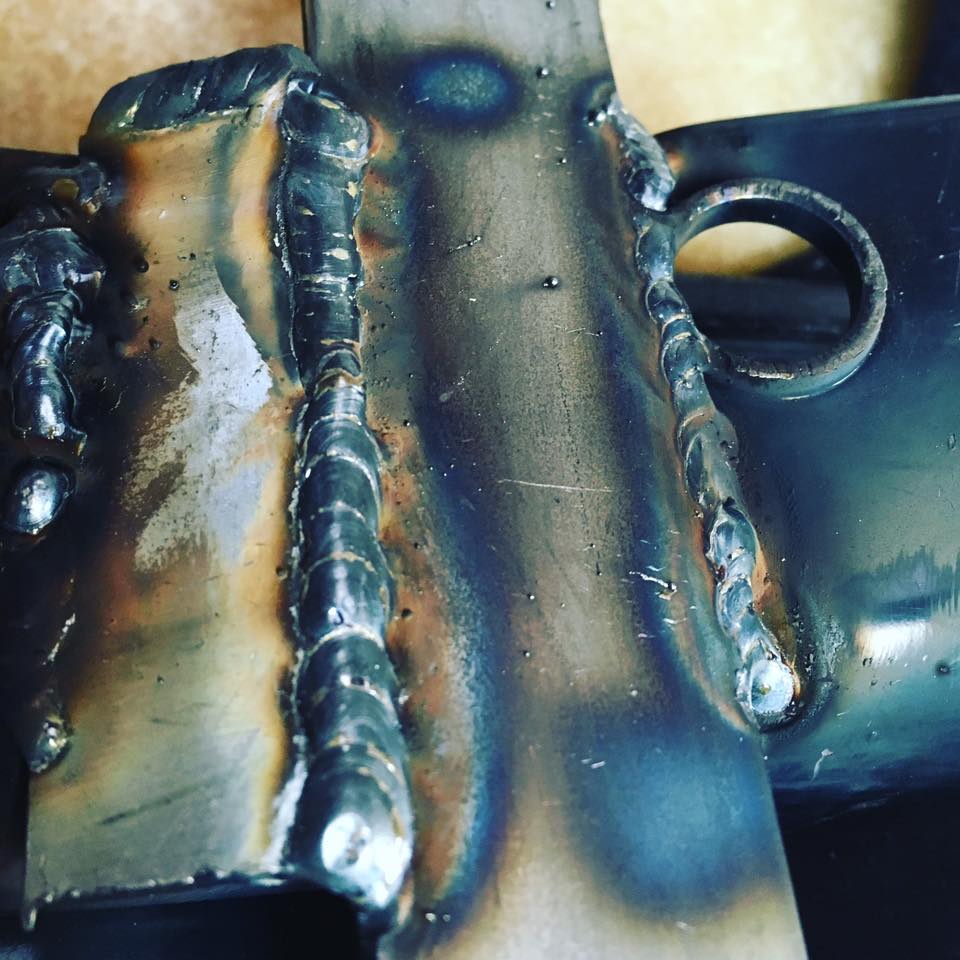
With the welder running at full steam again, I addressed an issue that had been bothering me since I got the car. The chassis has several points where flex will happen under heavy cornering loads, with the rear strut towers being the most obvious. Nobody makes any bolt-in rear bar for the FX (of course) and I’d also like a solid point to mount harnesses in the future. I decided to make my own bar and weld it in. The attachments at the towers are 1/4" plate steel. These are stupid strong and aren’t going anywhere.
When it came to the bar itself, it was nature that provided the answer in the form of a neighbor’s tree falling on a section of my fence. An undamaged section of the top rail I replaced was ground down (to get the galvanization off) and welded in place. This bar is very thick wall and incredibly sturdy. I would feel comfortable running a tow strap around this thing and pulling the car, it’s that strong.
For more content like this, check out Daily Downshift
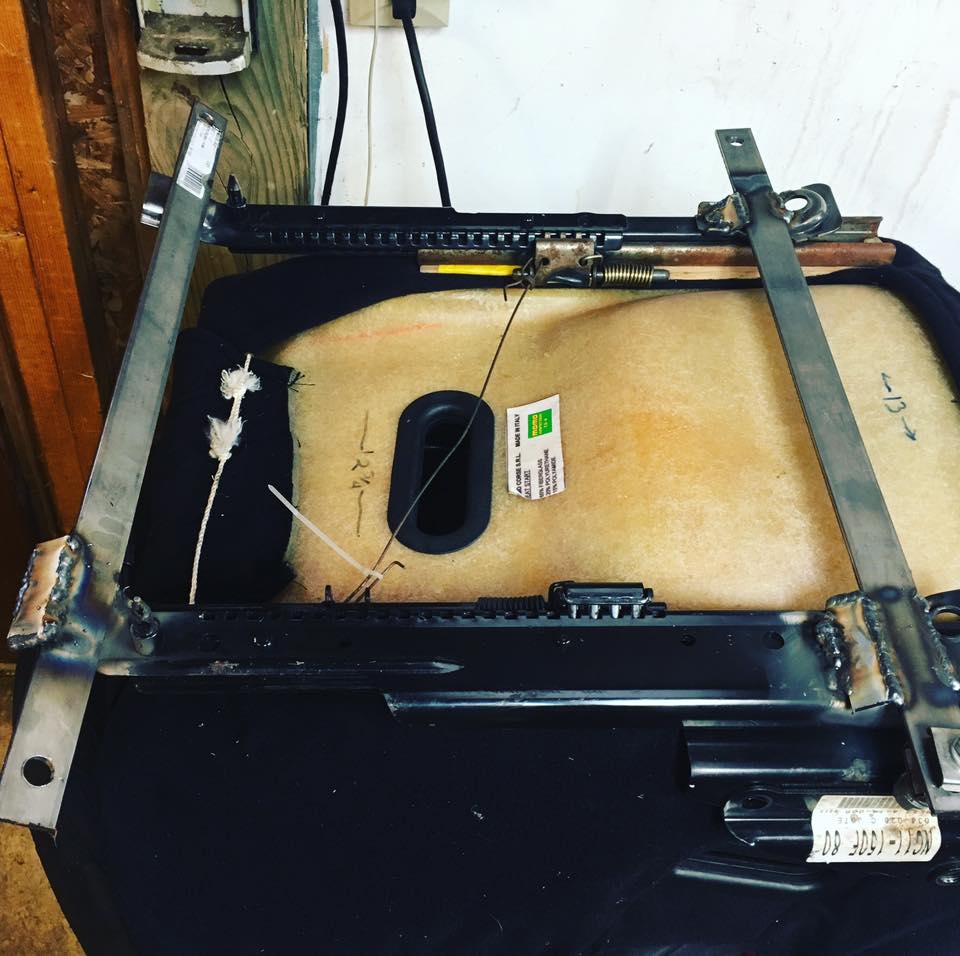
A friend of mine just got fancy new Sparco seats for his NA Miata track car, so he sold me his old well-worn Momo for a good price. Miata rails are significantly narrower than the FX, so some thick steel bar and reinforcement plates were welded on to allow the seat to bolt in.
My welds are still far from perfect, but it’s satisfying to see how much improvement has taken place.
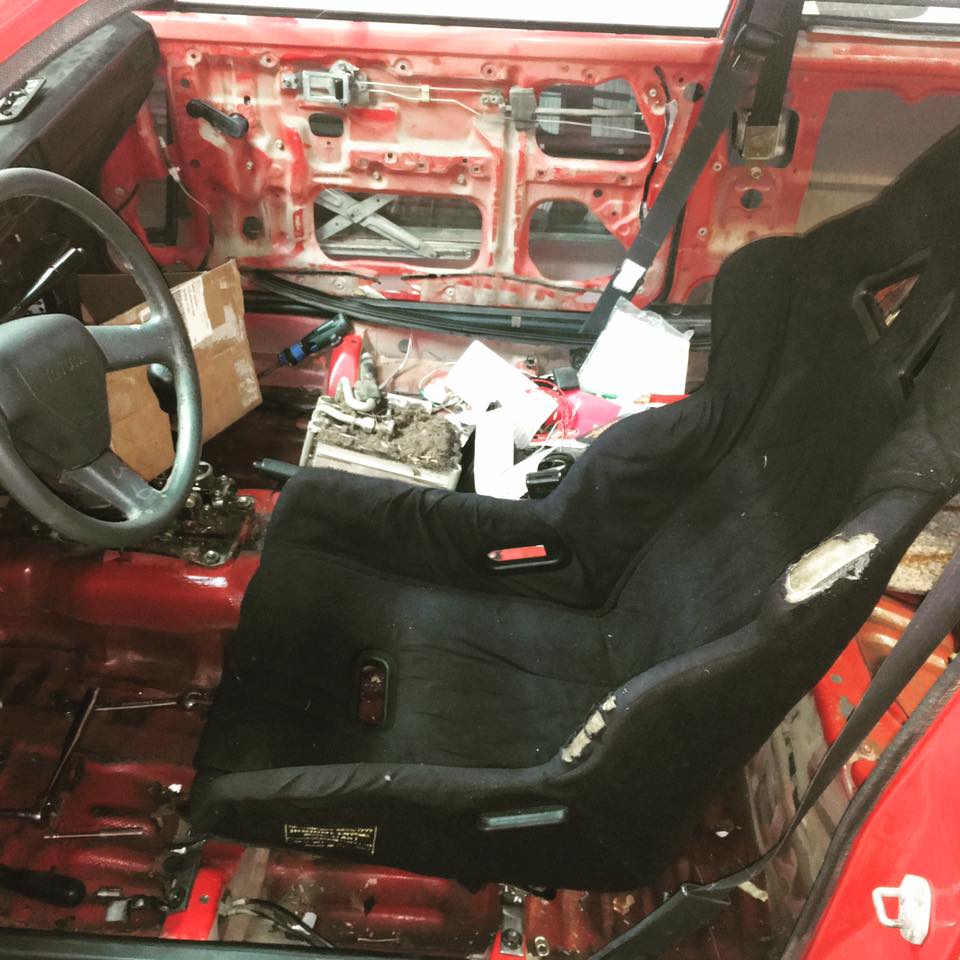
Here’s the seat bolted in. The cover is well worn, but it will do the job just fine. The seating position is several inches lower than stock, which will improve the driving experience immensely. The stock seats are actually really awesome, but they sit really high up in the car, as well as lacking adequate side bolstering for track work.
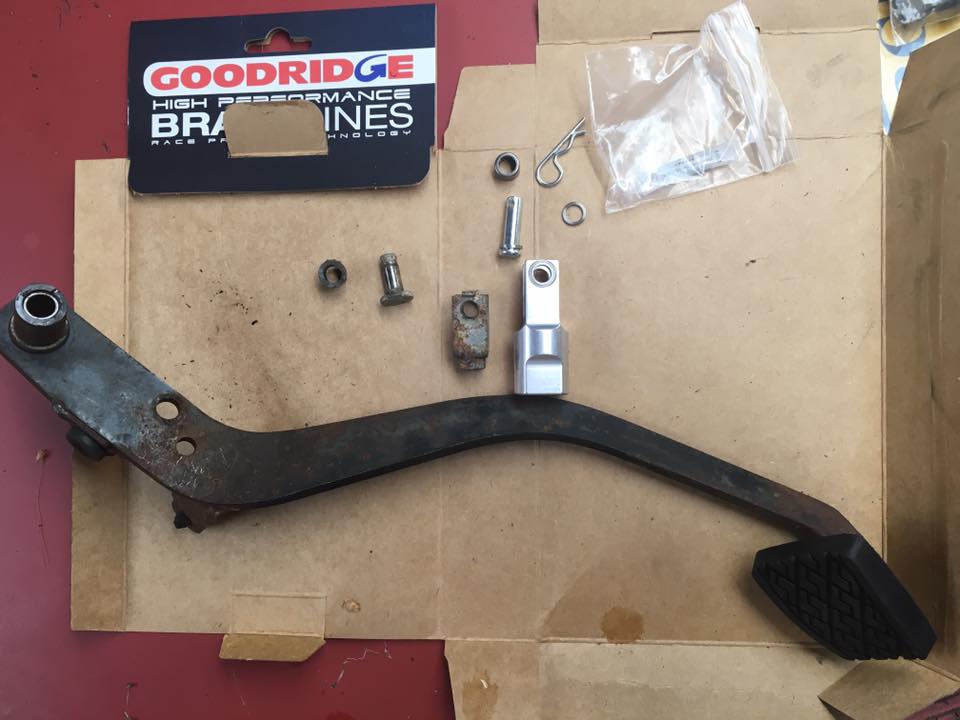
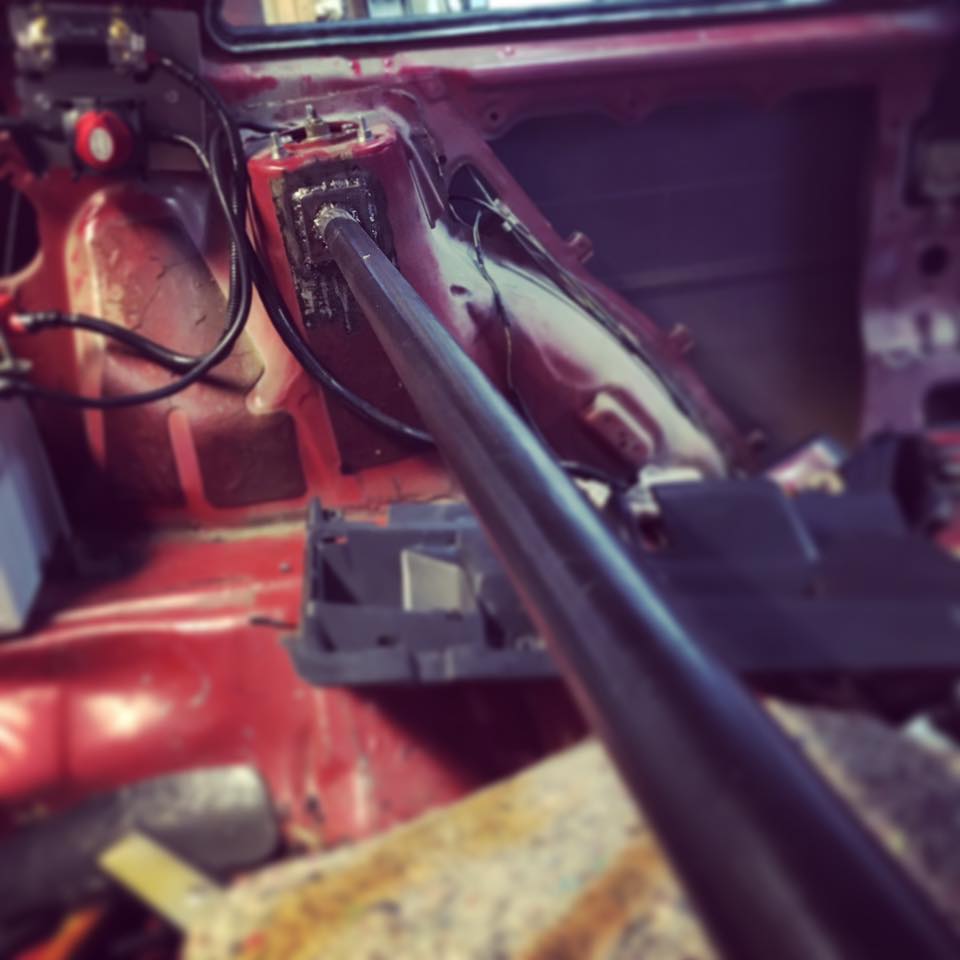
The clutch pedal on this car had some pretty terrible feel. Every time I pressed the pedal, I was greeted with crunchy, squeaky action. I had installed a roller bearing clevis on my MR2, so I ordered one for the FX thinking it would be pretty close to the same. The threads are indeed the same, but the AW11 clevis is much longer than the stock part. I ended up having to cut around 3/8" off the back side to allow for enough adjustment, but it does work.
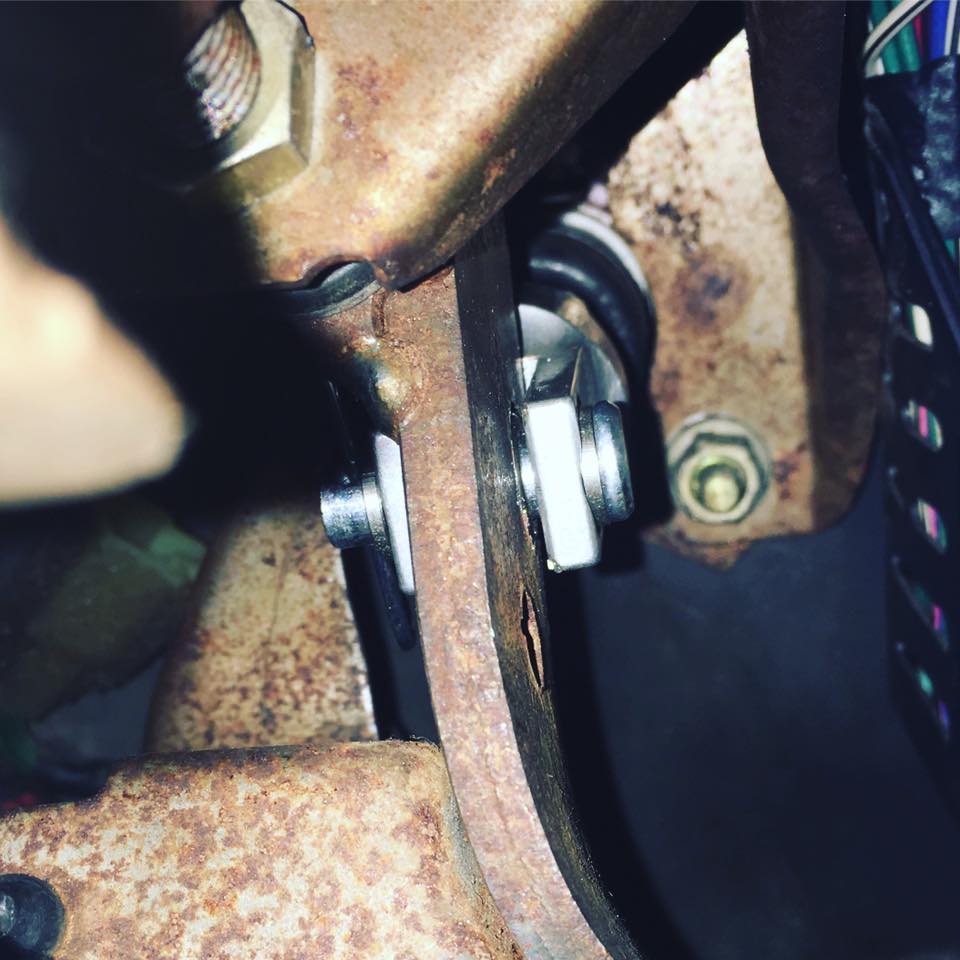
Here is the clevis installed. Pro tip - when you cut aluminum with a cutting disc, it gets REALLY hot. Like melt your glove into your finger in a split second hot. Just, you know, FYI.
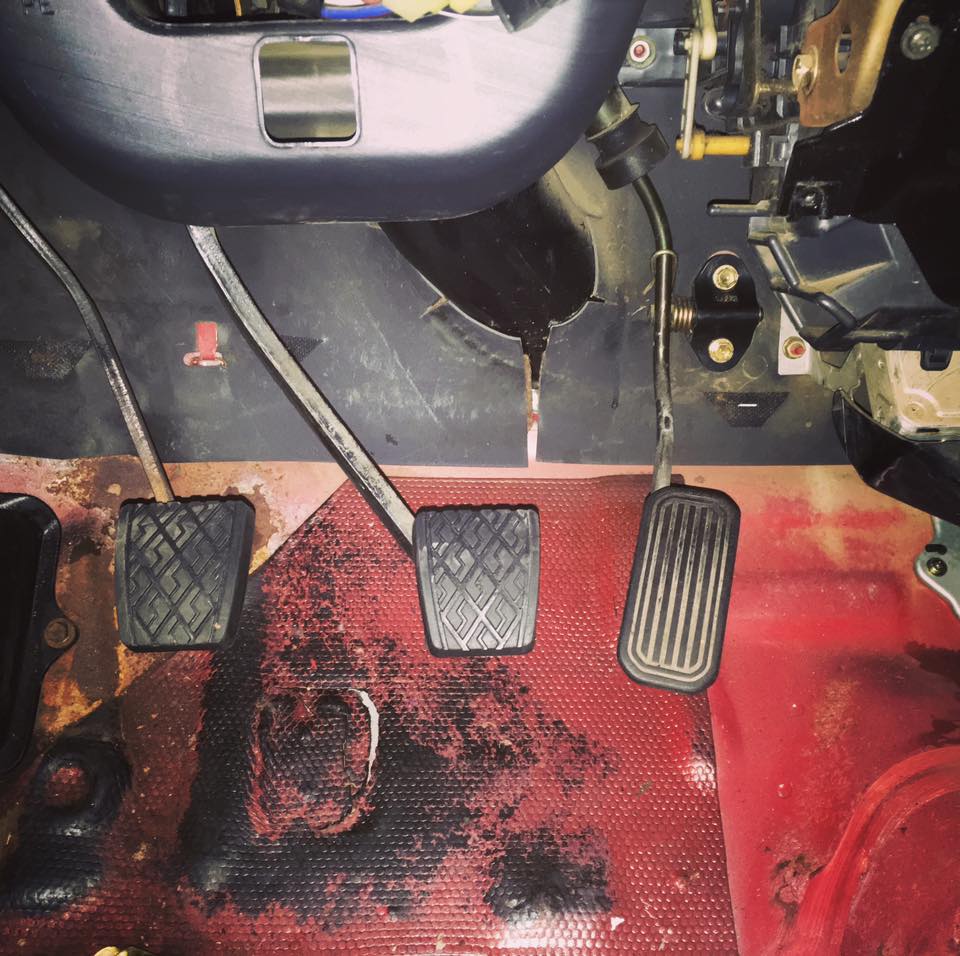
Since I was already fiddling around the pedal box area, I removed the gas pedal and used my bench vice to apply a slight bend in it. This moved it “out” towards the driver slightly, and closer to the brake pedal, allowing for super easy heel-toe action.
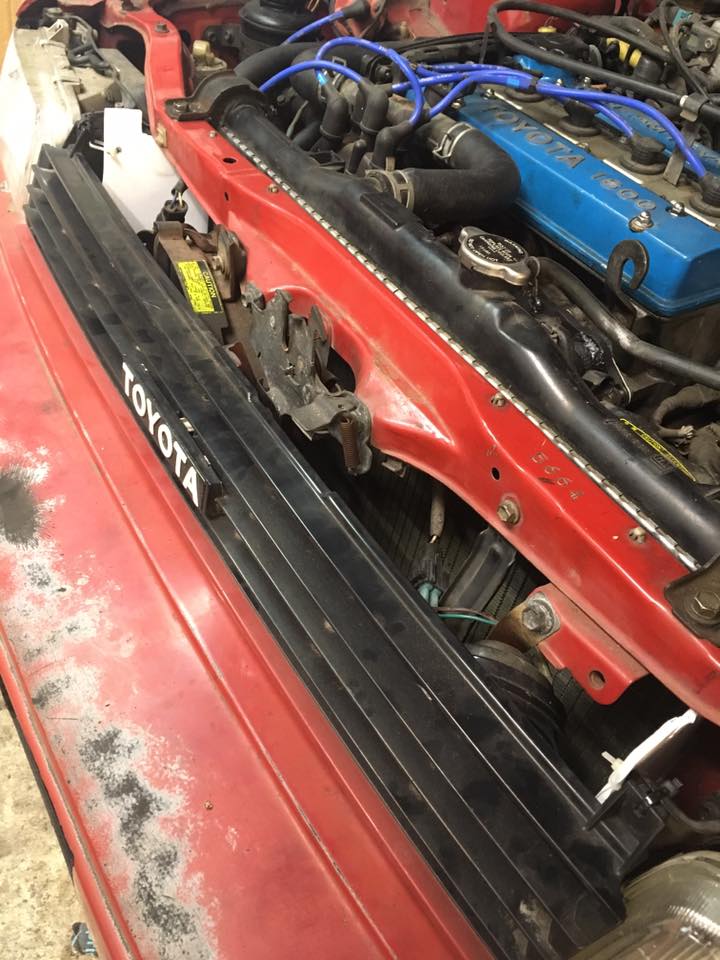
Using a sheet of coroplast (corrugated plastic, often used for yard signs), I made air block off panels to keep air flowing through the radiator, rather than tumbling around behind the headlights. This stuff is very cheap, easy to work with, very light, and fairly rigid for its weight.
That’s it for this part of the build. Next time hopefully we’ll have the exhaust finished, sound deadening removed, and maybe even have the car in a drive-able state.
For more content like this, check out Daily Downshift