 by "Jake - Has Bad Luck So You Don't Have To" (murdersofa)
Published 04/19/2017 at 11:21
by "Jake - Has Bad Luck So You Don't Have To" (murdersofa)
Published 04/19/2017 at 11:21
No Tags
STARS: 4
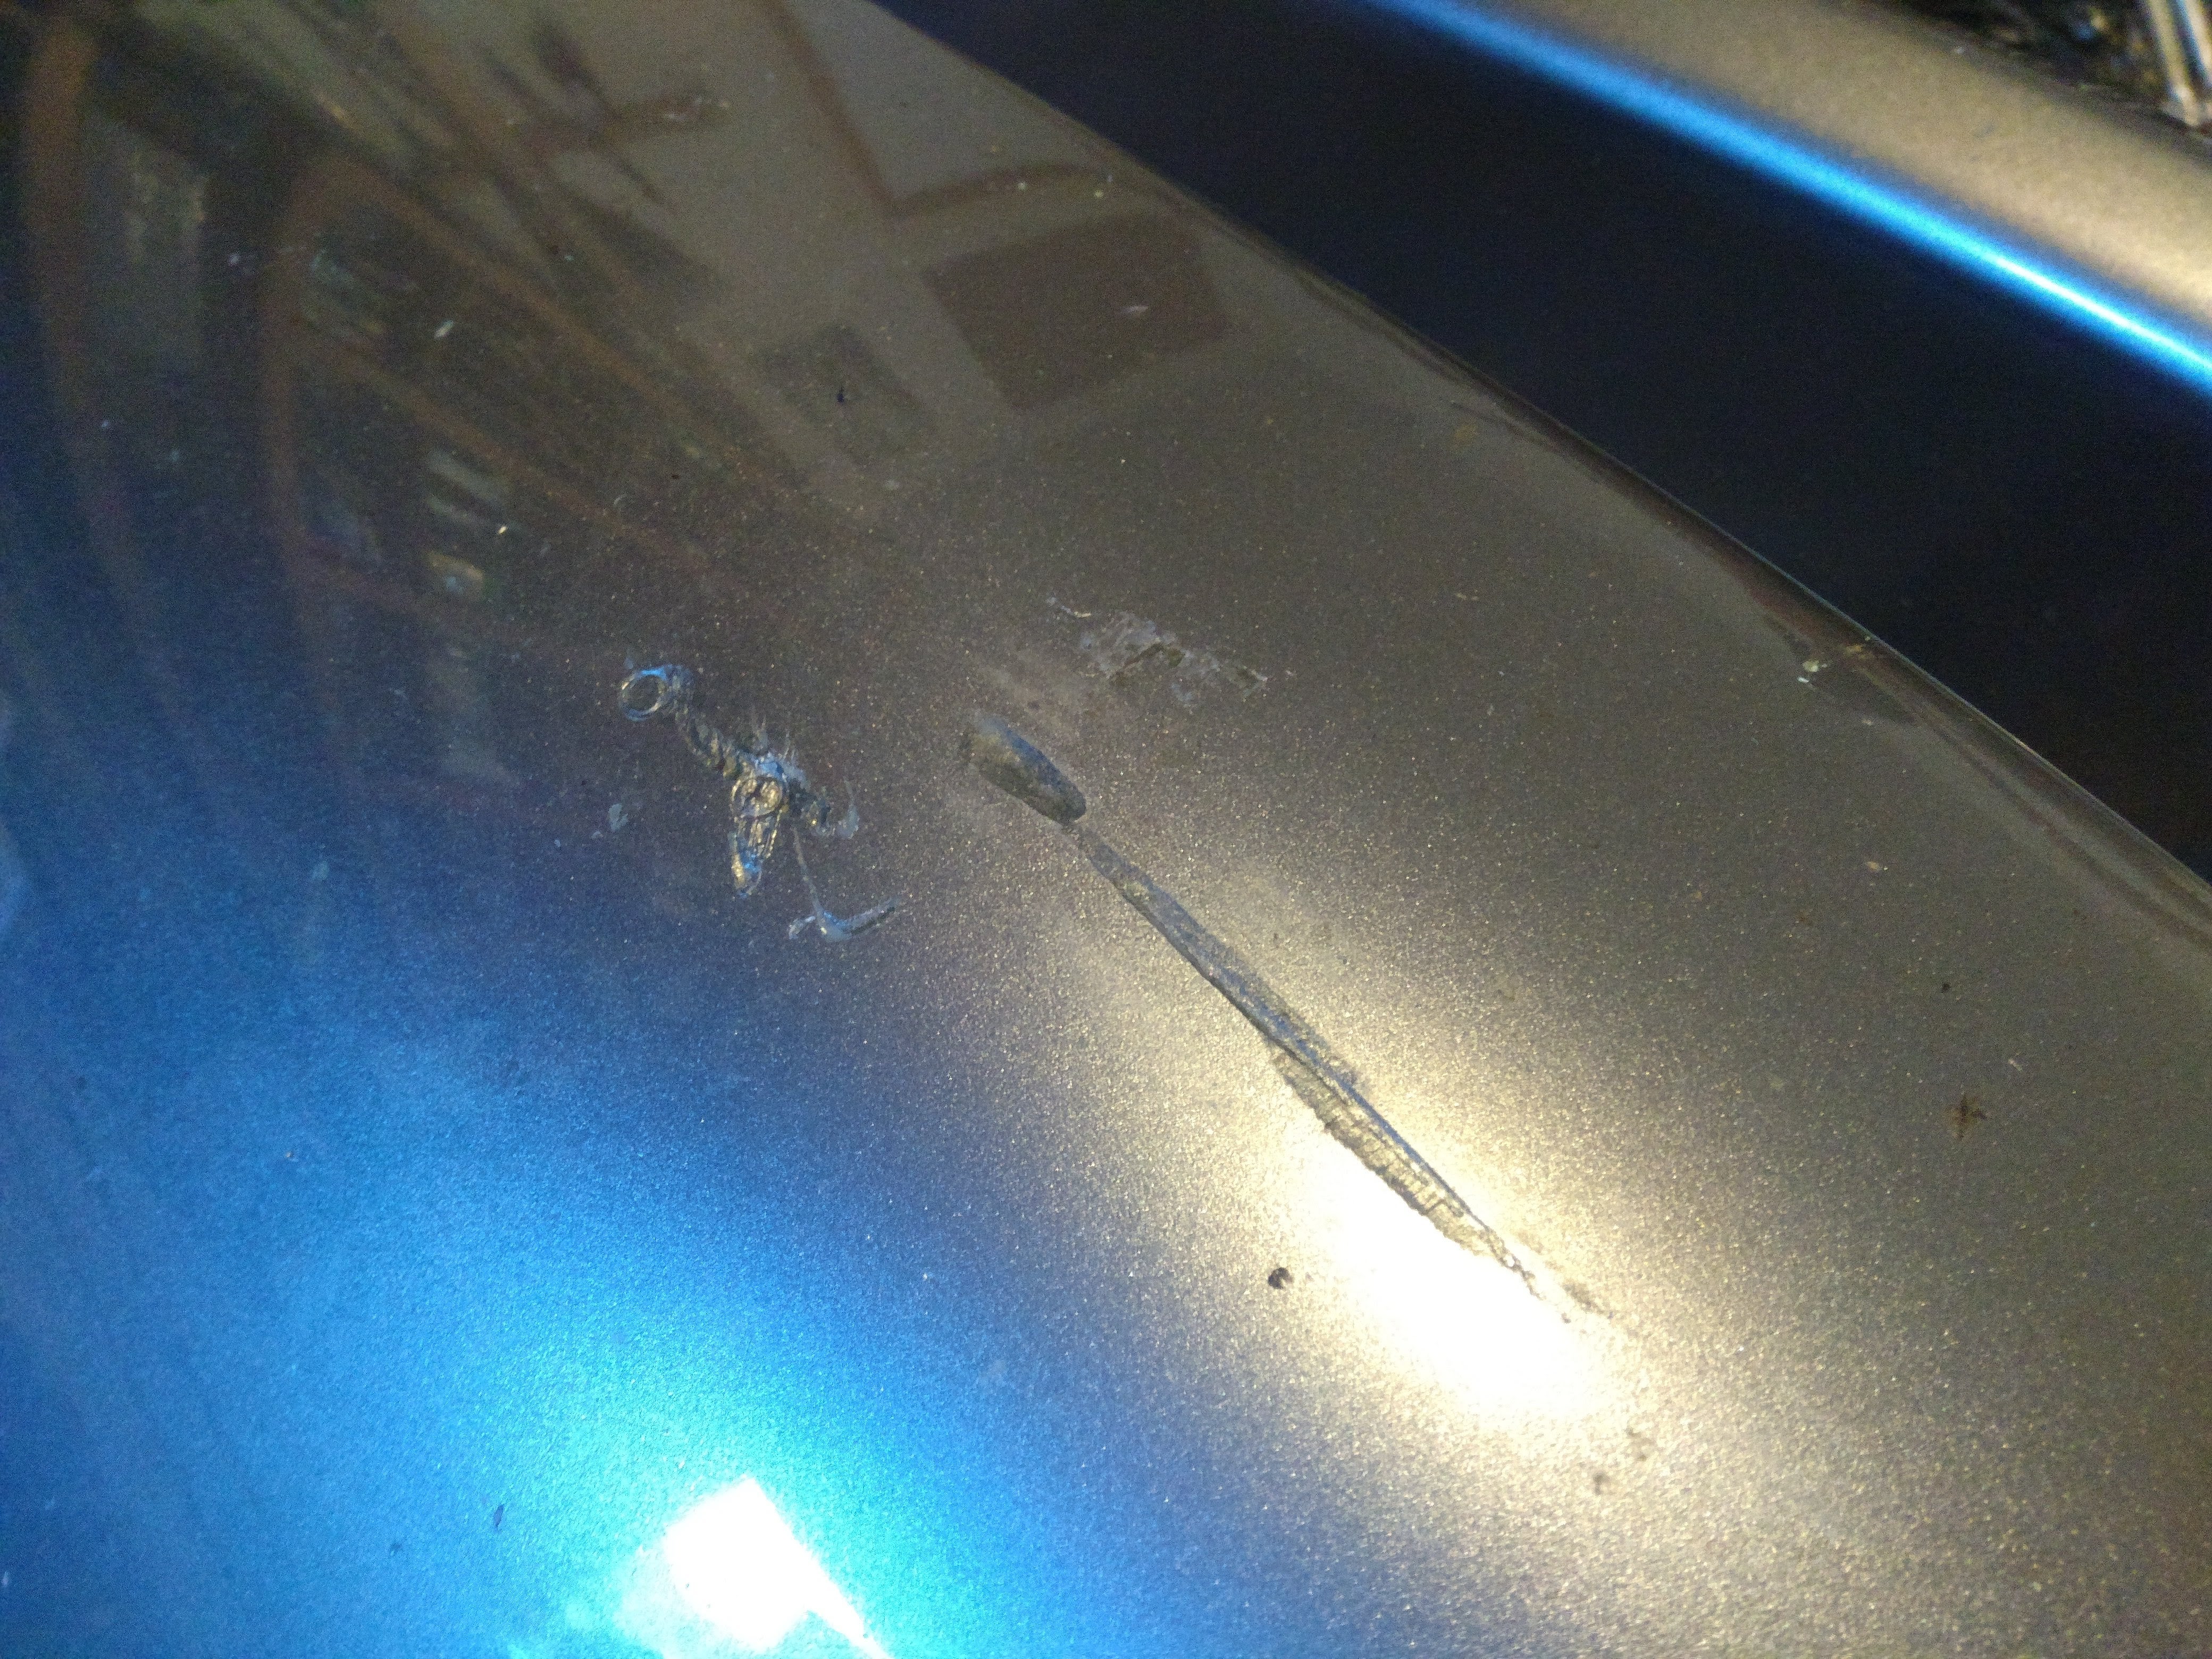
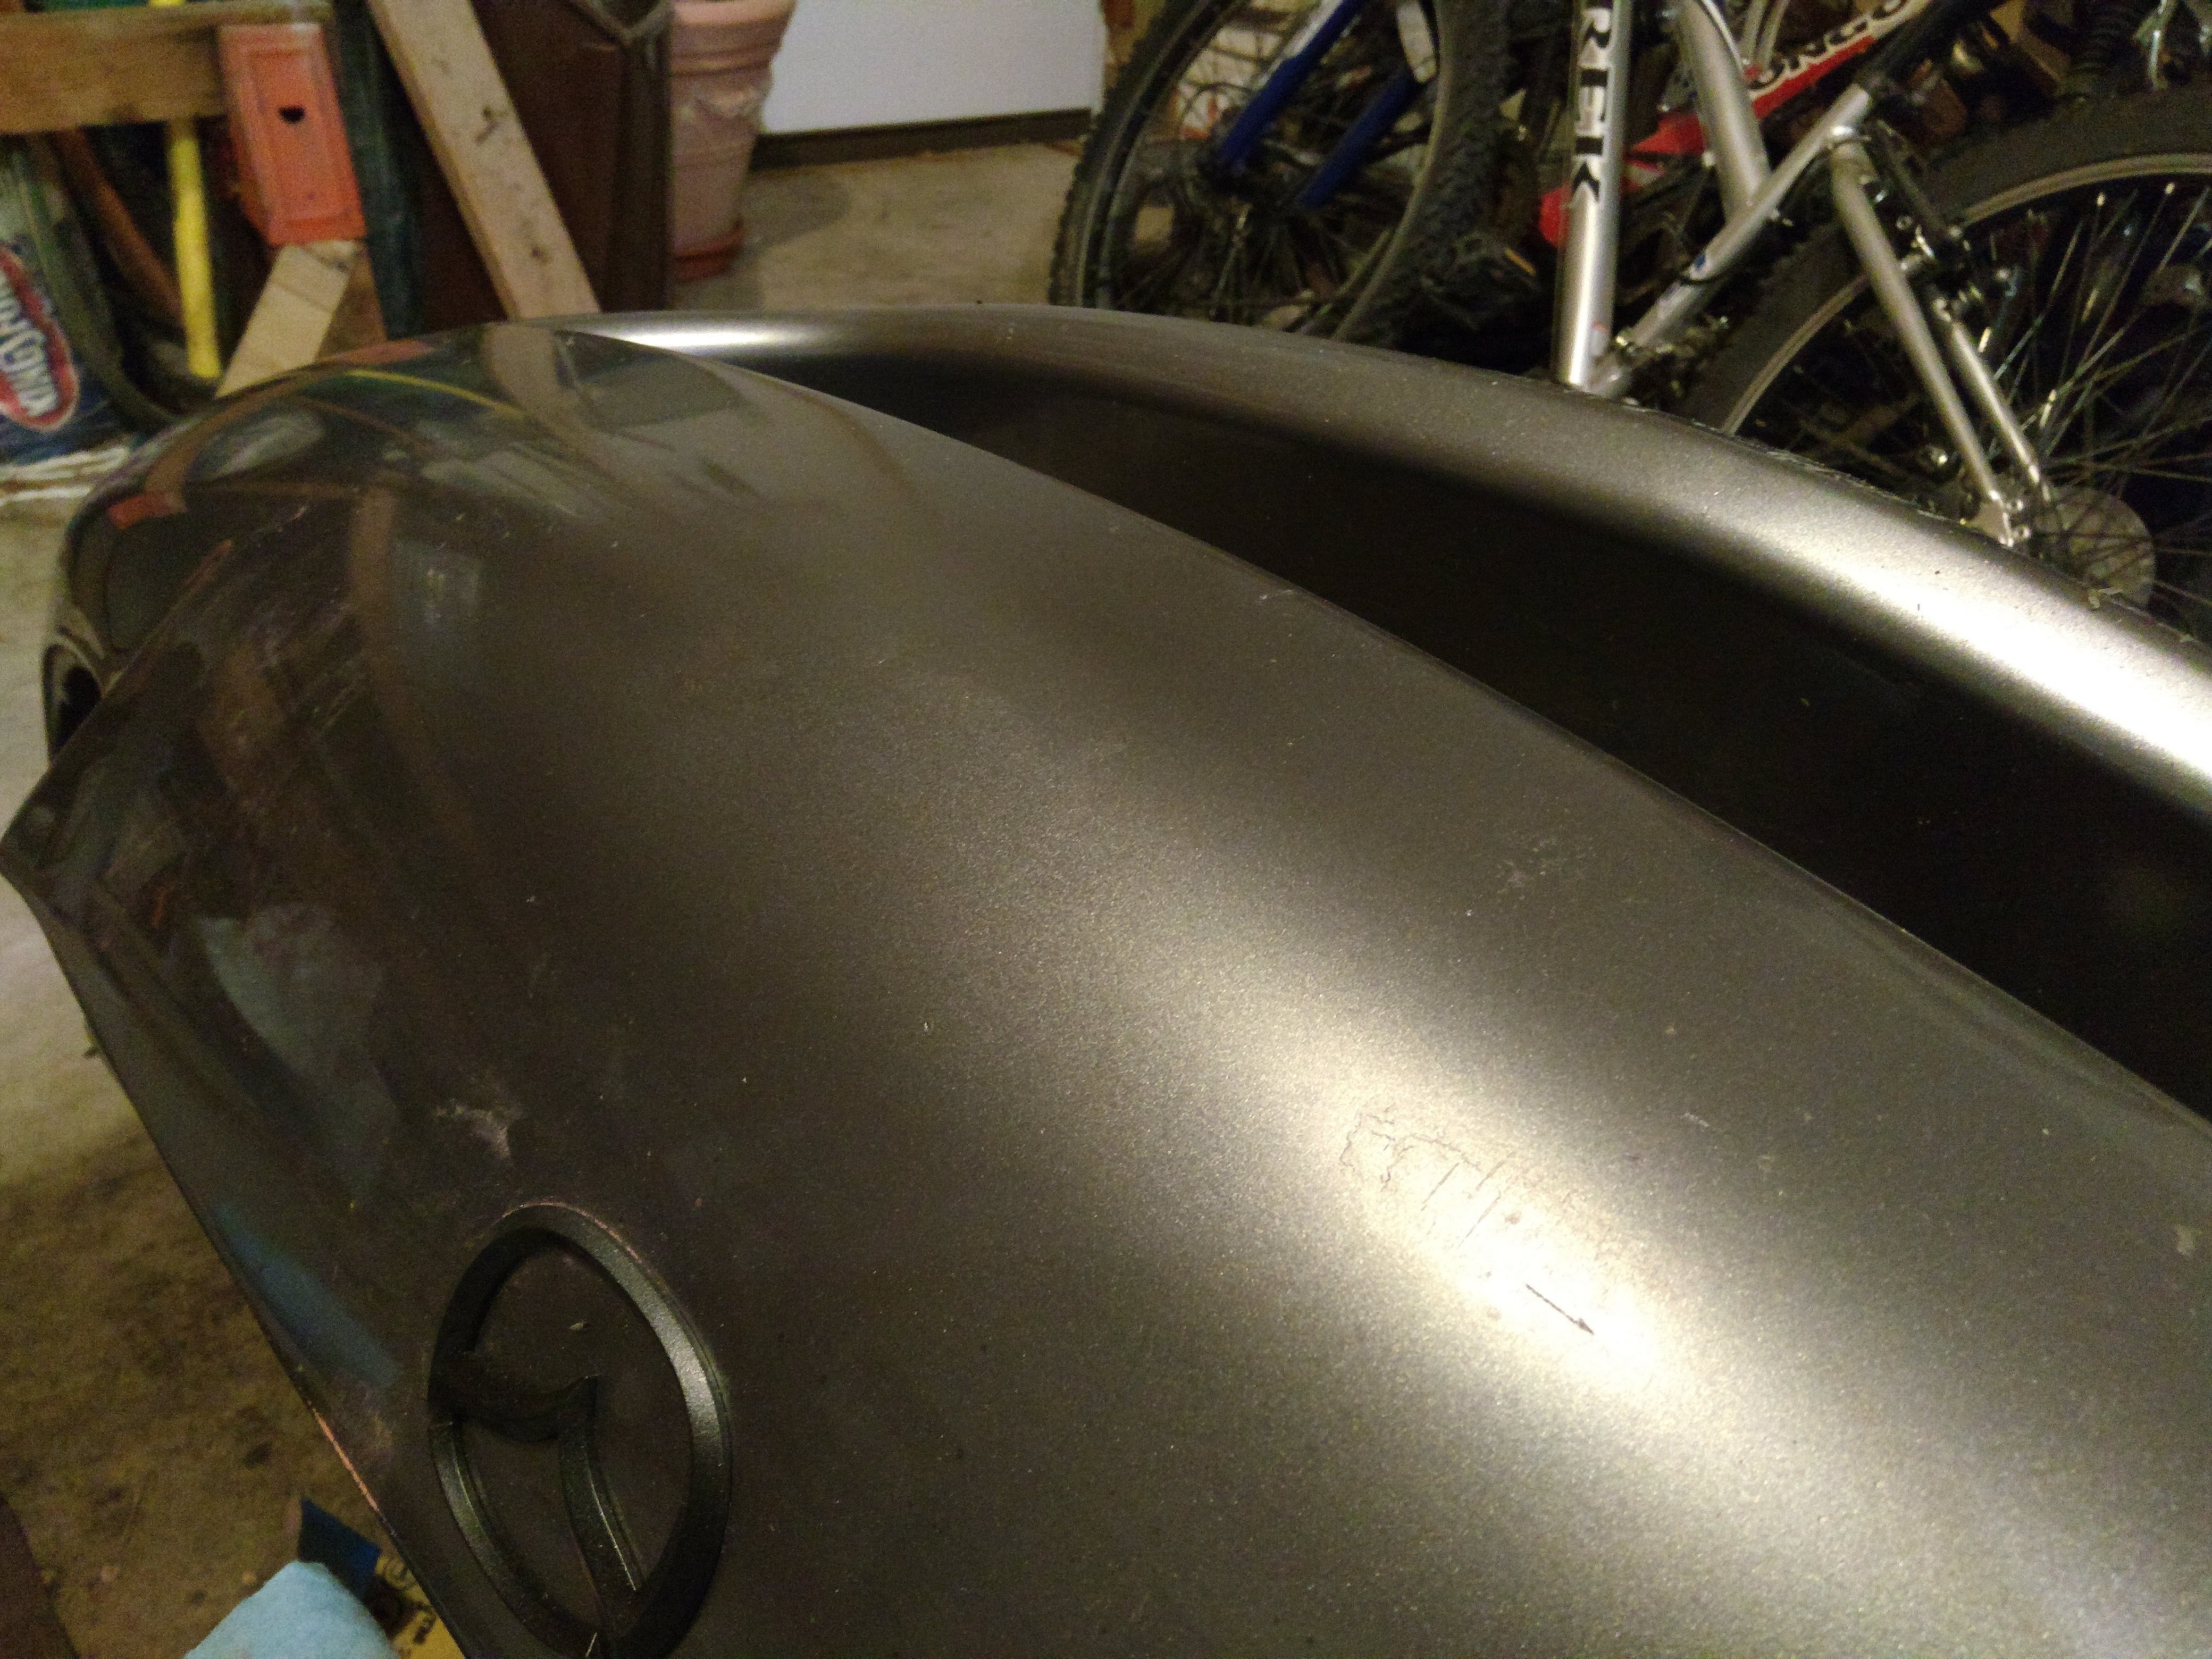
More or less got the body filler where I want it. Is it perfect? Nope. But I don’t really have all the tools I need to do this properly nor the patience to get it much better than that. Still, unless you’re practically touching it with your nose the small imperfections aren’t noticeable. This is after one light coat to gauge how smooth the body filler is. The paint match is fantastic. I’m considering doing a complete de-badge of the entire car since I have the ability to get rid of the residual holes, as well as shaving off the embossed text on my side marker lights and giving them a very light tint.
Today I’ll put on a few more base coats and then start with the clear coat and then wetsanding, unless I decide to take off my front Mazda badge in which case I’ll start filling it in.
 "benjrblant" (benjblant)
04/19/2017 at 11:25, STARS: 3
DIY ALWAYS WINS!
"Jake - Has Bad Luck So You Don't Have To" (murdersofa)
04/19/2017 at 11:36, STARS: 2
$40 in materials vs a $450 body shop bill. Hell yeah.
 "Monkey B" (monkeyb)
04/19/2017 at 16:44, STARS: 0
gonna have a peeling issue, I don’t see any prep on the clear.
"Jake - Has Bad Luck So You Don't Have To" (murdersofa)
04/19/2017 at 16:45, STARS: 0
First picture was taken before I did anything.
"Monkey B" (monkeyb)
04/19/2017 at 19:40, STARS: 0
2nd photo suggests the same, especially for a front fascia.
"Jake - Has Bad Luck So You Don't Have To" (murdersofa)
04/19/2017 at 20:40, STARS: 0
Sanded with 400 grit... which is all covered up by the base coat in the second picture