 by "someassemblyrequired" (someassemblyrequired)
Published 01/03/2017 at 15:04
by "someassemblyrequired" (someassemblyrequired)
Published 01/03/2017 at 15:04
Tags: avgeek
; projects
STARS: 2
Right now FlightAware (the online flight tracking site) is offering free Enterprise subscriptions to those who supply them with ADS-B data(normally the same account would cost you $89.99/month). You can put together an ADS-B receiver for less than $100, and potentially less than $50 depending on how well stocked your junk drawer is. I decided to try to build one and figured Oppos might also be interested in putting one together, so I’ve typed out a little how-to.

What is ADS-B?
A utomatic d ependent s urveillance – b roadcast equipped aircraft send position data from their onboard GPS system out as an unencrypted broadcast. This can be used by air traffic controllers as a backup for radar and by other aircraft to alert them to traffic in the area. We can capture these broadcasts, examine them locally, and use them to get an Enterprise level FlightAware subscription for free.
What Do I Need for a Basic Setup?
Raspbery Pi
For this build you’ll need a Raspberry Pi, which is essentially a small desktop capable of running Linux. Any Pi will do, I use a first gen that I had lying around. The Pi handles the data gathering, processing and export. These run about $35 plus shipping for the Pi itself. There is a Pi Zero available for $5, but you’d need a WiFi USB stick and an externally powered hub. The Zero is roughly equivalent to a first gen Raspberry Pi, so it will work, but after adding accessories, you’re probably better to go with the full Pi.
You’ll want a case for your Pi as well (they are just a circuit board) and you’ll need to supply power to your Pi via a USB micro connector. I used an old cellphone charger I had lyingaround, but they’re available everywhere.
!!! UNKNOWN CONTENT TYPE !!!
Here’s a kit with Pi, case, and power supply for $49.99 on Amazon.
You can buy the individual pieces separately if you have some of the components but you’ll only save about $10 or so.
Antenna/Receiver Kit:
!!! UNKNOWN CONTENT TYPE !!!
You’ll also need a cheap TV/radio tuner USB stick and antenna. These run about $10-$15 – I used this one from Amazon:
SD Card:
You’ll need at leastan 8GB memory card (the Pi uses this as a hard disk). Newer Pi’s use Micro SD cards, older models SDHC. Here’s a 32GB one for $10:
!!! UNKNOWN CONTENT TYPE !!!
Ethernet Cable/Wireless Dongle:
You’ll need to connect the Pi to your router, I just used an old Ethernet cable, but you can also set up a USB Wi-fi dongle as well.
Keyboard/Mouse/Monitor or TV:
For basic setup you’llneed a USB keyboard/mouse and a display device – the Pi outputs HDMI, with earlier models also having an RCA video out. These aren’t required once setup is complete.
Putting Together Your Receiver:
Once you’ve assembled everything, you can set up your receiver station. The first step is putting an operating system on to the SD card. Here’s what you need to do:
1. Format the card. You’ll need a program called SDFormatter for this, which you can download from the SD card association here . You need to click the Options button and make sure the Format Size Adjustment option is set to On:
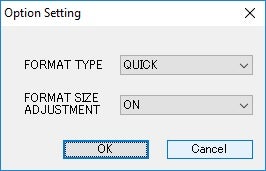
Click OK, and the dialog should look like this:
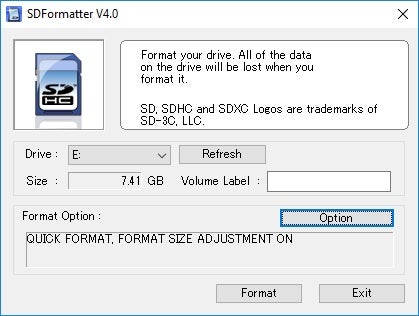
Click Format to format the disk.
2. Next you’llneed to download NOOBS (New Out of Box Software) from here and extract all the files into the root directory ofthe SD card using your favorite compression program.
3. Startyour Pi and boot into NOOBS, select Raspian, and let the Pi do its thing.
Now you should seethe Raspian desktop:
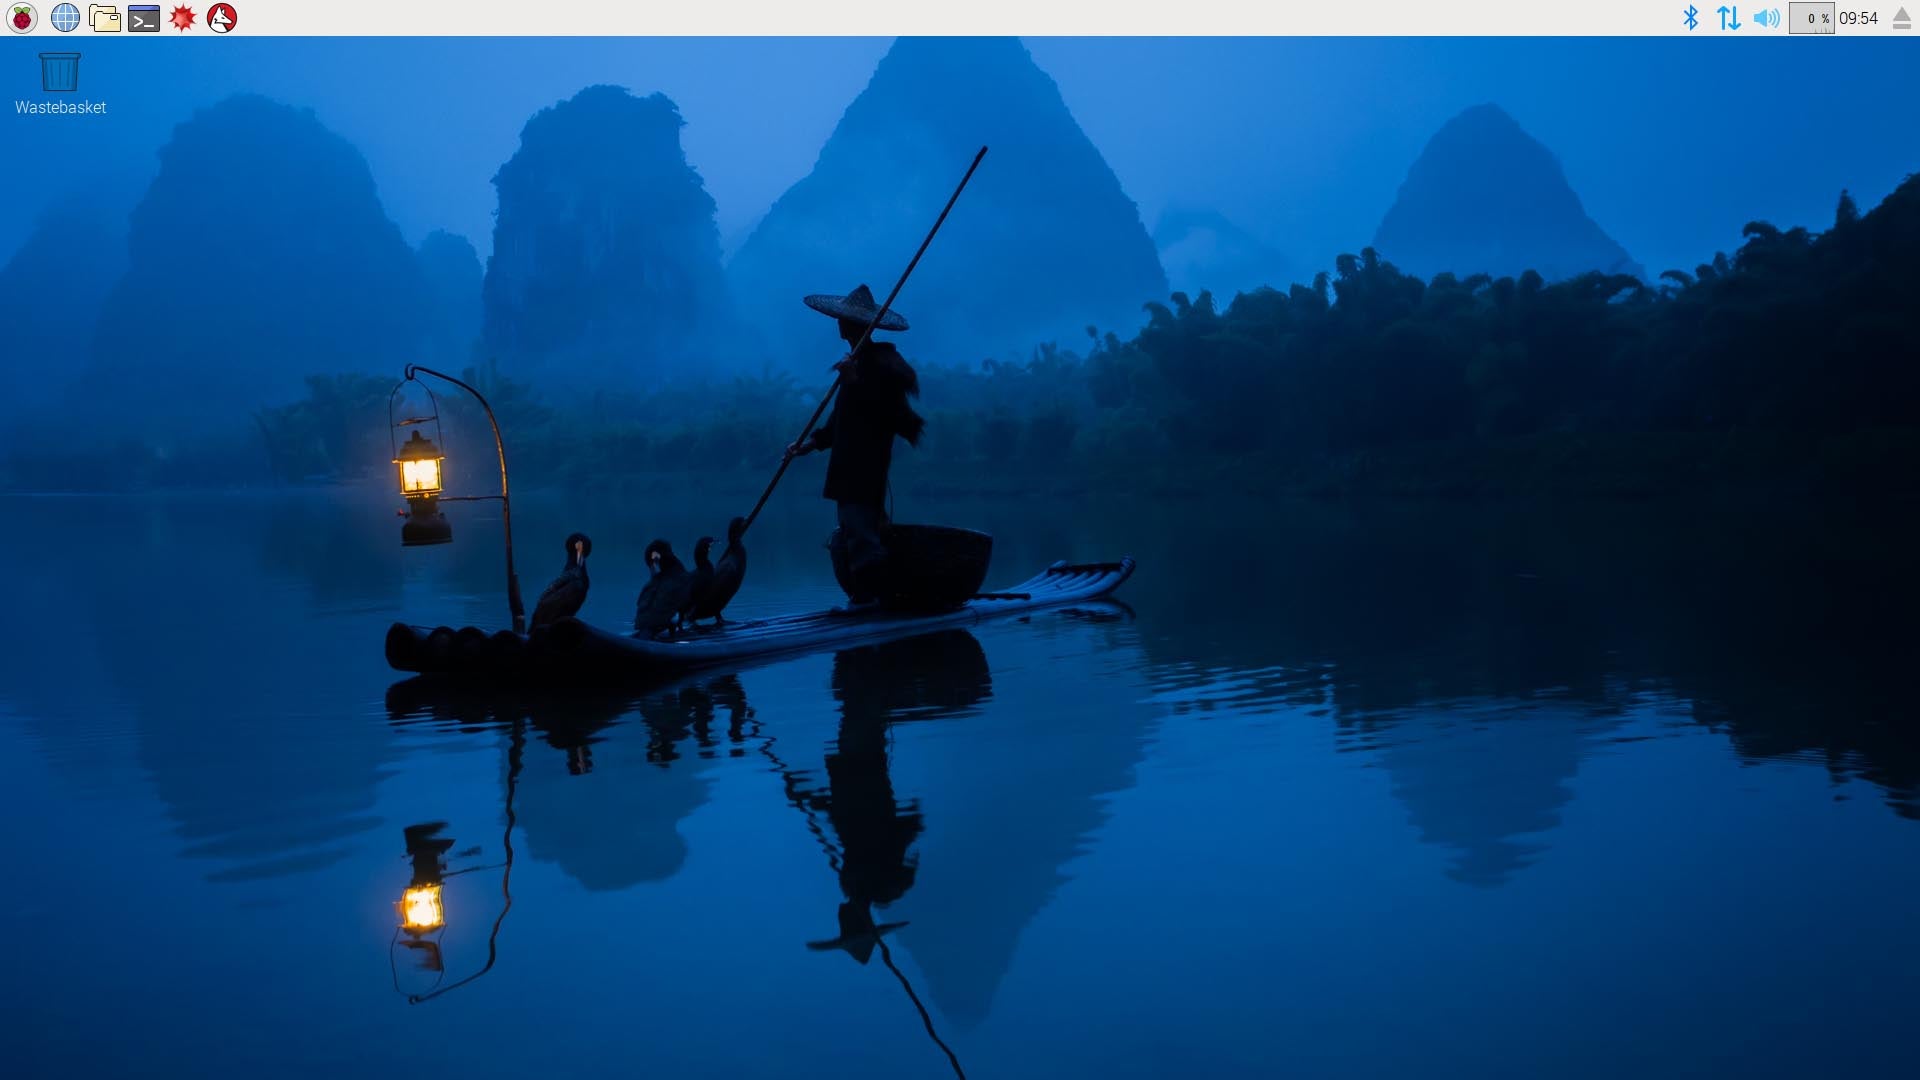
From here, we need to go to the command line and download some software packages that will gather the ADS-B data and send it to FlightAware so we can get our free account.
To do this, open acommand line on your Raspberry Pi (the icon with
>_
in the screenshot above).
Enter the following commands:
!!! UNKNOWN CONTENT TYPE !!!
sudo dpkg -i piaware-repository_3.1.0_all.deb
!!! UNKNOWN CONTENT TYPE !!!
sudo apt-get update
!!! UNKNOWN CONTENT TYPE !!!
sudo apt-get install piaware
!!! UNKNOWN CONTENT TYPE !!!
sudo piaware-config allow-auto-updates yes
!!! UNKNOWN CONTENT TYPE !!!
sudo piaware-config allow-manual-updates yes
These commands download and configure the PiAware software needed to connect to FlightAware. We also need to get software that can receive and interpret the data coming from our receiver. That software is called dump1090 (1090 Mhz is the transmission frequency), and you can install it on your Pi with the following commands:
sudo apt-get install dump1090-fa
Now all you need to do is connect the antenna to the USB tuner dongle, plug it in and reboot your Pi – you can do that from the command line by entering:
sudo reboot
Position your antenna so it has a clear sky view (it works better outside if that’s an option). Within a few seconds it will start beaming data. I don’t get great reception at my house, since I’m in a valley with lots of mountains around, but apparently up to a 250 mile range is possible.
Once your Pi is up and running, follow this link to claim your receiver:
http://flightaware.com/adsb/piaware/claim
You’ll need to login to FlightAware or createa new account. After that you can view statistics and recently tracked flights from the My ADS-B link at the top of the FlightAware site. This allows you to view your stats, recently tracked flights and nearby receivers:
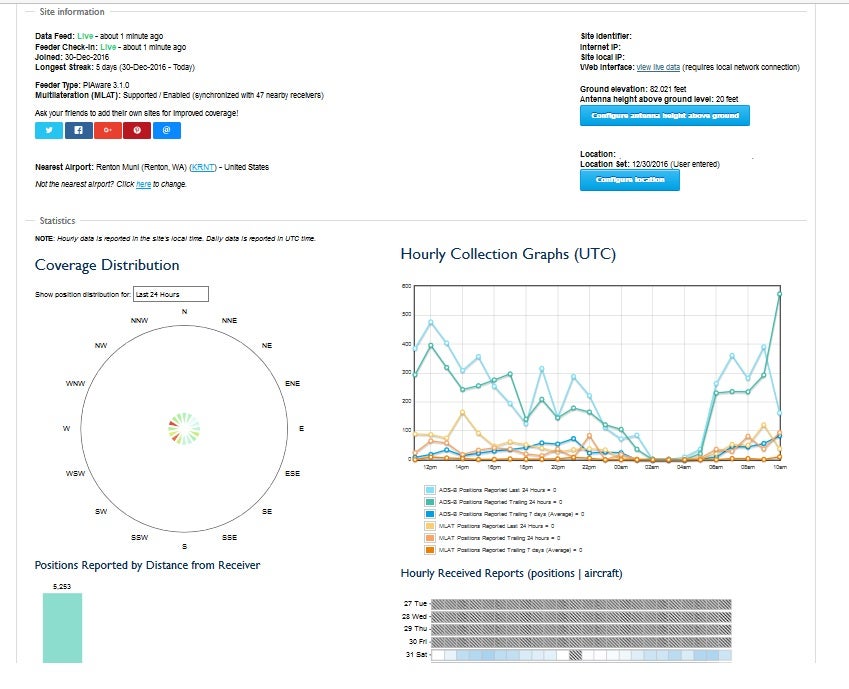
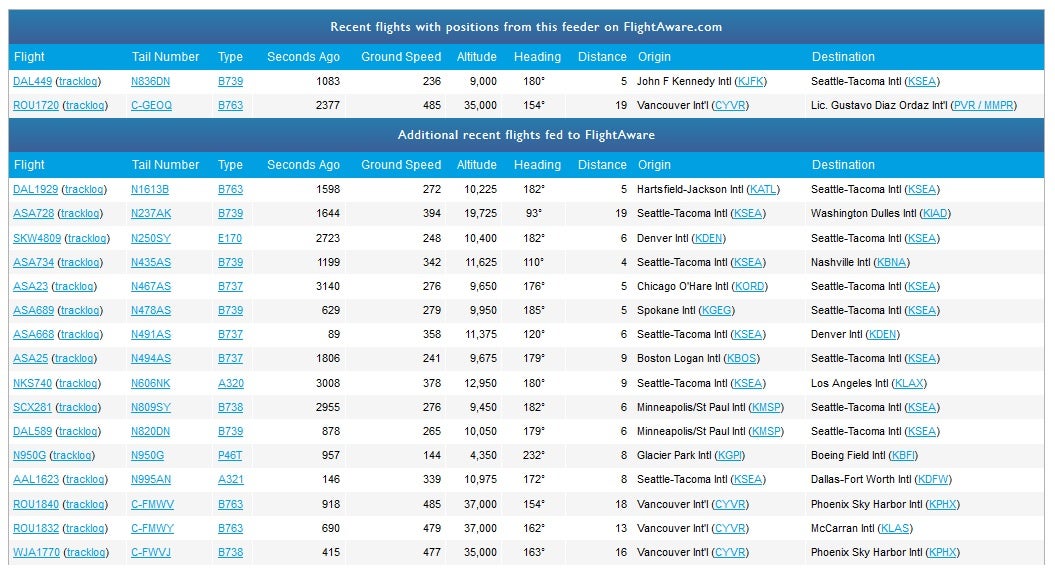
You can also click the View Live Data link on that page to view real time data from your receiver - here’s an example.
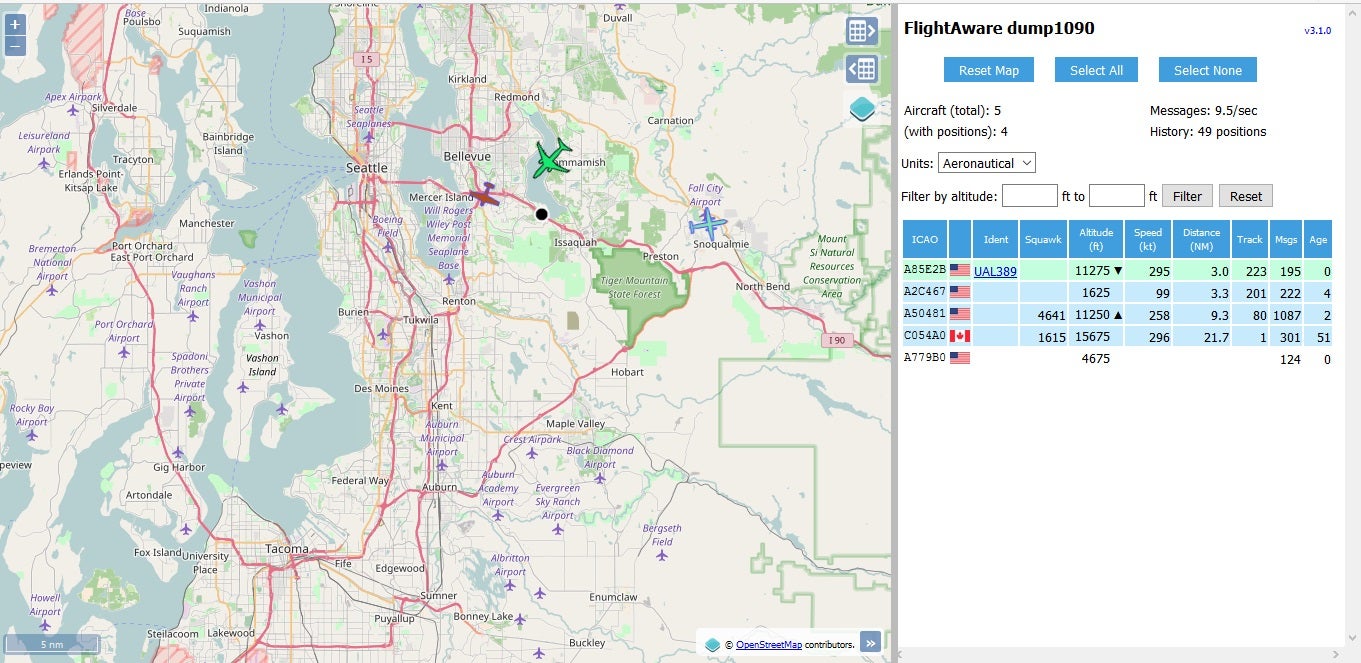
You can click aircraft in the list or on the map for registrations and a link to flight details on FlightAware.
 "For Sweden" (rallybeetle)
01/03/2017 at 15:09, STARS: 0
Not using ModeSMixer
-_-
"someassemblyrequired" (someassemblyrequired)
01/03/2017 at 15:11, STARS: 0
Is that bad? I’m guessing that’s a replacement for dump 1090 right?
 "TheHondaBro" (wwaveform)
01/03/2017 at 15:11, STARS: 2
I guess you can say...
Some assembly required.
"someassemblyrequired" (someassemblyrequired)
01/03/2017 at 15:12, STARS: 1
Yep, once again username is accurate.
"For Sweden" (rallybeetle)
01/03/2017 at 15:13, STARS: 0
ModeSMixer combines multiple ADS-B feeds of varying formats, and includes a web server function.
"someassemblyrequired" (someassemblyrequired)
01/03/2017 at 15:15, STARS: 0
Ah OK, will look into it, thanks. Just getting into this, so starting with the basics.
 "WilliamsSW" (williamssw)
01/03/2017 at 15:26, STARS: 0
Do you happen to know if there are restrictions on where you live in order to get this? I know that they actively seek users in remote areas, to expand data coverage. For me, though, the KMDW Class C is 1300 feet up (and KORD sits just on top of that), so I’m not sure they’re interested in more data from me.
"someassemblyrequired" (someassemblyrequired)
01/03/2017 at 15:30, STARS: 1
I haven’t seen any - Puget Sound has a lot of receivers, and I got my free account without any trouble.
"WilliamsSW" (williamssw)
01/03/2017 at 15:35, STARS: 1
Thanks- I haven’t seen any either, but I should probably sign up before they change their minds...
"For Sweden" (rallybeetle)
01/03/2017 at 15:41, STARS: 1
Anyone can buy it. You have to have pretty good coverage in a poorly-covered area to receive complimentary equipment.
"WilliamsSW" (williamssw)
01/03/2017 at 16:55, STARS: 0
Thanks! I knew there was some additional kicker they were offering to people in poor coverage areas— it’s the free equipment.