 by "StudyStudyStudy" (jesterjin)
Published 01/04/2017 at 15:30
by "StudyStudyStudy" (jesterjin)
Published 01/04/2017 at 15:30
No Tags
STARS: 4
I made quite a few purchases to get this motor into the car, that number at the bottom of the page is going to go up pretty quickly these next few posts...
Preemptively I ordered a complete gasket set online. The last couple motors I nickeled and dimed my way into paying more then a generic gasket set so this time I decided to get one ahead of time.
Turns out the first gasket I went to go use, an o-ring for the oil pan pickup, was nowhere near the right size. Not wanting to risk having a leak in the crucial oil supply, I spent the time to go to the local toyota dealership and order the o-ring.
While waiting for the o-ring I spent a few hours cleaning the grime off the old bolts. This is the blessing of working with newish engines you don’t have bolts ready to fall apart and snap on you, with a bit more cleaning I bet you could have fooled anyone.

With the cleaned bolts and the o-ringW acquired, I put the upper pan on with a nice thin layer of FIPG and then slipped in the gasket for the pickup tube and sealed up the oil pan.
With the bottom end sealed up it was time to move to the top and the front.
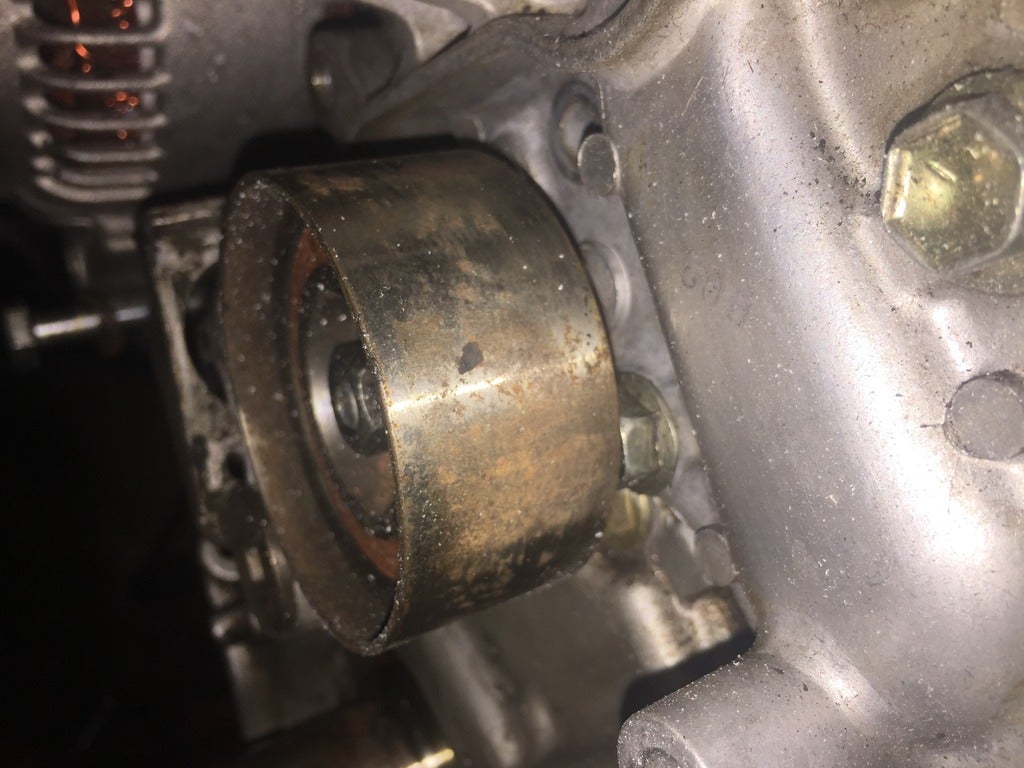
The front of the engine had apparently gone over with witness items such as a newish looking timing belt and fresh gasket maker on the water pump. What did not instill confidence was the absolute cake of grime and the pitted tensioner pulley, oh and not to mention the missing timing belt guide.
I figured while I was here I might as well do the main seals, turns out there is a loyal following that says you have to use OEM seals if you don’t want further leaks down the road. Given this was my first JZ motor, I decided to take heed of the advice and ordered genuine toyota seals.
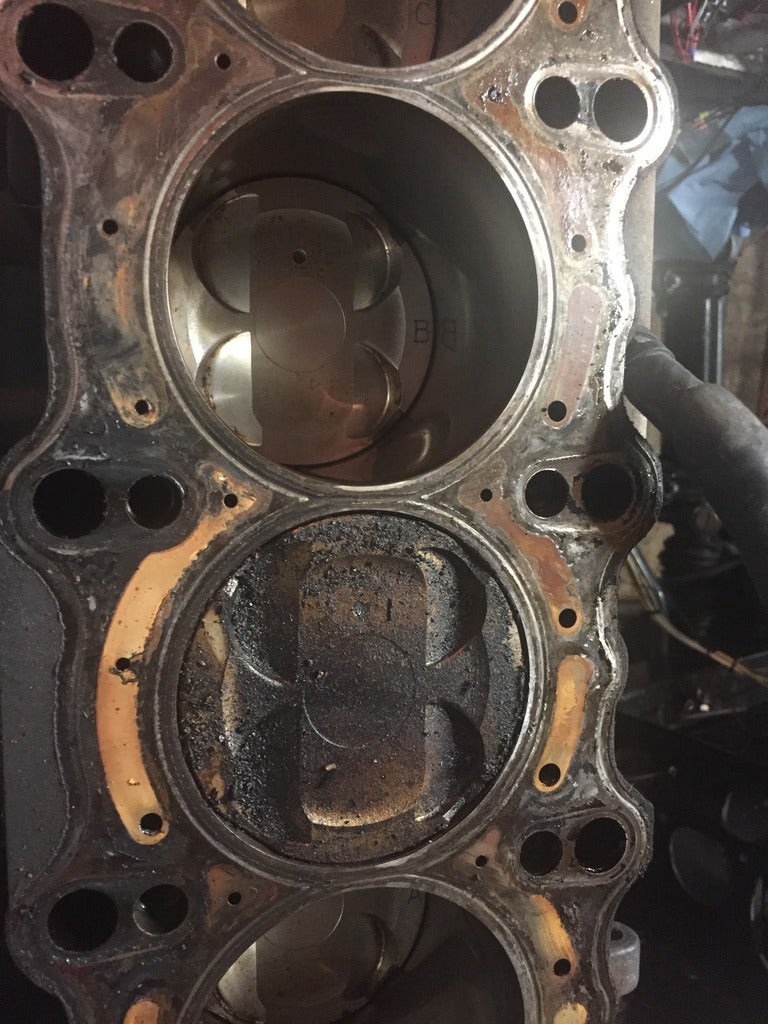
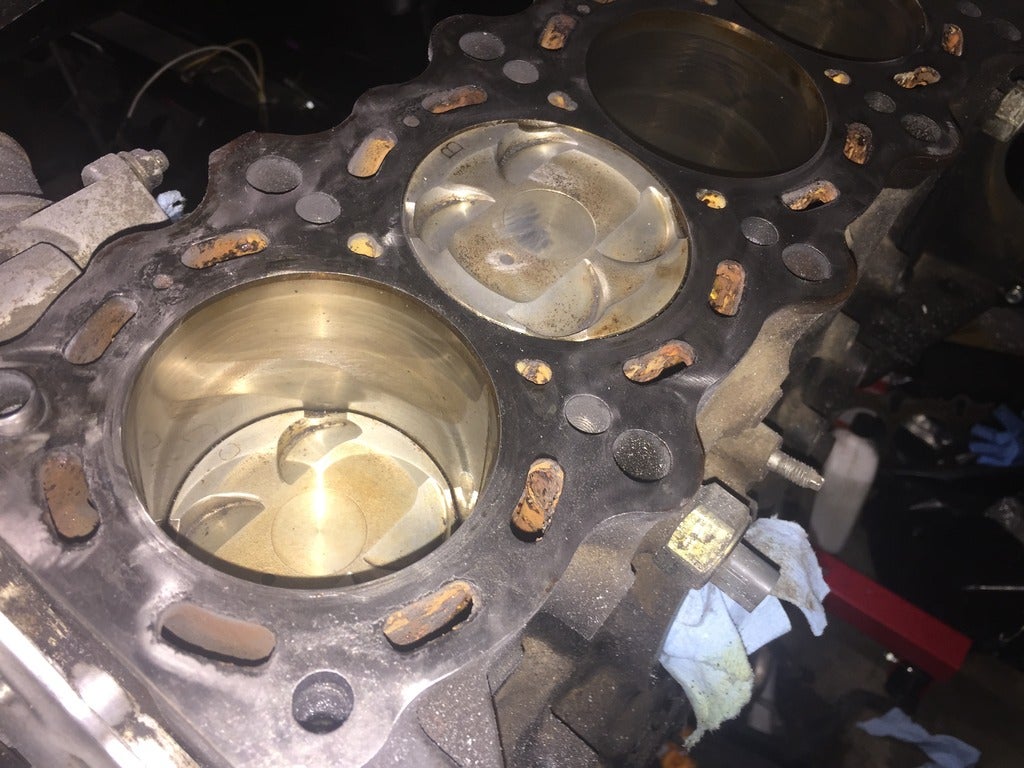
Then came the top of the block. With the head off I could see quite a bit of build up on the deck, luckily the grime on the pistons came off real easy. A paper towel and a a little bit of brushing with a brass brush was enough to remove the majority on the pistons. Given the intake track was absolutely filthy I attribute all this grime to the EGR system.Most likely the rubber or vitron on the headgasket had burned itself onto the surface.
With the pistons cleaned off, I started using a razor blade to scrape off the carbon on the deck, but found it pretty rough going. Searching online I found someone used a Roloc Wheel with a die grinder to some really fantastic results which was also the recommended method for resurfacing ford heads for resealing when no decking is performed, so I ordered a set of wheels, the adapter, and went off to purchase an electric vertical die grinder.
It worked really well, but the die grinder was too fast and I ended up breaking off a whole bunch of bristles on the brush, but the surface came out pretty clean.
Given that this motor had good compression values my hope was to save things for a full blown rebuild down the road, but when I found stalagtites of carbon/rust buildup on the exhaust valves I decided this was far beyond me to risk with a new turbo and sent it off to the machine shop.
Money Spent:
Genuine toyota cam/fms/rms/oil pan cover gaskets - 80
Roloc brush and adapter - 25
Electric die grinder - 40
Razor blade and scraper - 3
Genuine toyota o-ring for oil pan - 6
Subtotal - 155
Total spent - 22799
!!! UNKNOWN CONTENT TYPE !!!
!!! UNKNOWN CONTENT TYPE !!!
 "OPPOsaurus WRX" (opposaurus)
01/04/2017 at 16:02, STARS: 1
what it cost to build a car piece by piece
 "crowmolly" (crowmolly)
01/04/2017 at 16:09, STARS: 1
Just checking- are any of those bolts torque-to-yield?
"StudyStudyStudy" (jesterjin)
01/04/2017 at 16:48, STARS: 0
build and rebuild lol
"StudyStudyStudy" (jesterjin)
01/04/2017 at 17:05, STARS: 0
For the oil pan? Don’t think so. Pan is aluminum so I highly doubt they’re a TTY setup. I did look up in the TSRM just now, doesn’t look like they are, in fact the only one noted are the pressure plate bolts, although I would think the headbolts should probably fall in the same category.
"crowmolly" (crowmolly)
01/04/2017 at 17:17, STARS: 0
Wasn’t sure if you were going to be re-using the head bolts.
"StudyStudyStudy" (jesterjin)
01/04/2017 at 17:21, STARS: 1
No worries, ARP head studs will be employed! Do appreciate the concern though.
"crowmolly" (crowmolly)
01/04/2017 at 17:24, STARS: 0
:)
Good luck with the build! Keep posting up your progress.